Create Orders for Customers and Walk In Clients in Boniii
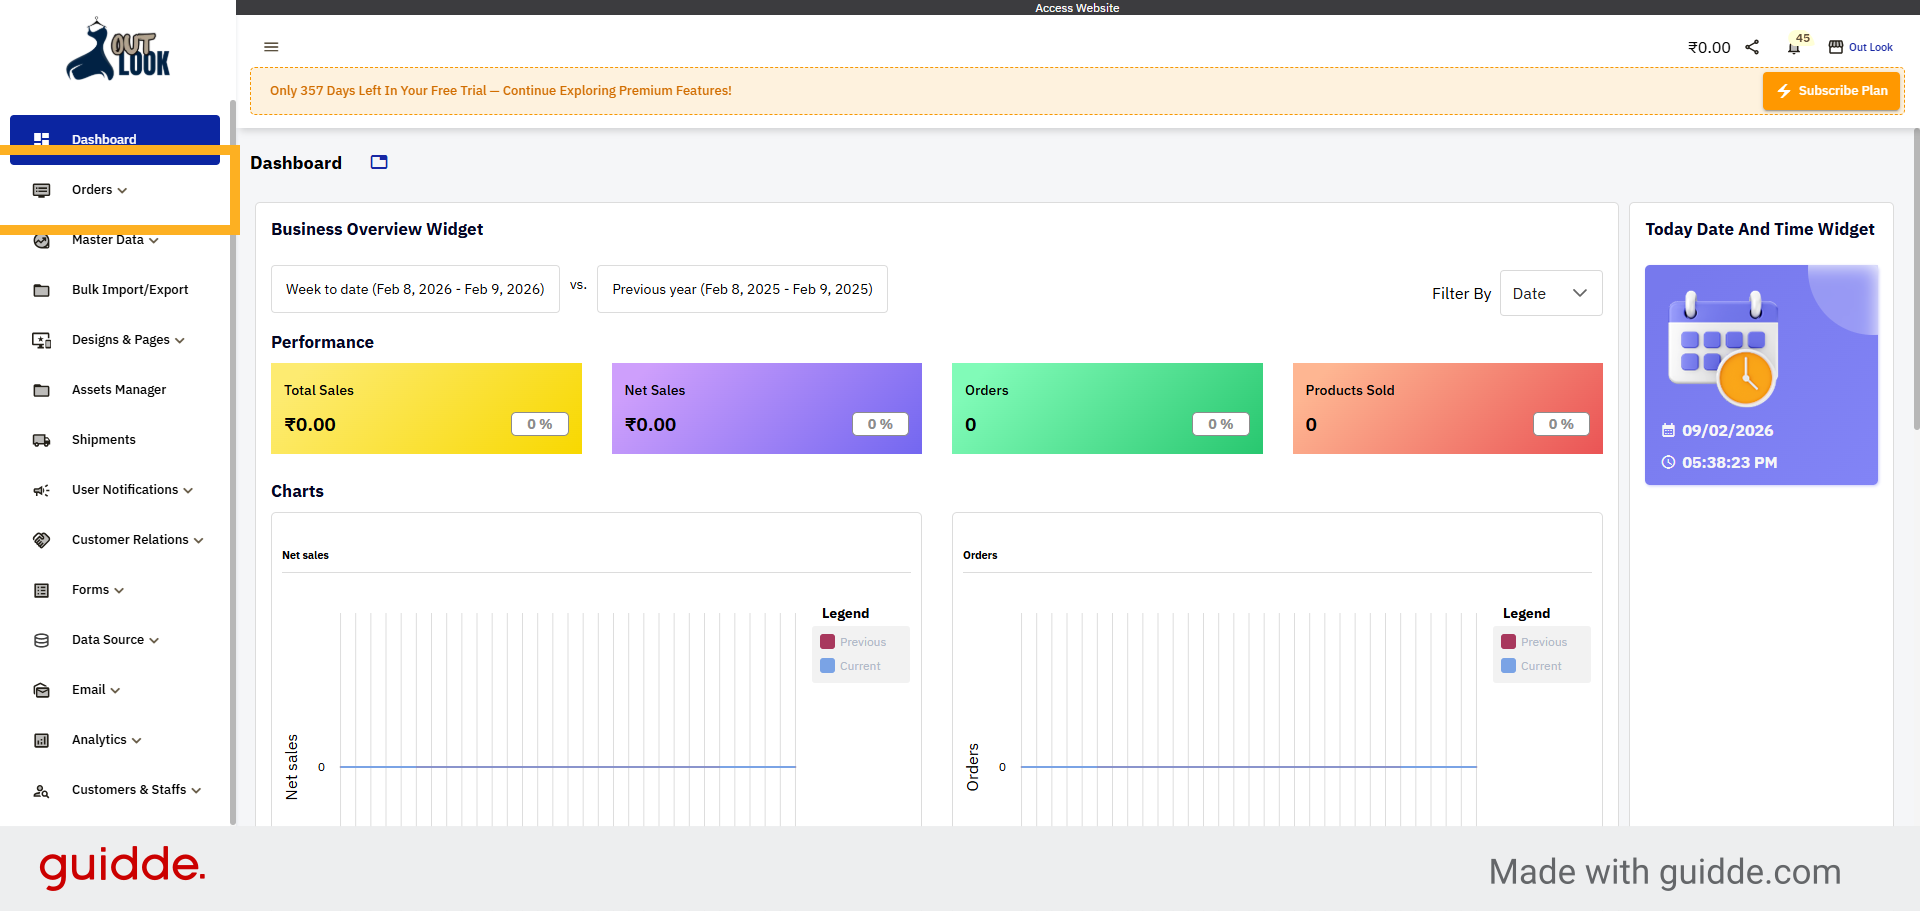
1. Open Orders Dropdown
Click the orders menu on the dashboard to access order options.
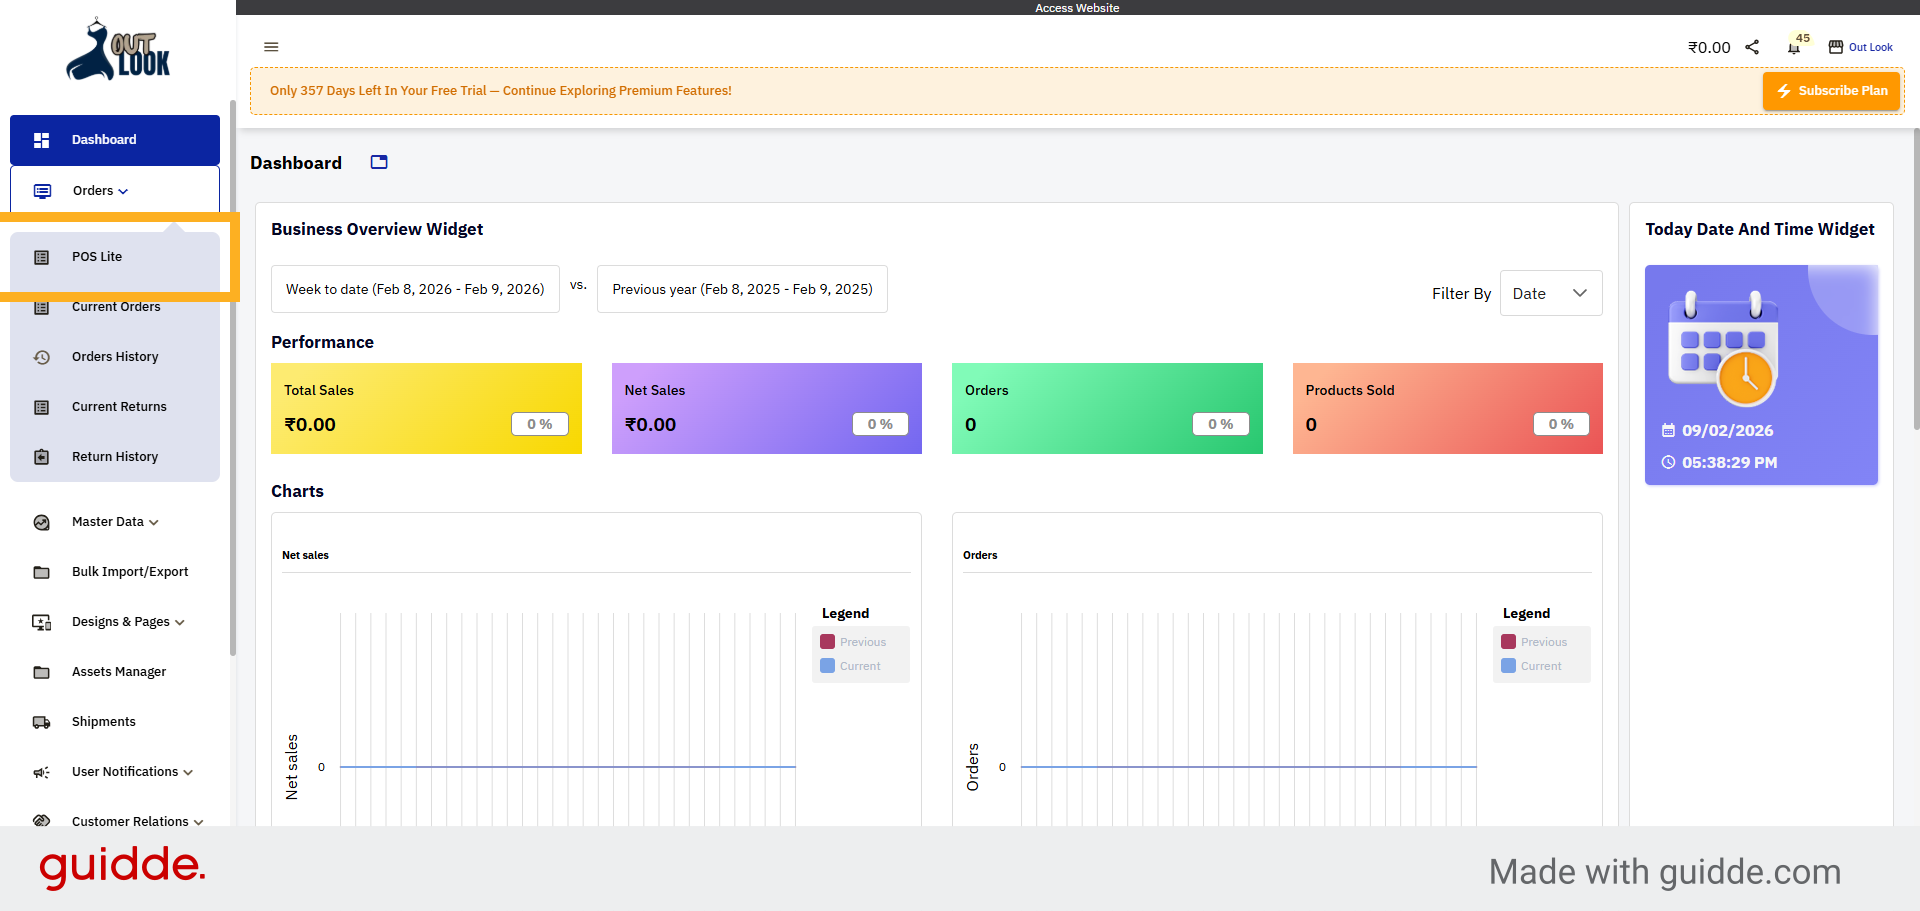
2. Select POS Lite Option
Click the "POS Lite" option from the dropdown to open the POS Lite interface for order creation.
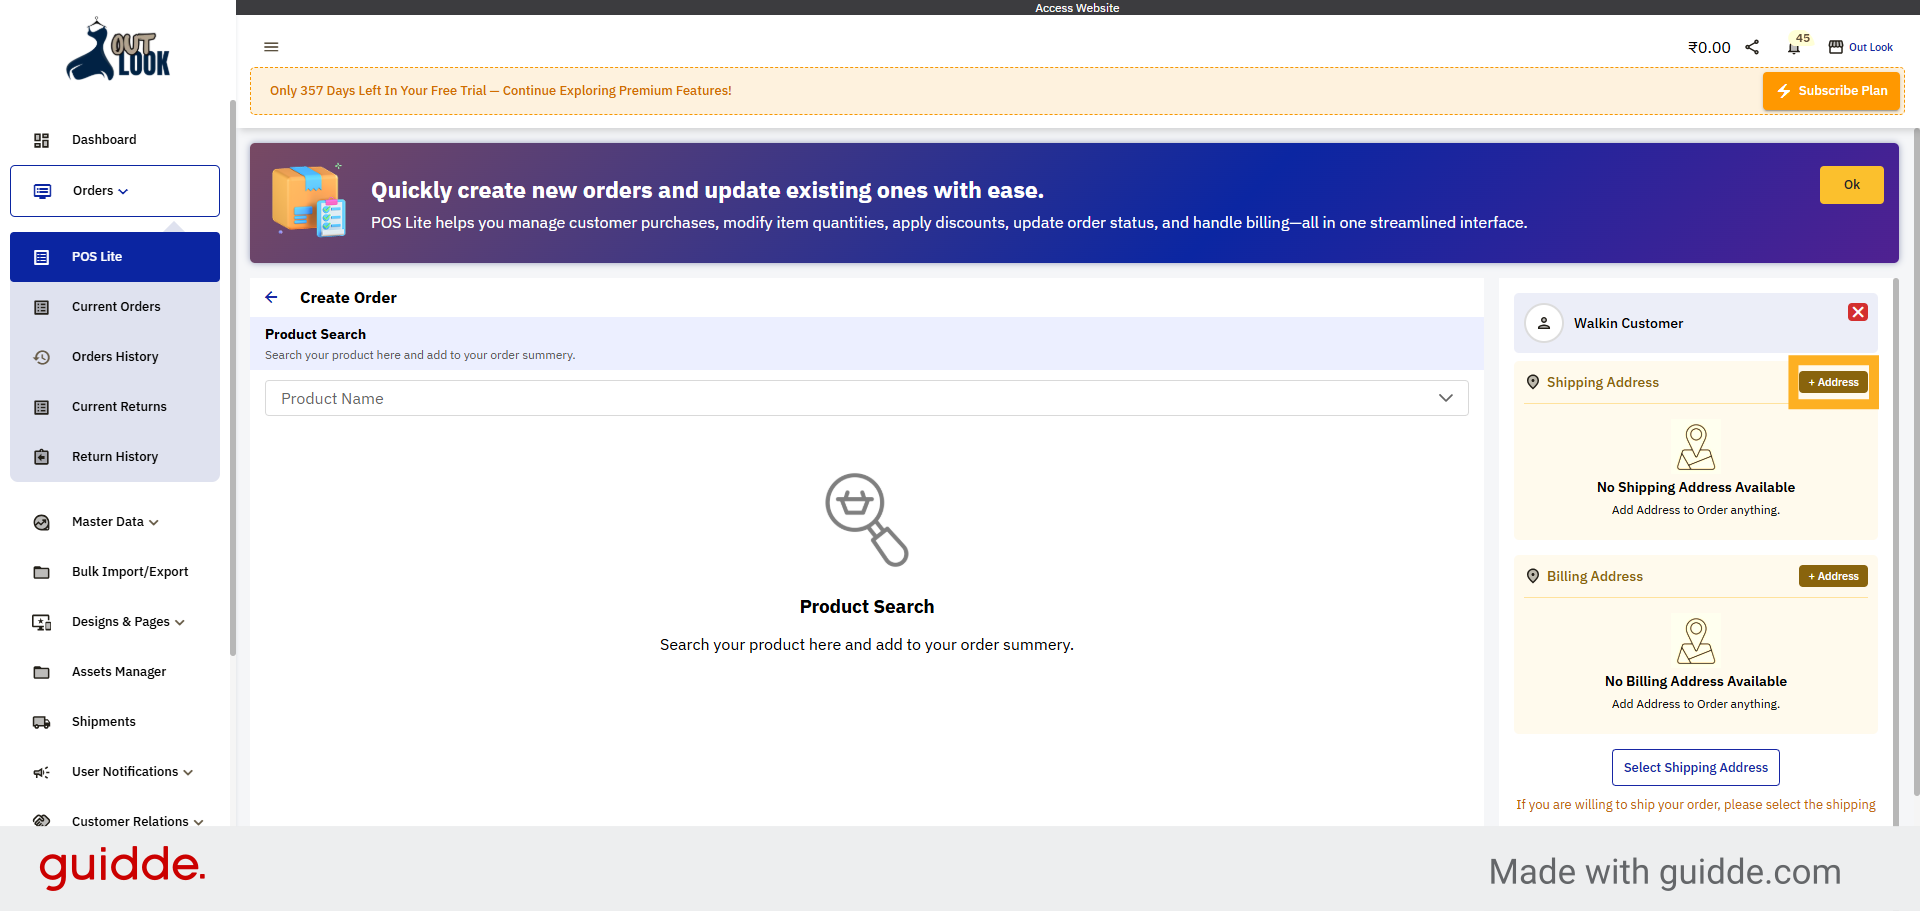
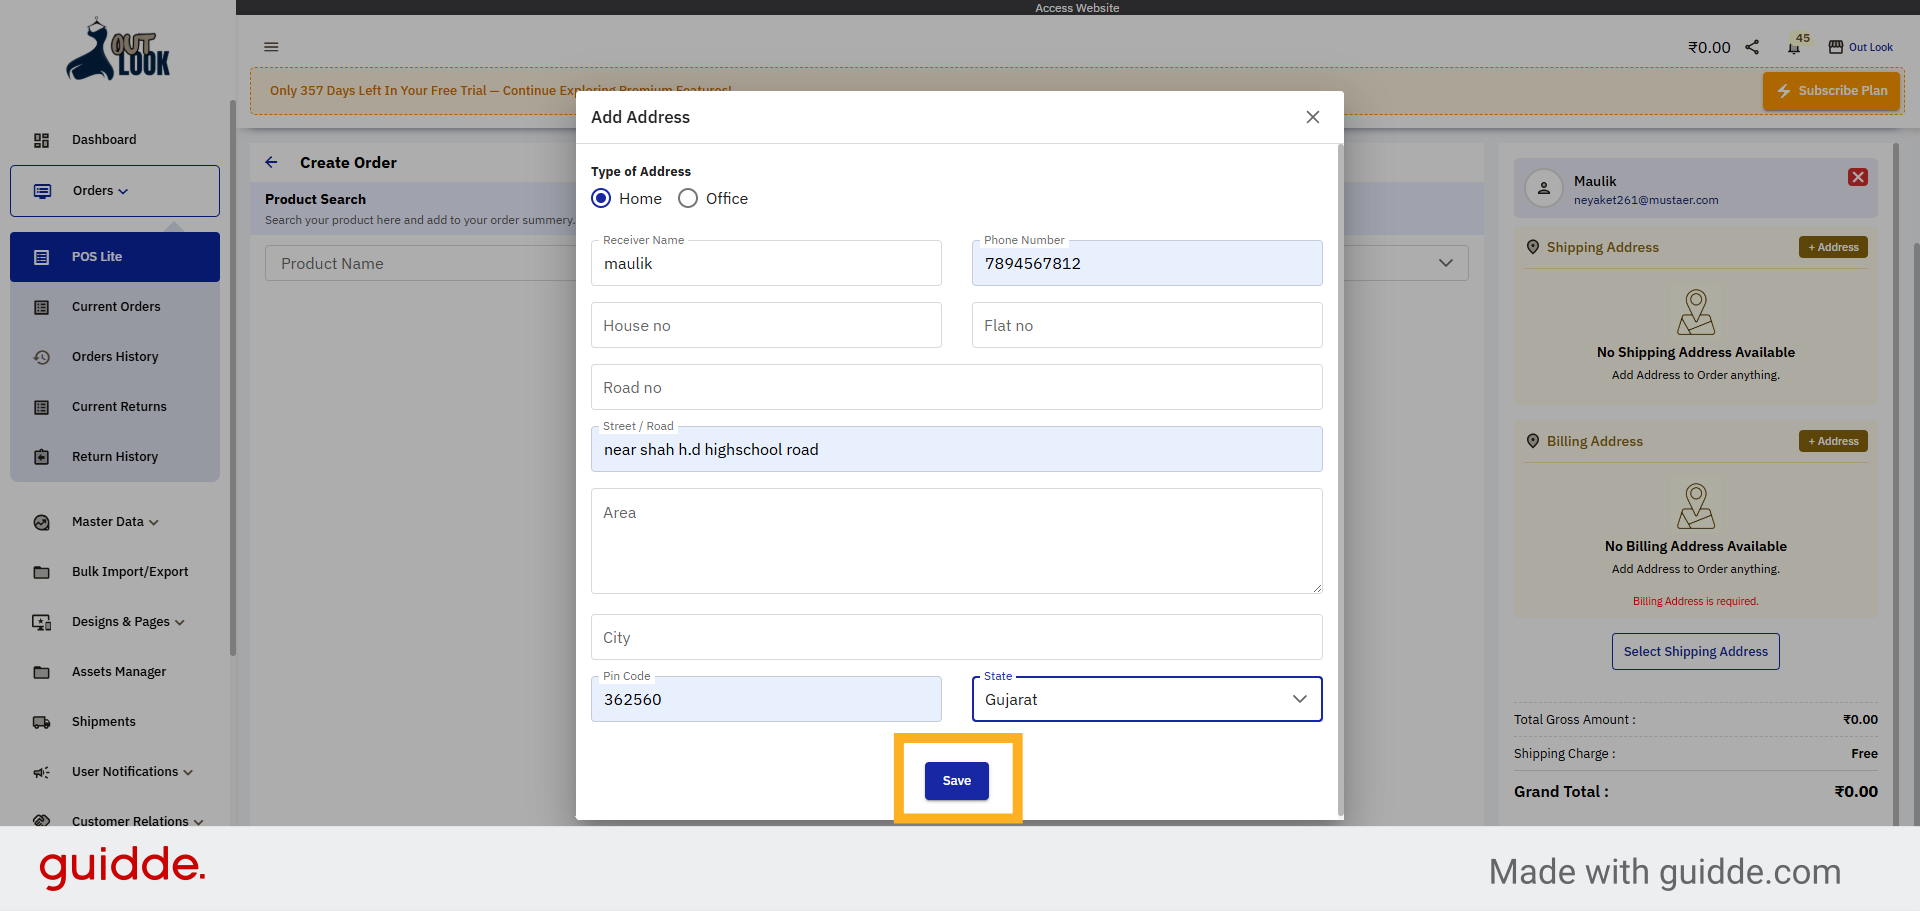
3. Add New Address
Click the "Address" button to begin adding a new address for the Walk-in Client in the order form
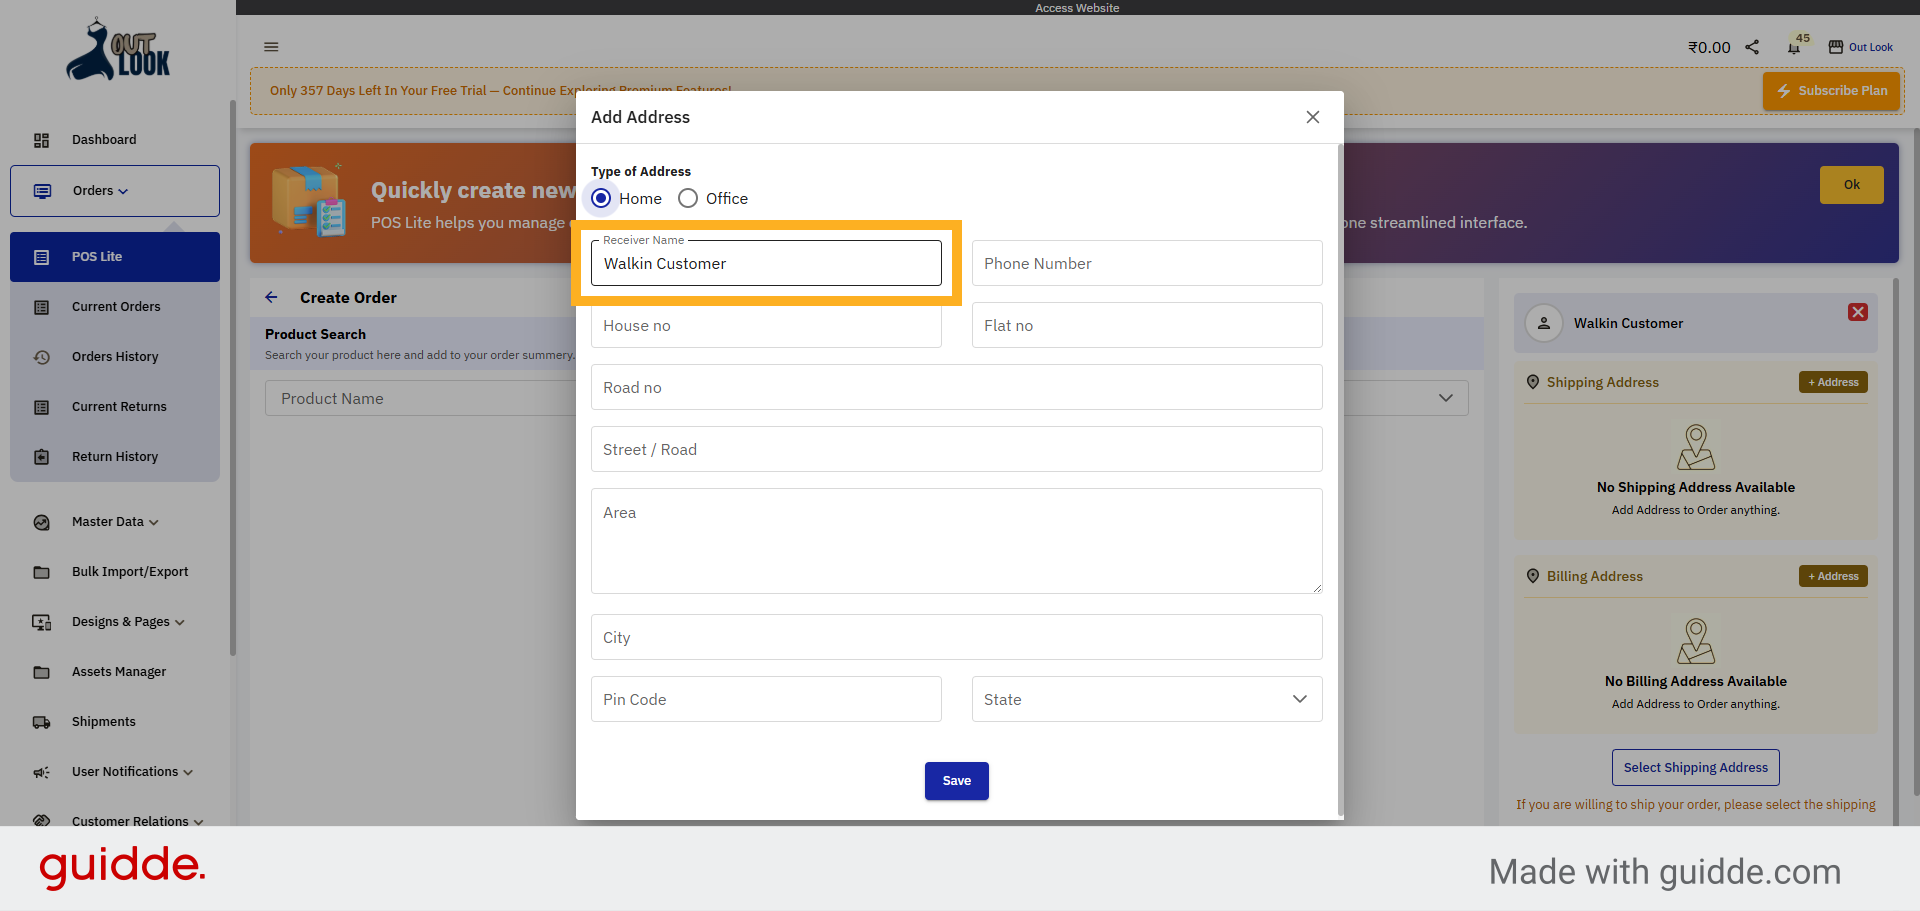
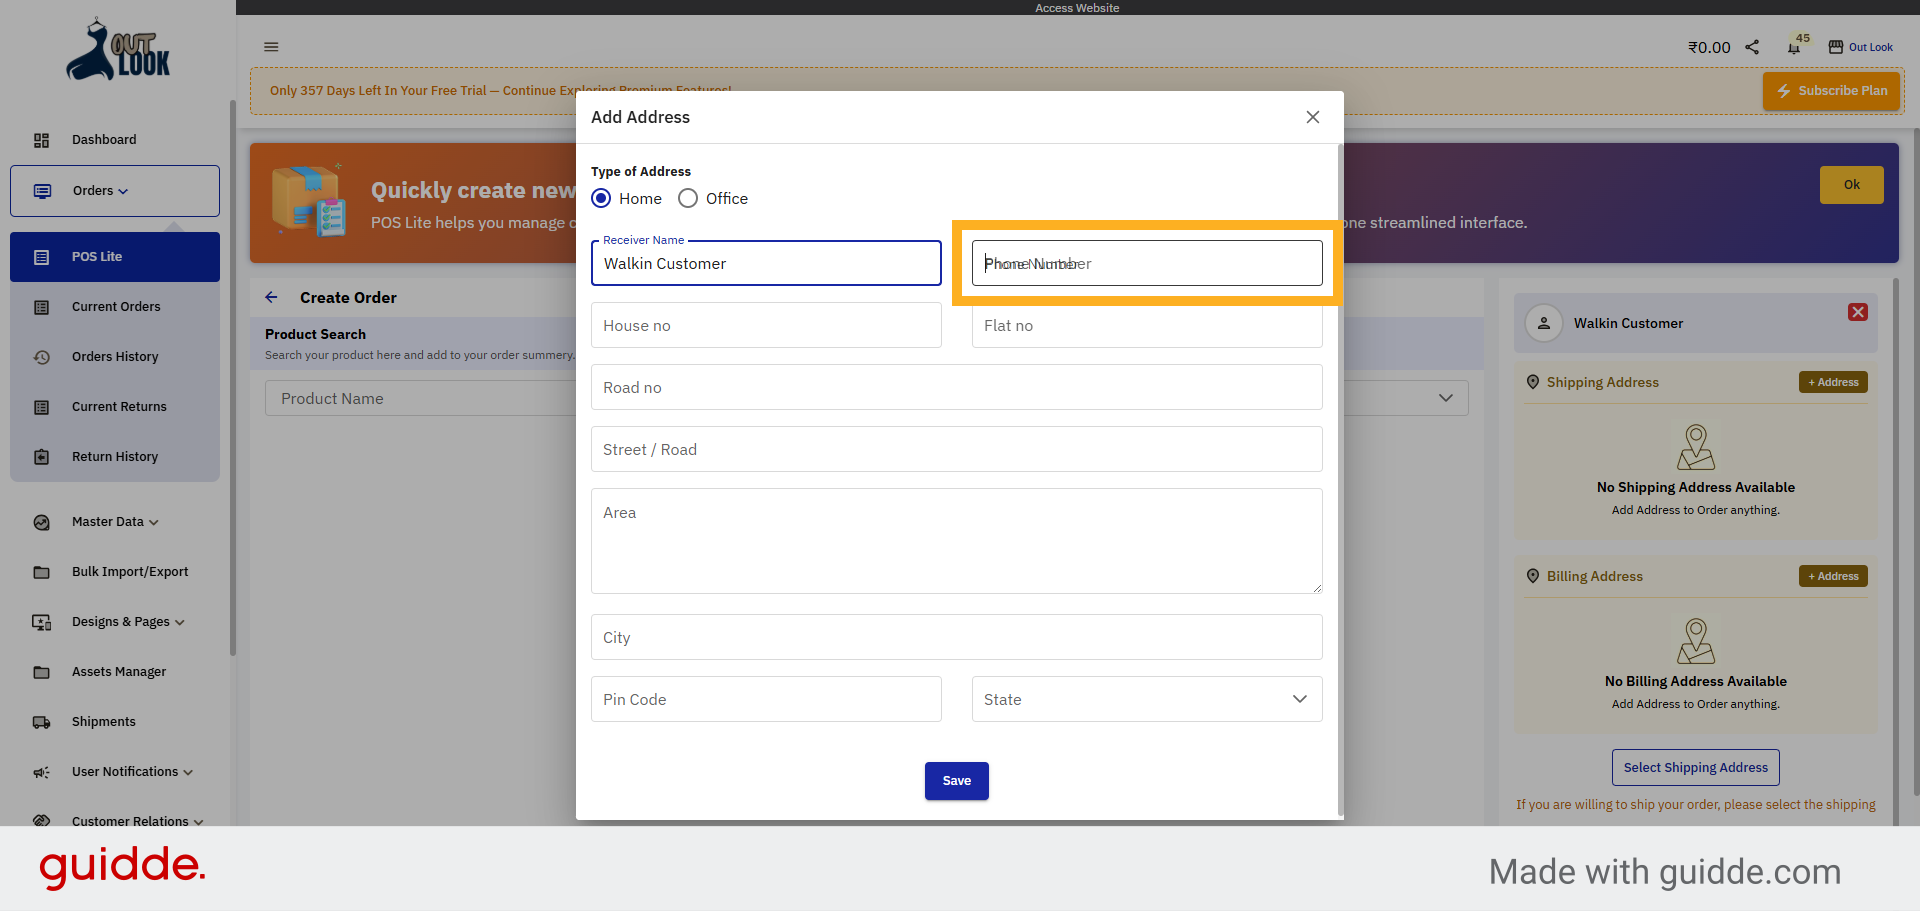
4. Enter Receiver Name Field
Click the "Receiver Name" field to enter the name of the person receiving the order.
5. Enter Phone Number Field
Click the "Phone Number" field to input the customer's contact number.
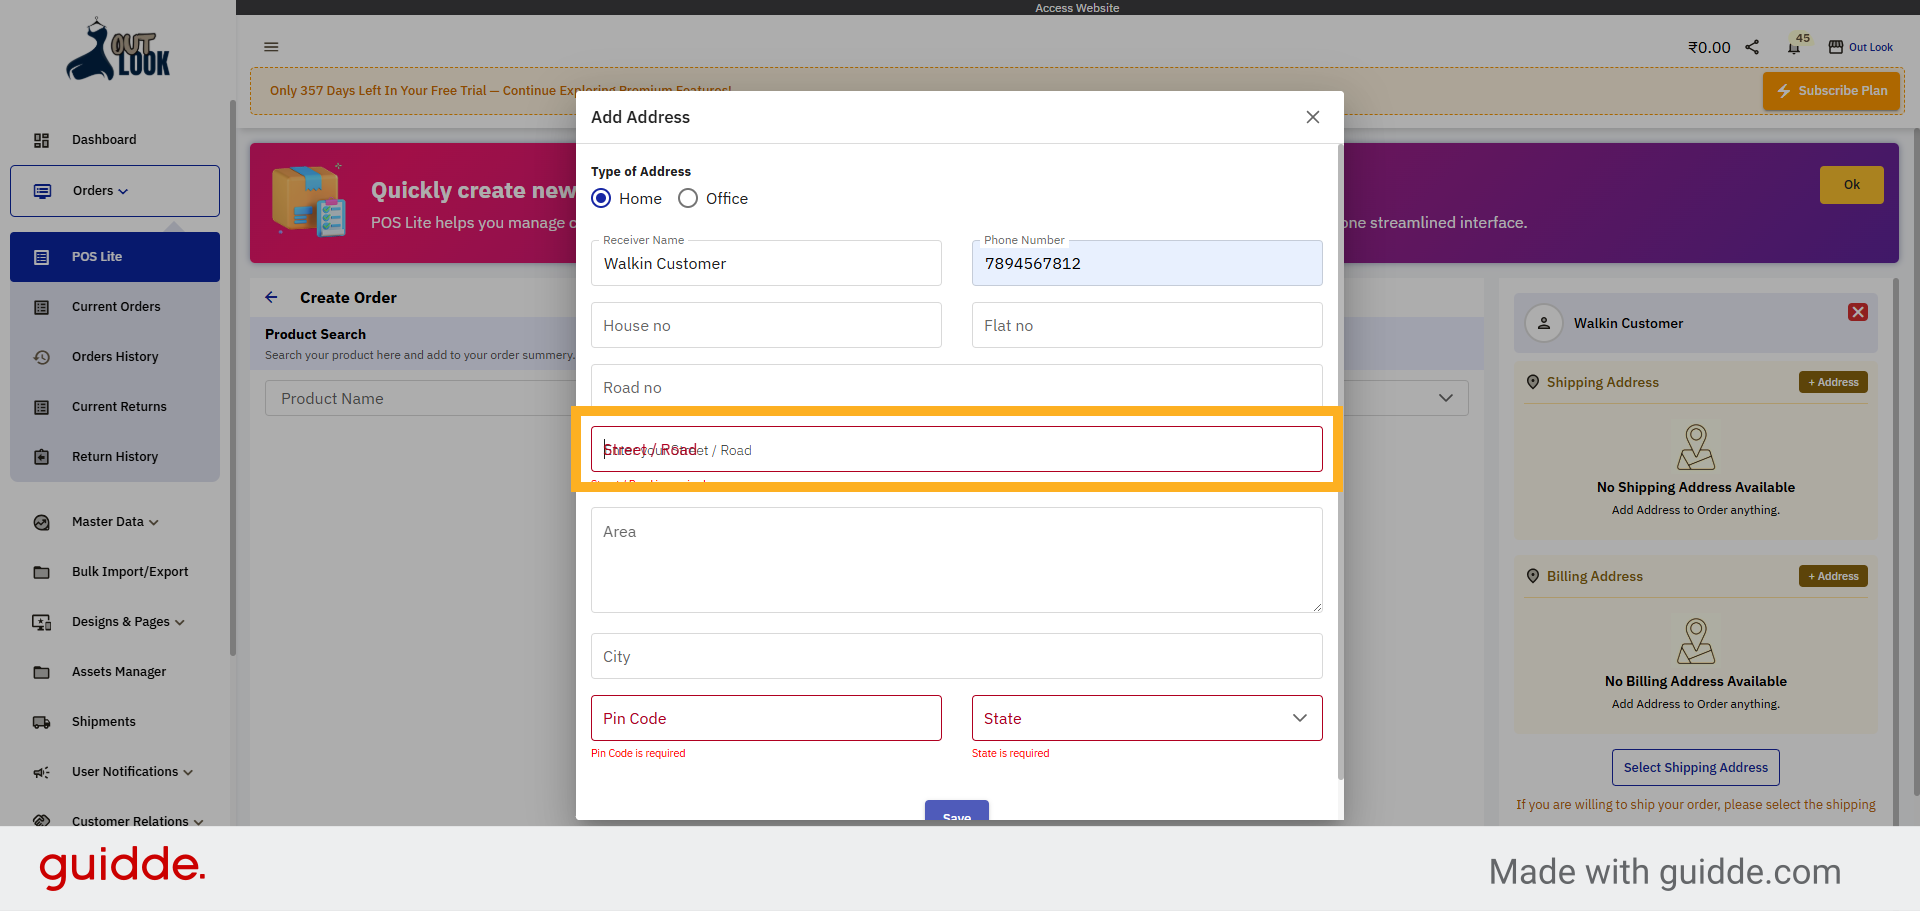
6. Enter Street or Road Field
Click the "Street / Road" field to specify the street or road information for the delivery address.
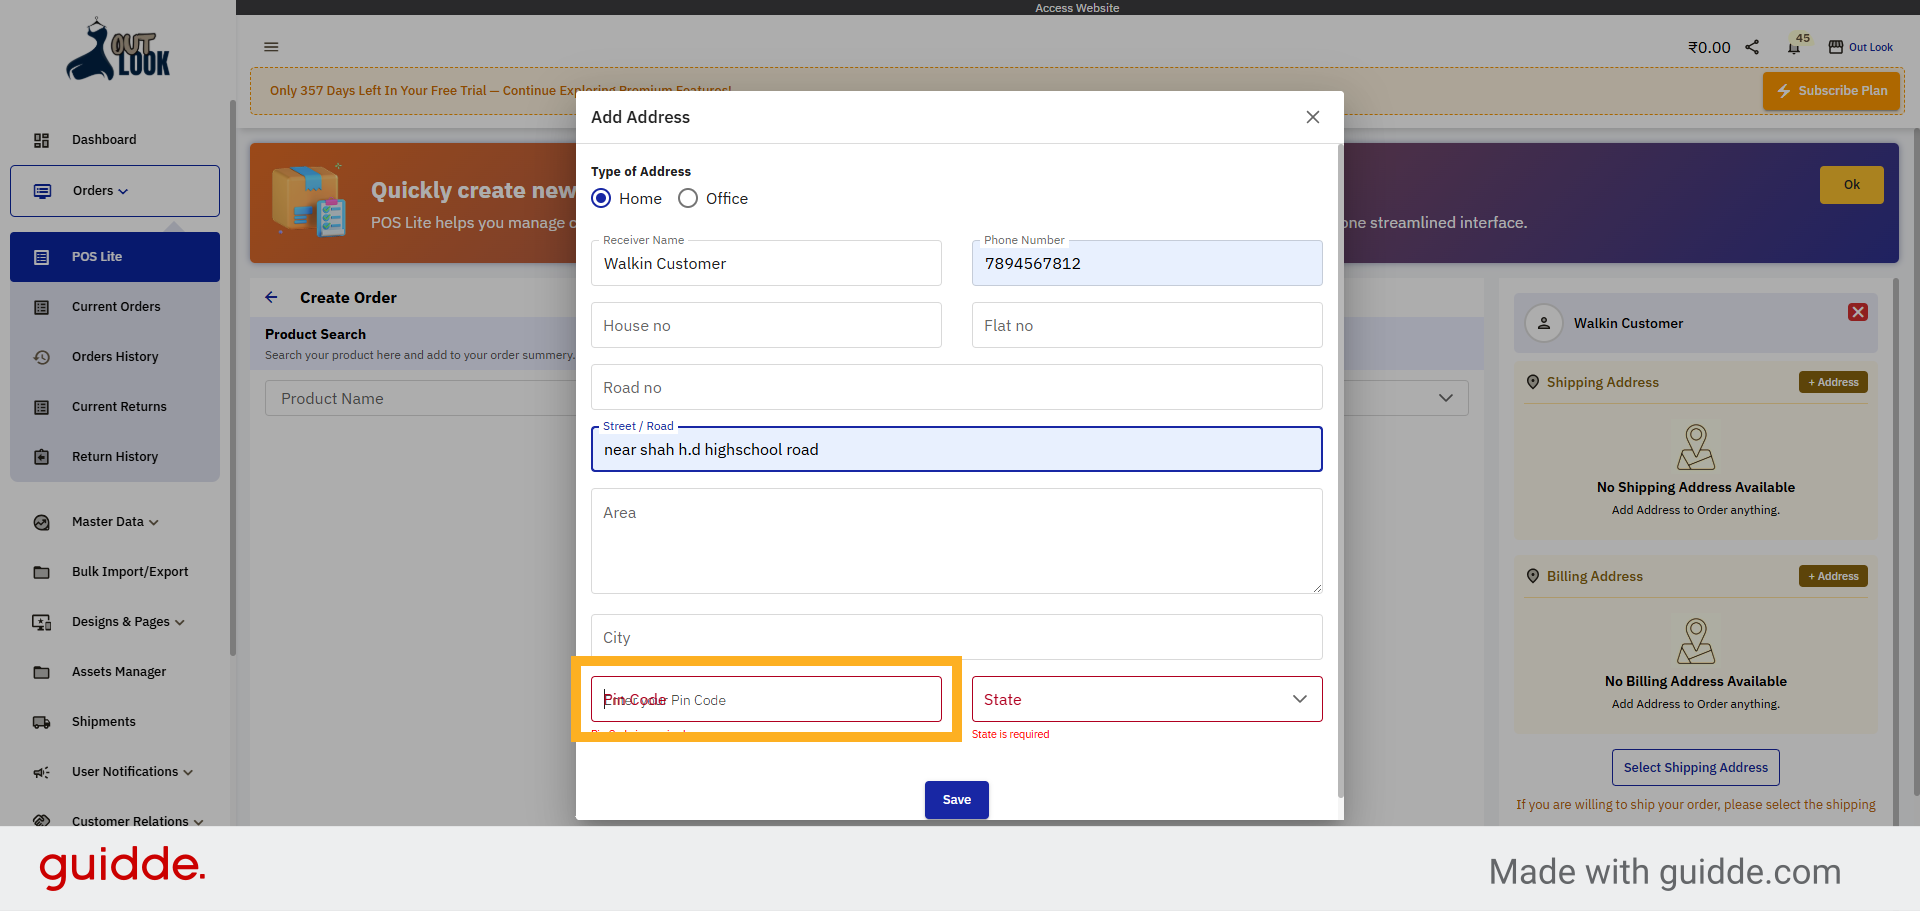
7. Enter Pin Code Field
Click the "Pin Code" field to input the postal code for the delivery address.
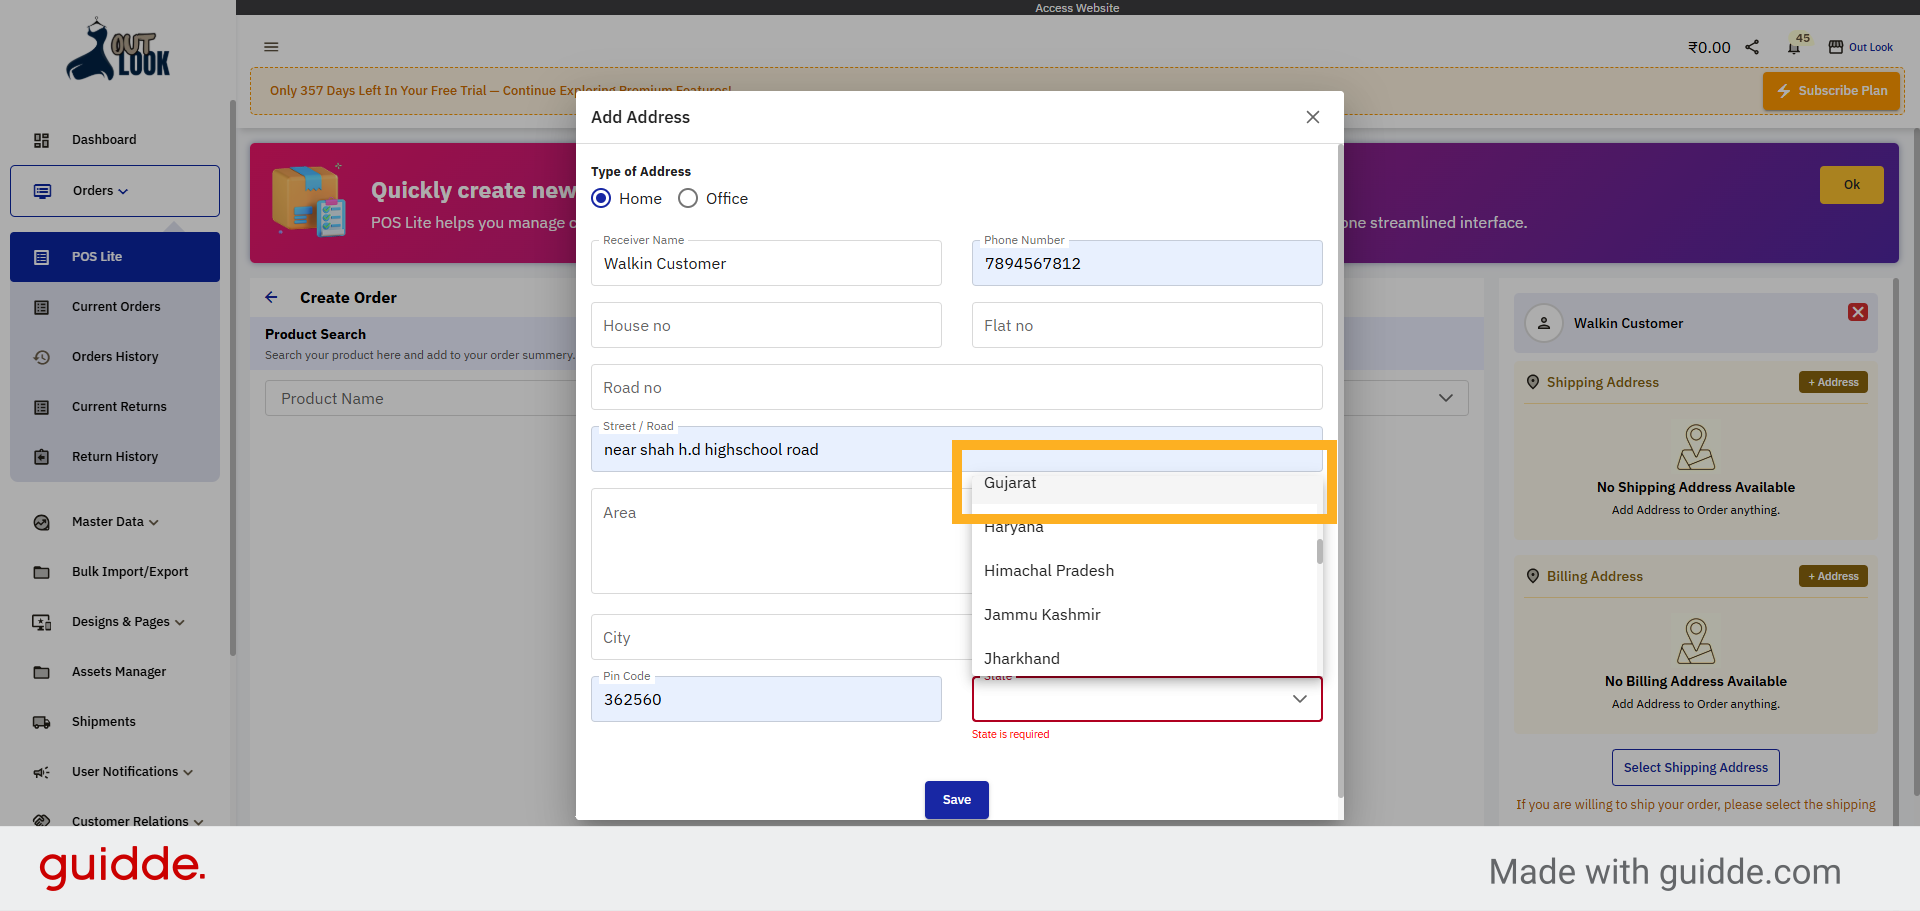
8. Open State Dropdown
Click the "Select State" dropdown to confirm or change the state selection for the address.
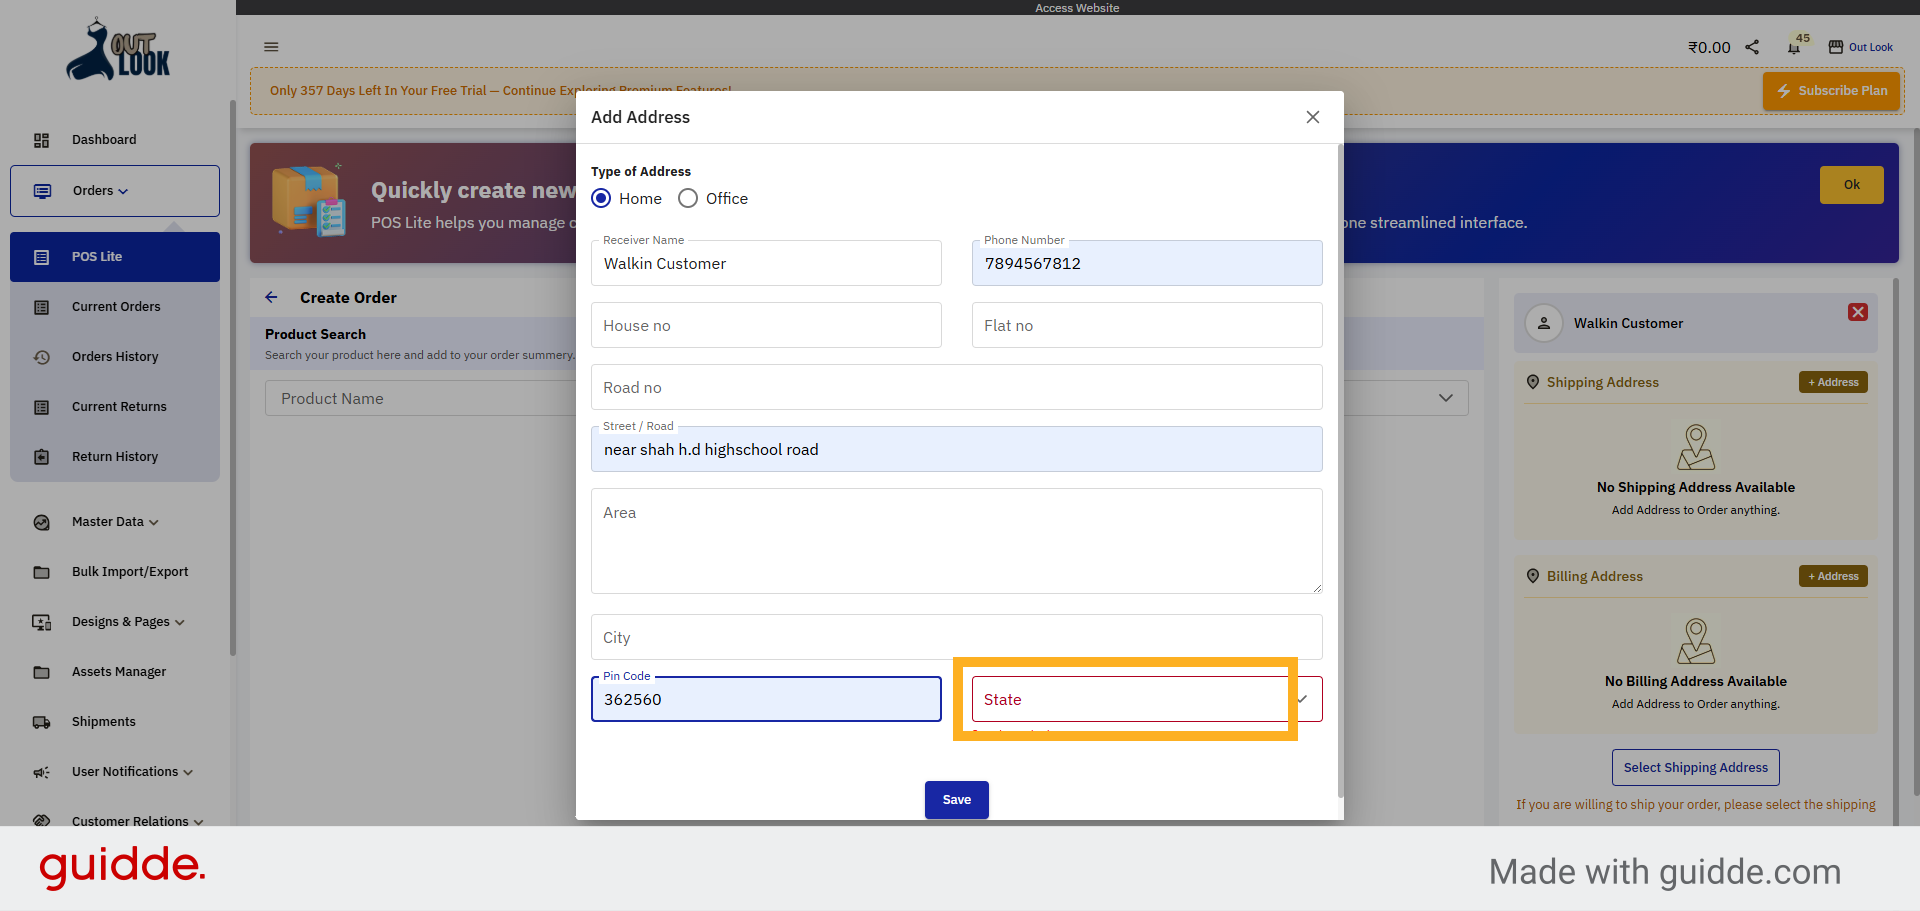
9. Choose State Gujarat
Select "Gujarat" from the state options to specify the delivery region.
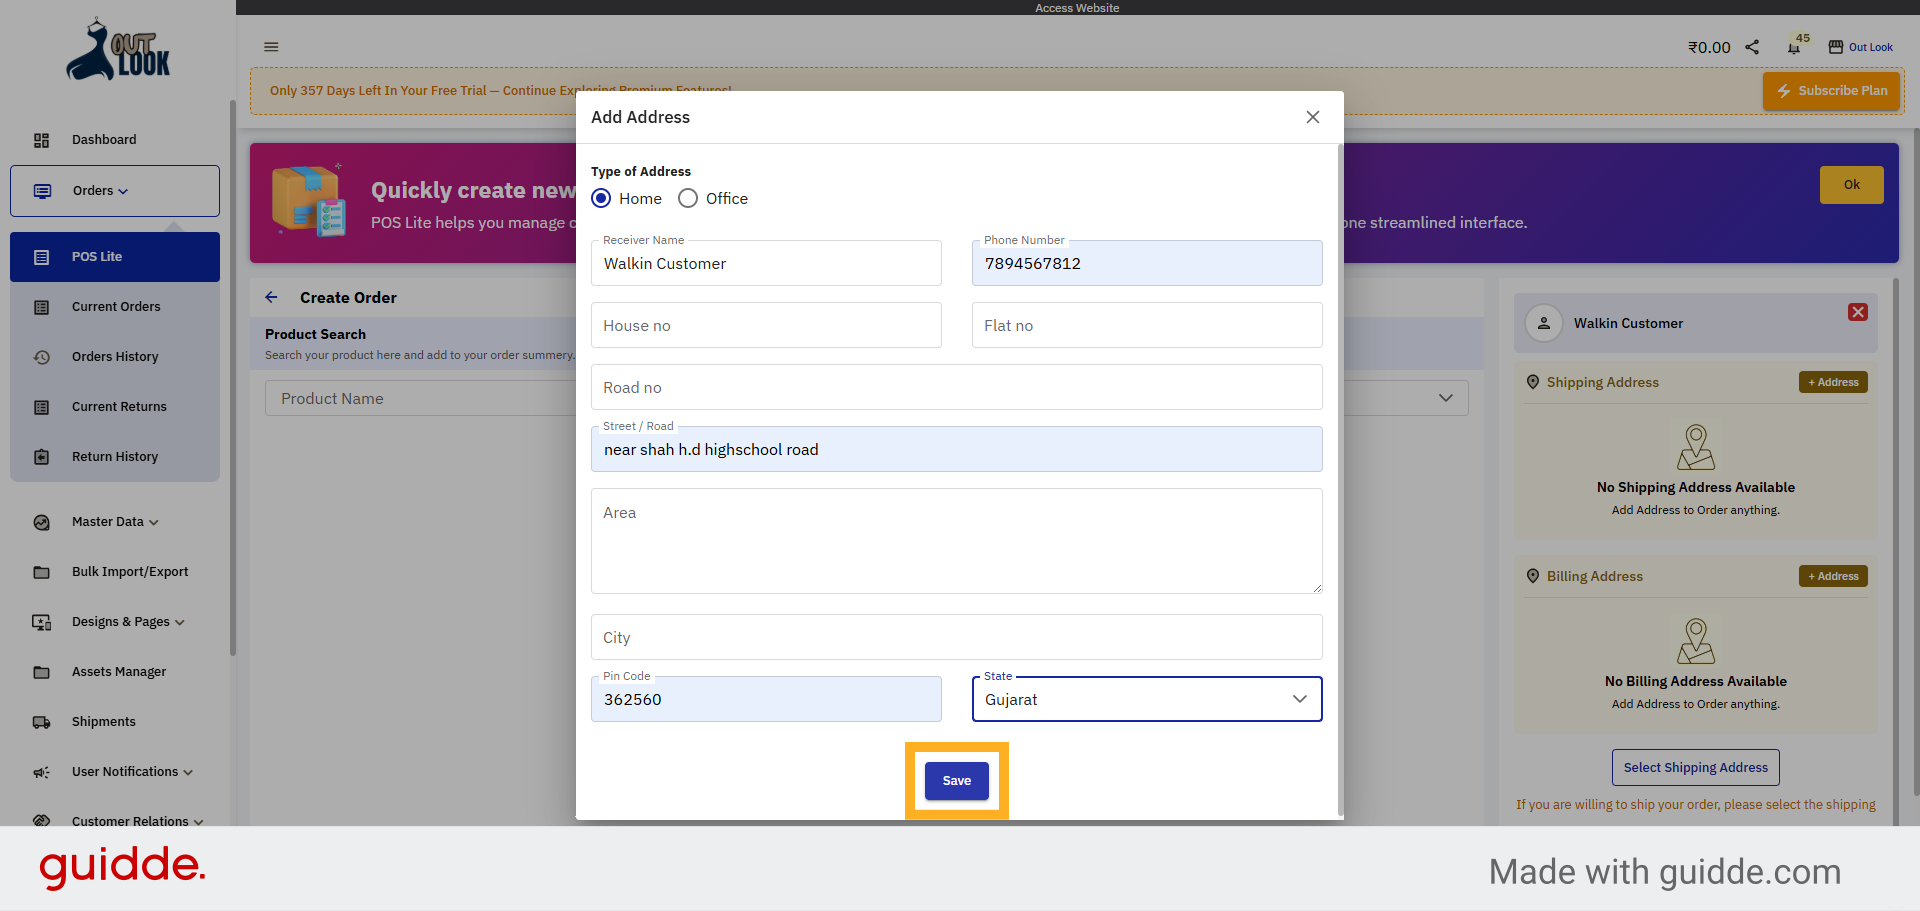
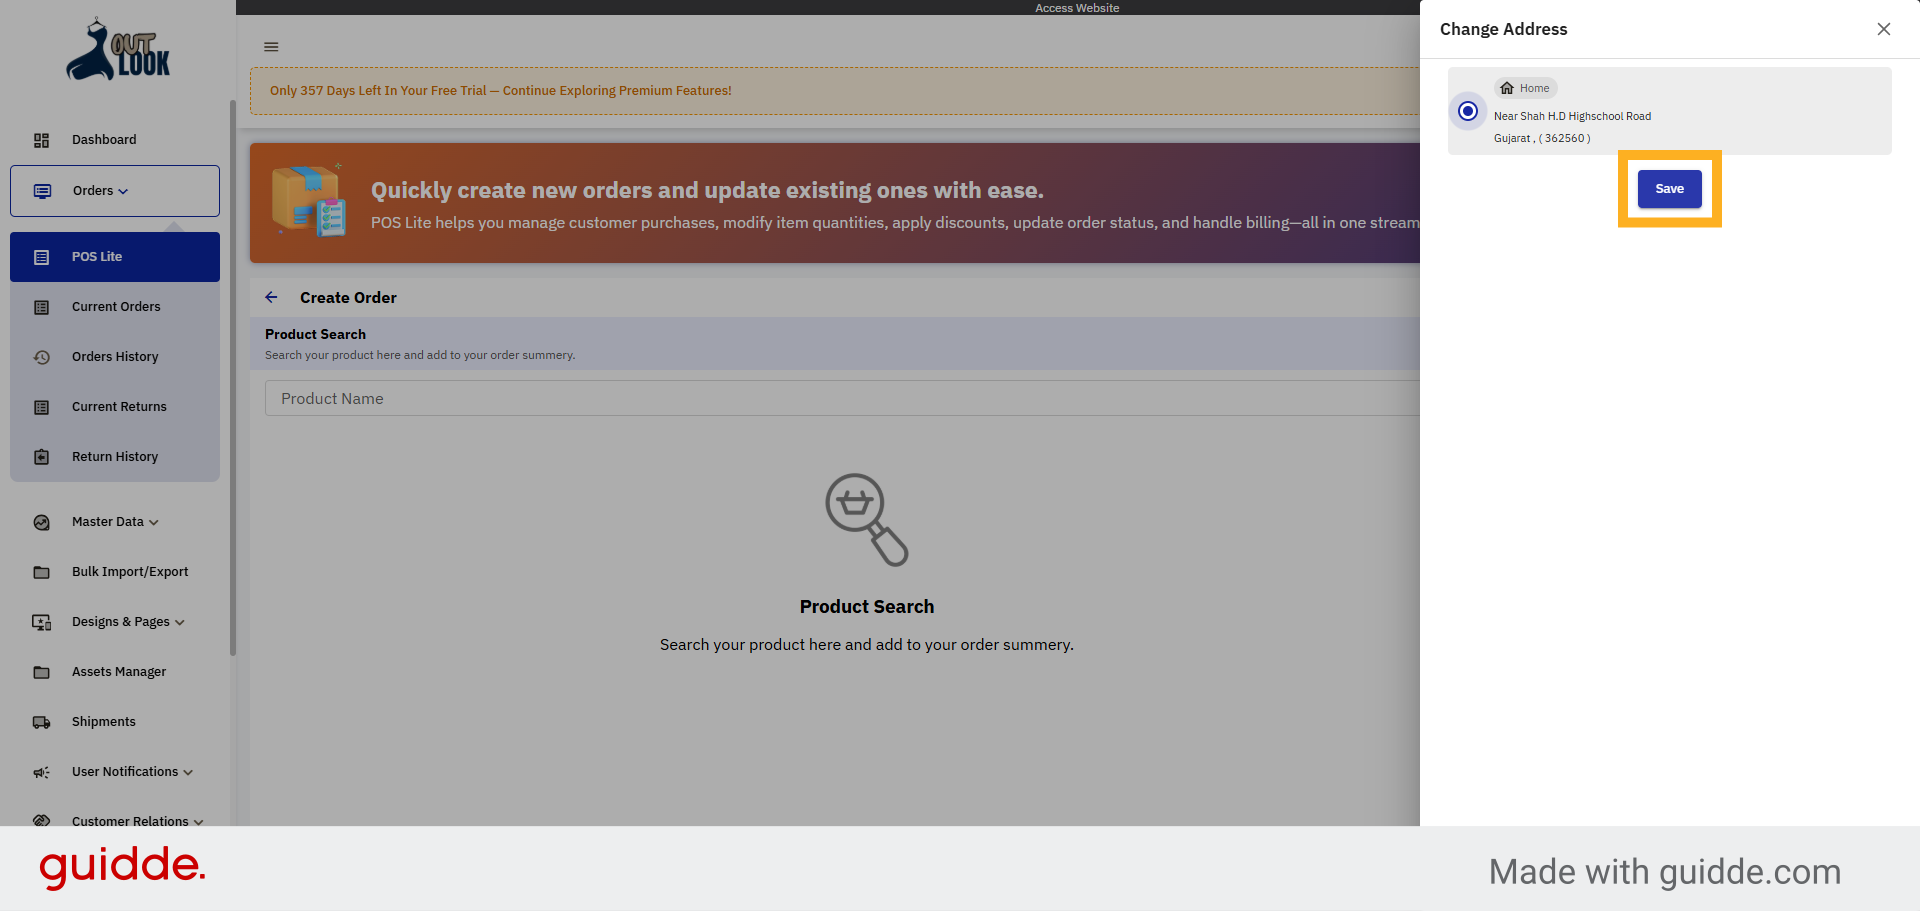
10. Save Address Information
Click the "Save" button to confirm and save the complete address details.
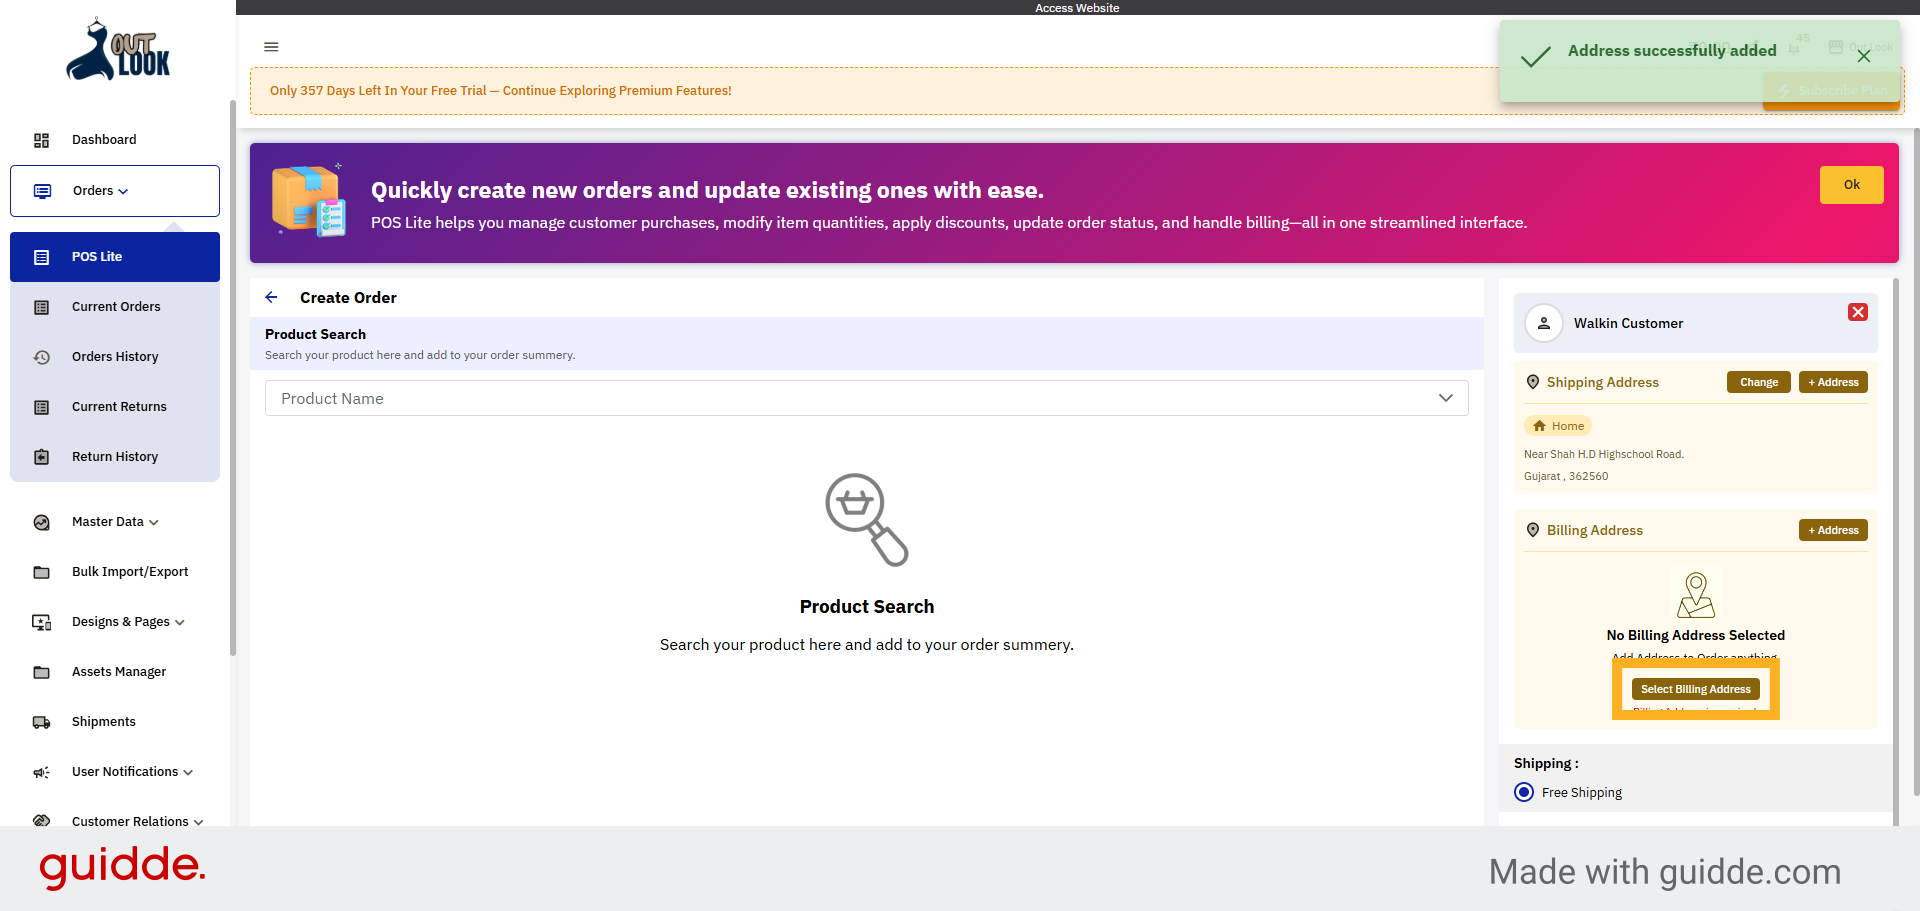
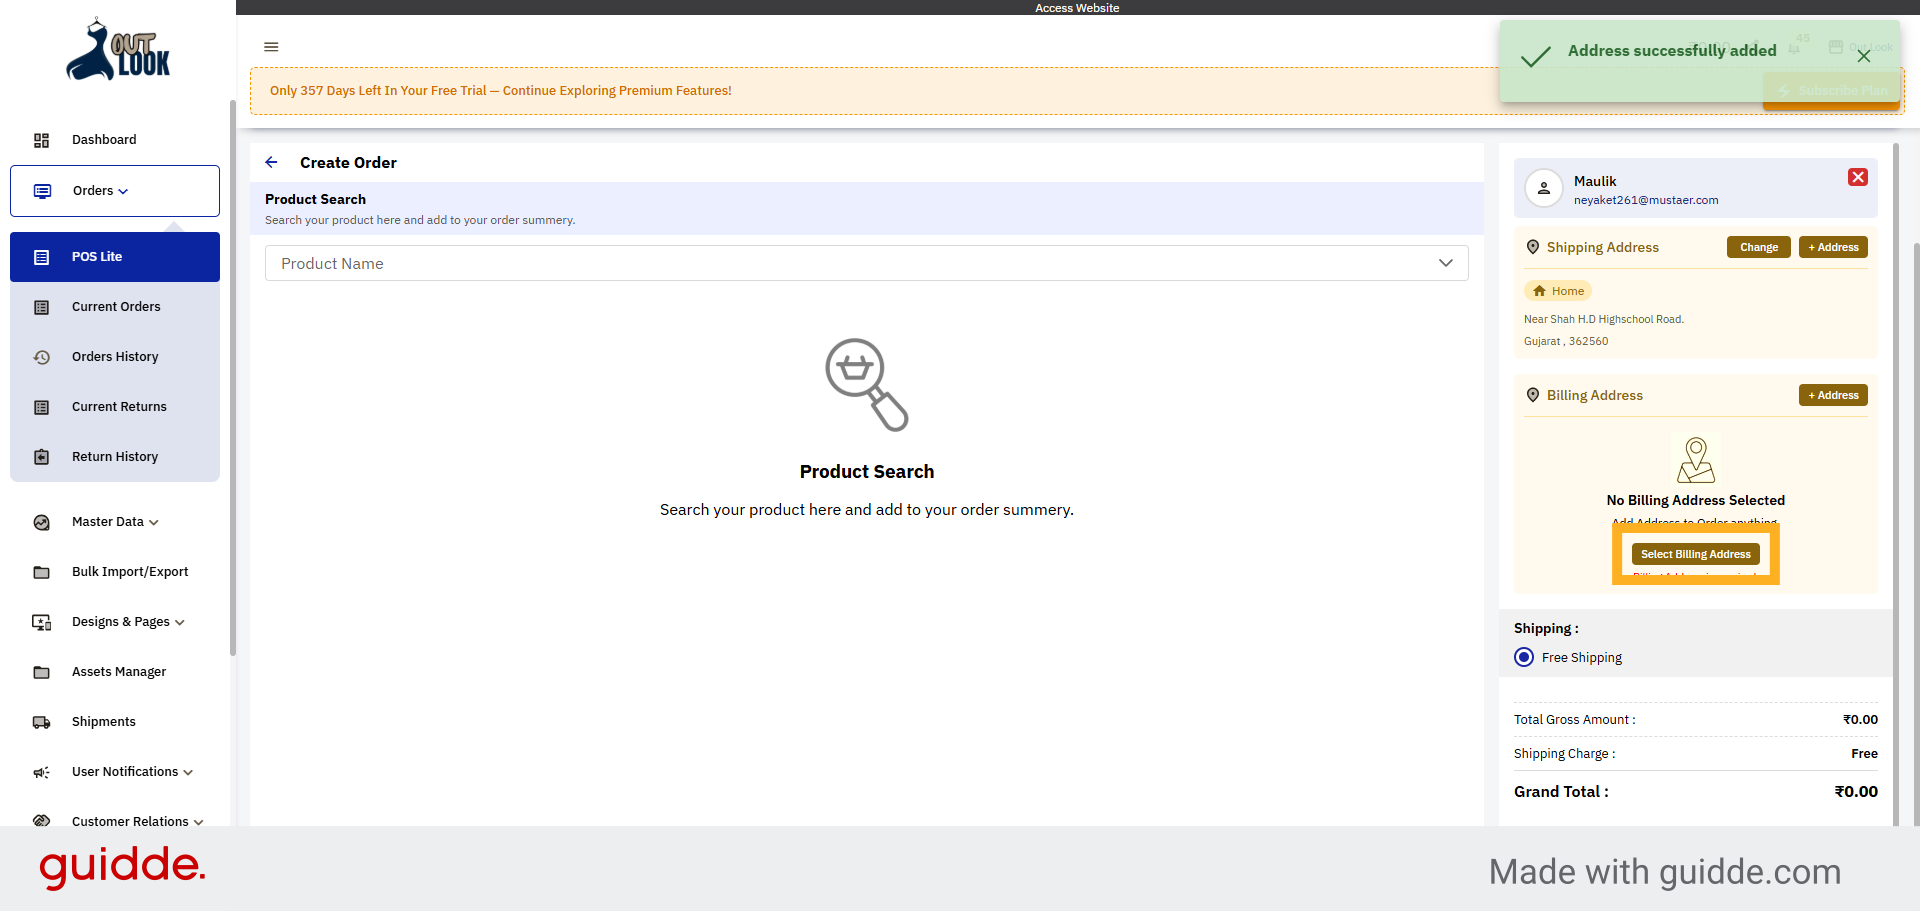
11. Select Billing Address
Click the "Select Billing Address" option to choose the billing address for the order.
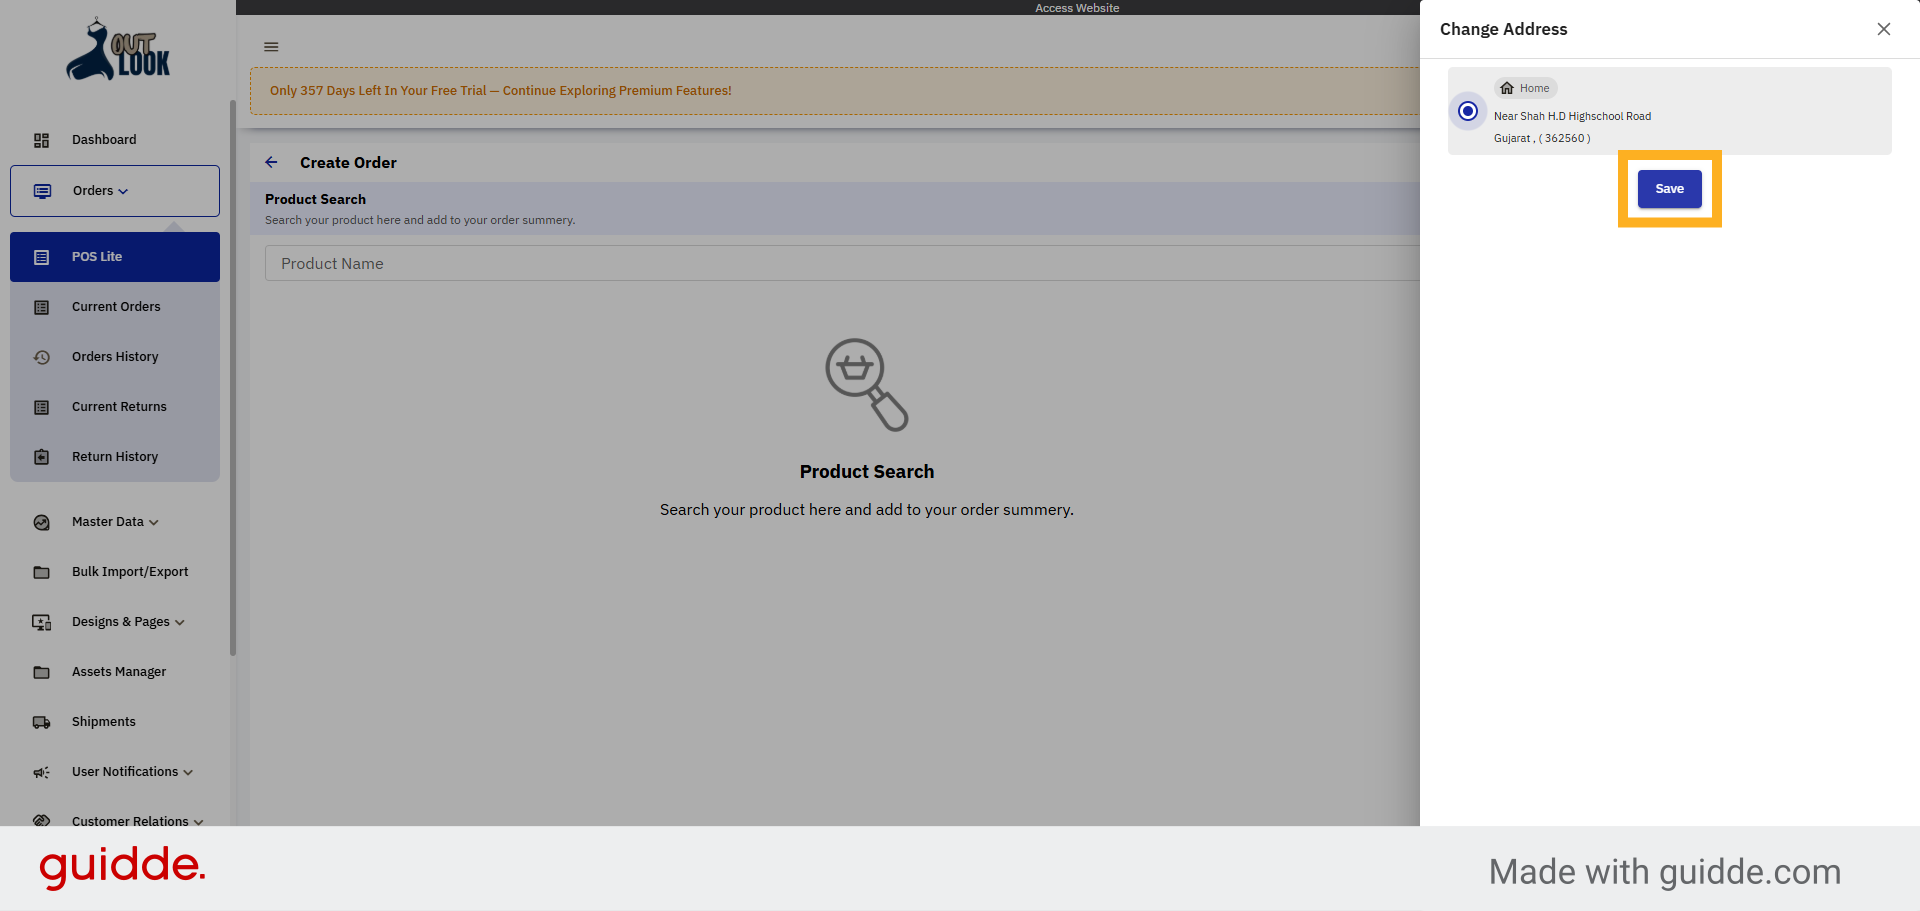
12. Confirm Billing Address Selection
Click here to confirm the selected billing address for the order.
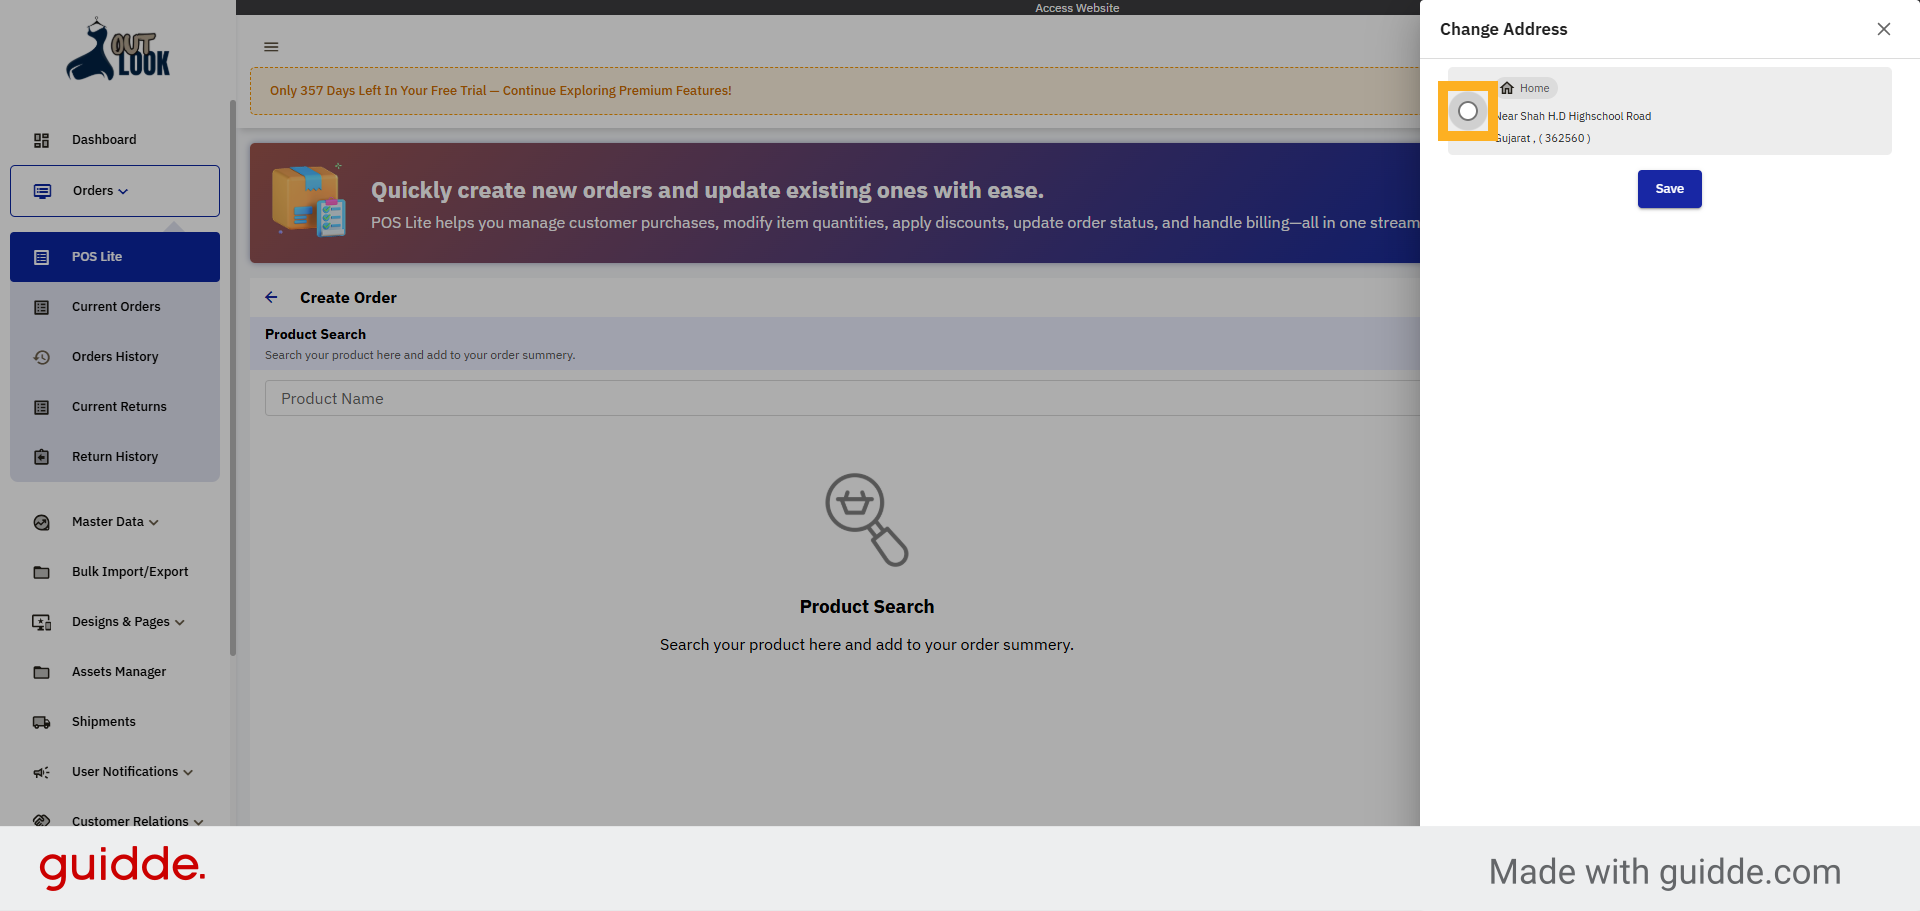
13. Save Billing Address
Click the "Save" button to finalize the billing address selection.
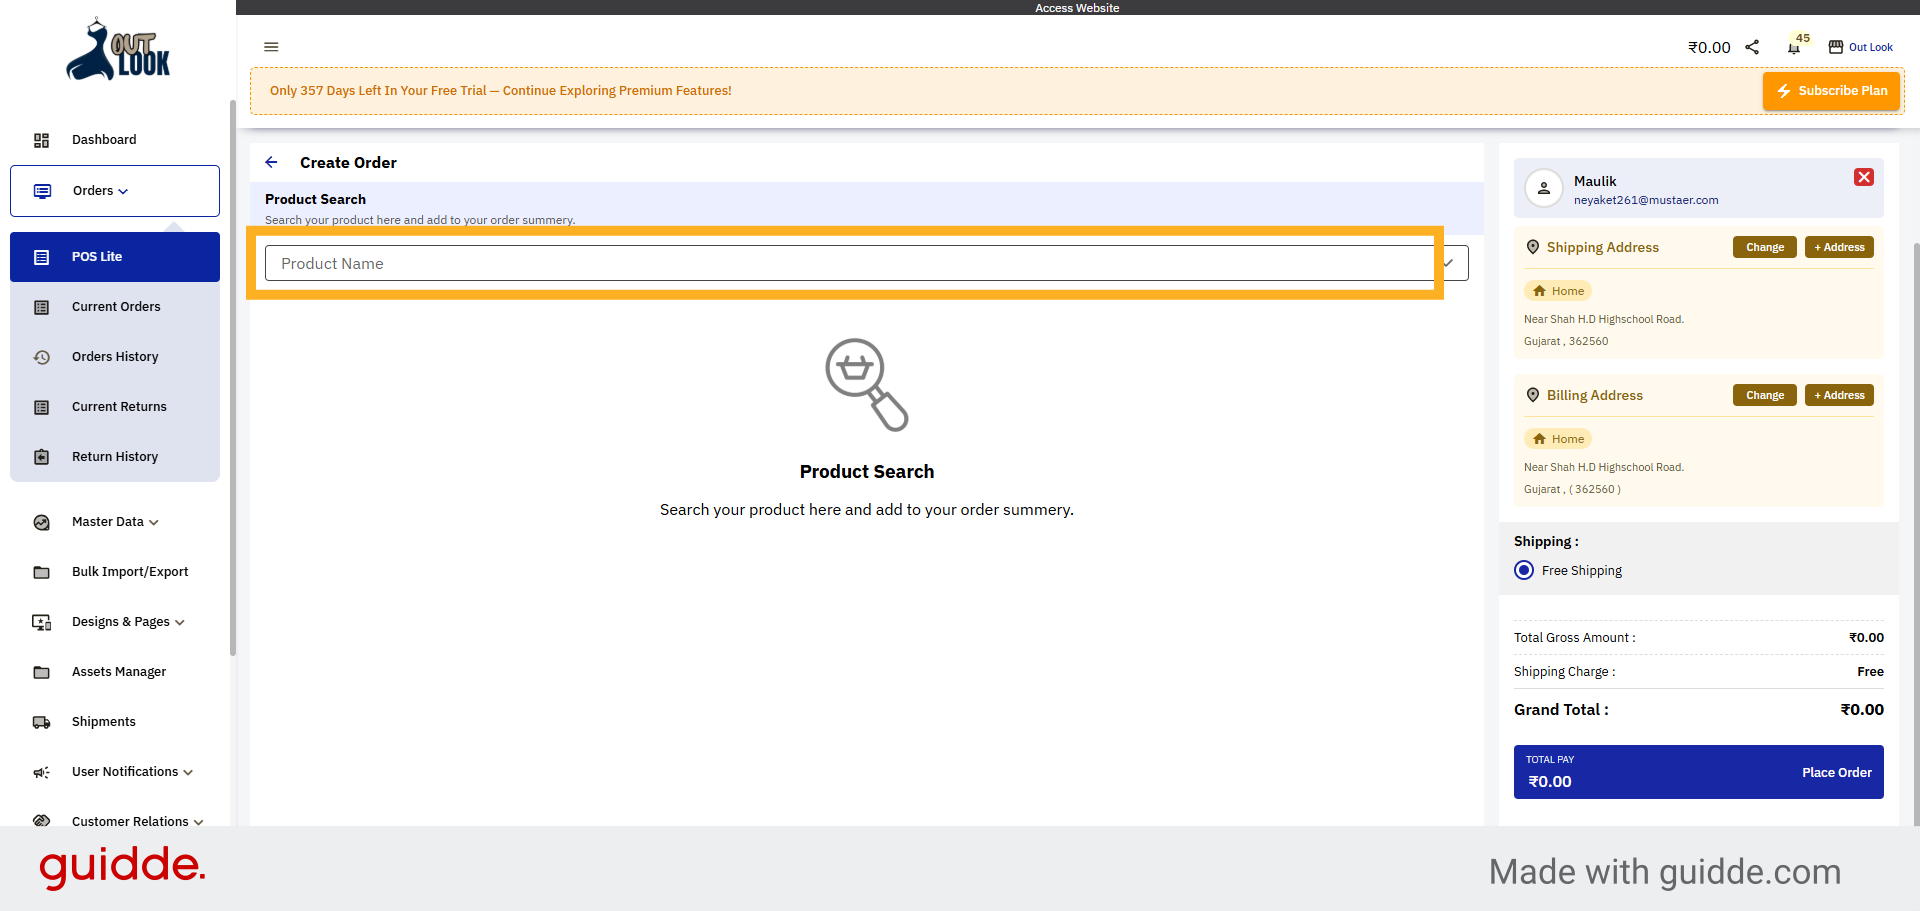
14. Select Product Name Field
Click the "Product Name" field to begin selecting the product to add to the order.

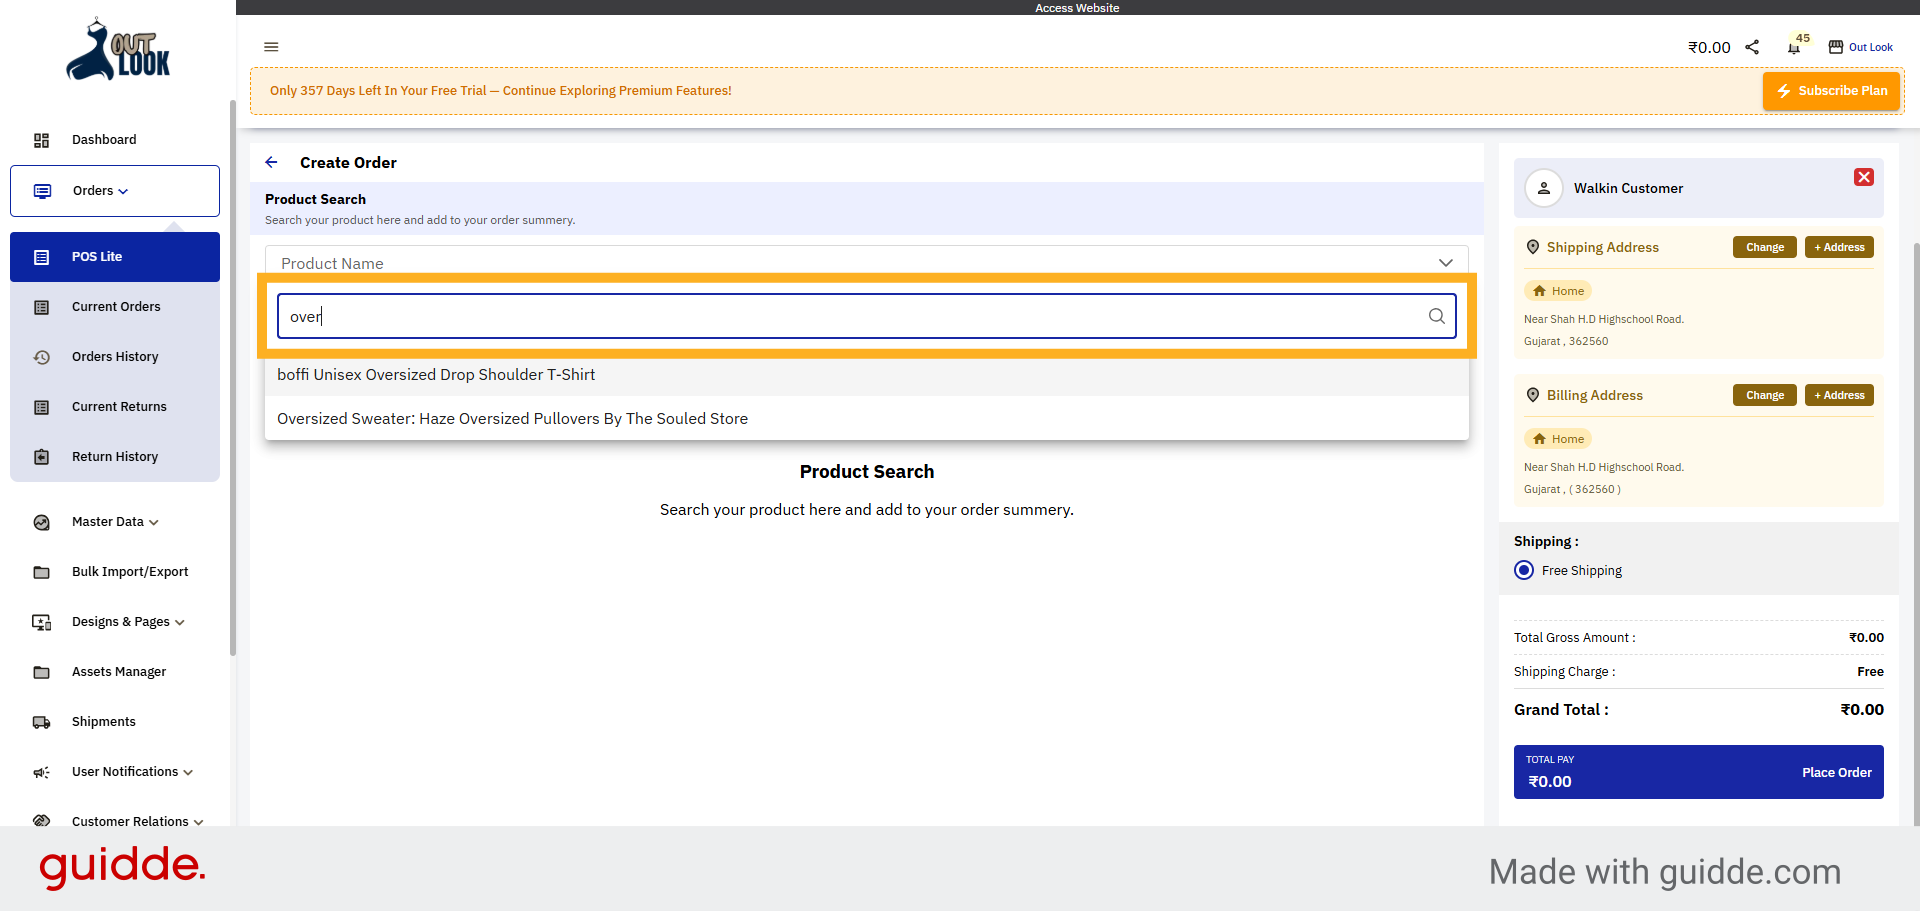
15. Enter Product Search Term
Enter a product search term such as "over" to filter available products.
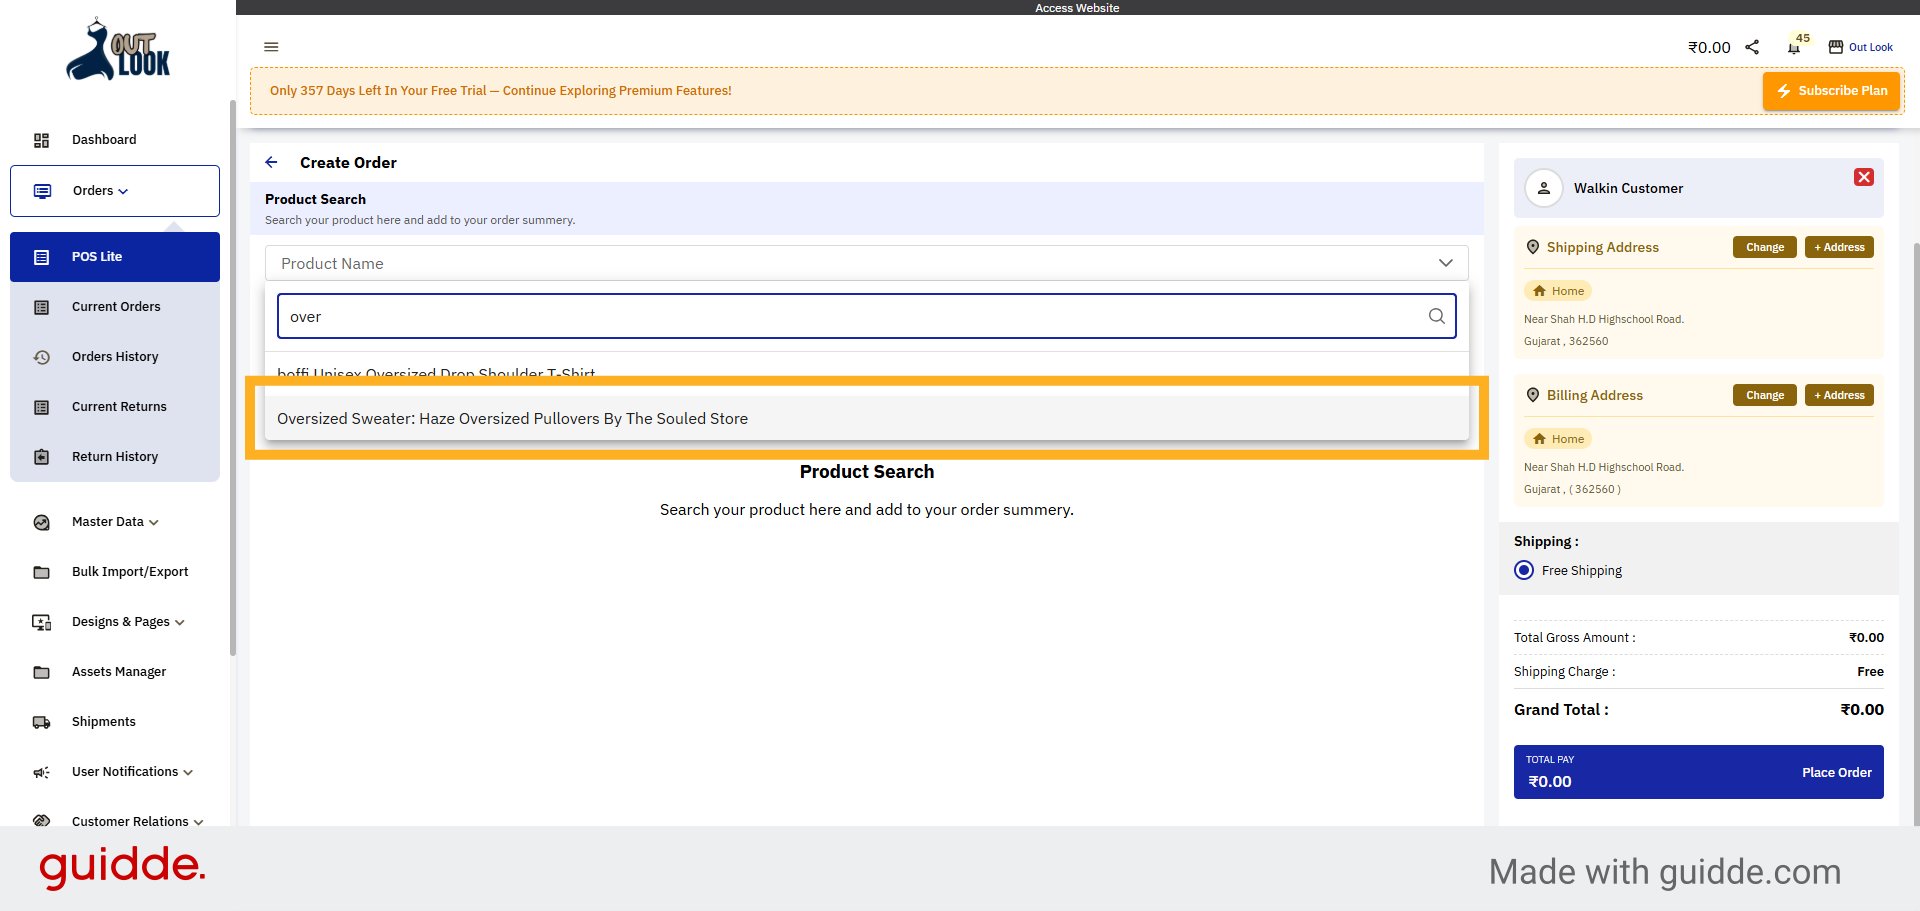
16. Choose Product from List
Select the product "Oversized Sweater: Haze Oversized Pullovers By The Souled Store" from the filtered
list.
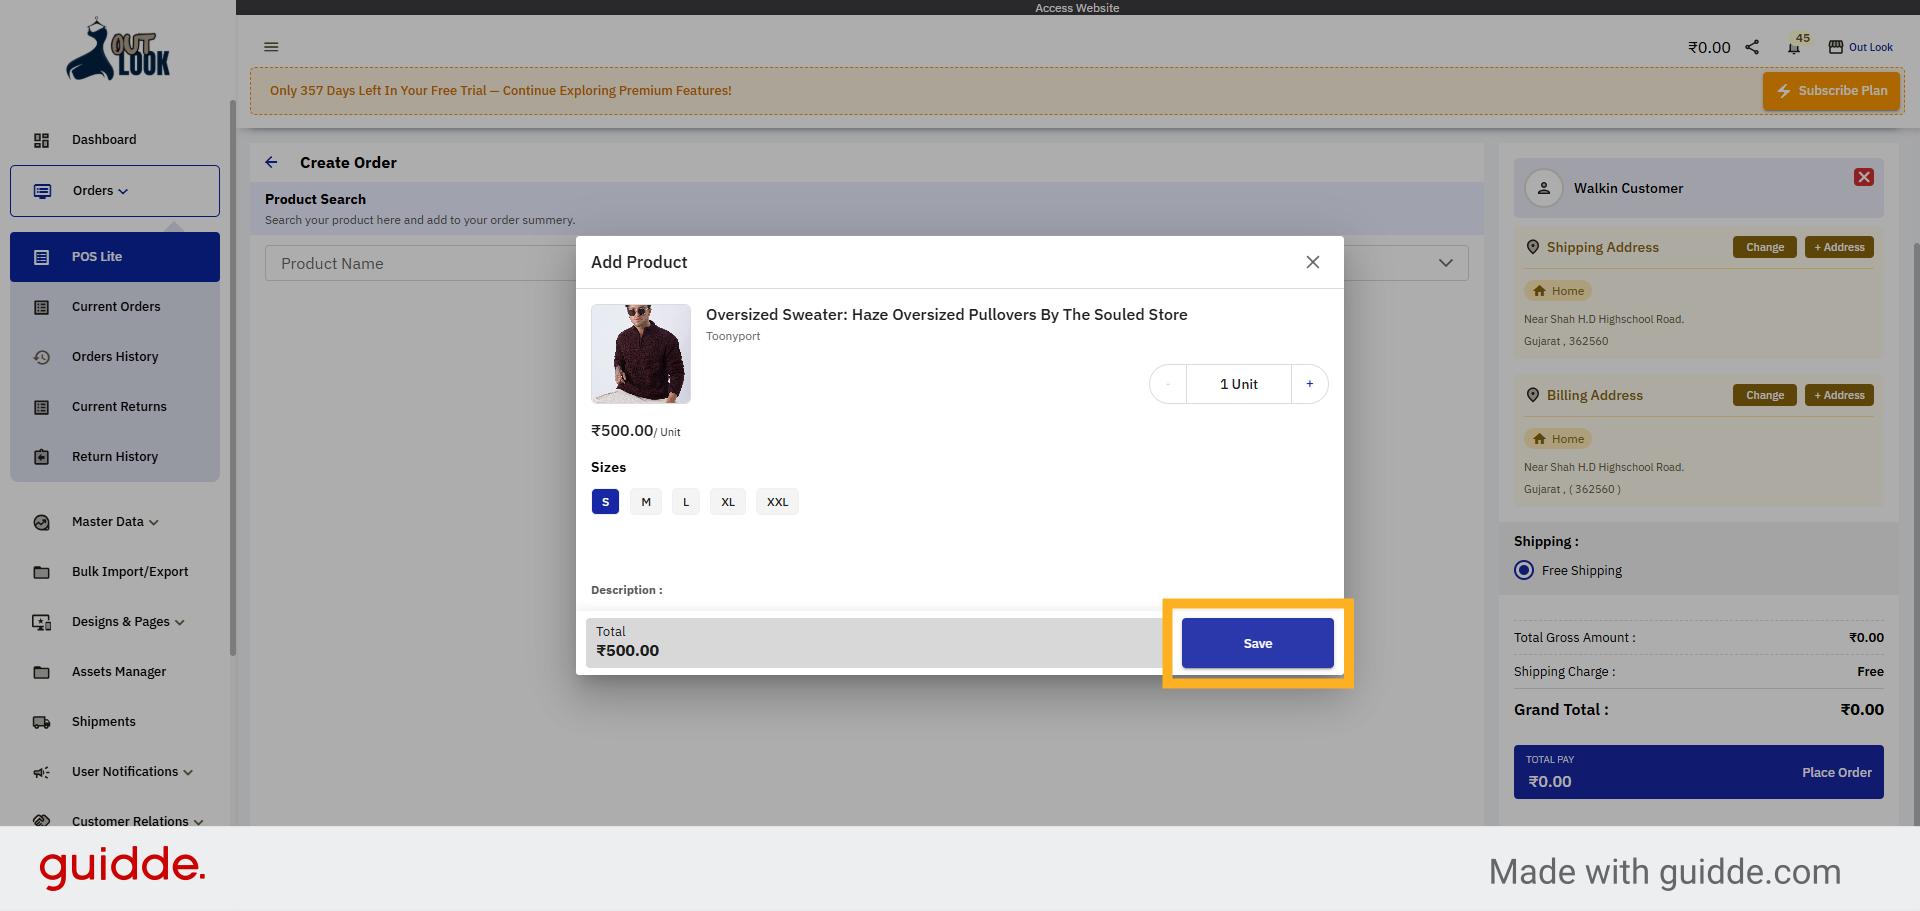
17. Save Product Selection
Click the "Save" button to add the selected product to the order.
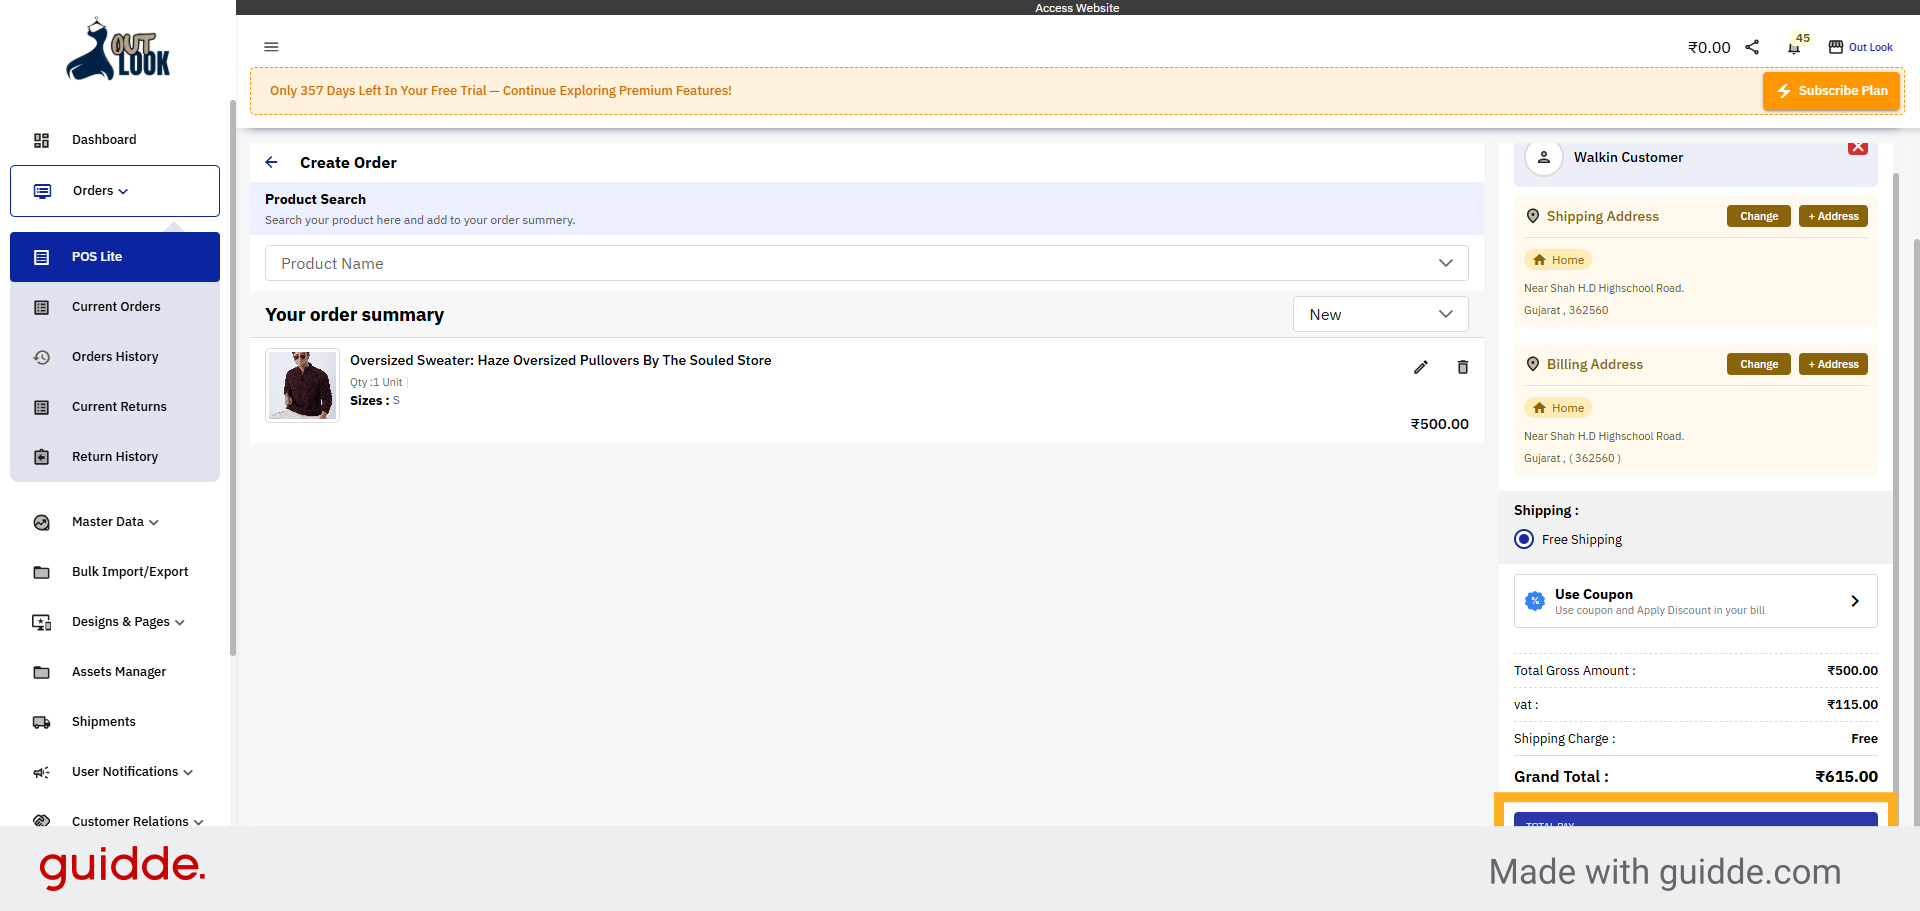
18. Place Order Button
Click the "Place Order" button to proceed with placing the order.
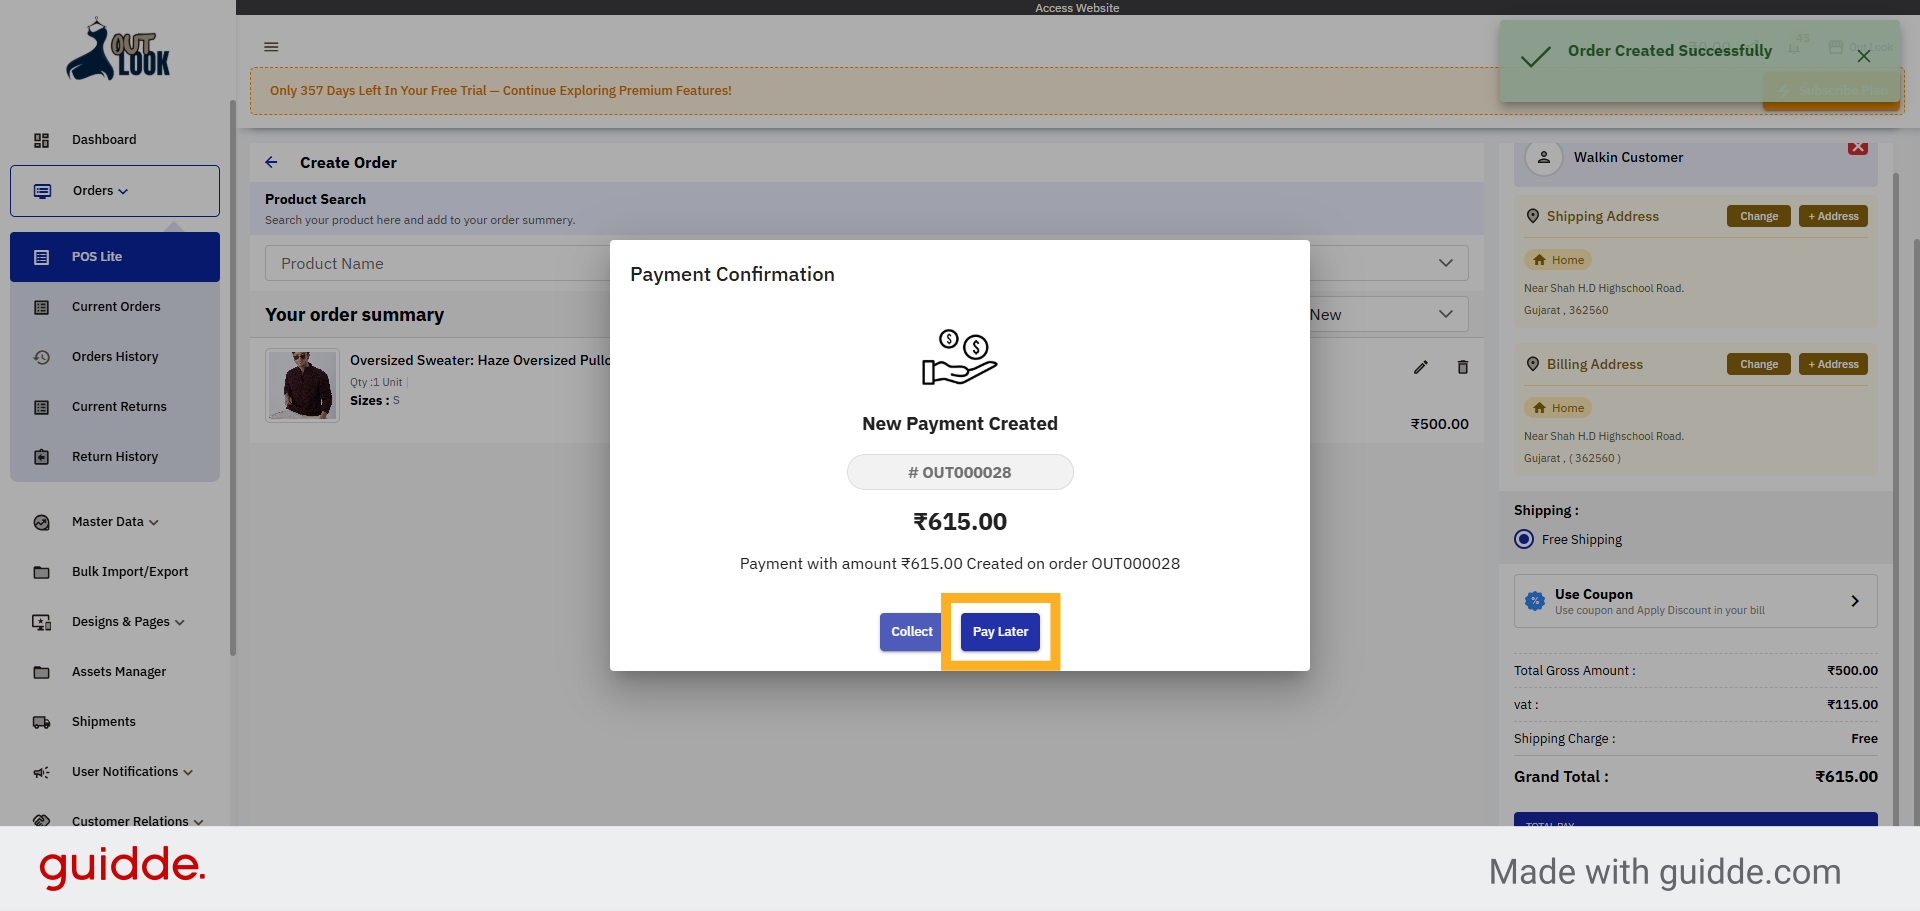
19. Select Pay Later Option
Click the "Pay Later" option to choose deferred payment for the order.
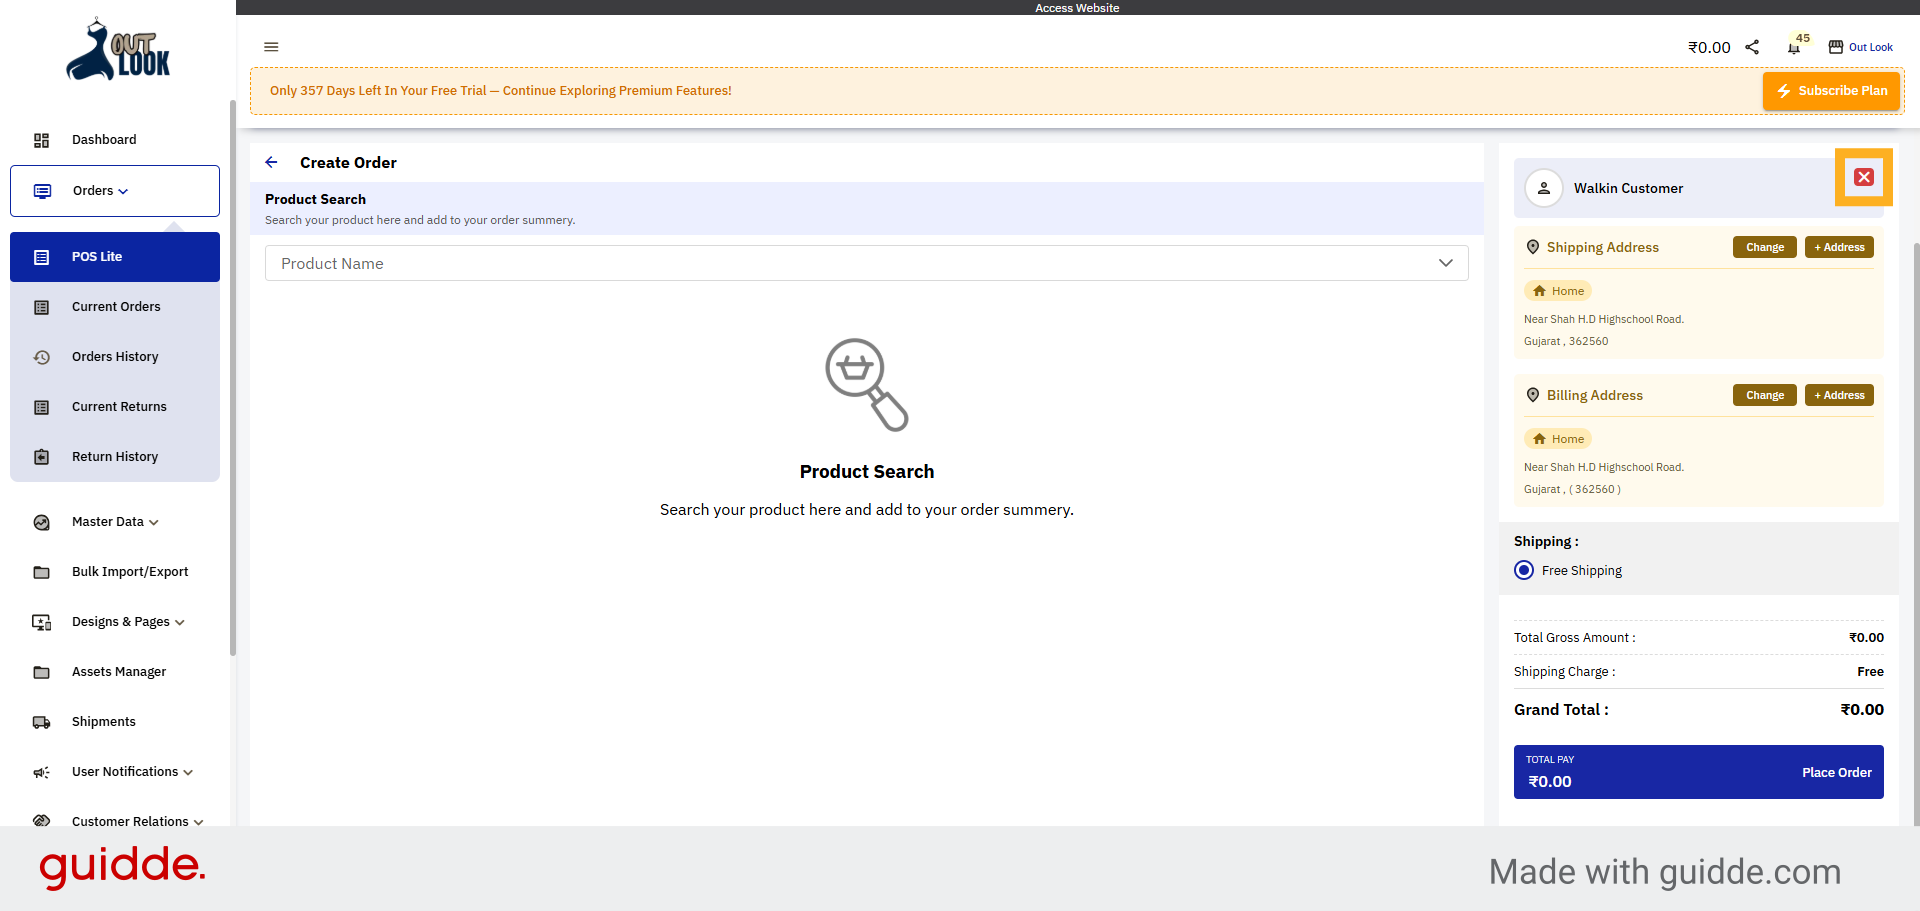
20. Clear Current Form
Click the "clear" button to reset the order form and prepare for a new entry.
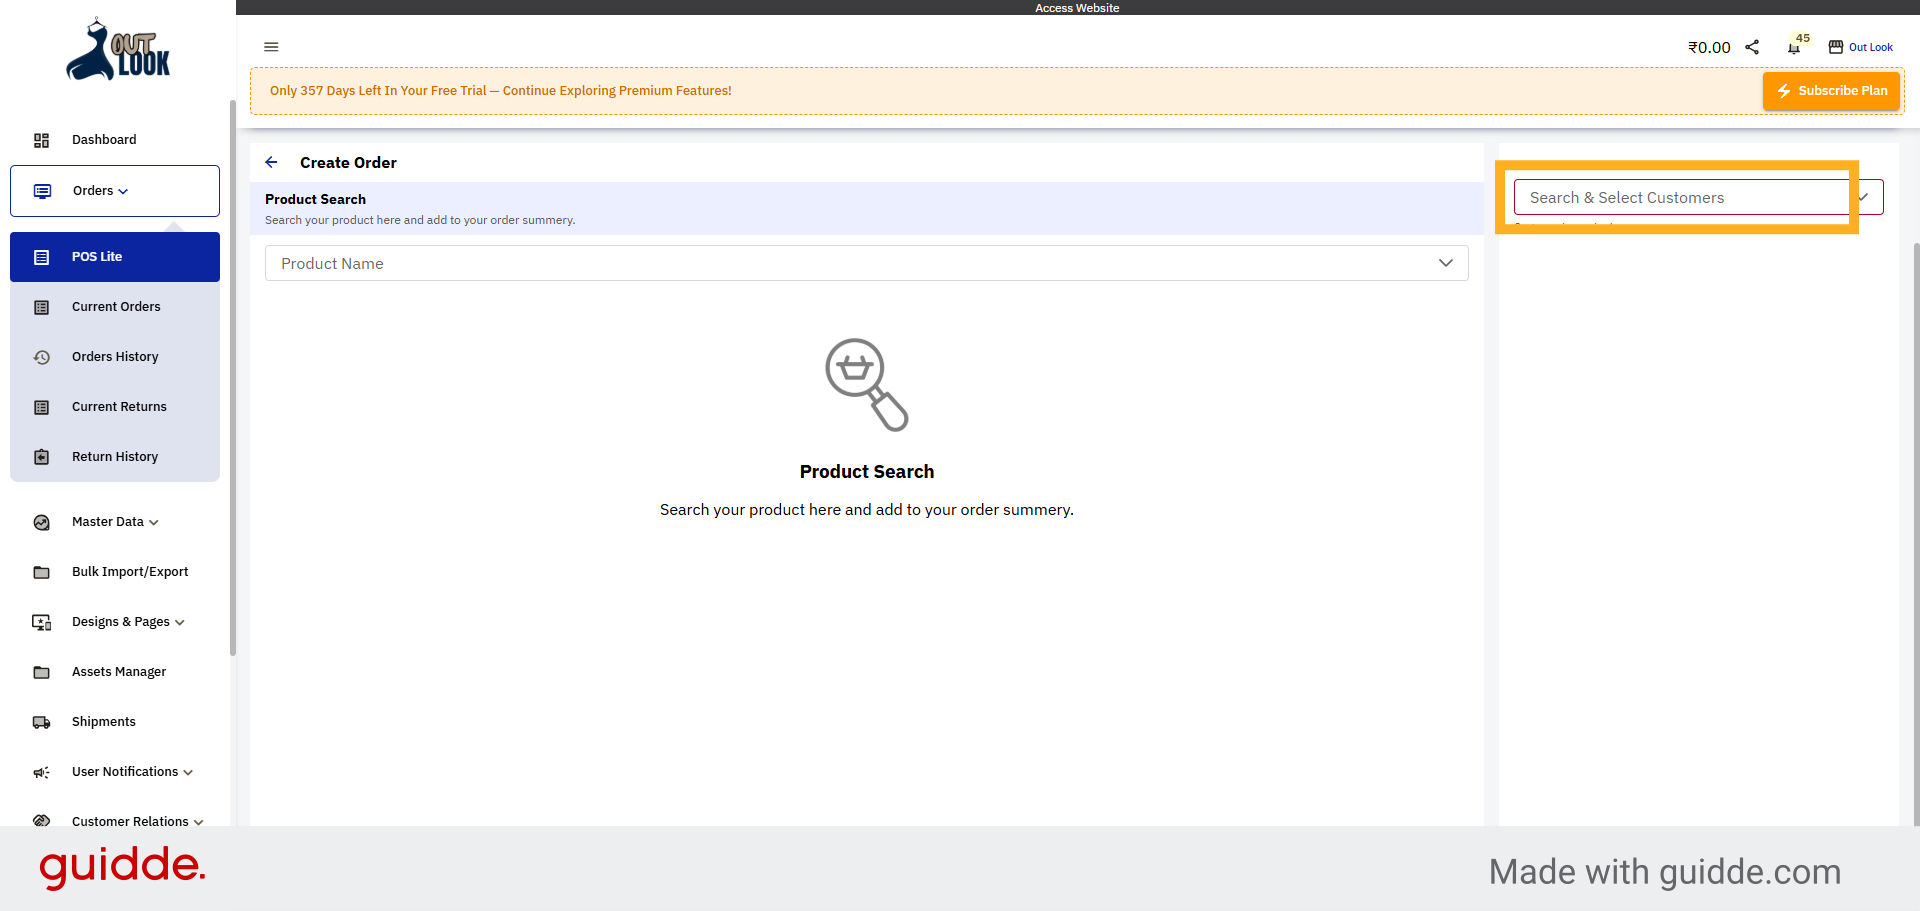
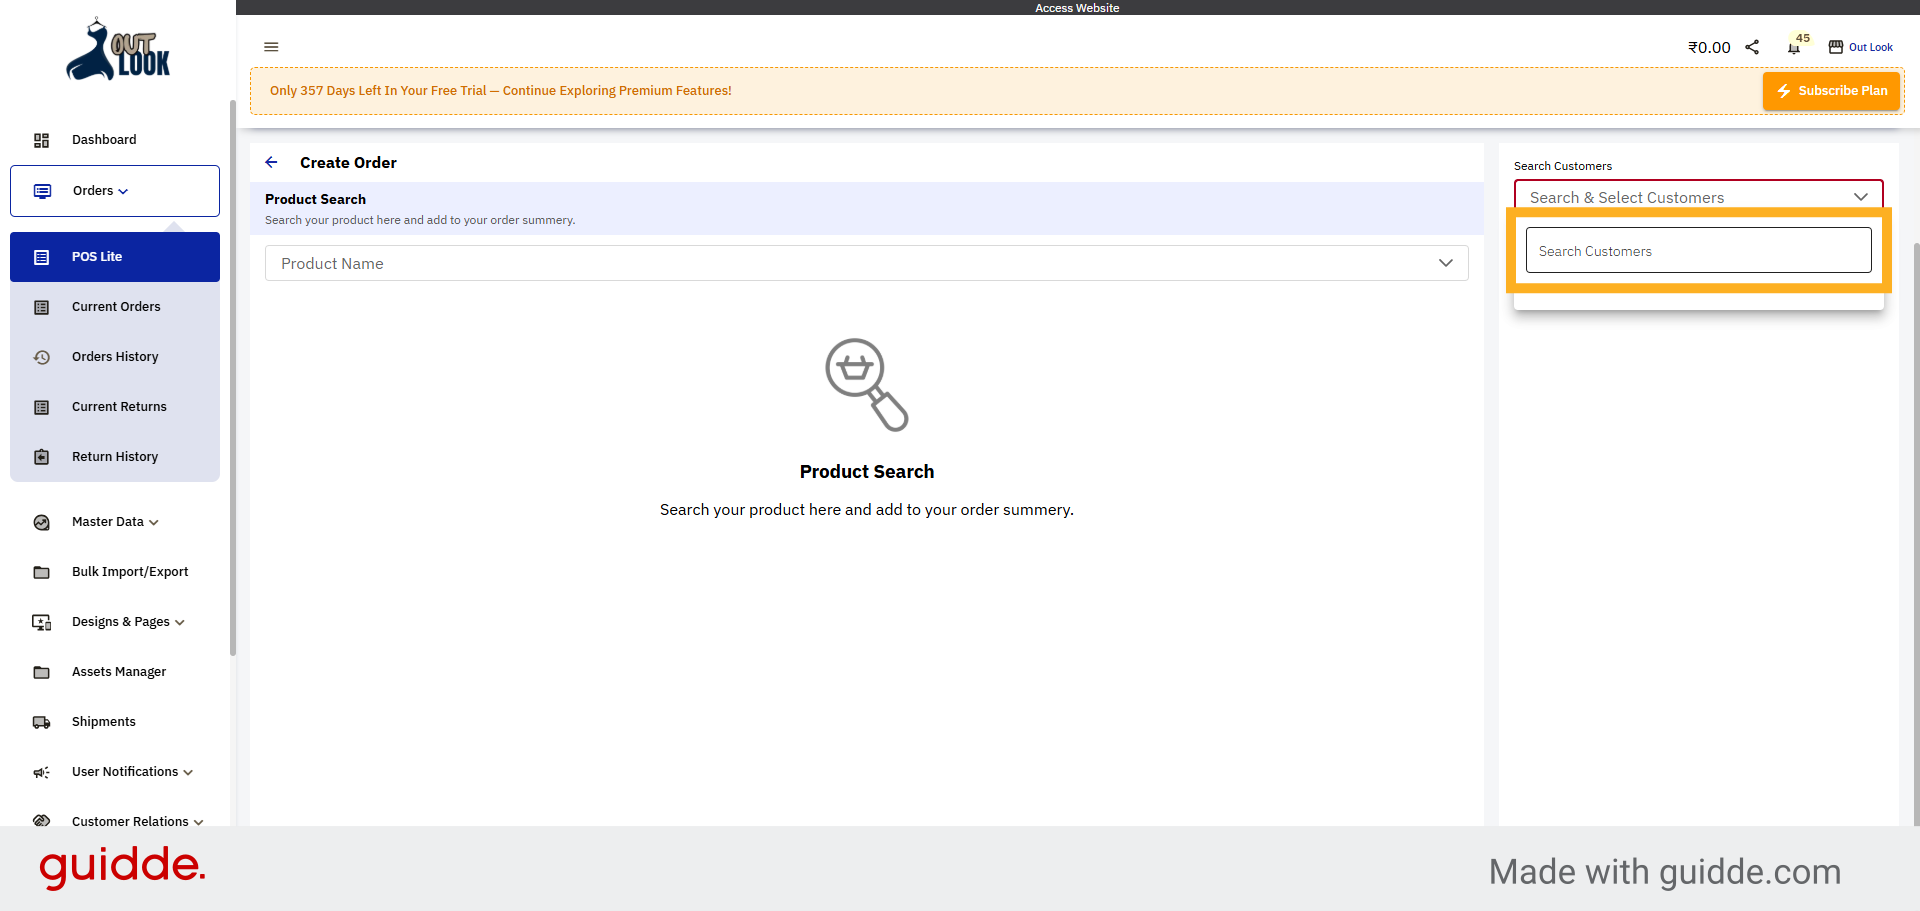
21. Open Customer Search
Click the "Search & Select Customers" field to find an existing customer for the order.
22. Select Search Customers Field
Click the "Search Customers" input to begin typing the customer's name or email.
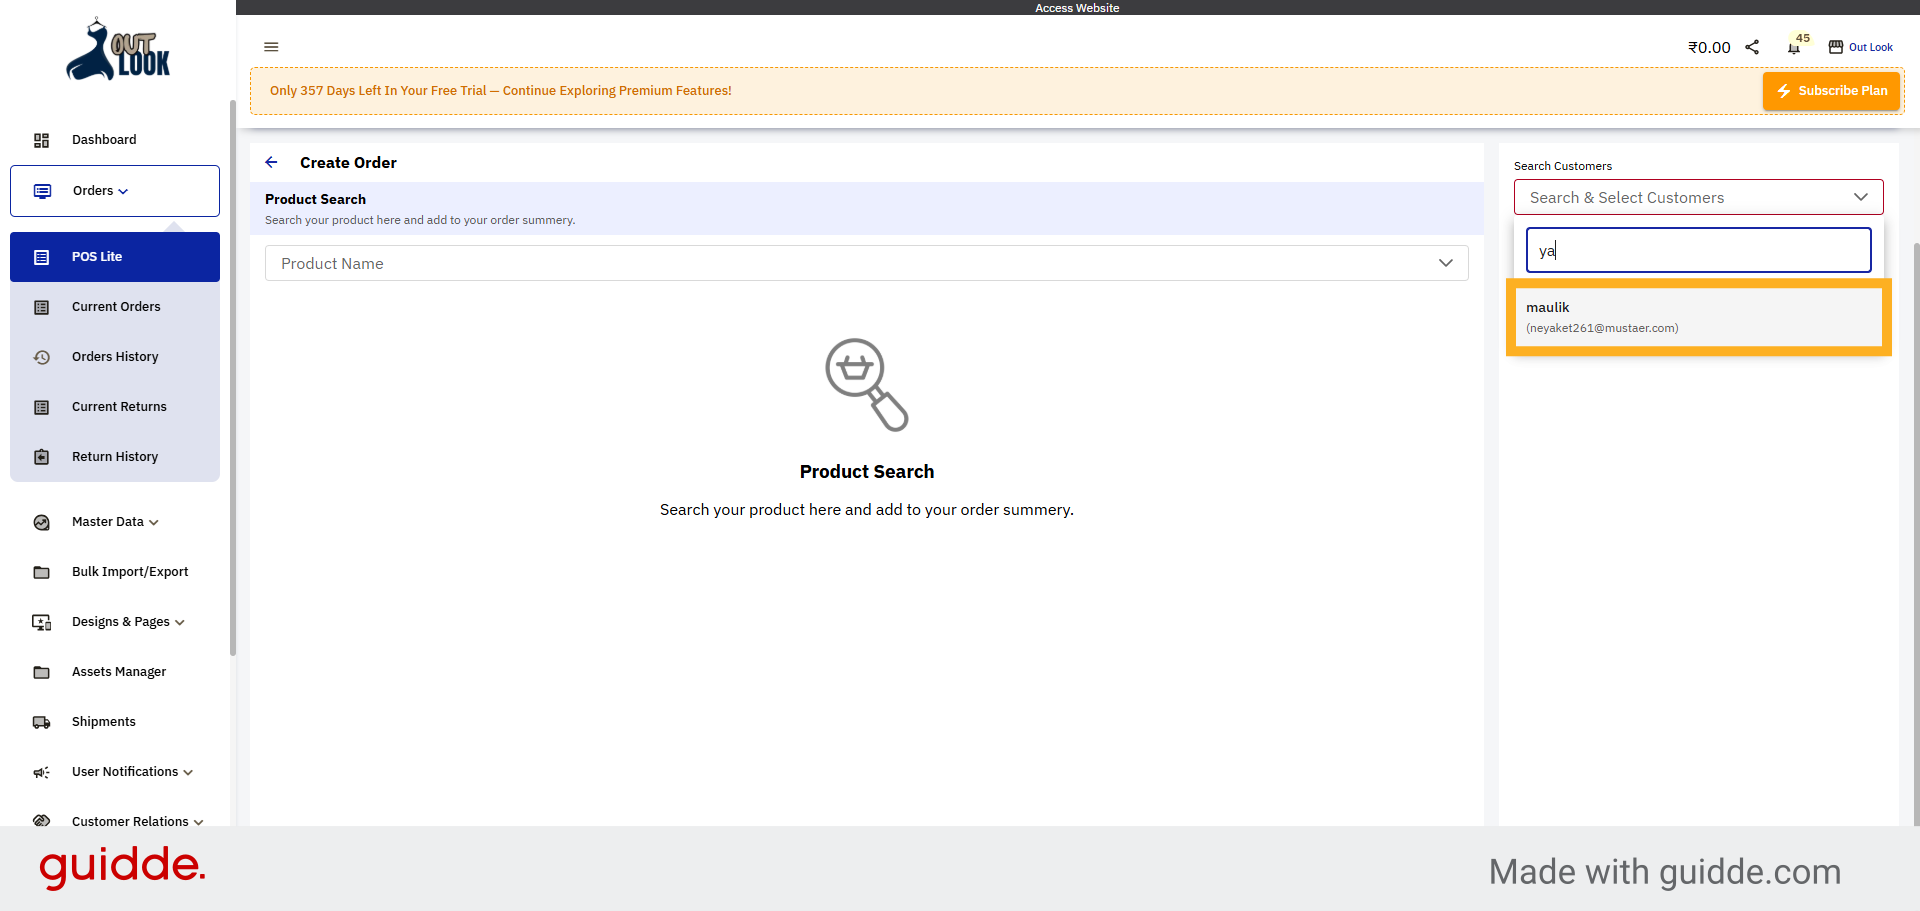
23. Select Existing Customer
Click the customer "maulik (neyaket261@mustaer.com)" to select them for the order.
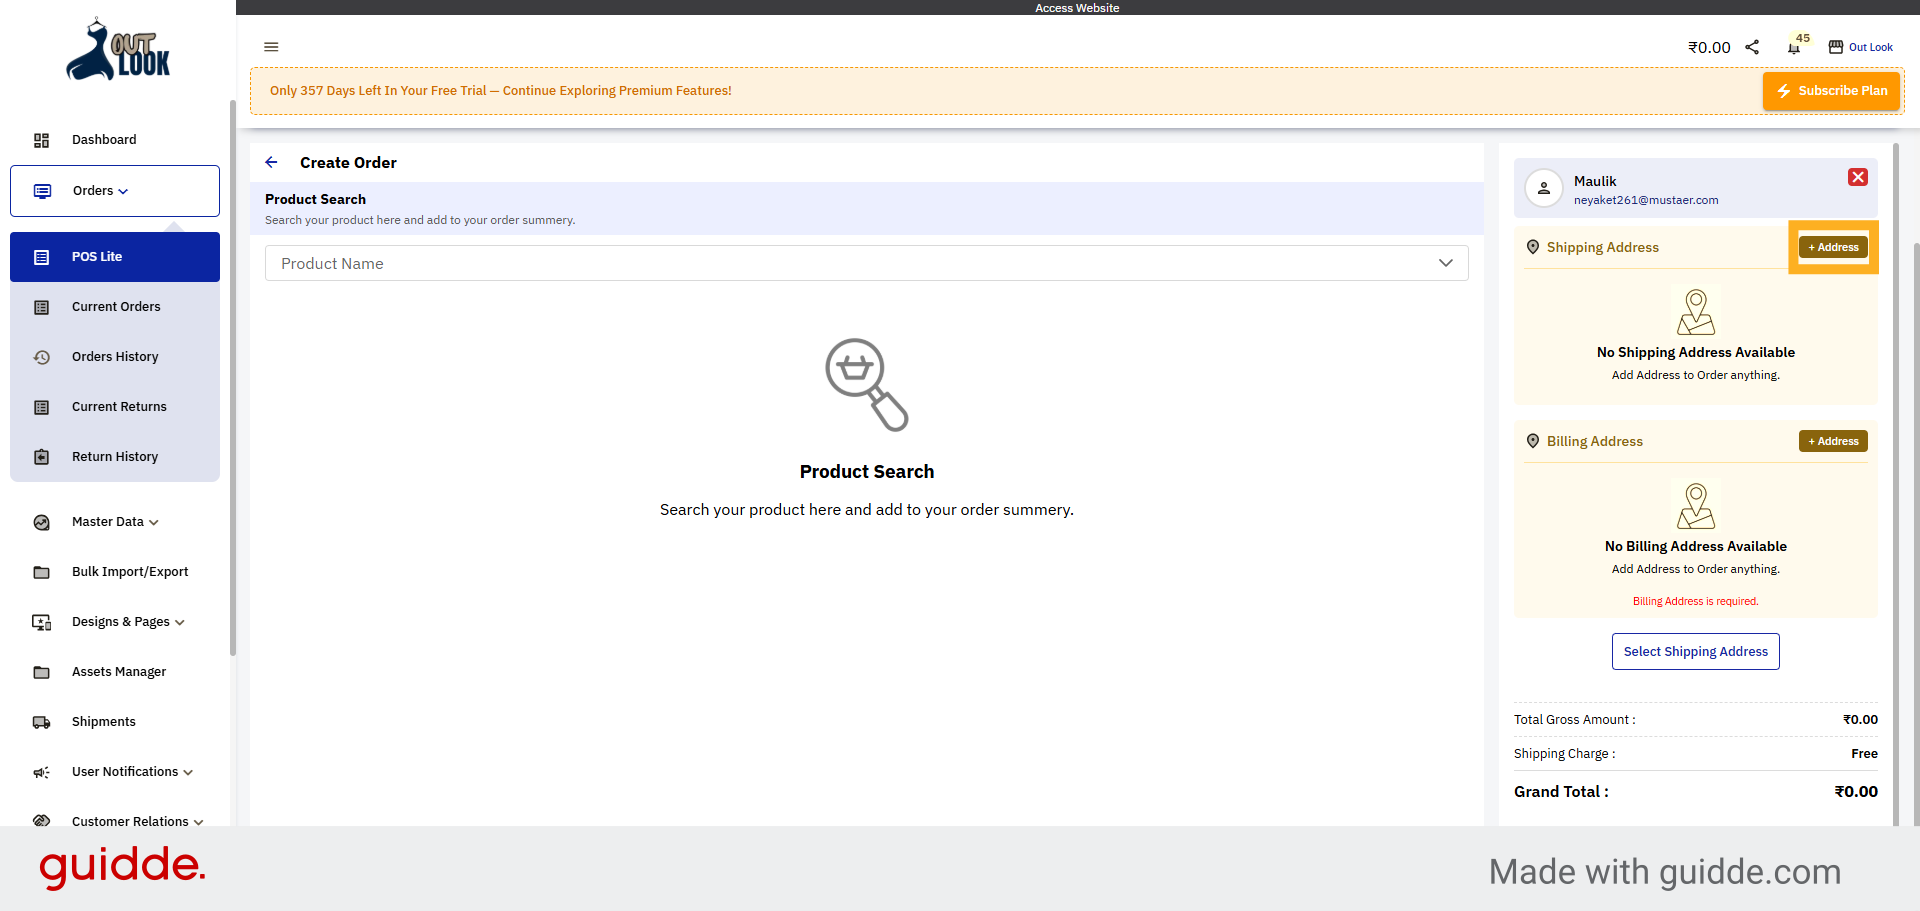
24. Add New Address for Customer
Click the "Address" button to add a new address for the selected customer.
25. Add Address Details
Enter your contact and location details including phone number, street/road, postal code, and select
your state to save your address.
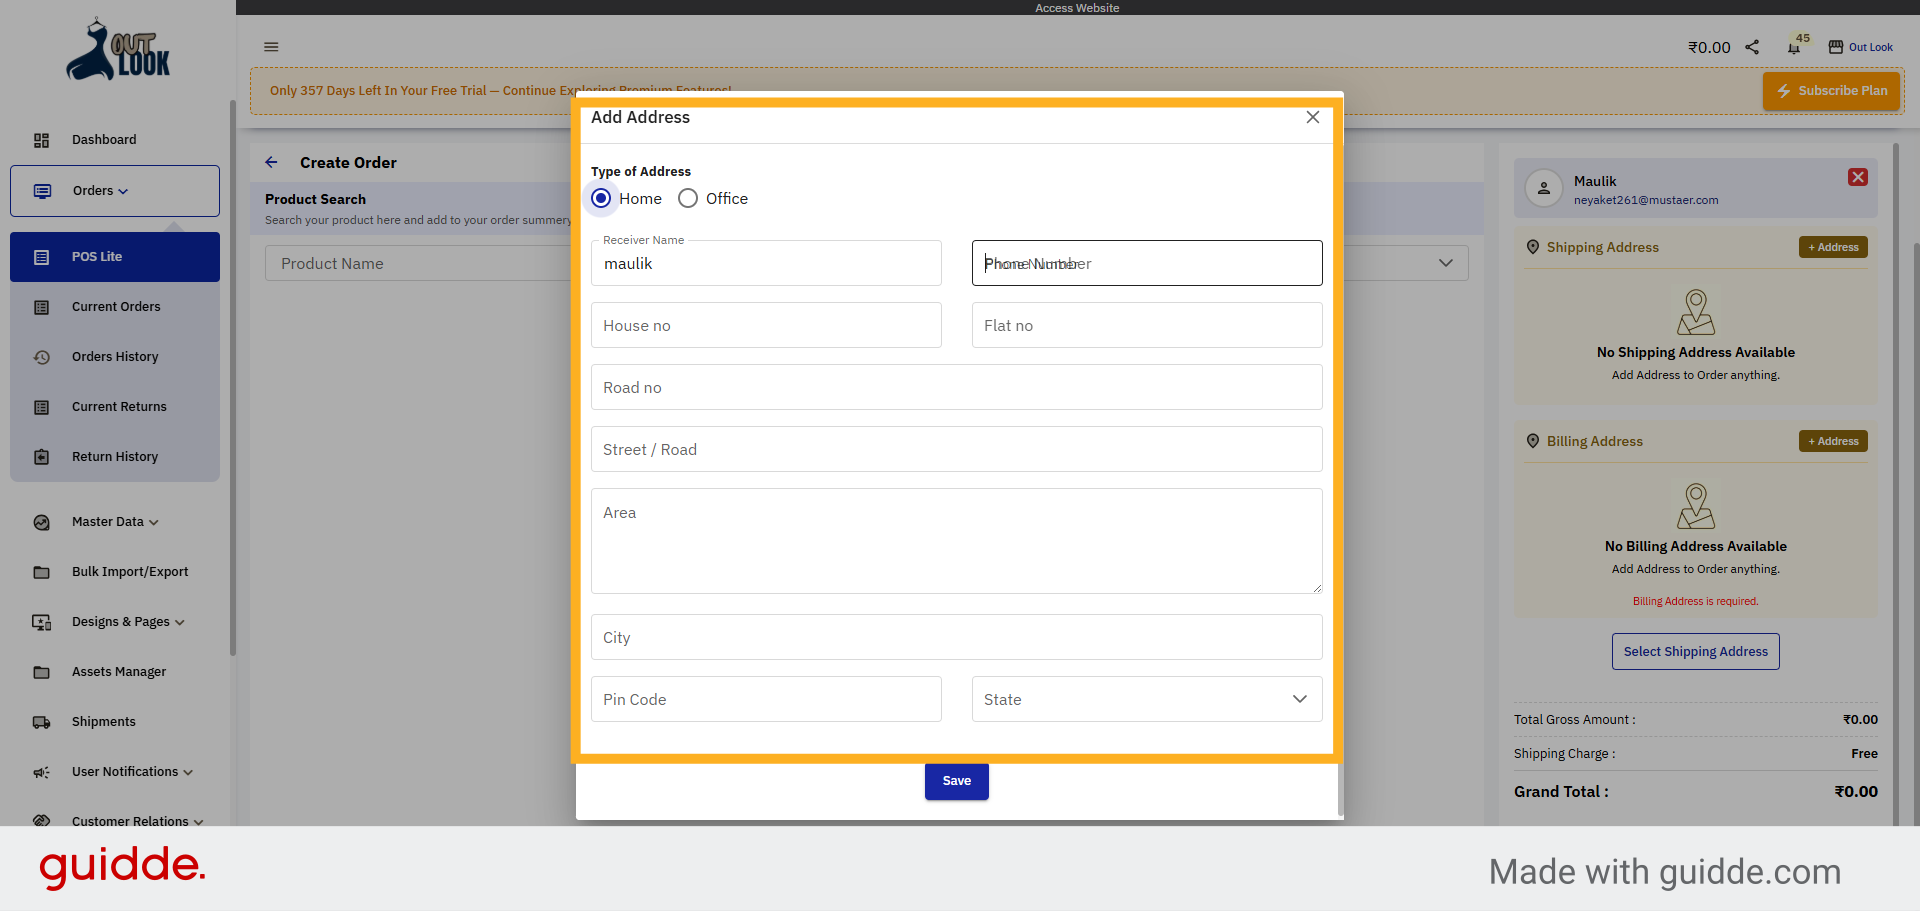
26. Save Address Details
Click the "Save" button to store the updated address information.
27. Select Billing Address
Click the "Select Billing Address" option to assign the billing address for the order.
28. Confirm Billing Address
Click here to confirm the selected billing address for the current order.

29. Save Billing Address
Click the "Save" button to finalize the billing address selection.
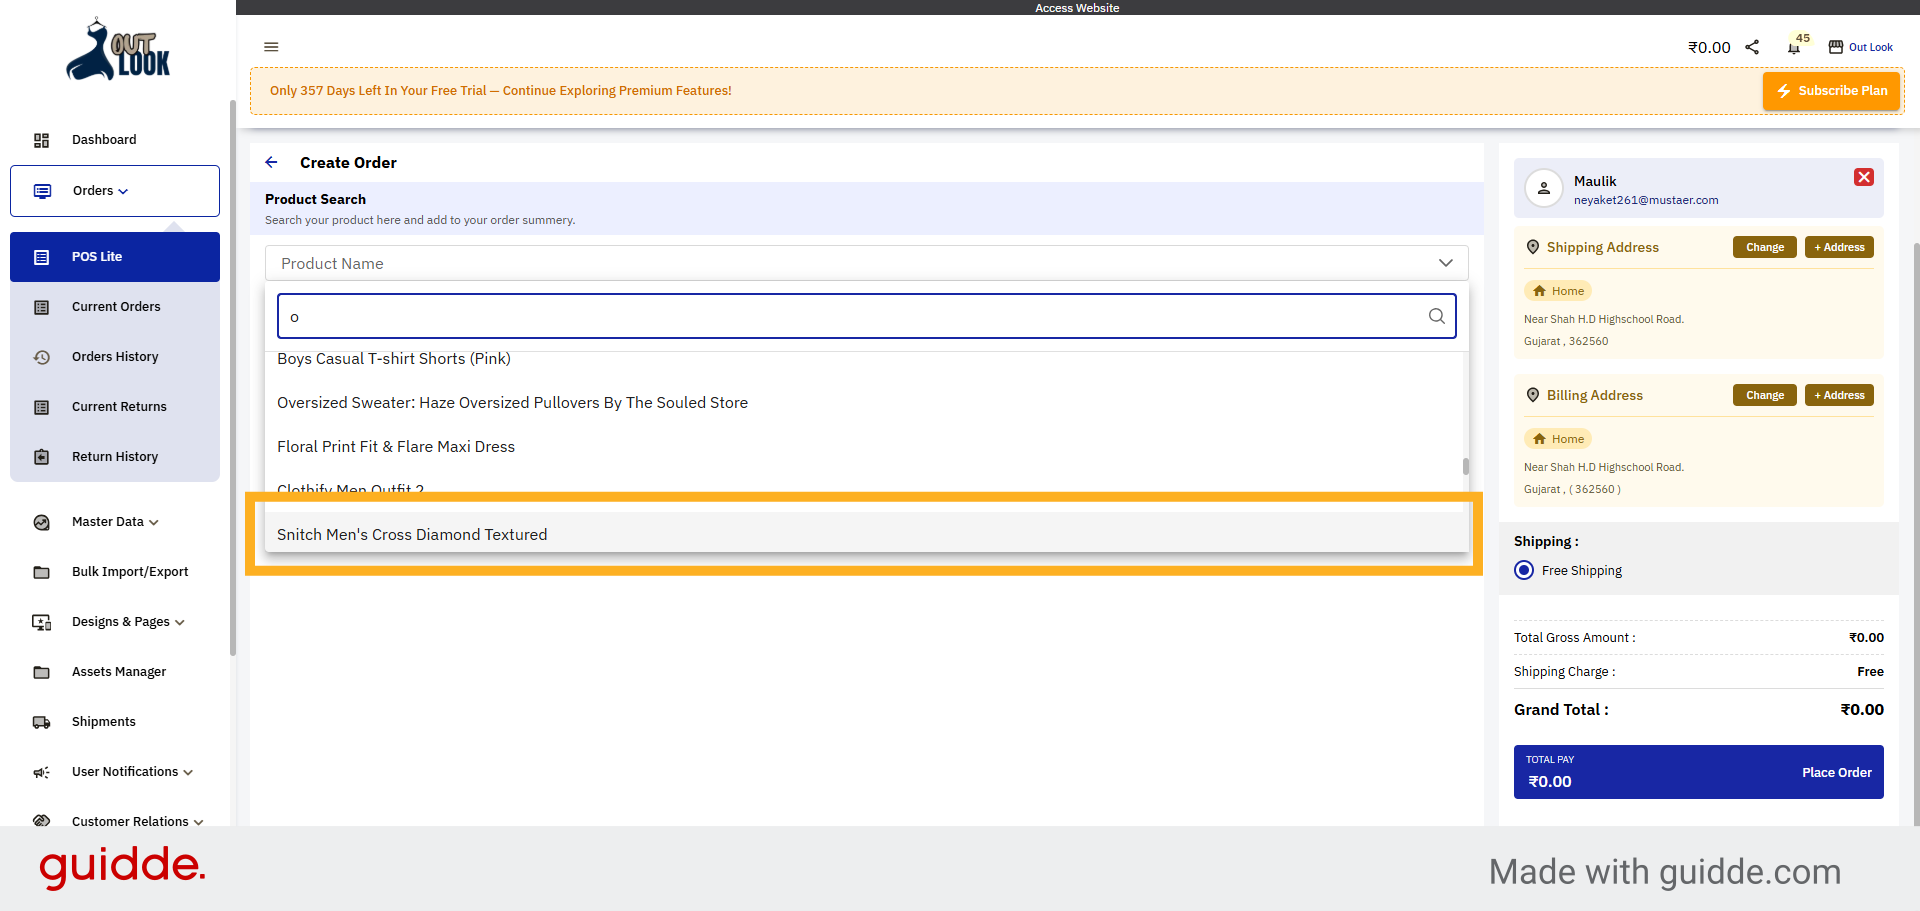
30. Select Product Name Field
Click the "Product Name" field to choose a product for the order.
31. Choose Product from List
Select "Snitch Men's Cross Diamond Textured" from the product list.
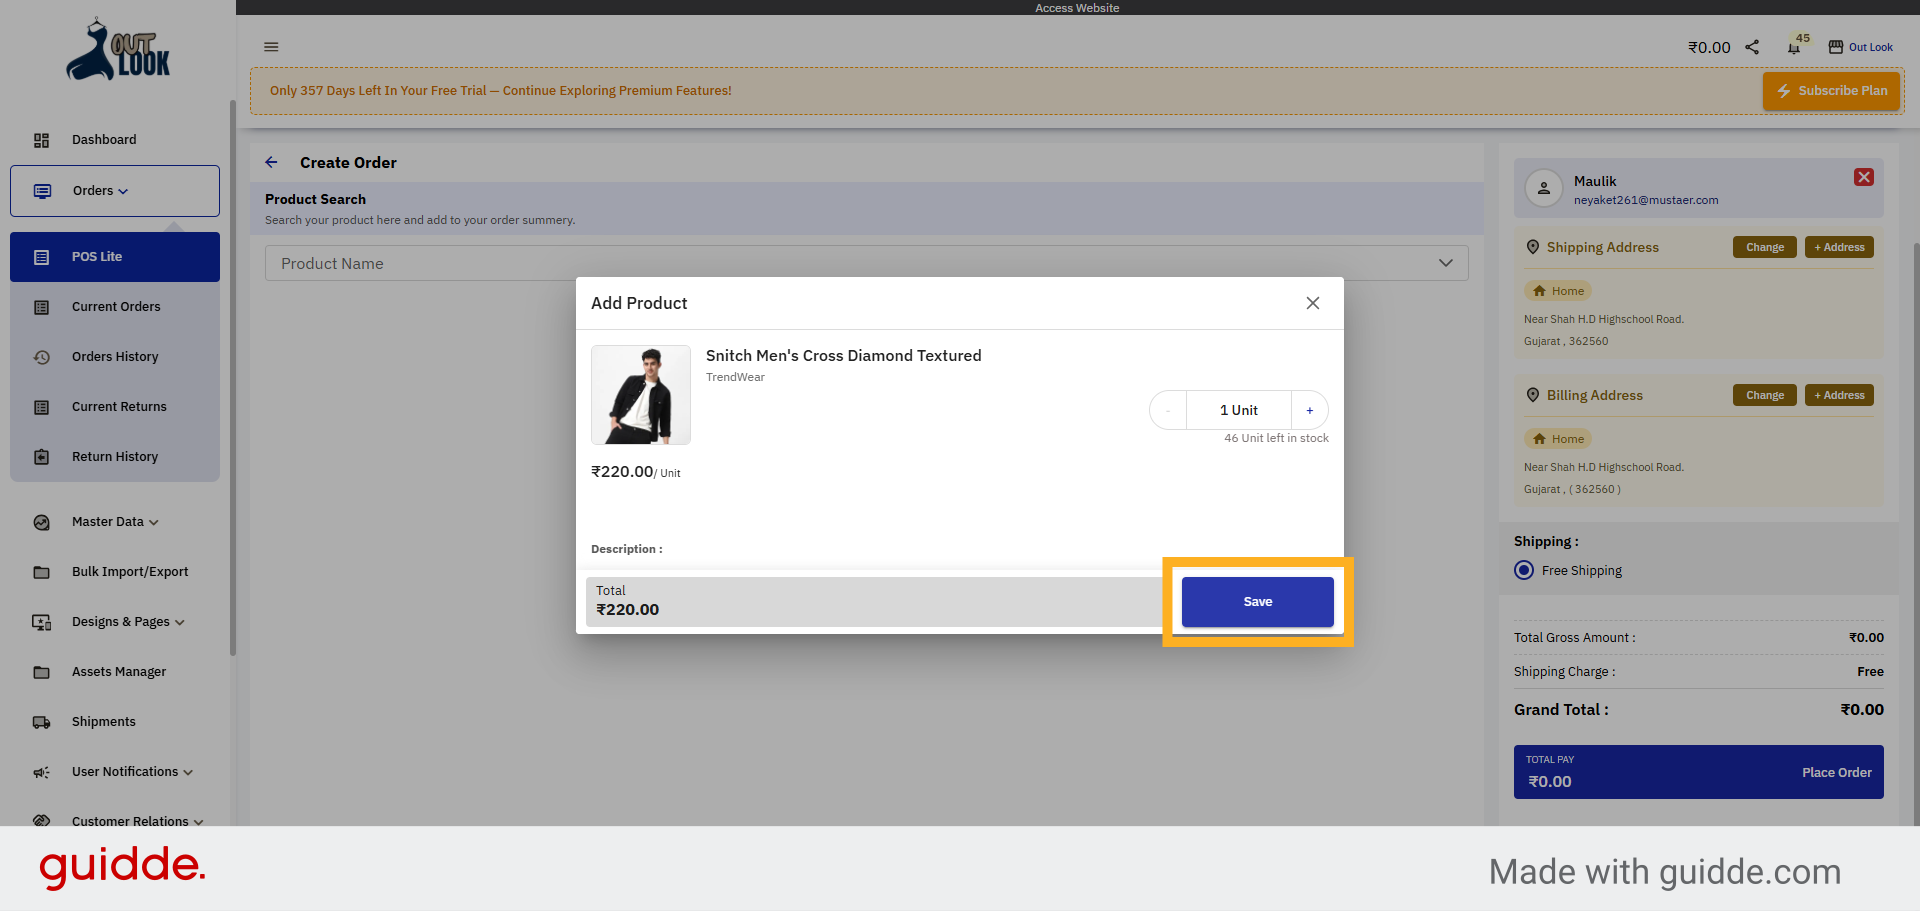
32. Save Product Selection
Click the "Save" button to add the selected product to the order.
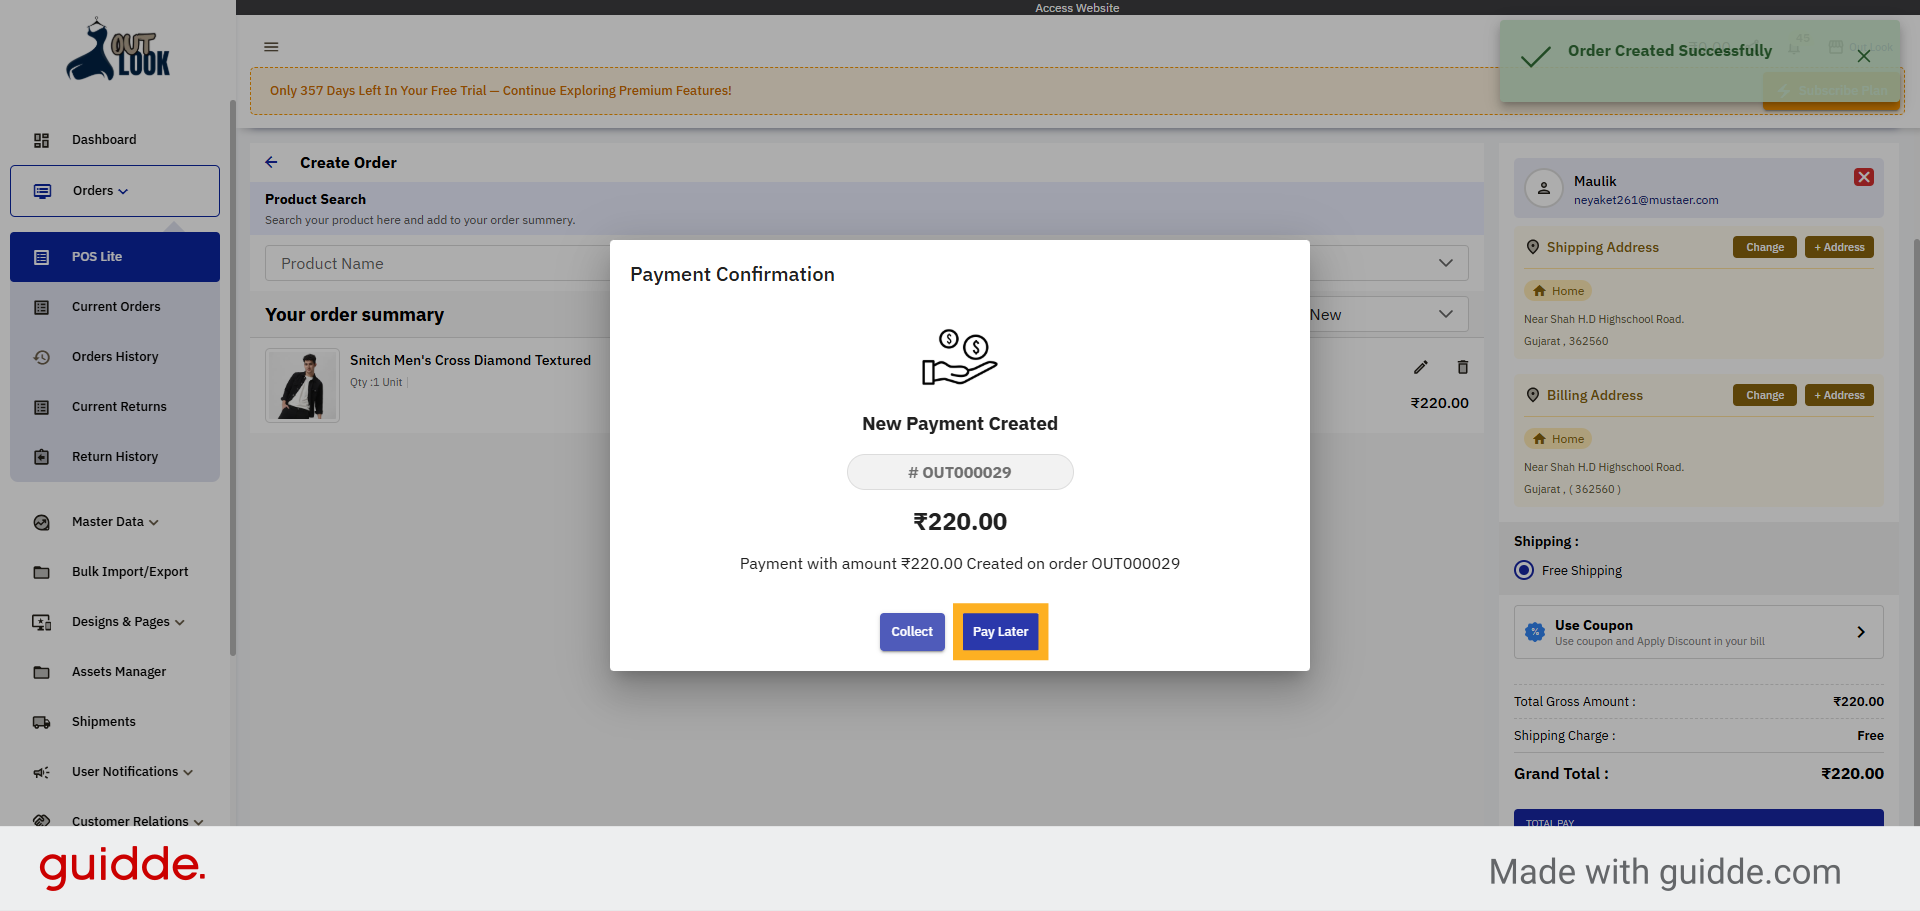
33. Click Place Order Button
Click the "Place Order" button to proceed with the order payment options.

34. Select Pay Later Option
Click the "Pay Later" option to defer payment and complete the order process.
You have successfully created orders for both new and existing customers by adding addresses, selecting
products, and choosing payment options. Next, explore managing order statuses and processing payments to
complete your sales workflow.
Uploading...