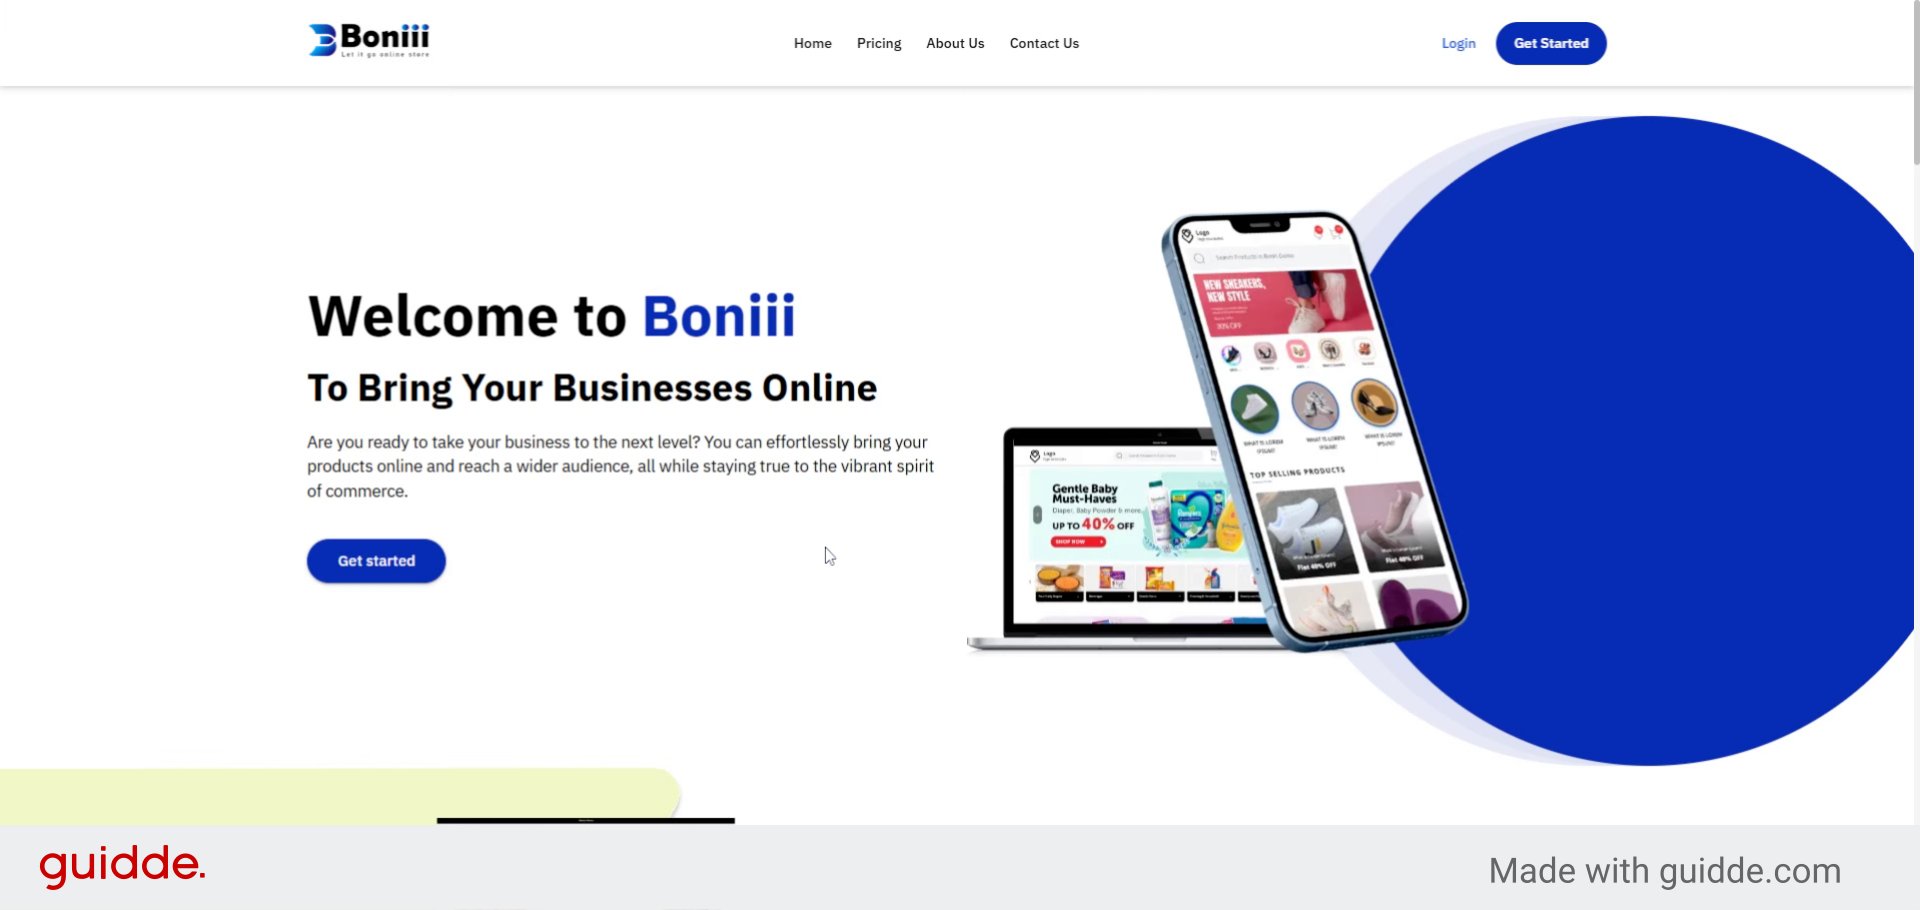
Create And Configure Q-Commerce Website Using Boniii
1. Introduction
You will learn how to set up your account, customize your site, and launch it successfully.
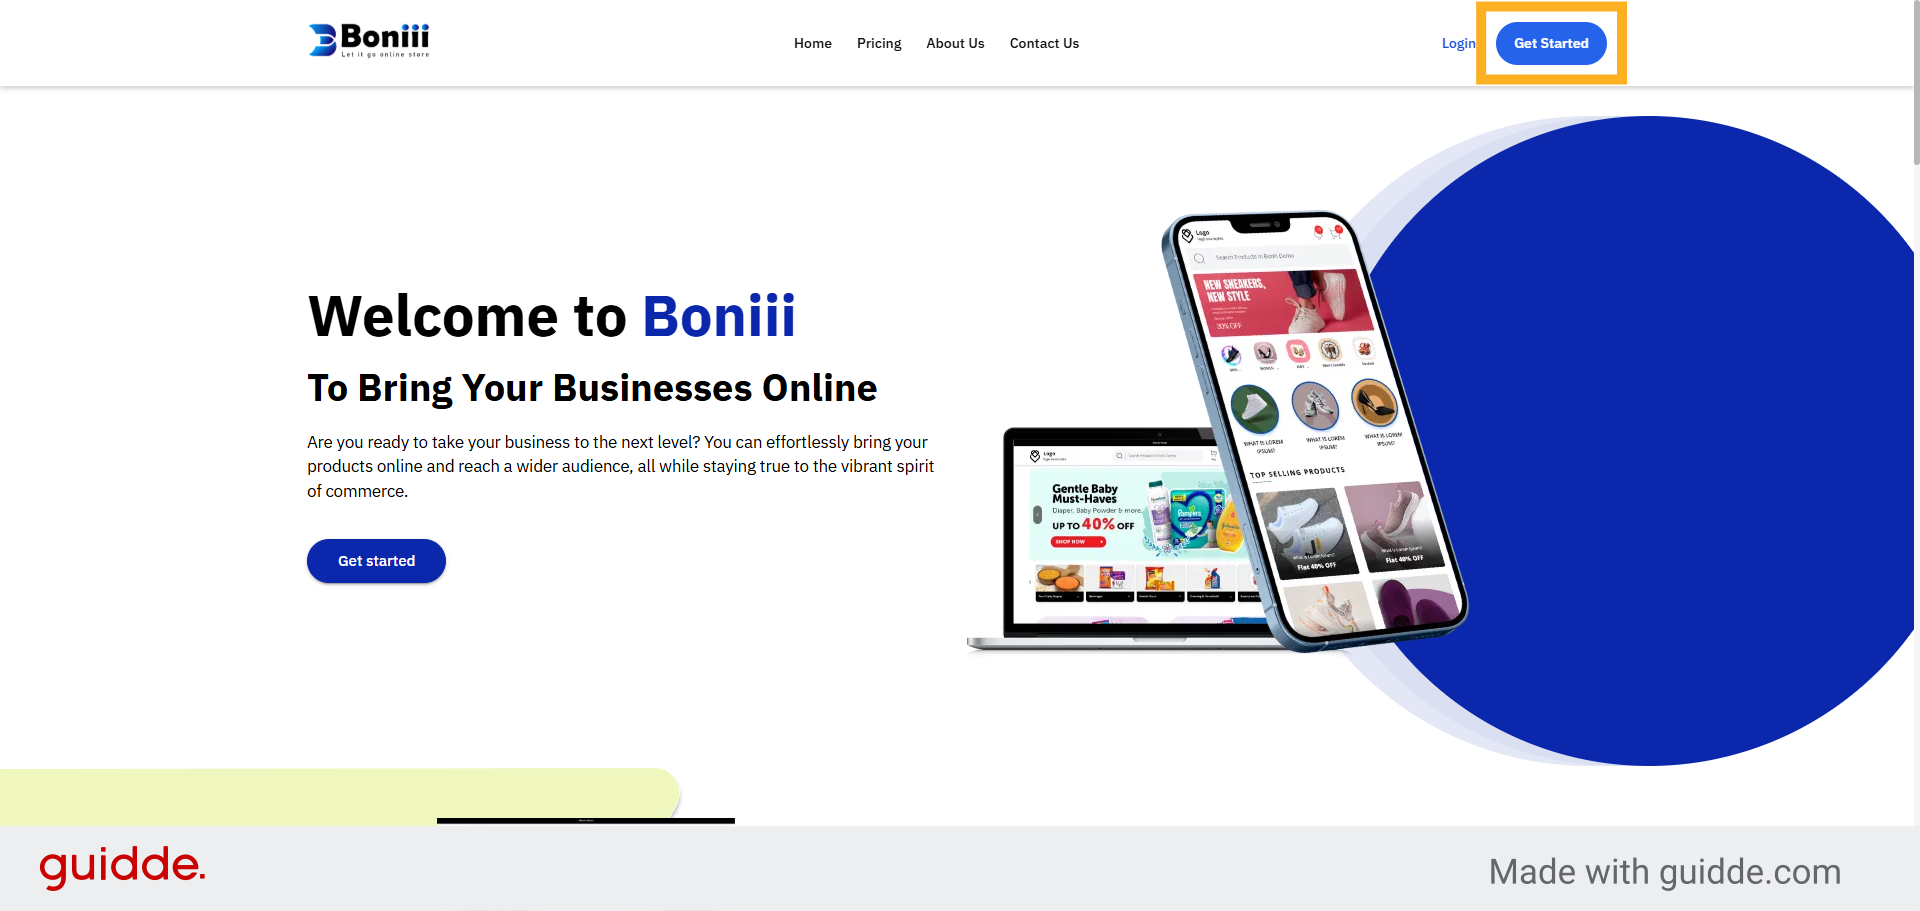
2. Click Get Started Button
Click the Get Started button on the Boniii homepage to begin creating your Q-Commerce website.
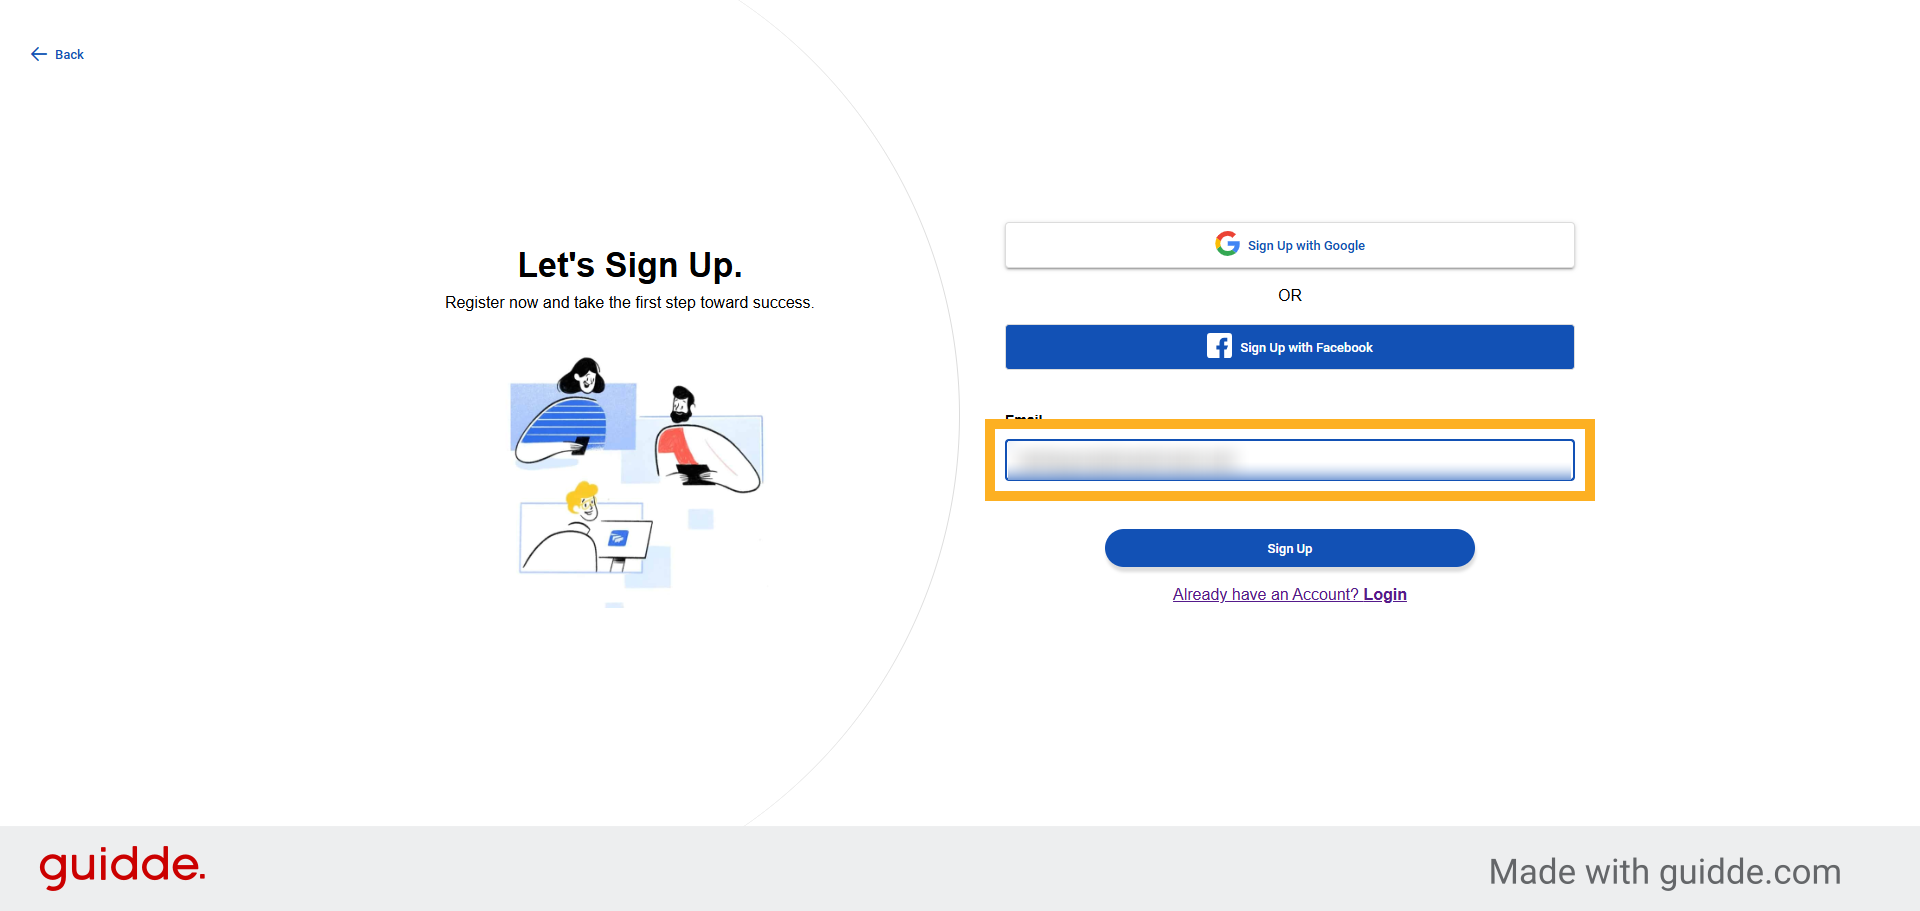
3. Enter Your Email Address
Enter your email address to register your Boniii account.
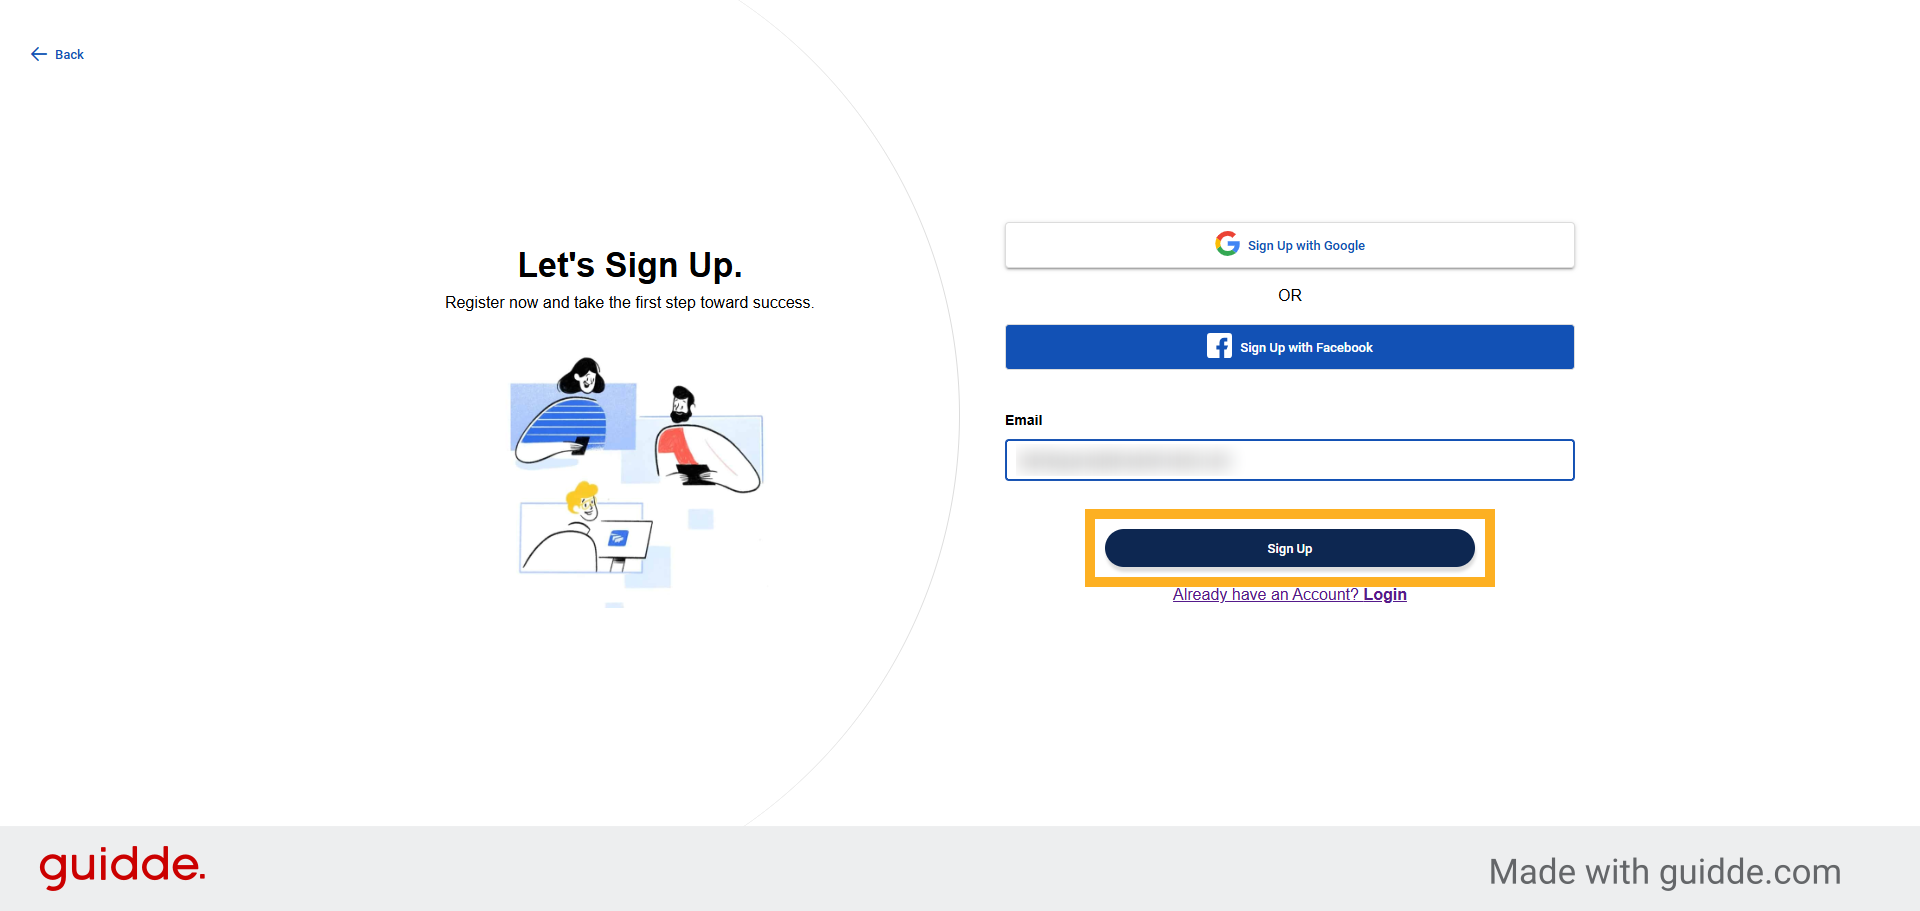
4. Click Sign Up Button
Click the Sign Up button to submit your registration information and continue.
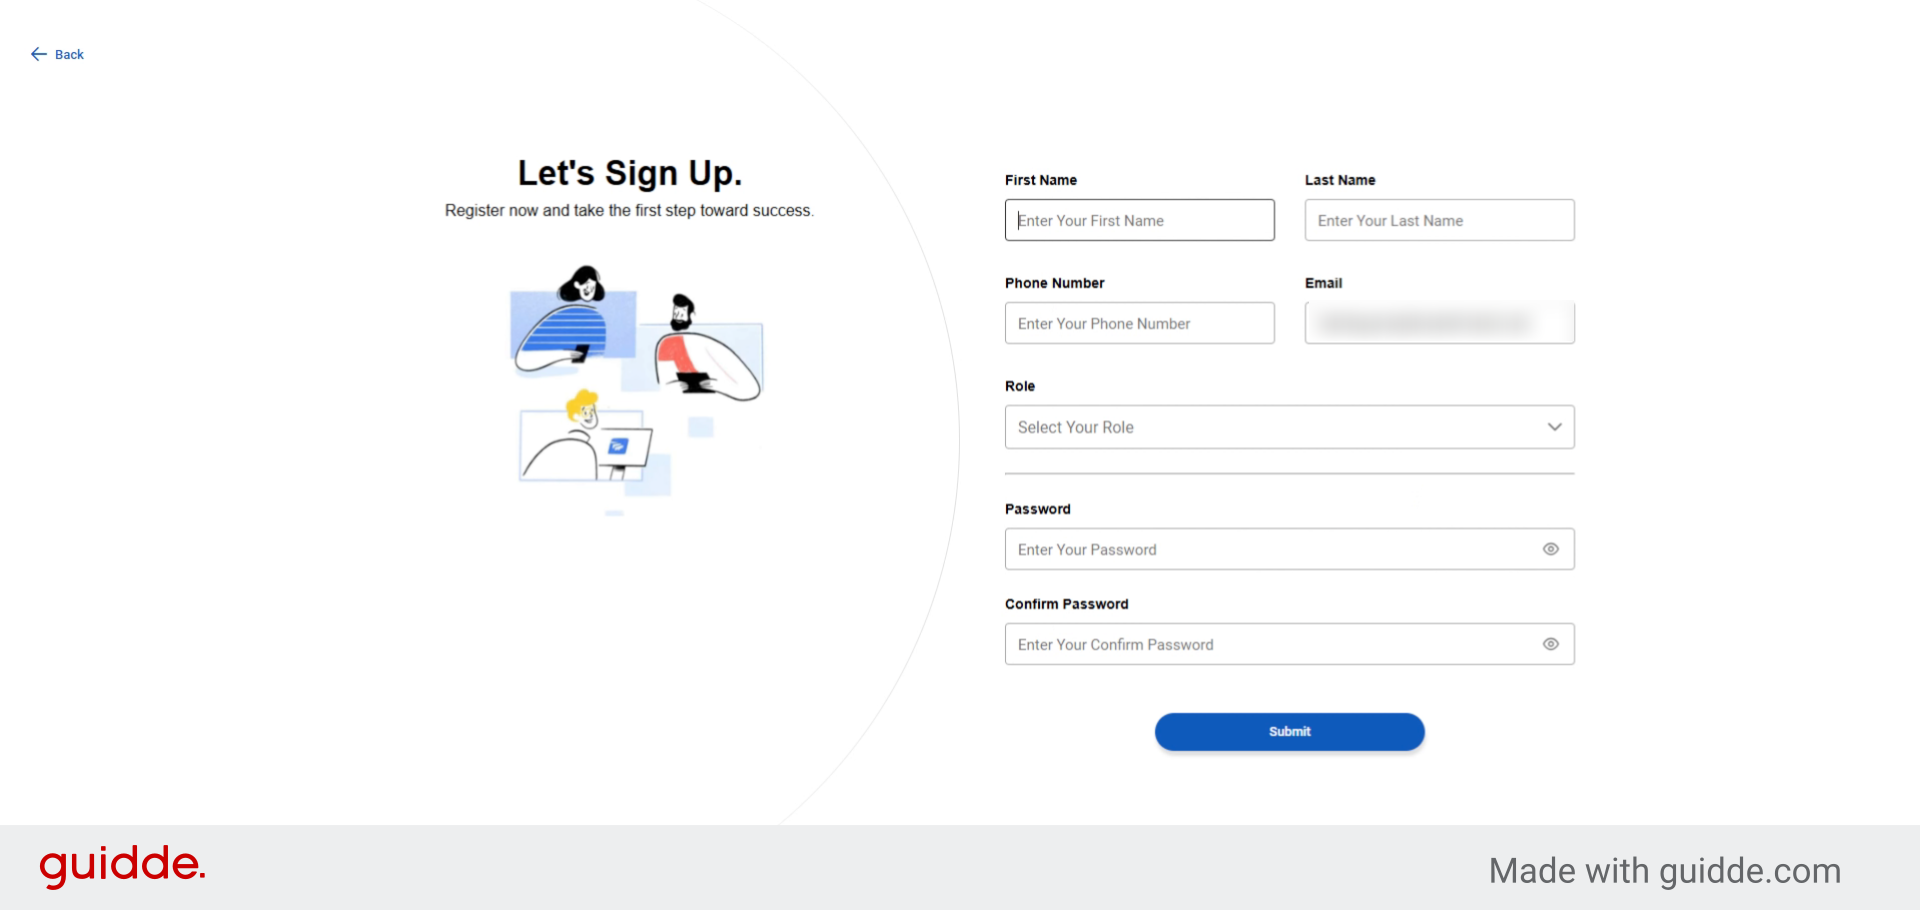
5. Fill Details Of Sign Up Form
Enter your personal details including first name, last name, phone number, email, role and set your
password to complete signup.
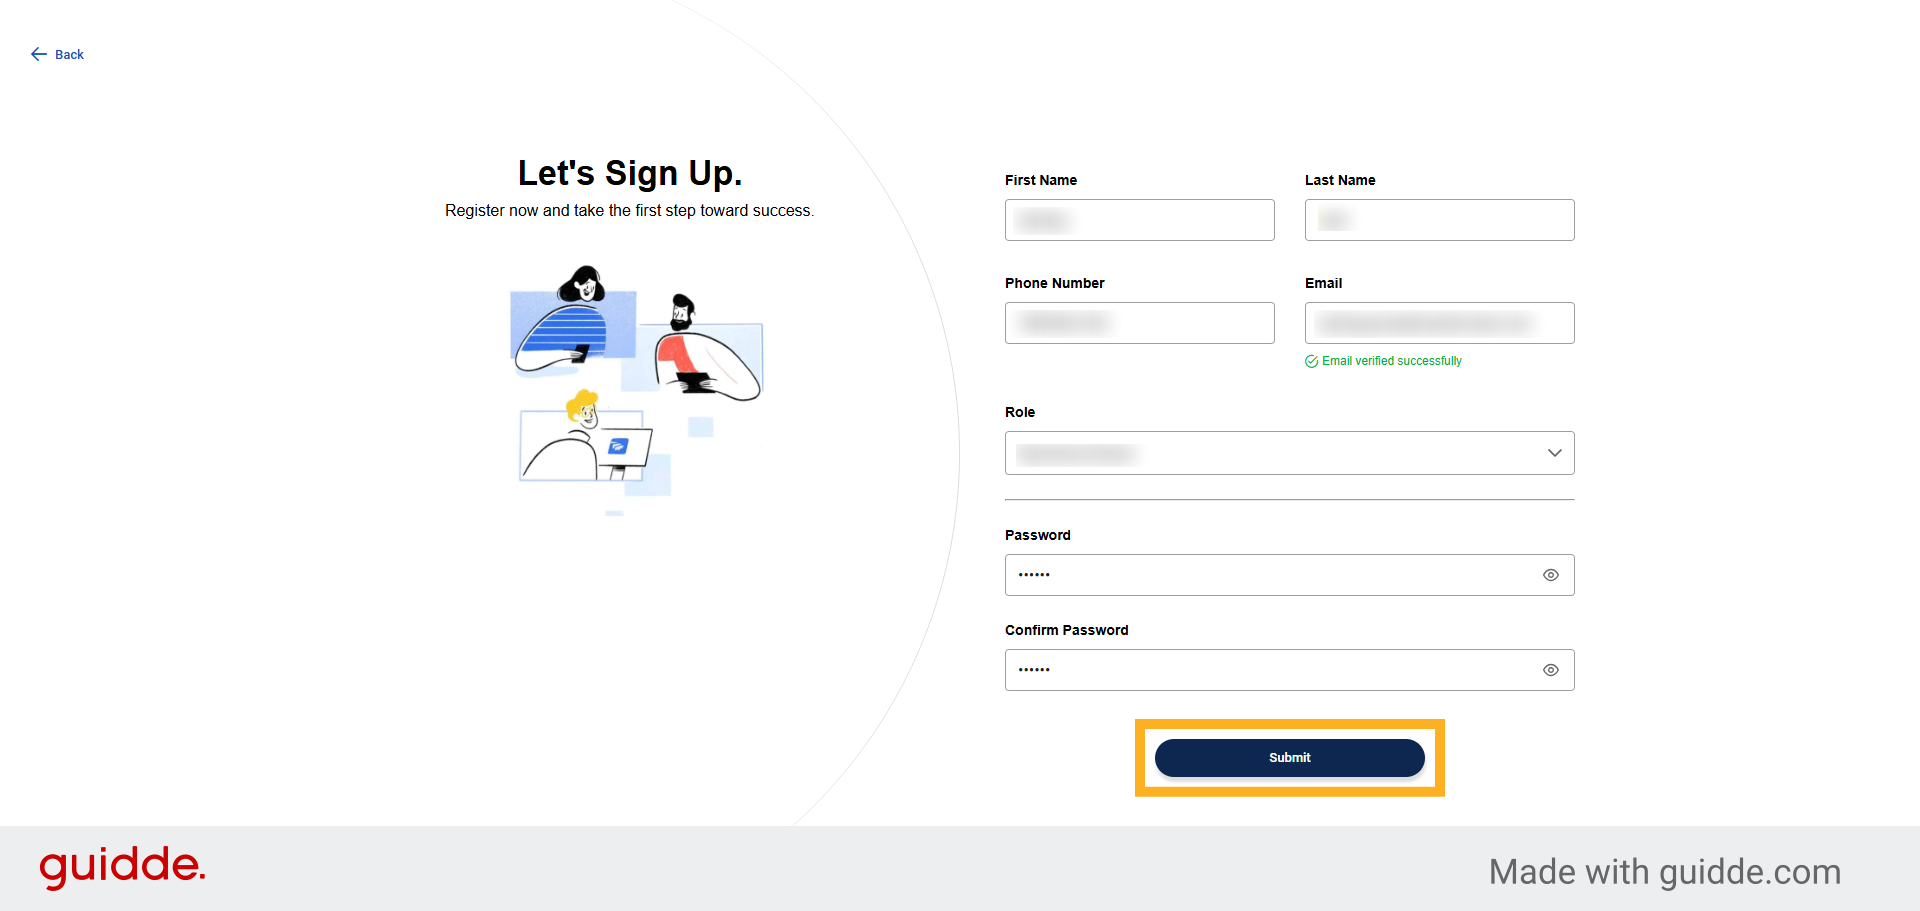
6. Click Submit Button
Click the Submit button to complete your account registration process.
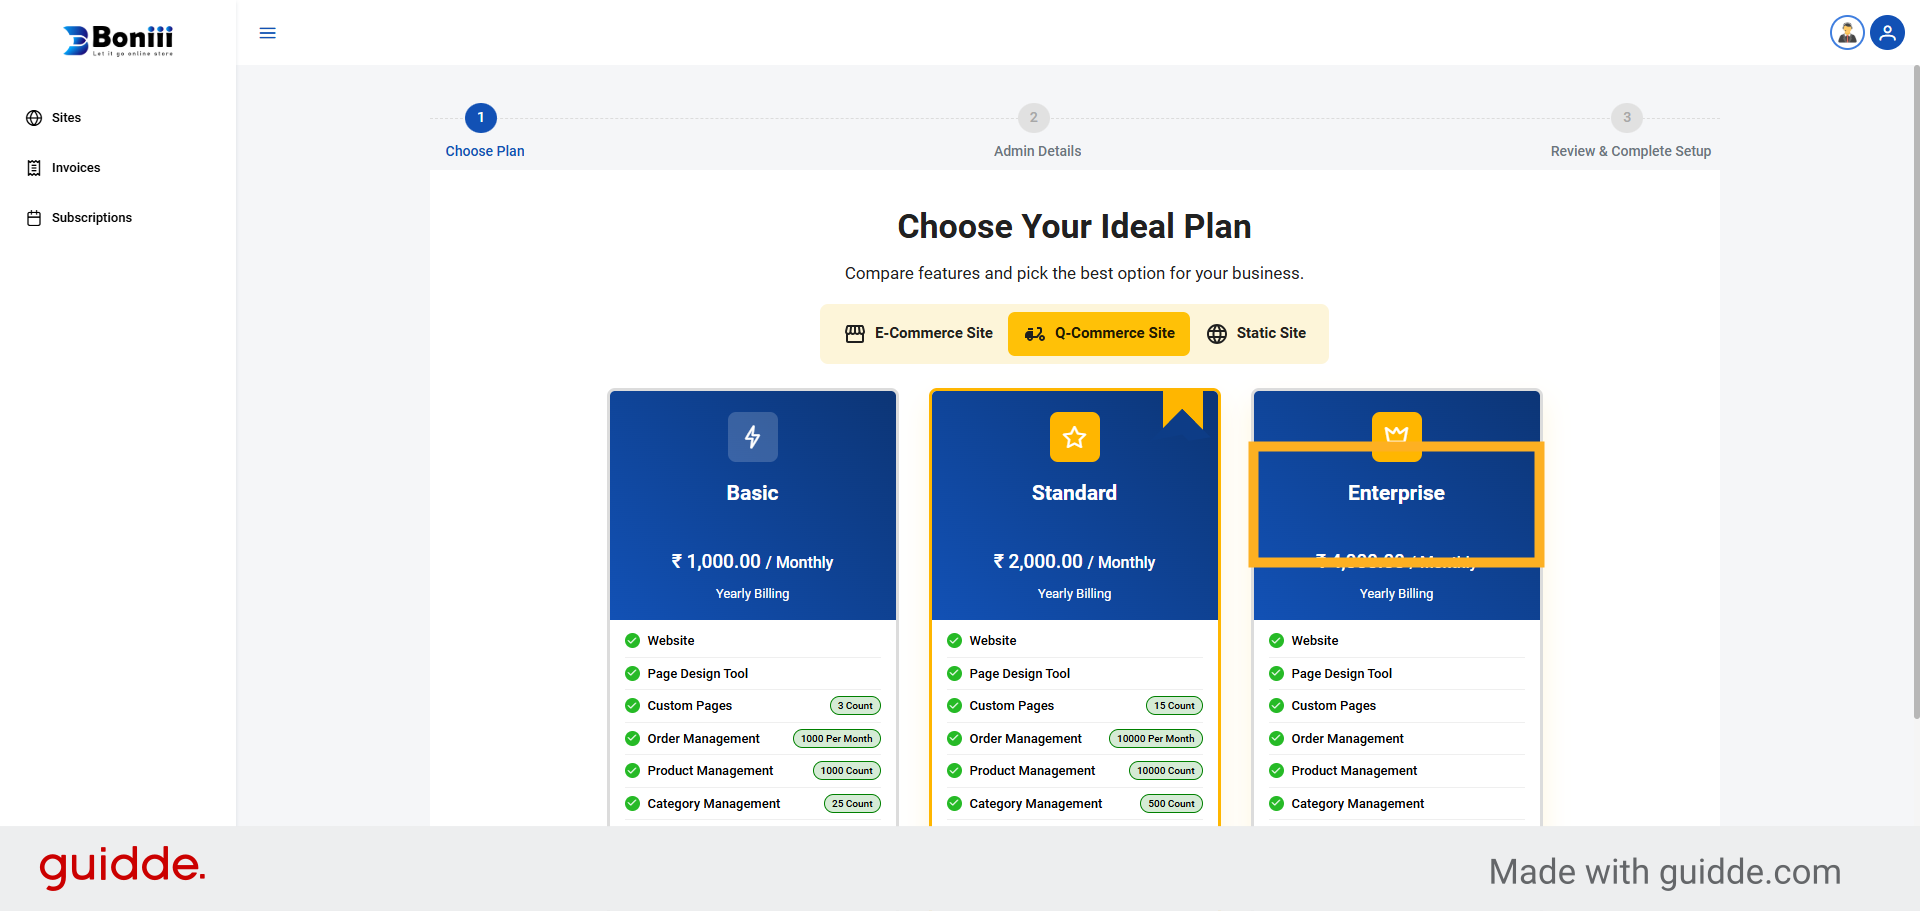
7. Select Q-Commerce Site
Click the Q-Commerce Site option to begin setting up your online store within the Boniii platform.
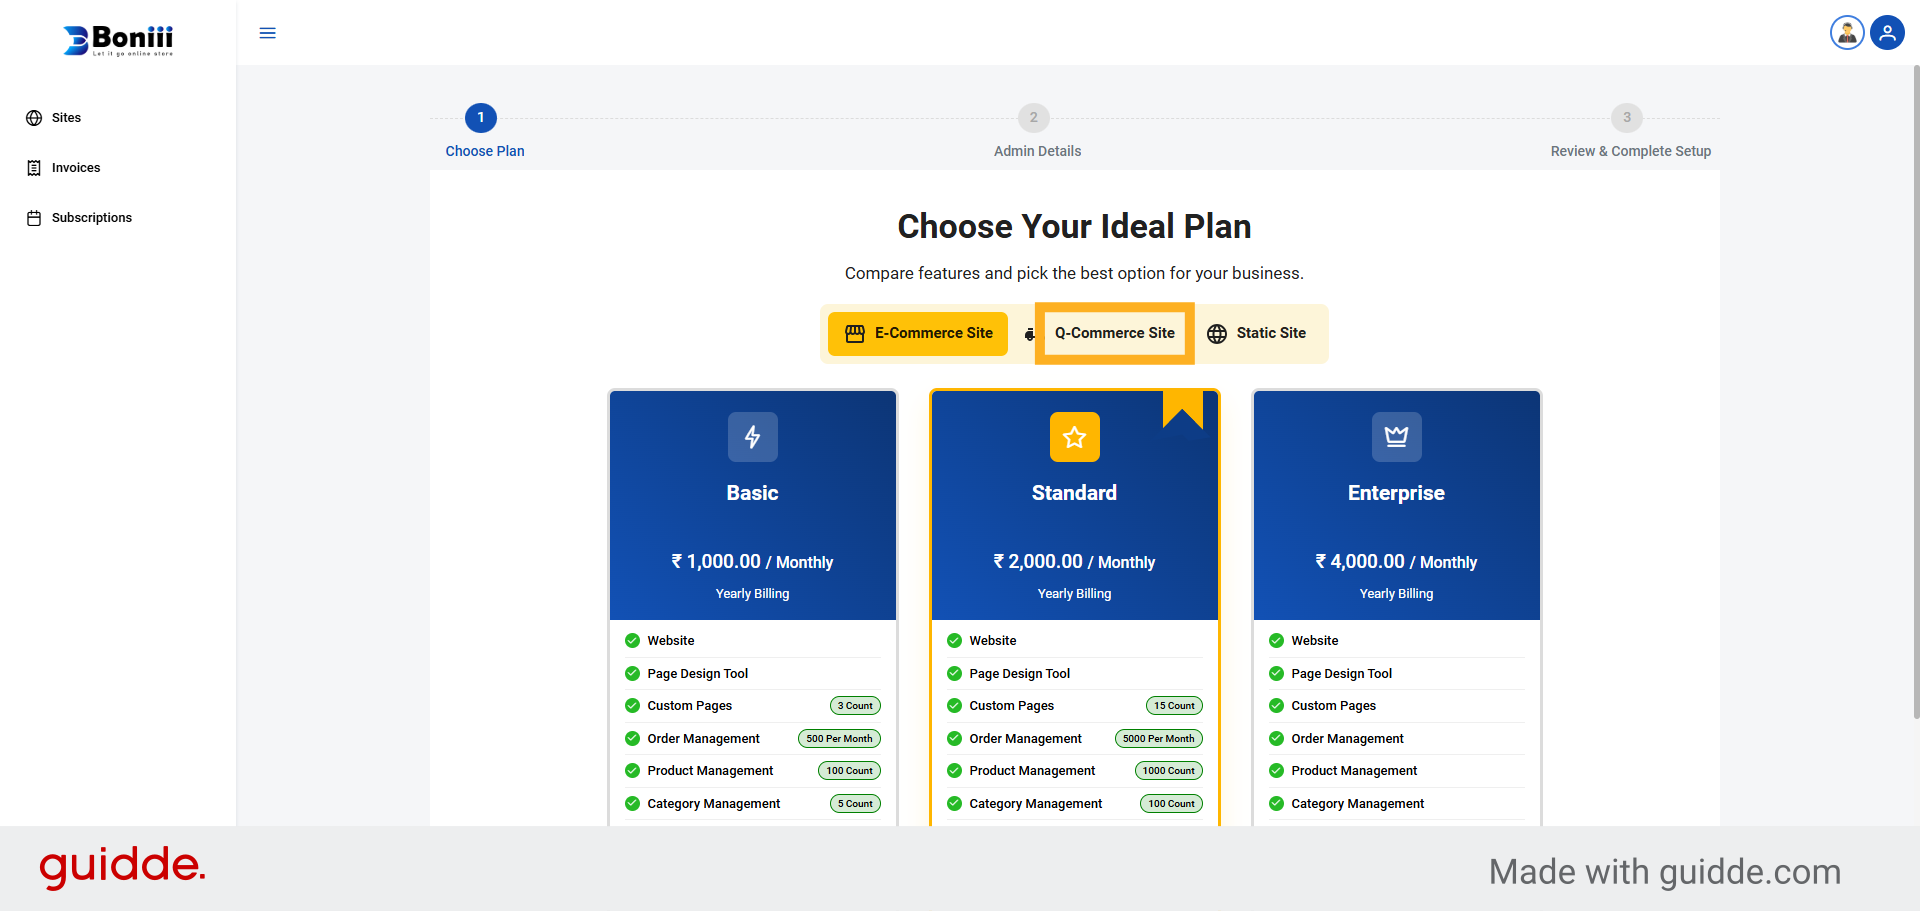
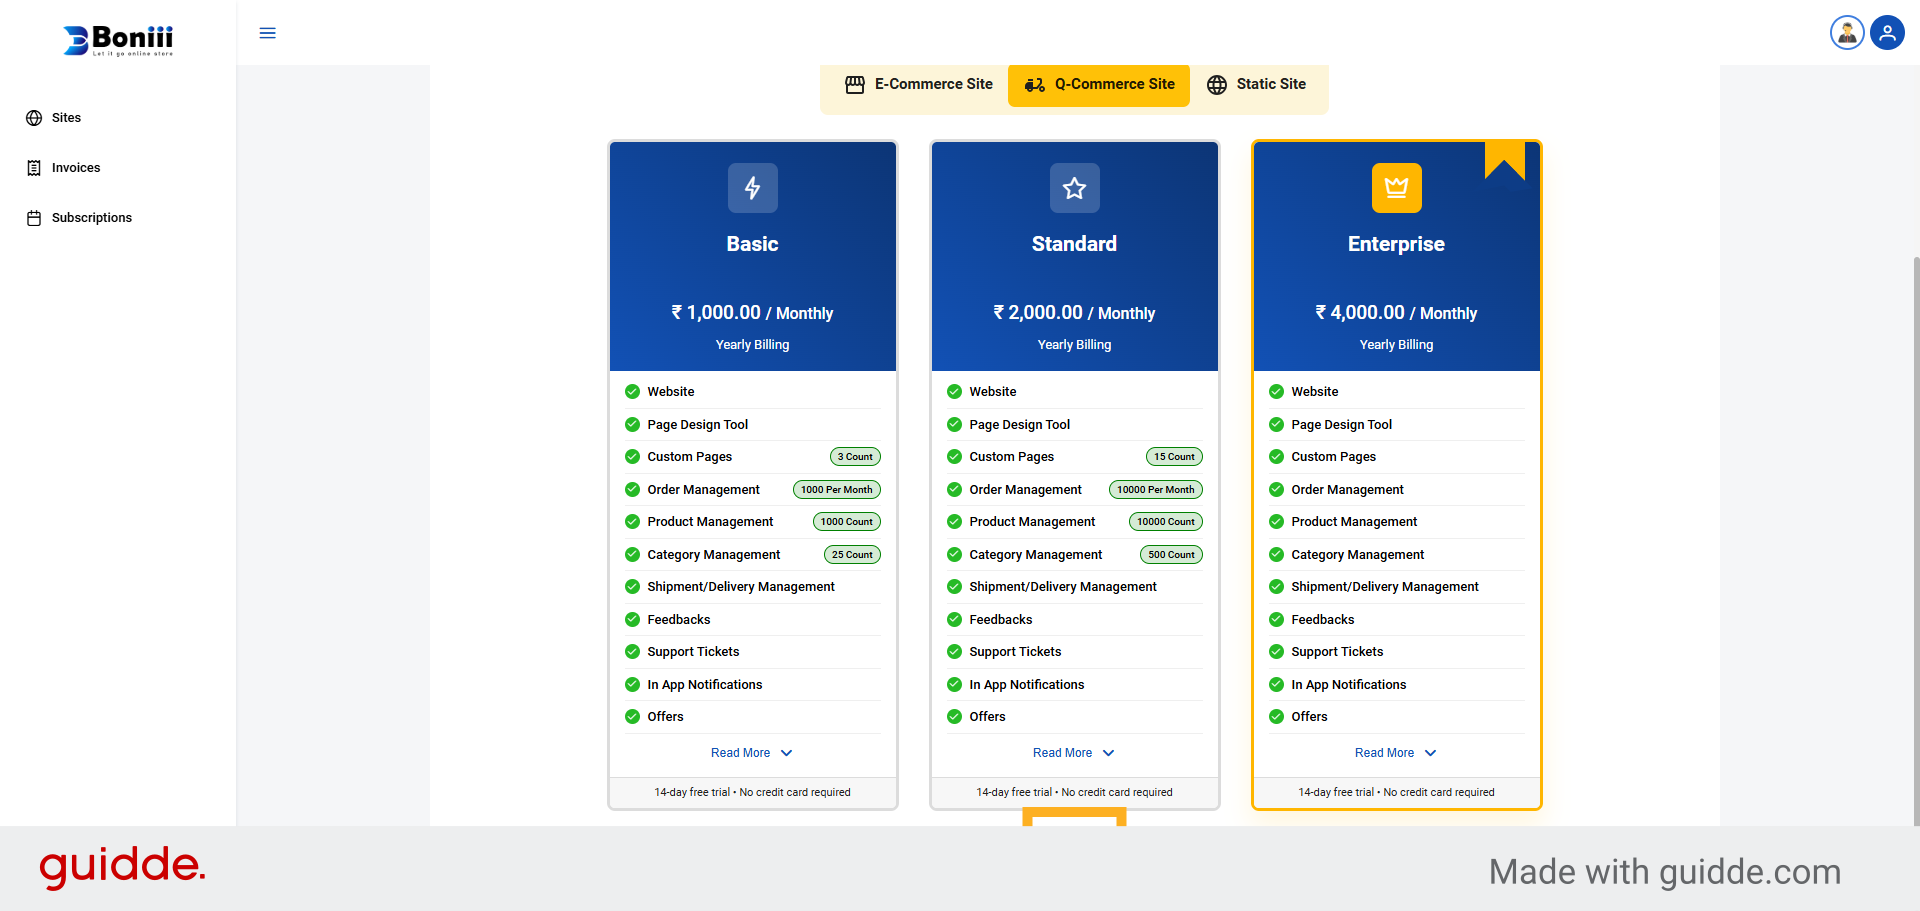
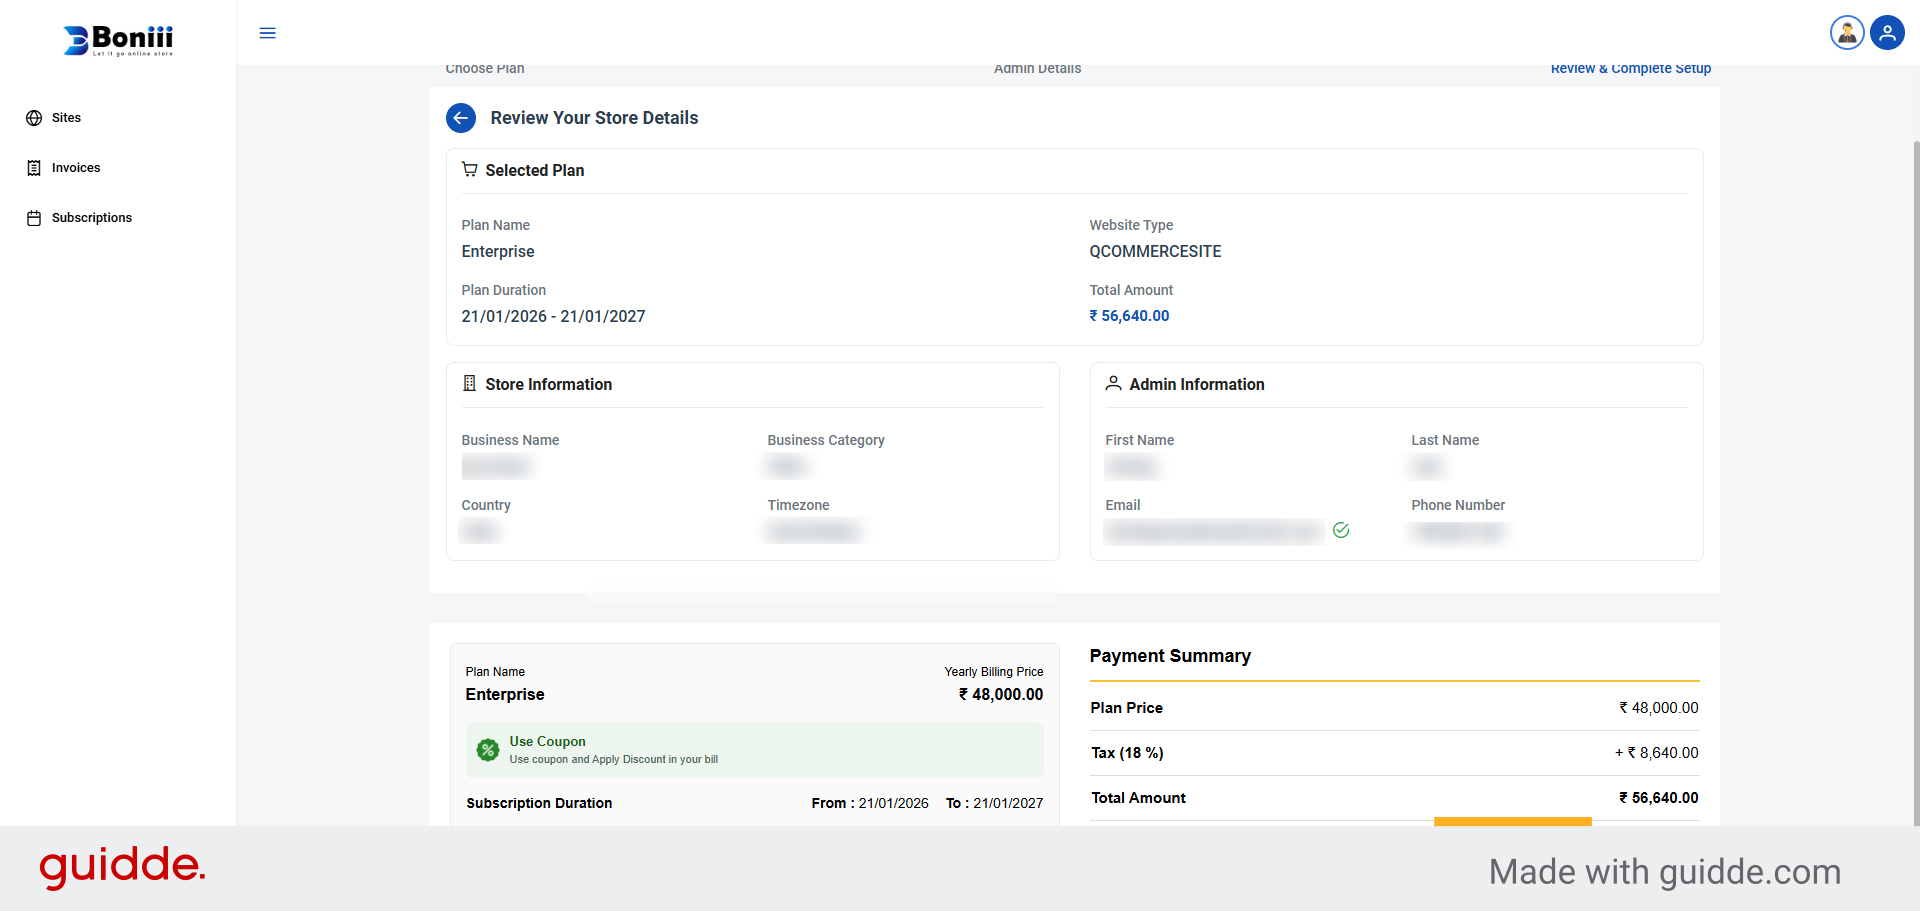
8. Select Plan
Choose a subscription plan that best fits your business needs and features.
9. Proceed To Next Step
Click the Next button to continue with the website setup process after entering your business
information.
10. Fill Business Detail Form
Provide accurate business details to complete your store setup
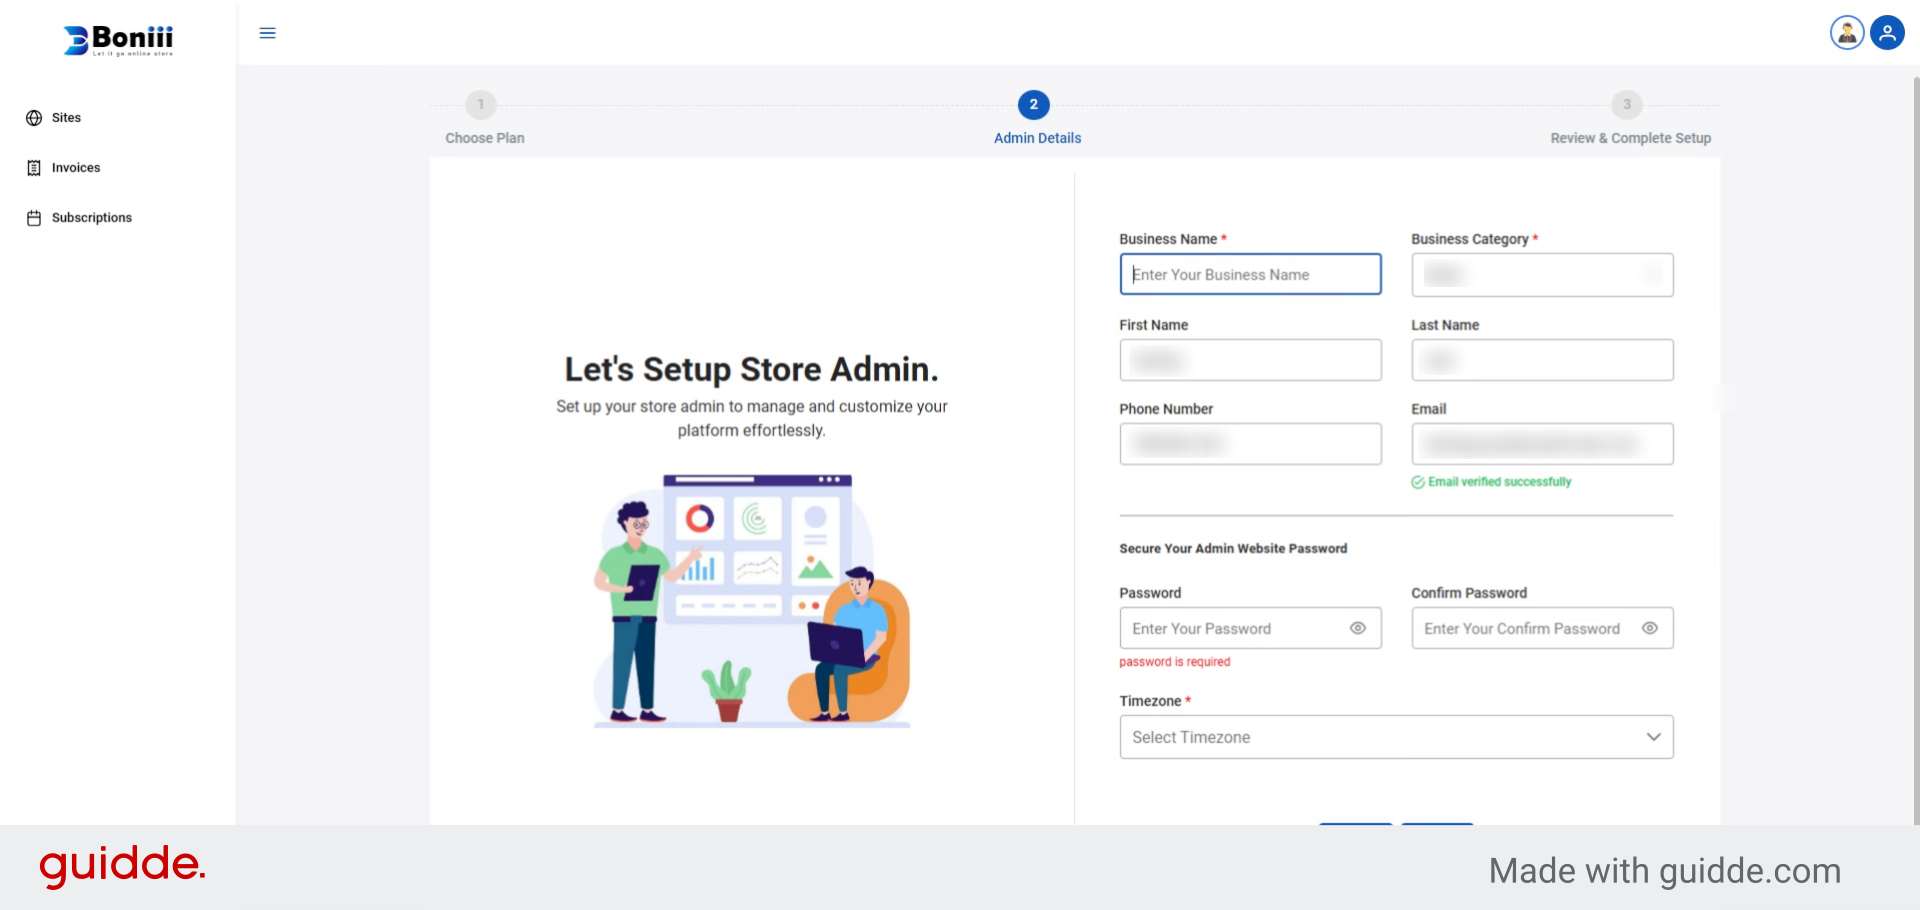
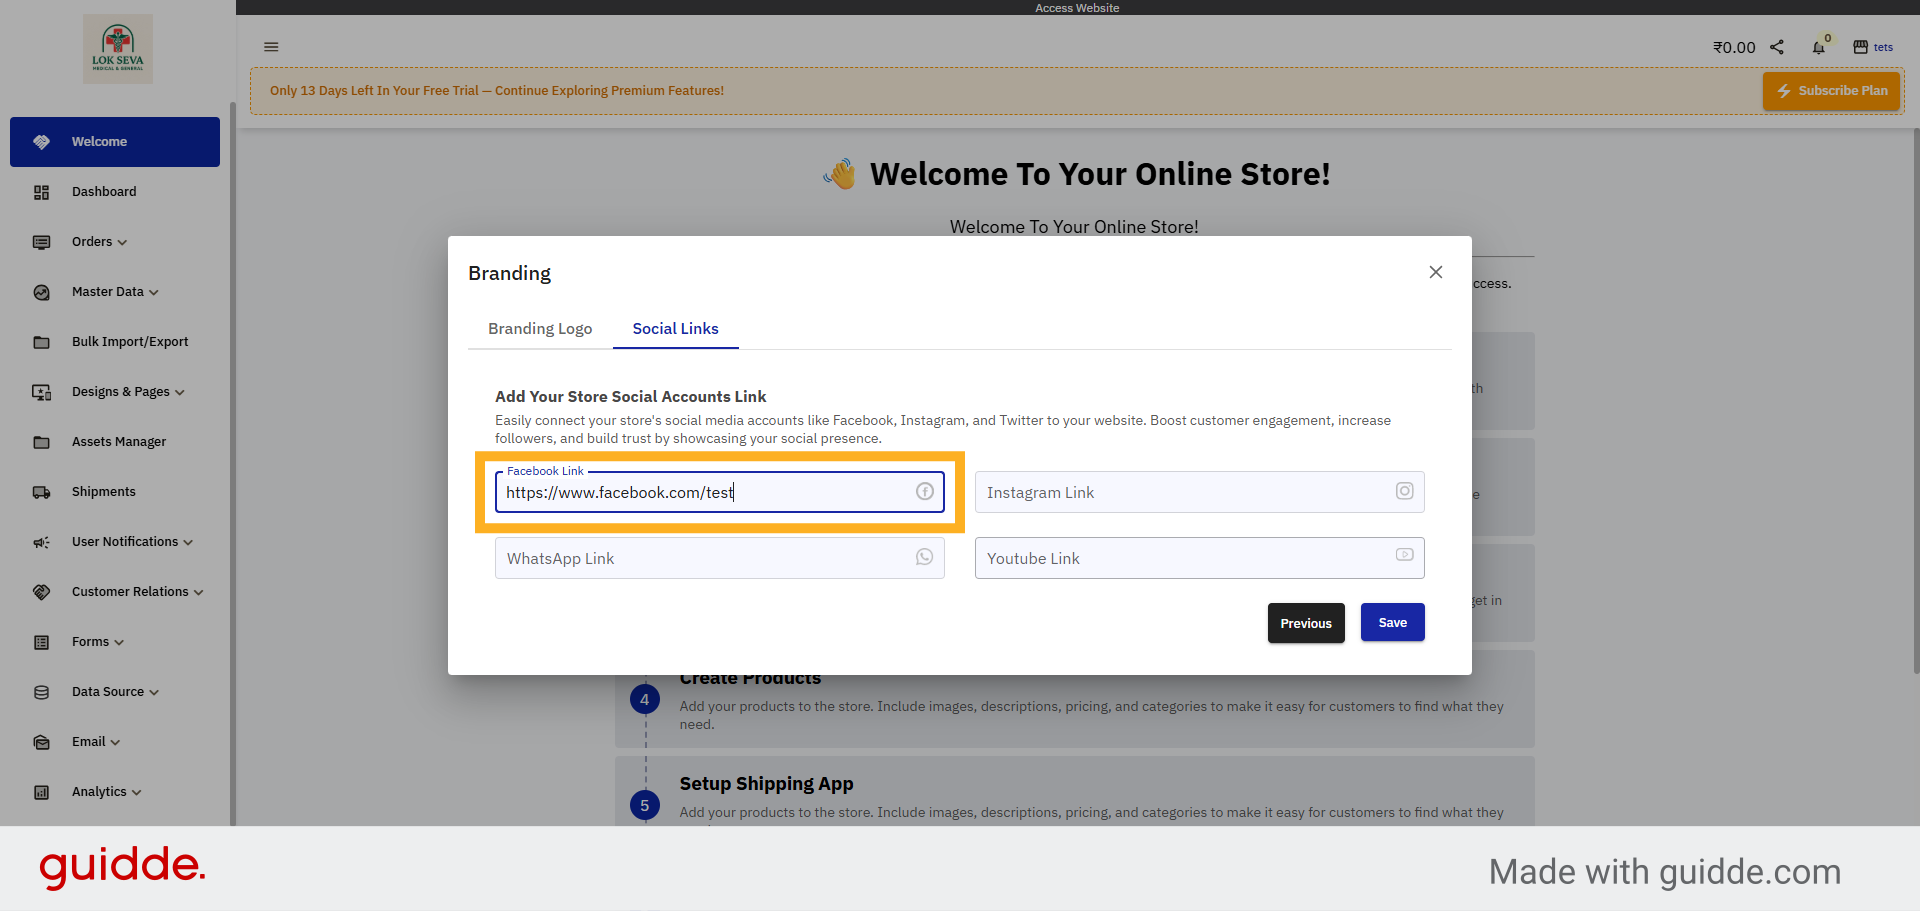
11. Enter Business Name
Click the Business Name field to input your registered business name for your Q-commerce site.
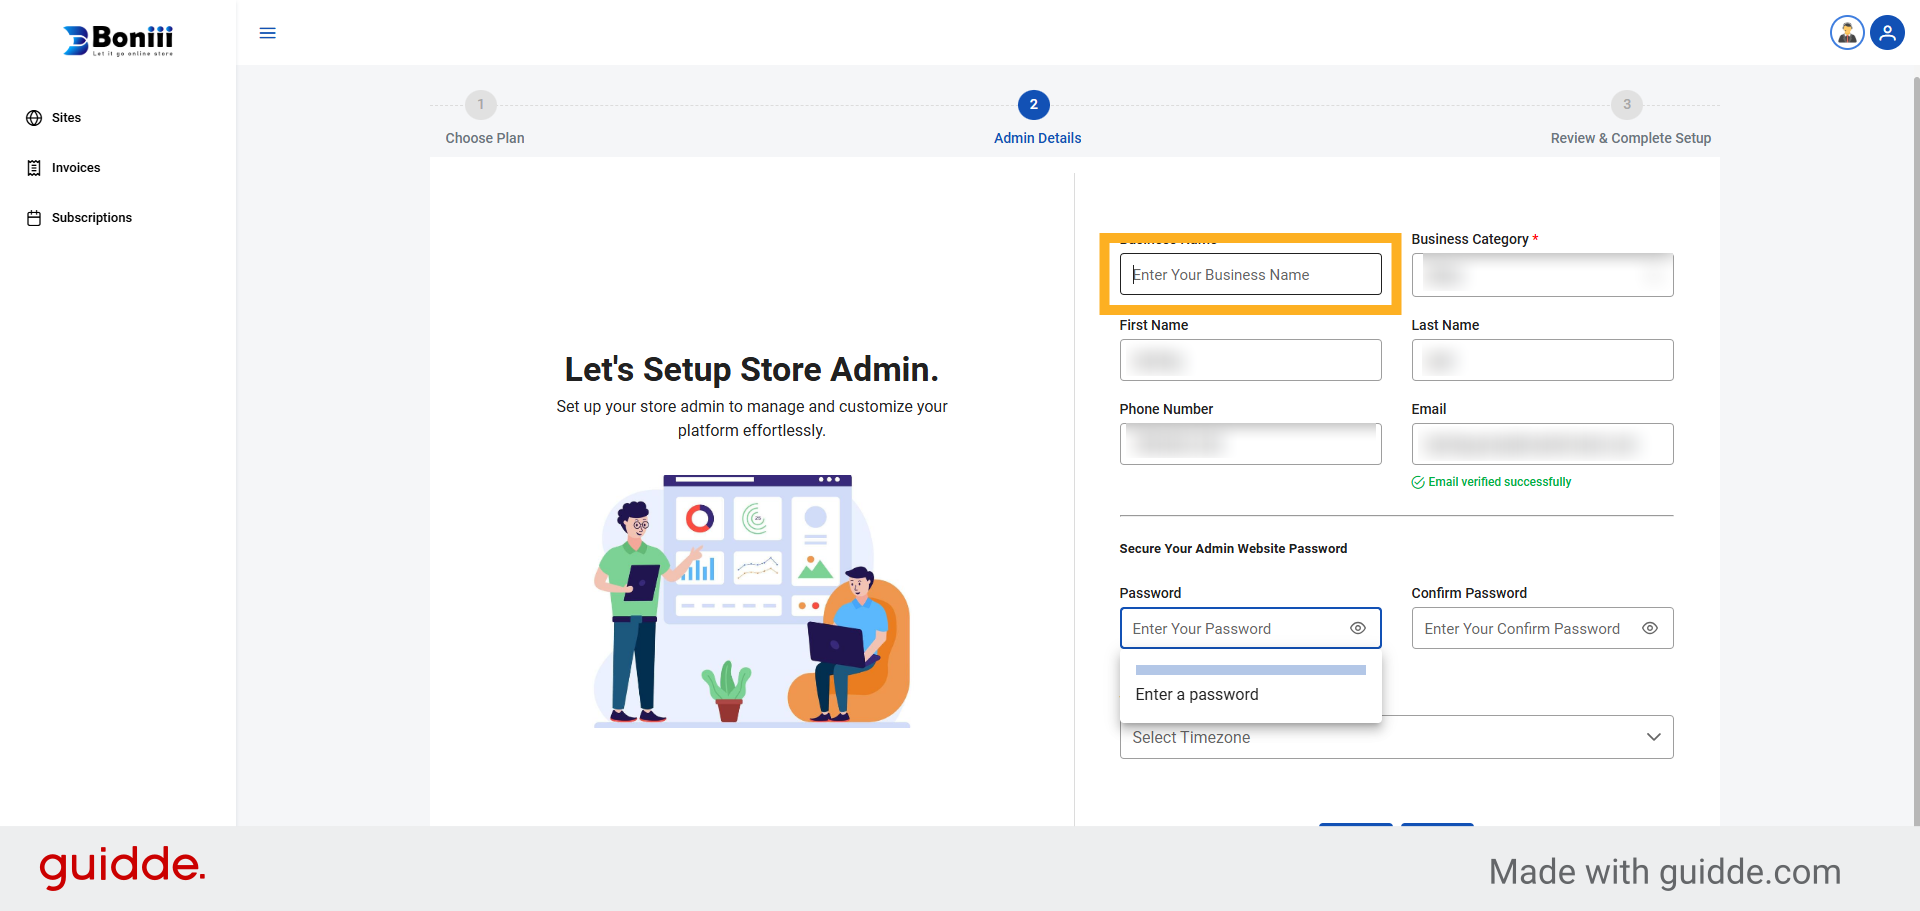
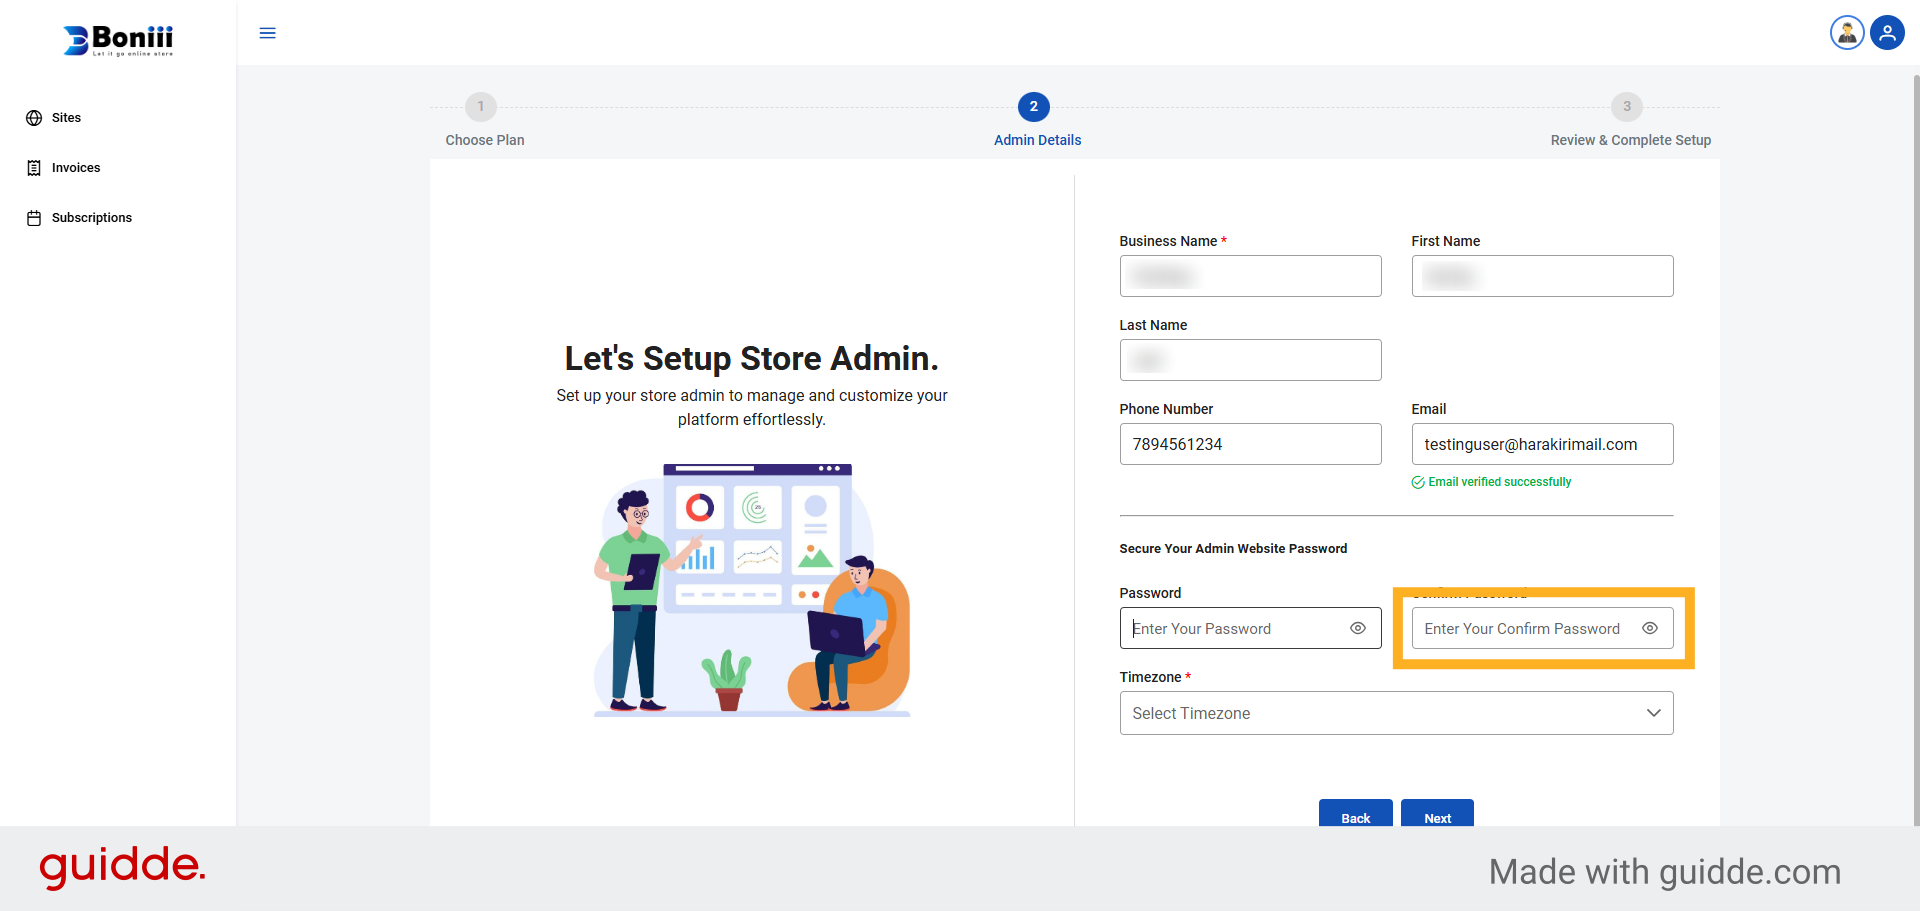
12. Enter Password Field
enter the password field and enter a secure password to continue.
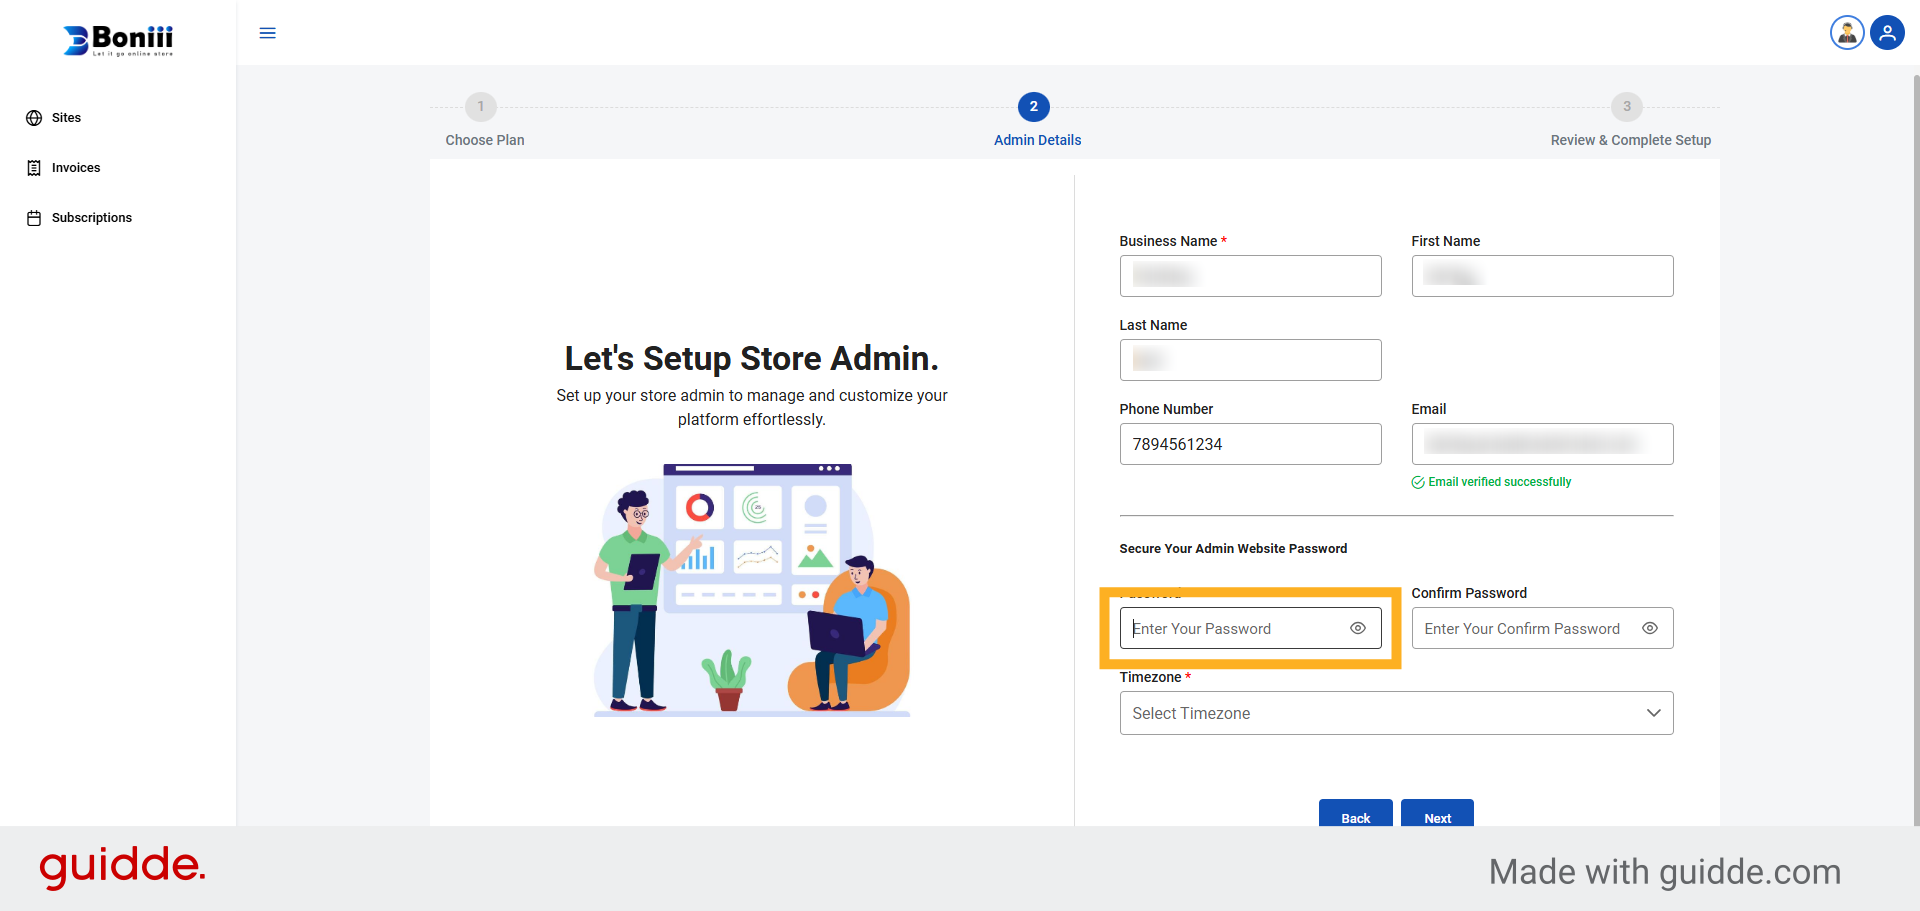
13. Enter Confirm Password Field
enter the confirm password field and enter a secure password to continue.
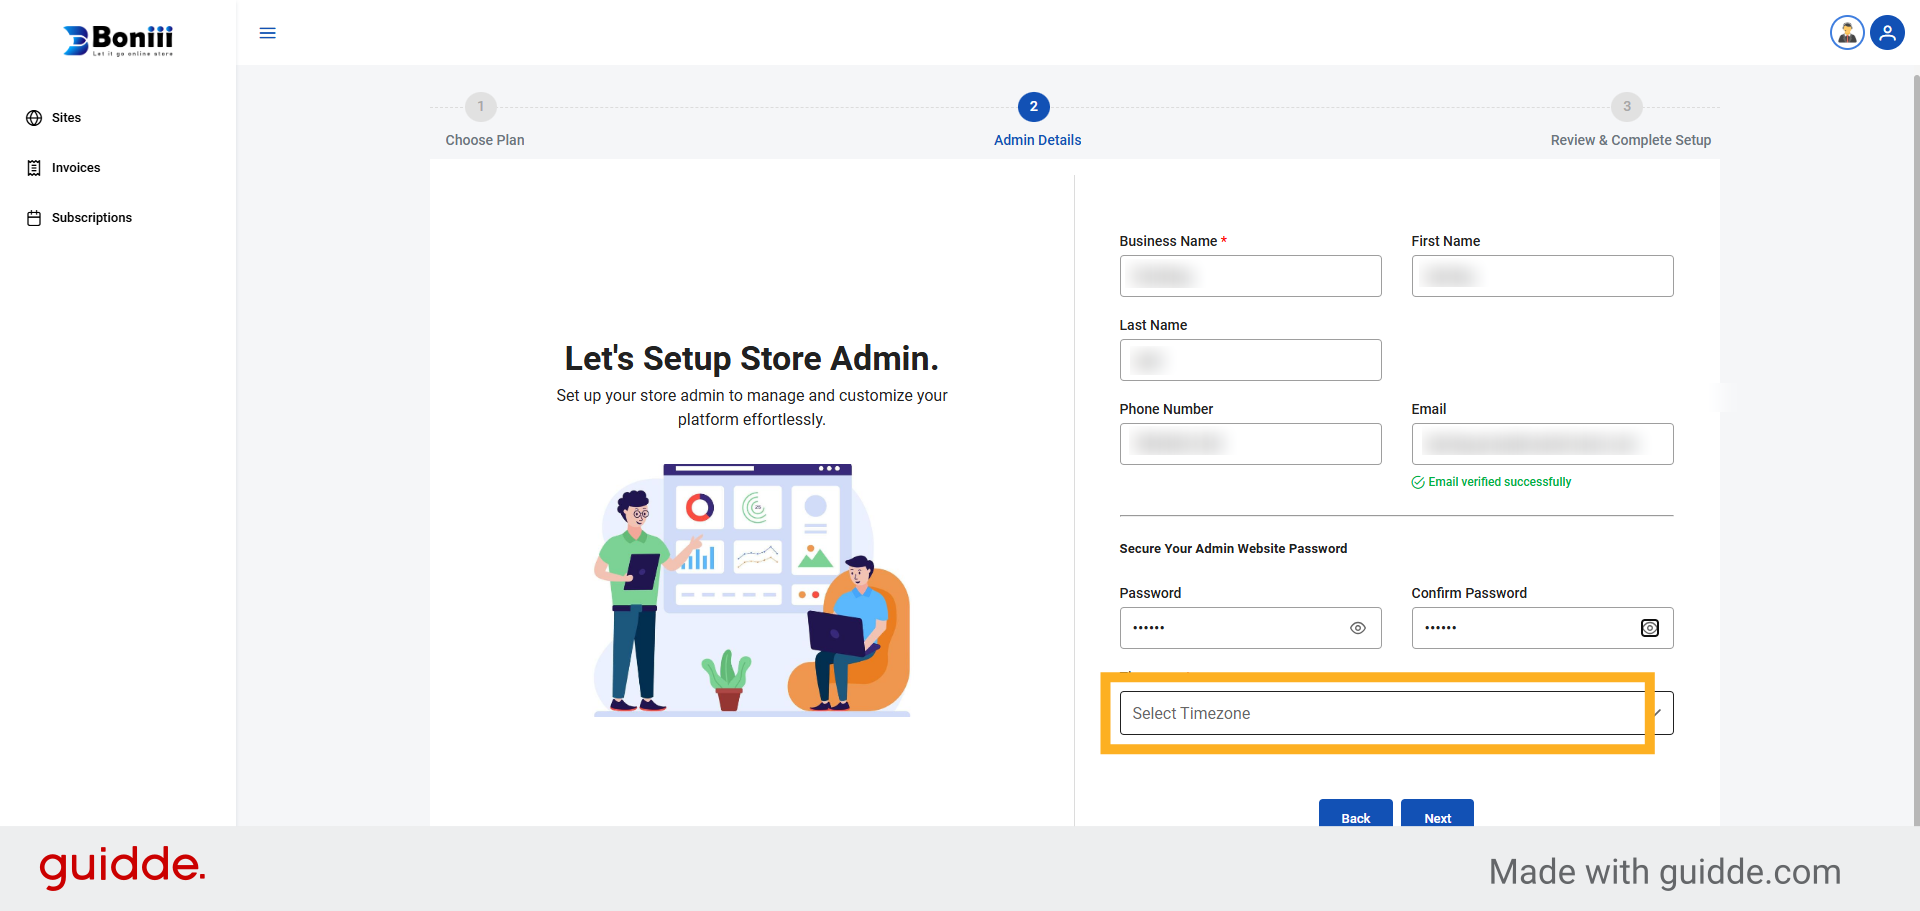
14. Select Timezone Dropdown
Click the Select Timezone dropdown to choose your local timezone.
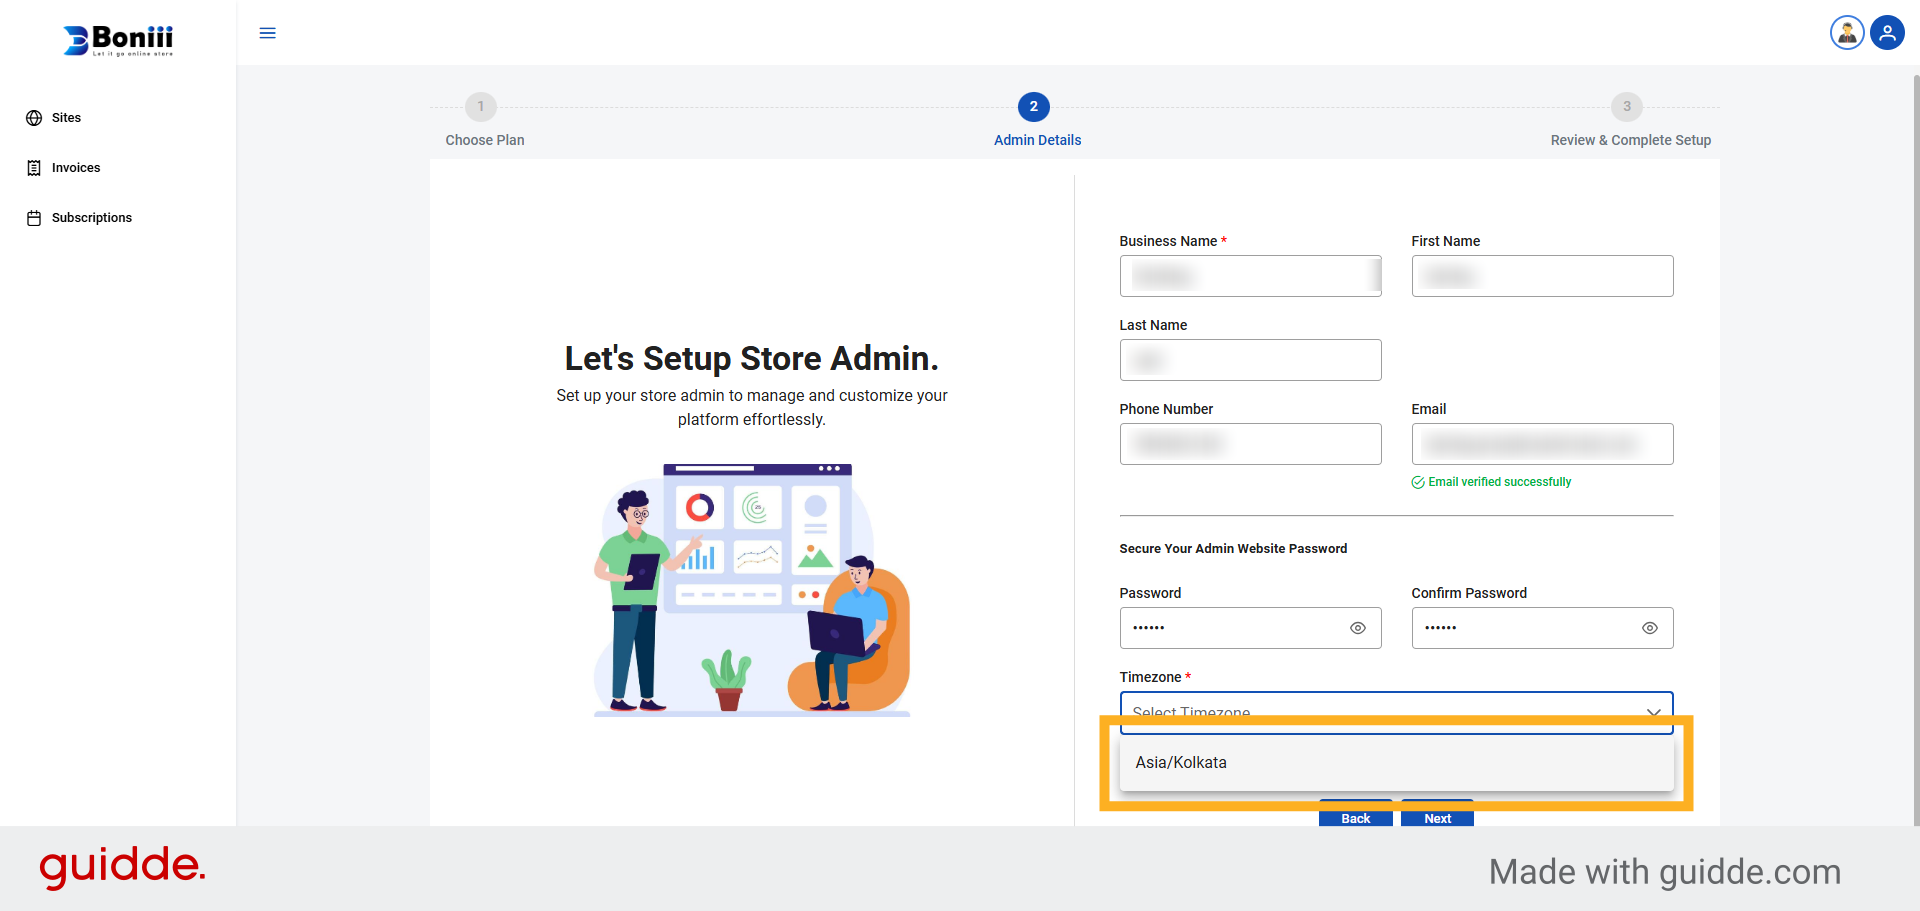
15. Choose Asia/Kolkata Timezone According To Your Country
Select Asia/Kolkata as your timezone to set correct time settings.
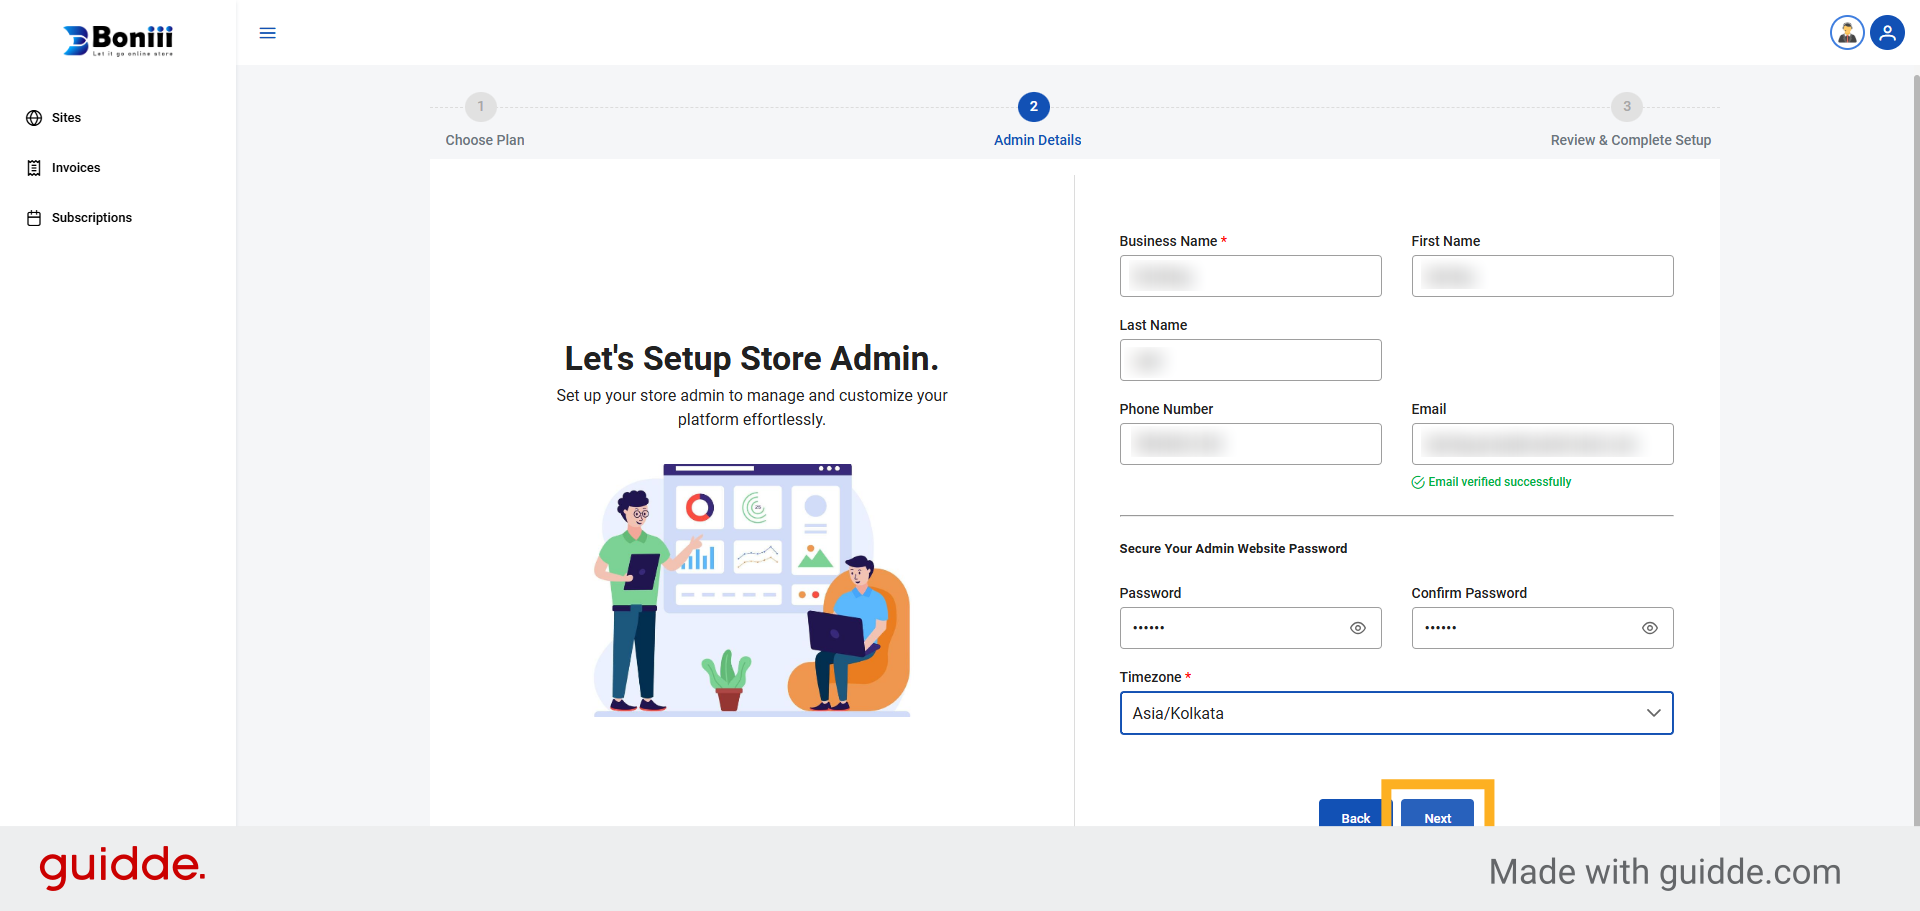
16. Click Next Button
Click the Next button to continue with the website setup process.
17. Start Free Trial
Click the Start Free Trial button to activate your account and begin using Boniii's services.
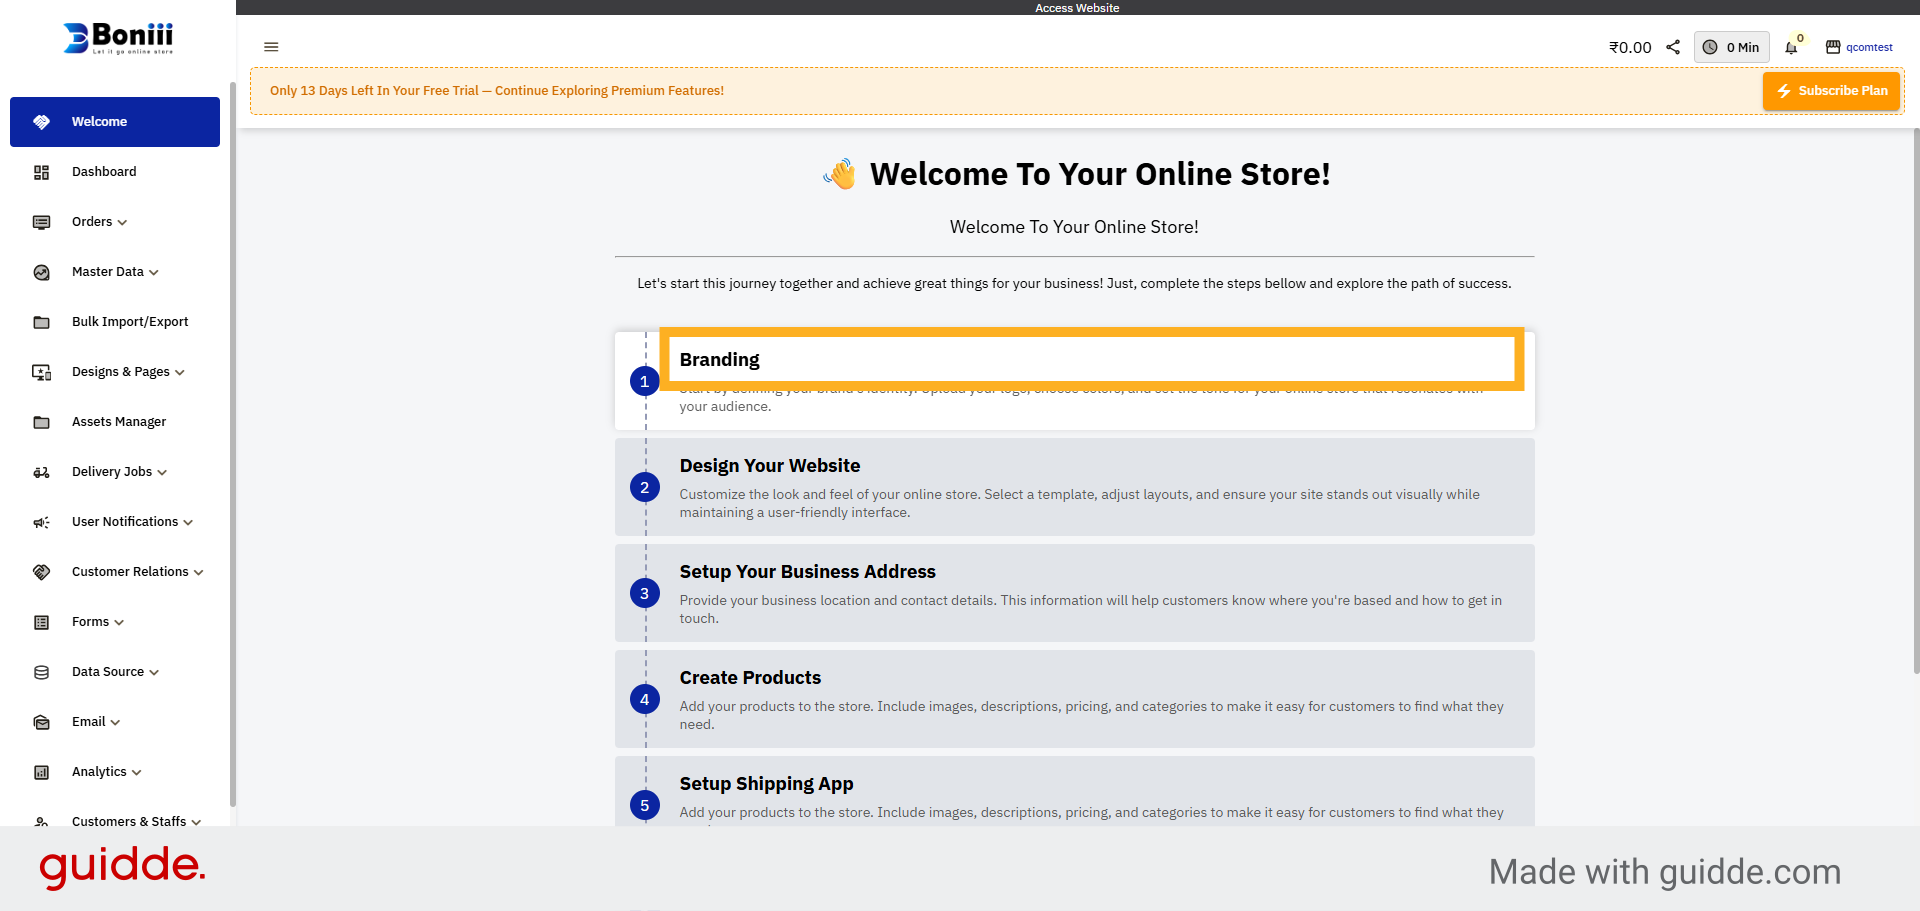
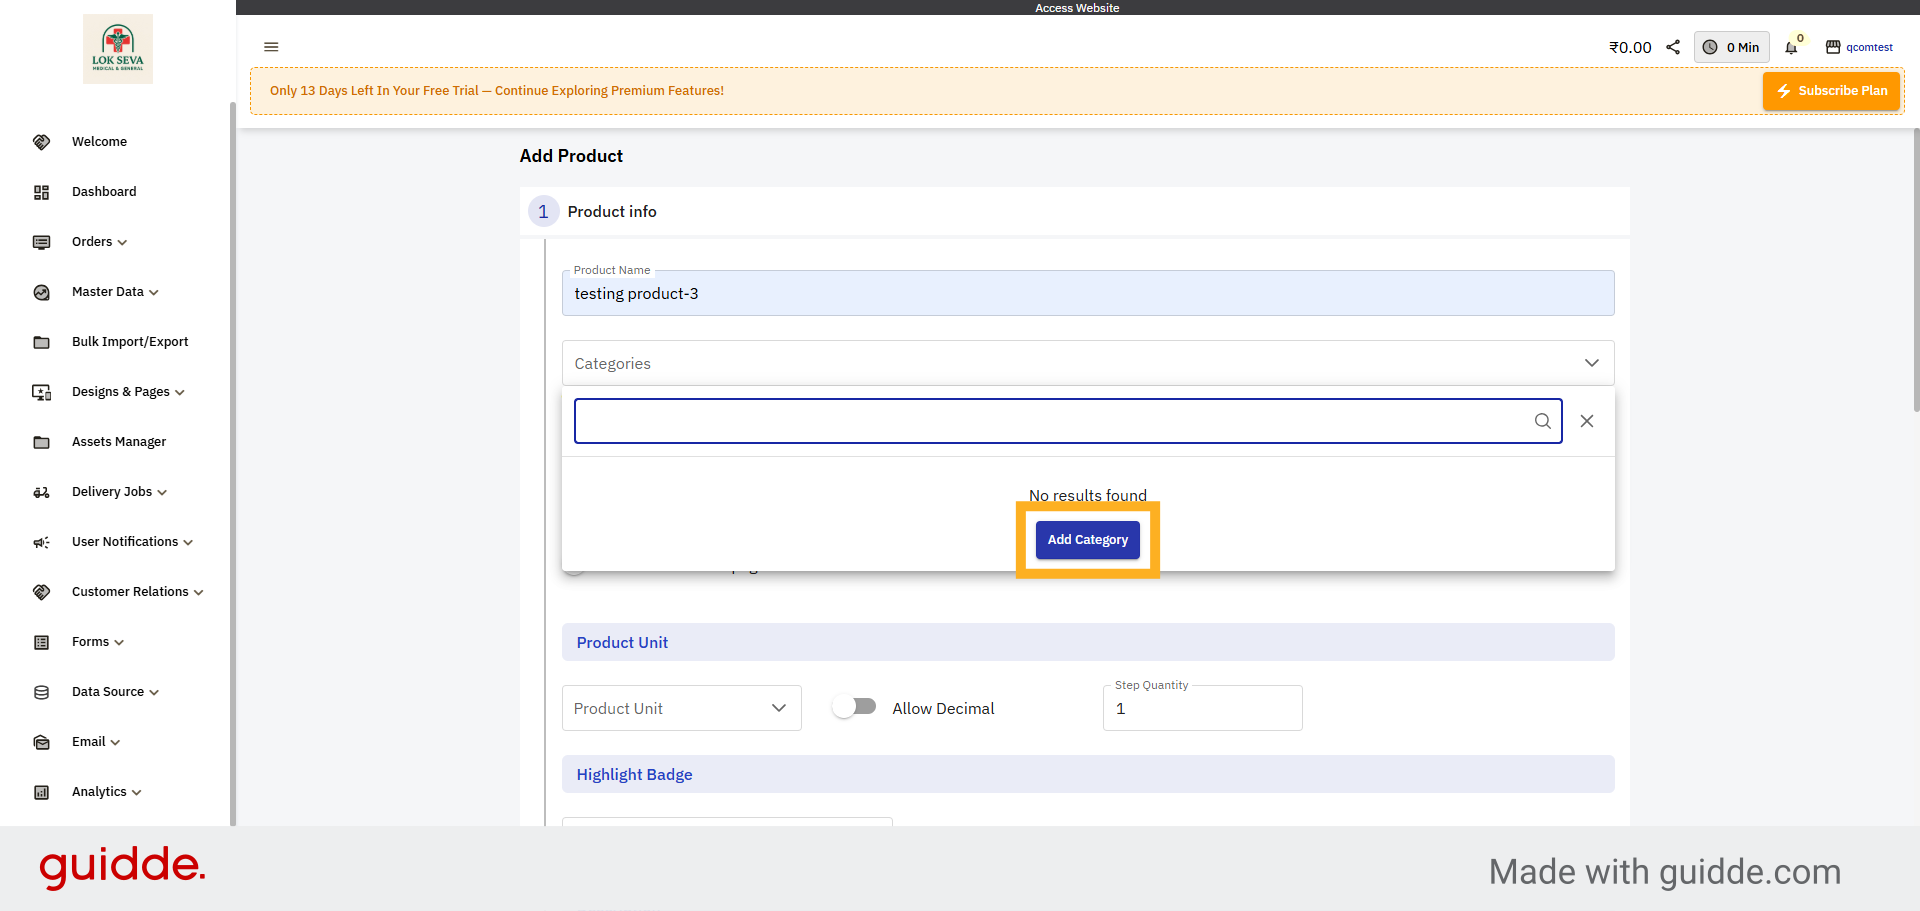
18. Open Setup Wizard
Click the Setup Wizard to access guided configuration tools for your Q-commerce website.

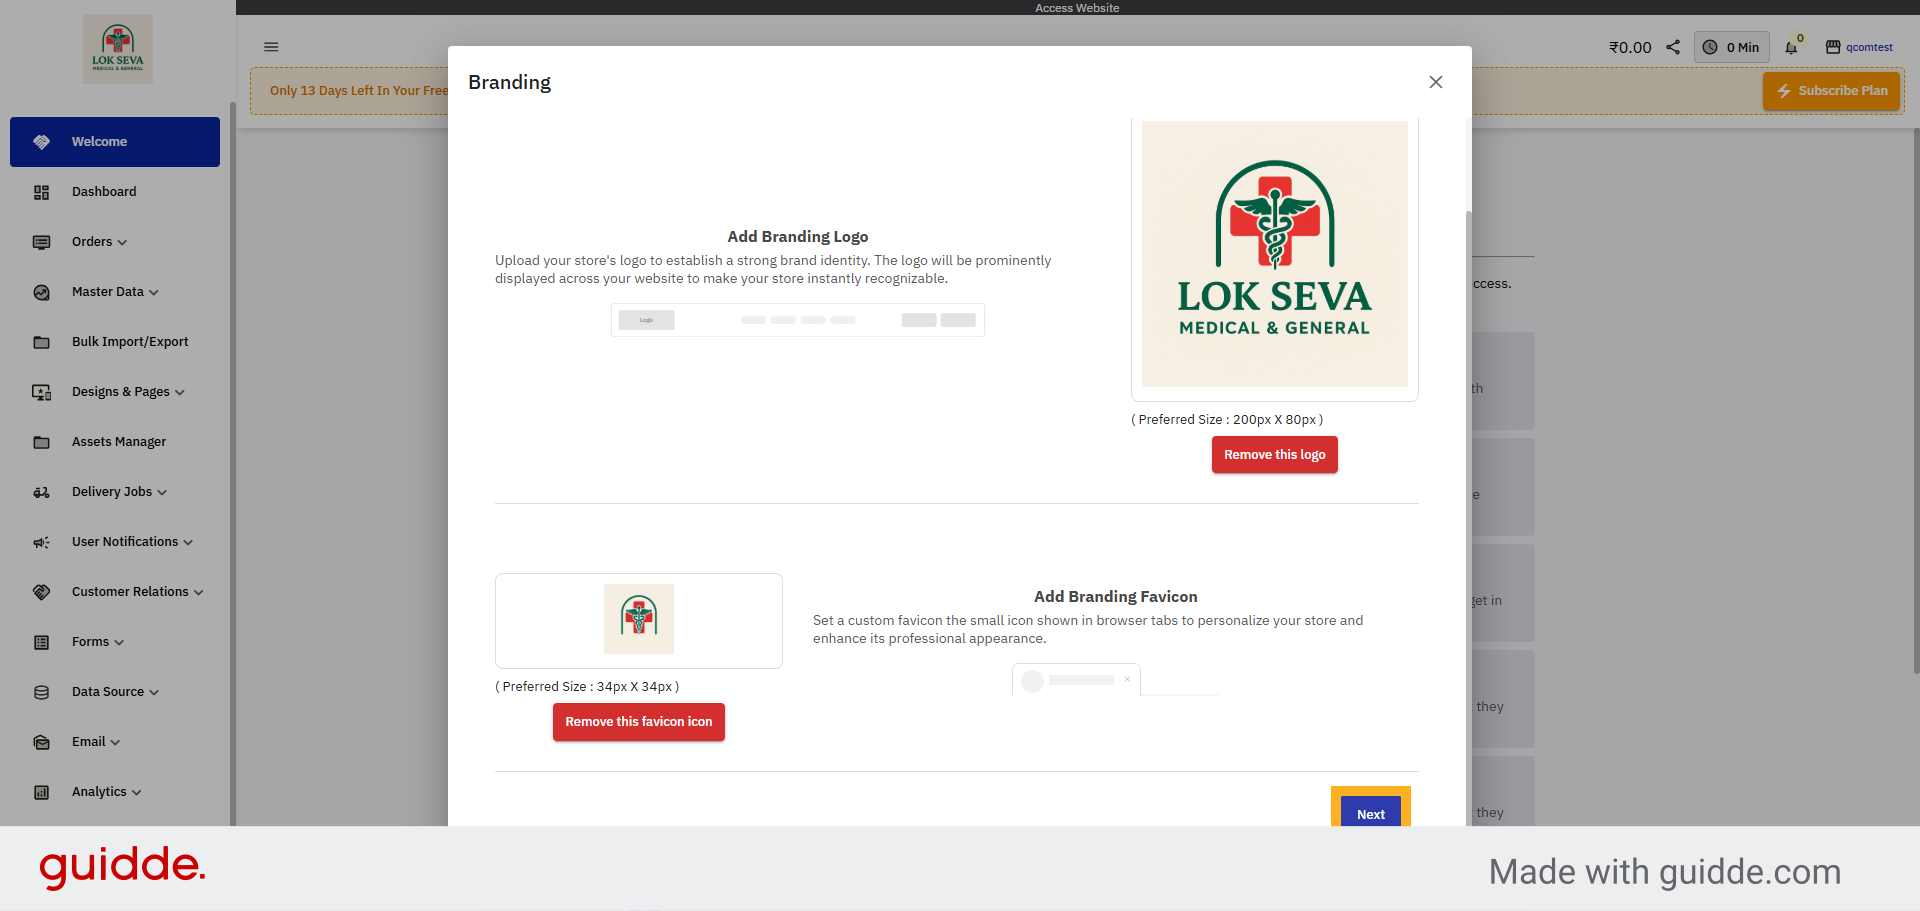
19. Access Branding Settings
Click Branding to customize your website's visual identity and brand elements.
20. Upload Branding Logo
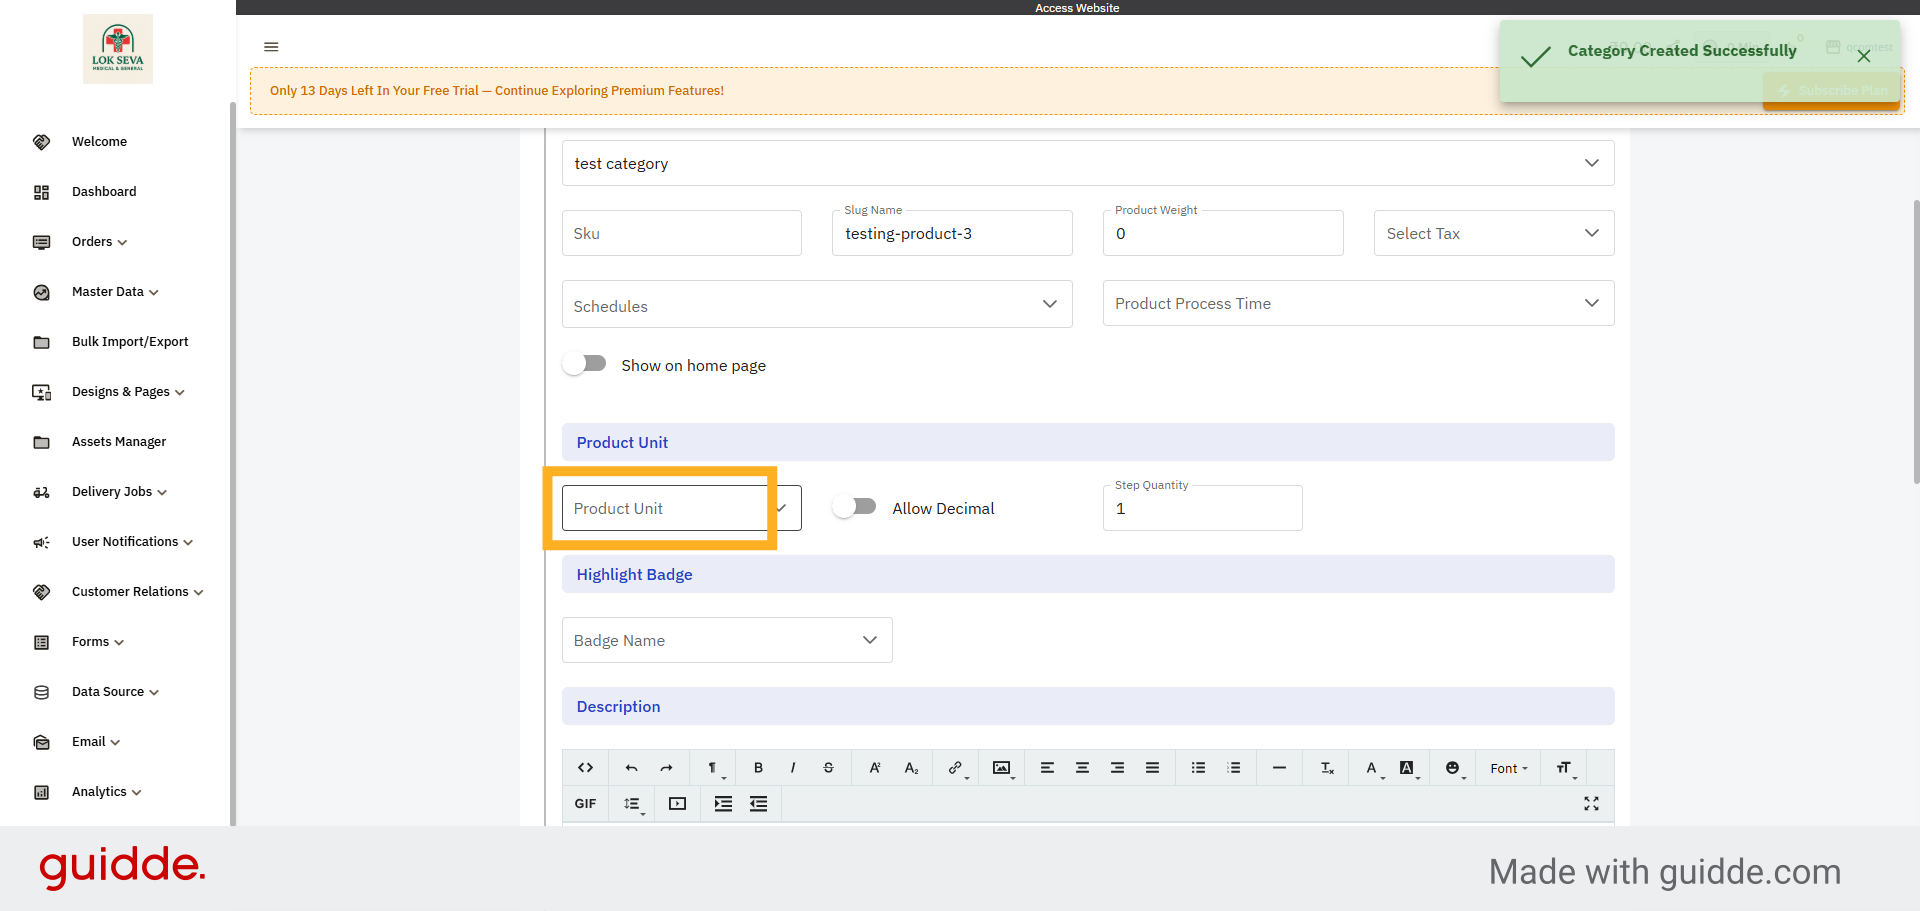
Click the add icon to upload a new logo for your brand.
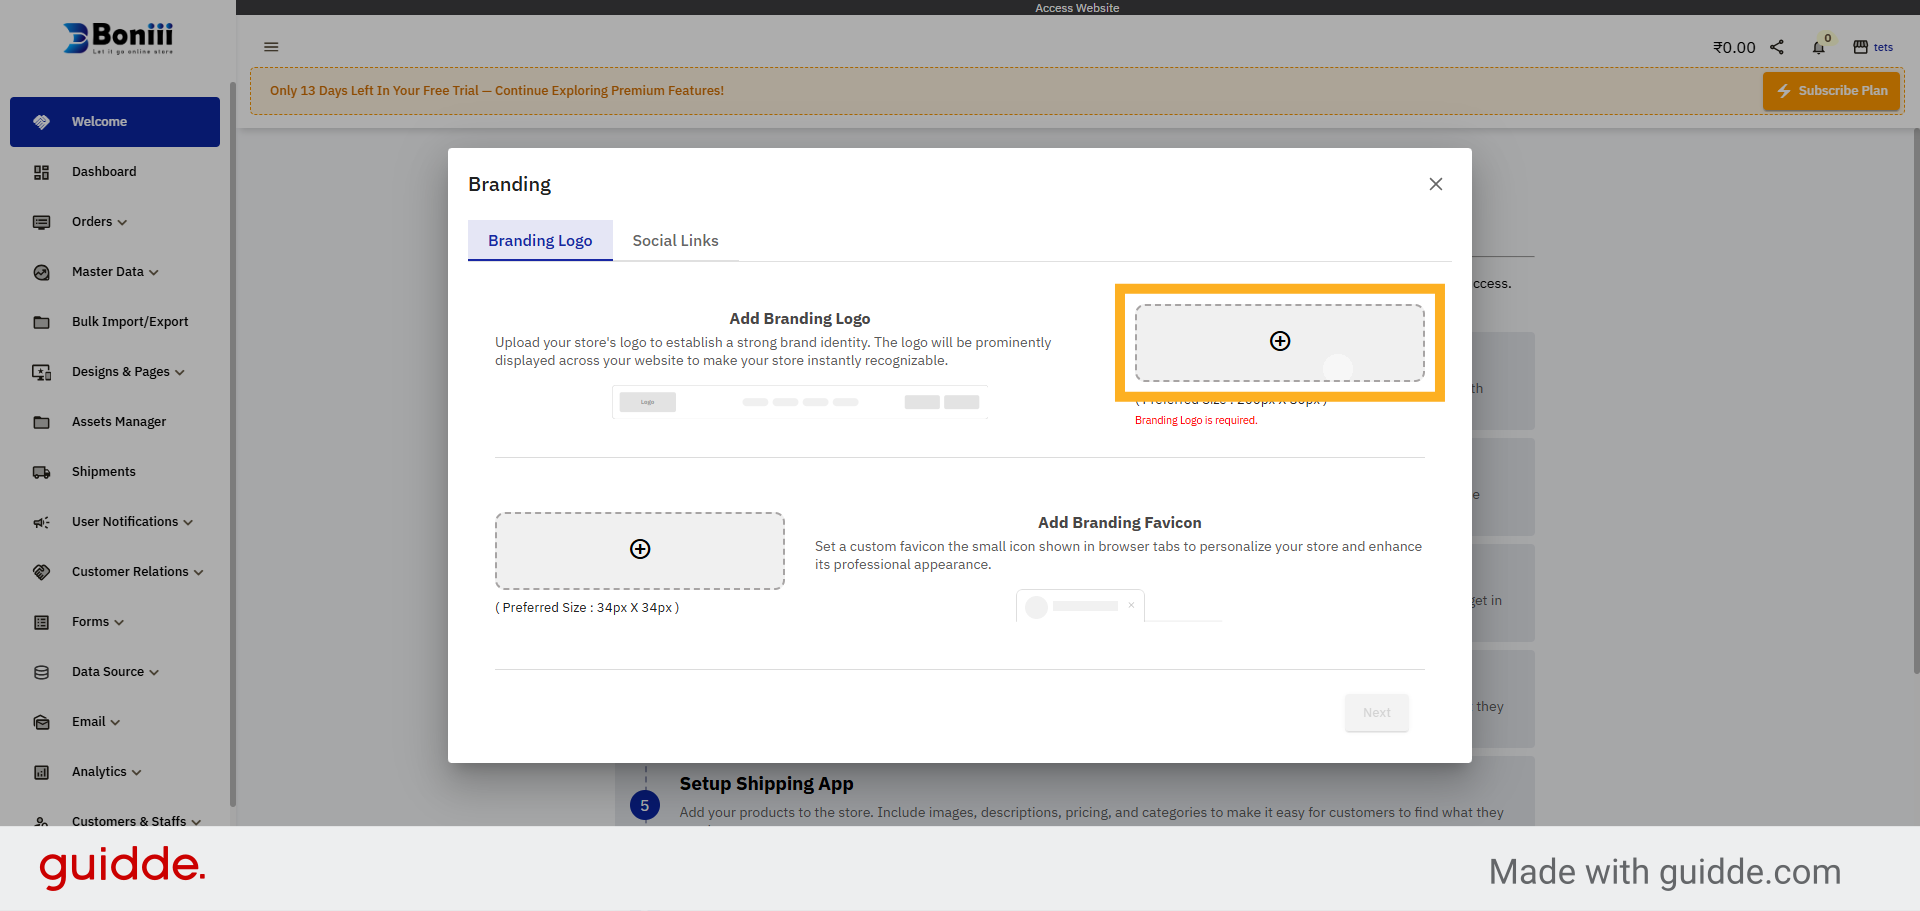
21. Upload Branding Favicon
Click the Add icon to upload your branding favicon.

22. Proceed To Next Branding Step
Click Next to continue with the branding configuration process.
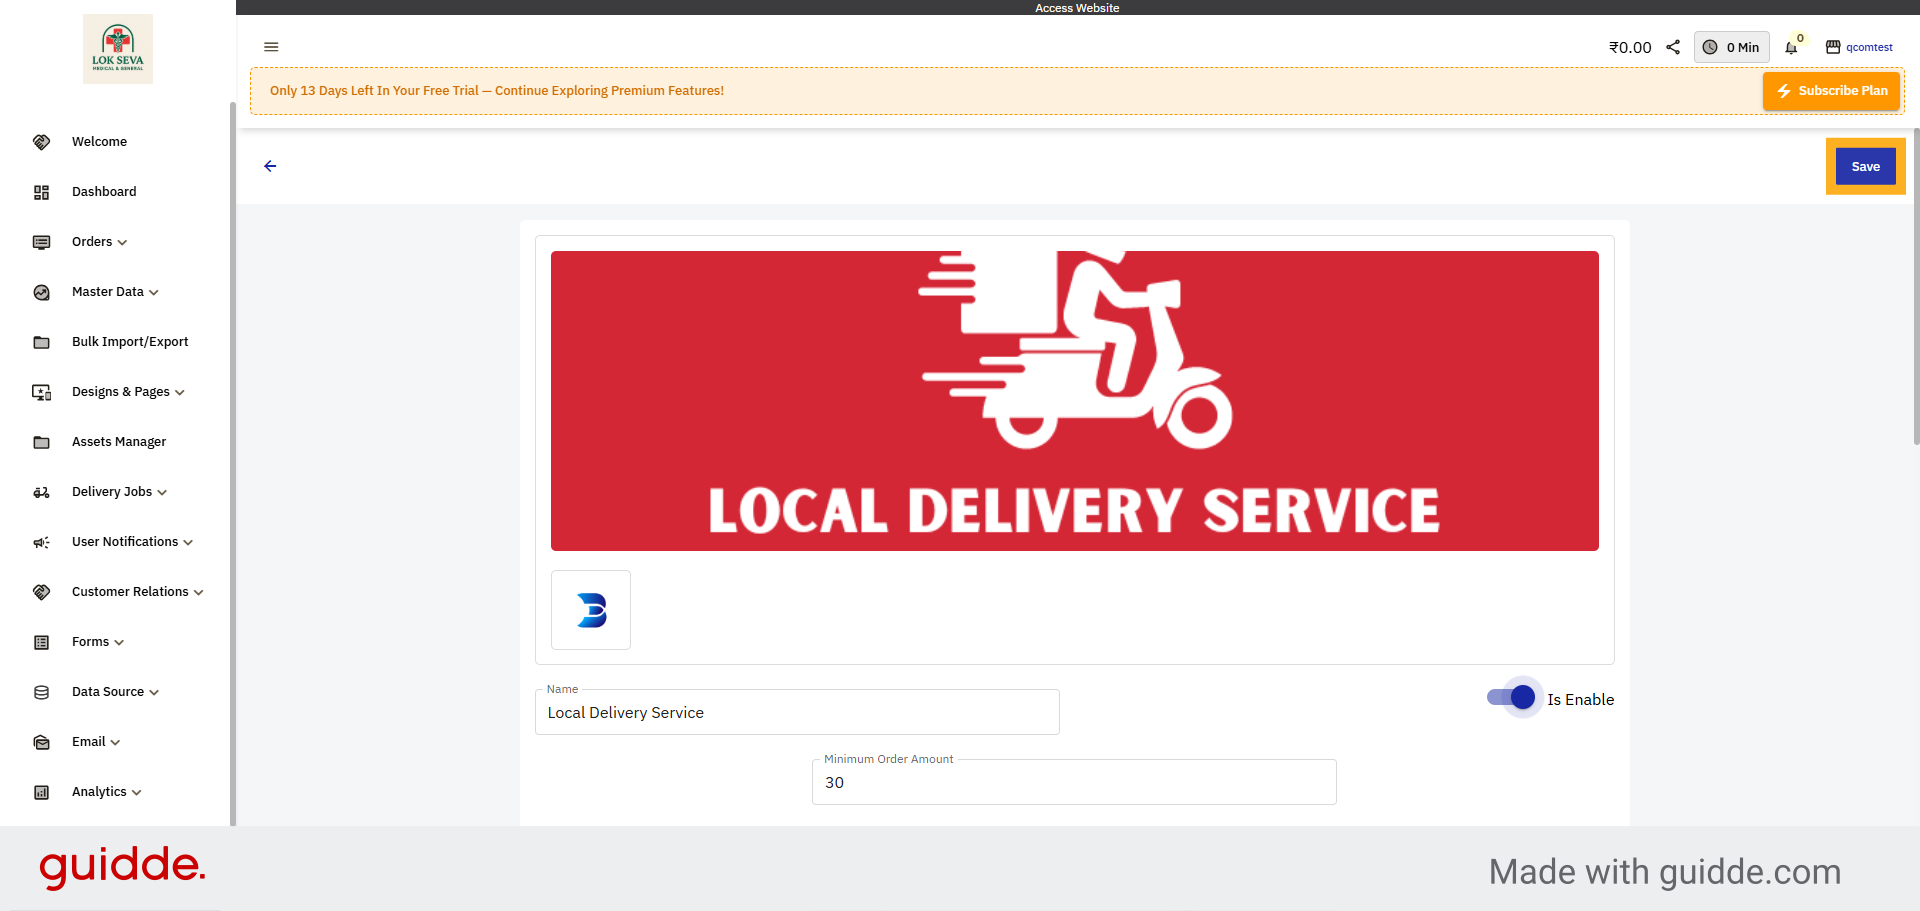
23. Enter Facebook Link Field
Fill in your Facebook page link to integrate social media with your store.
24. Save Social Media Link
Click Save to store your Facebook link in your website settings.

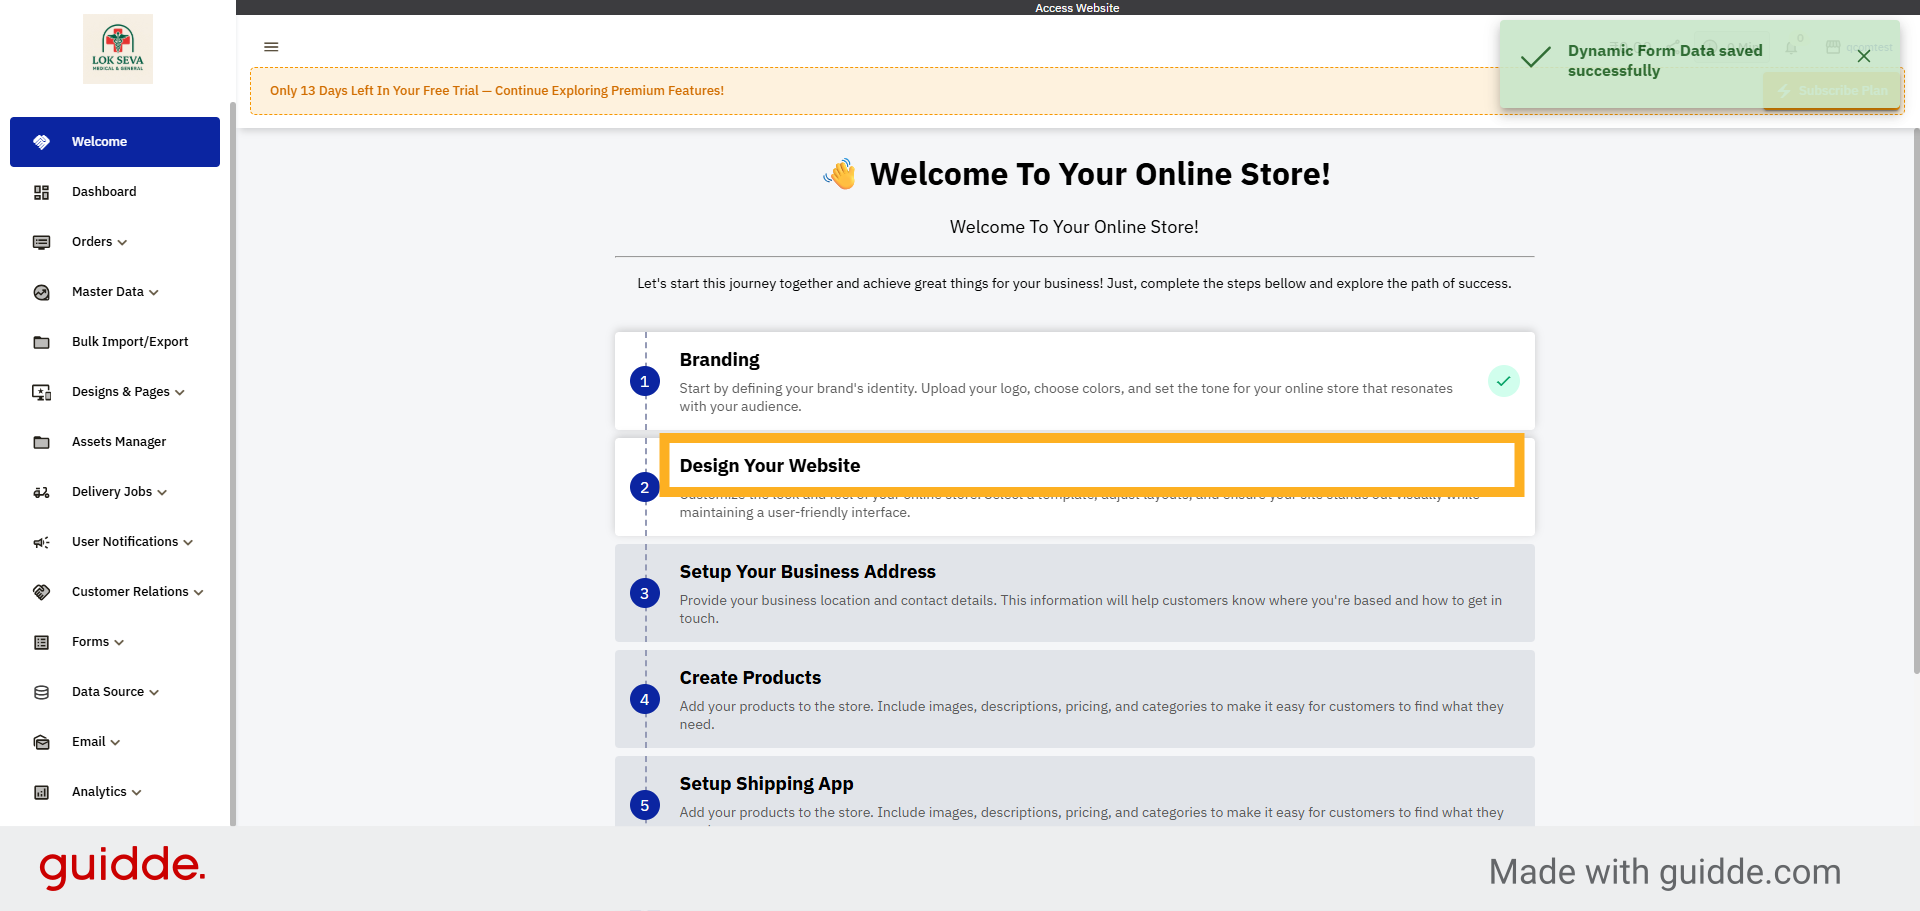
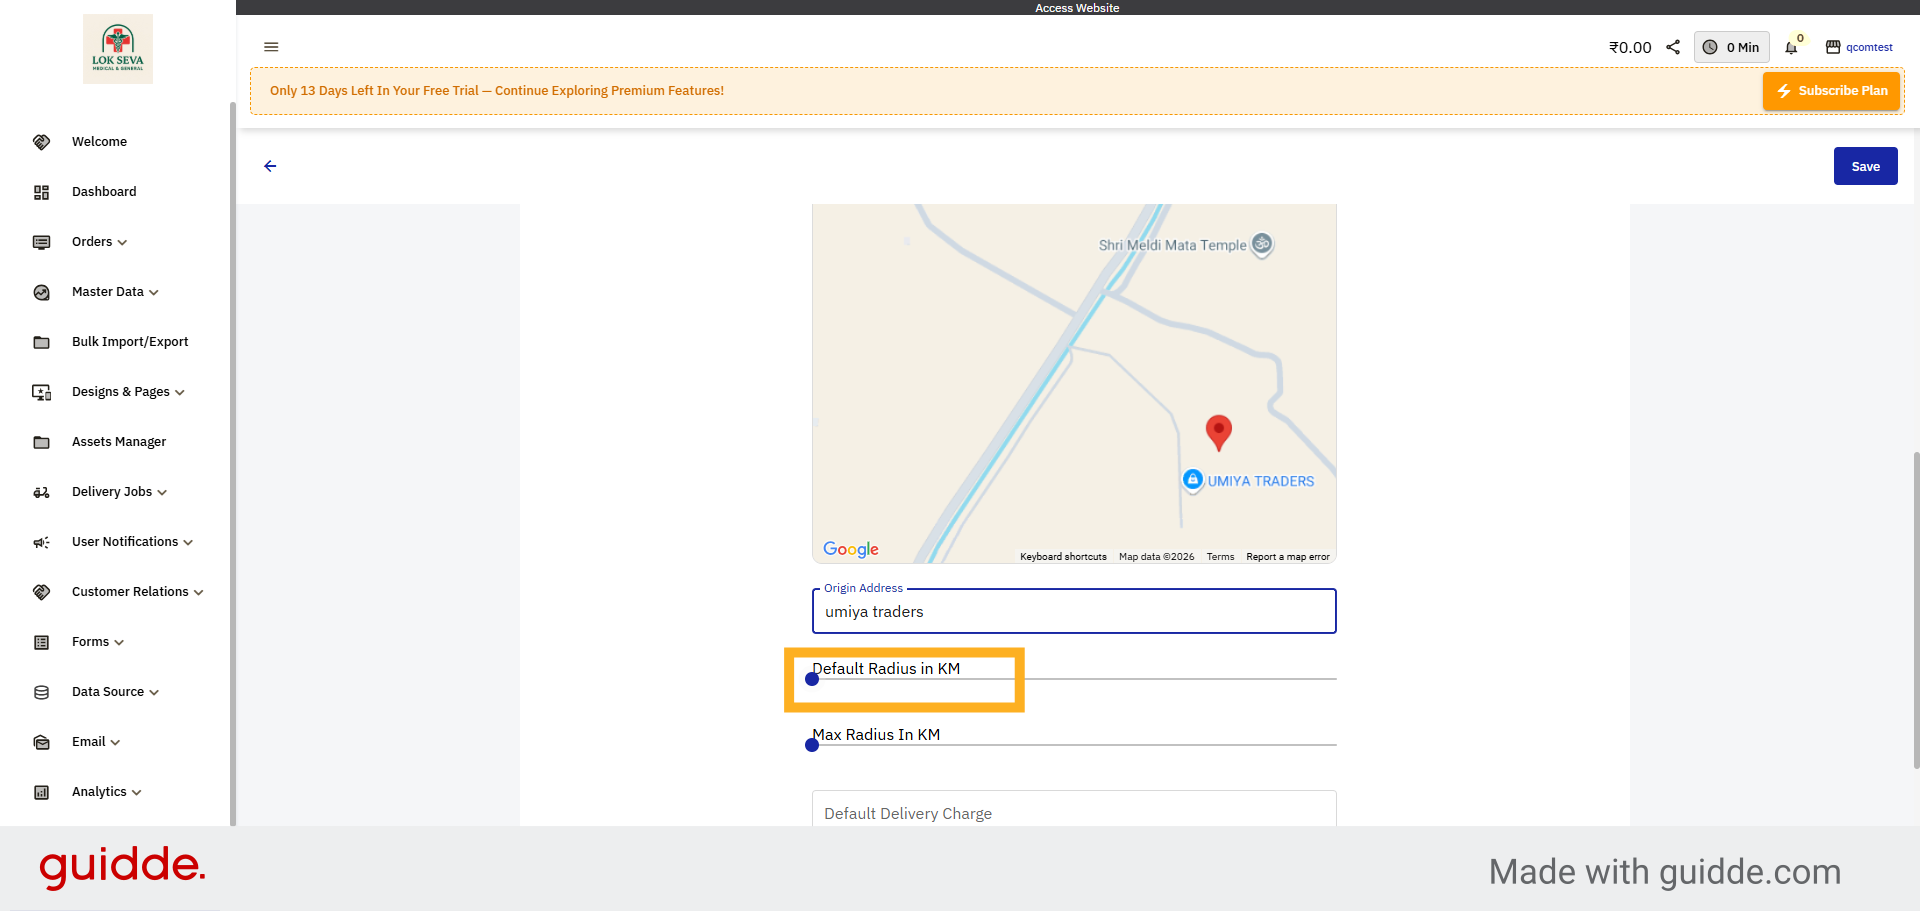
25. Open Website Design Section
Click Design Your Website to customize the layout and appearance of your online store.
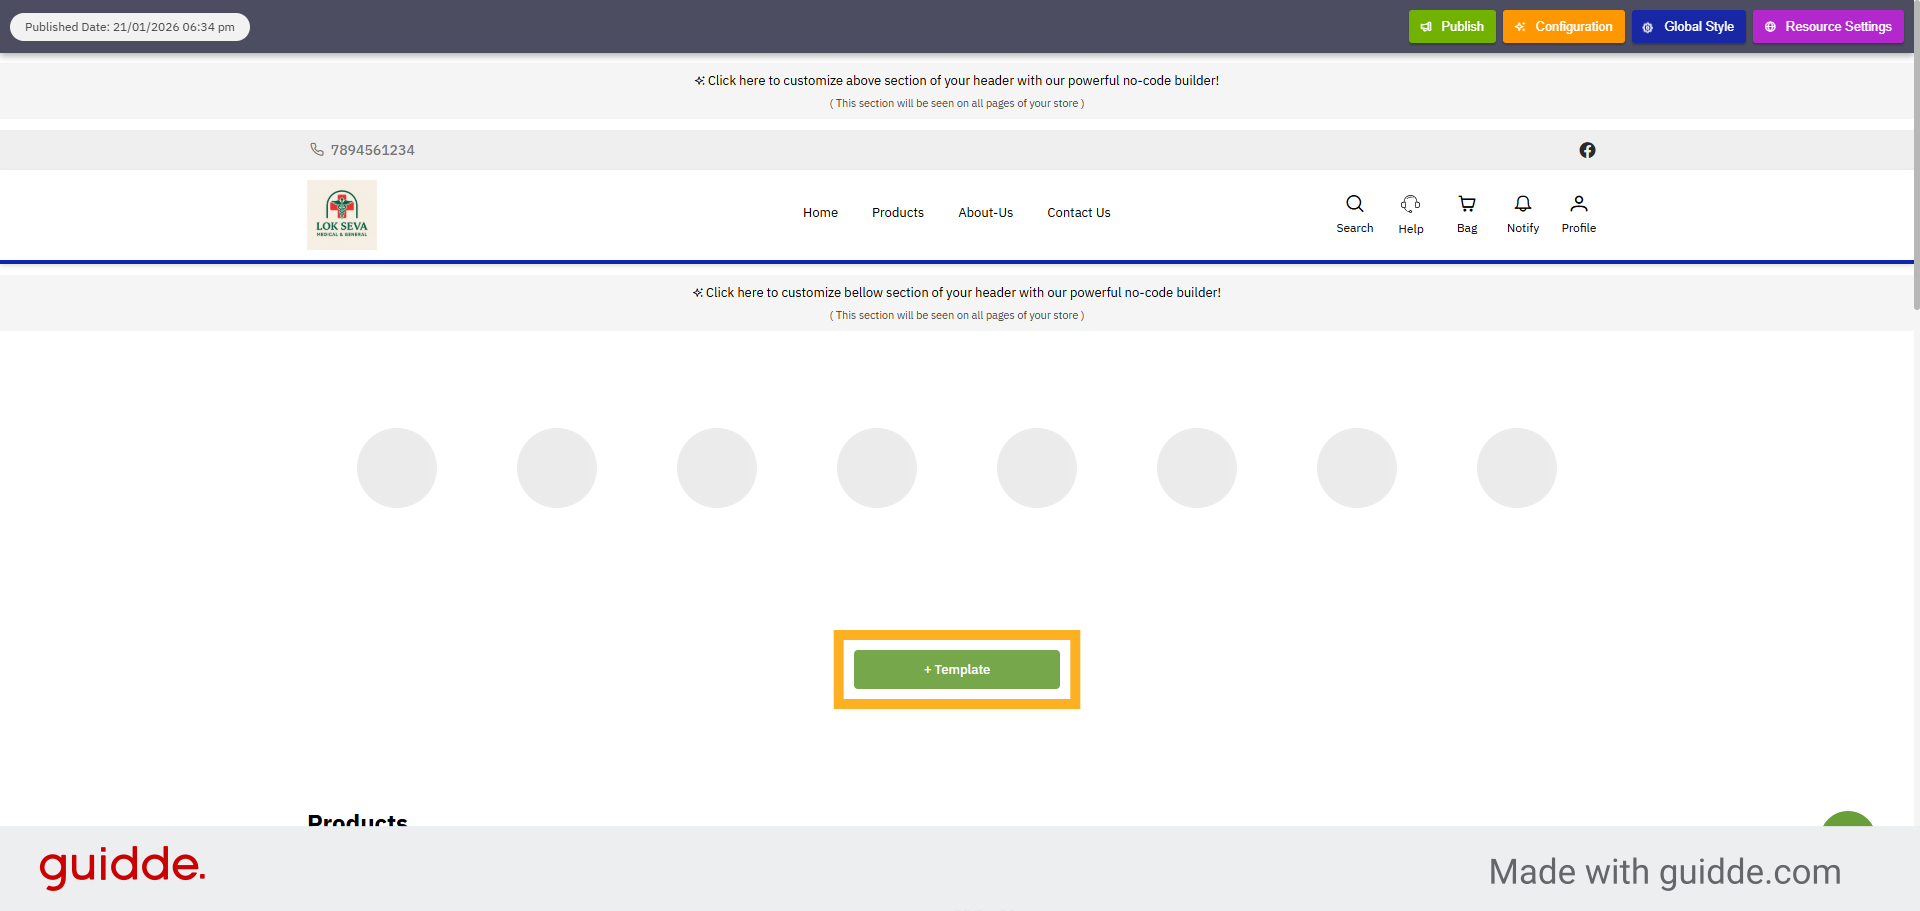
26. Add New Template
Click the Template button to browse and add new design templates for your website.
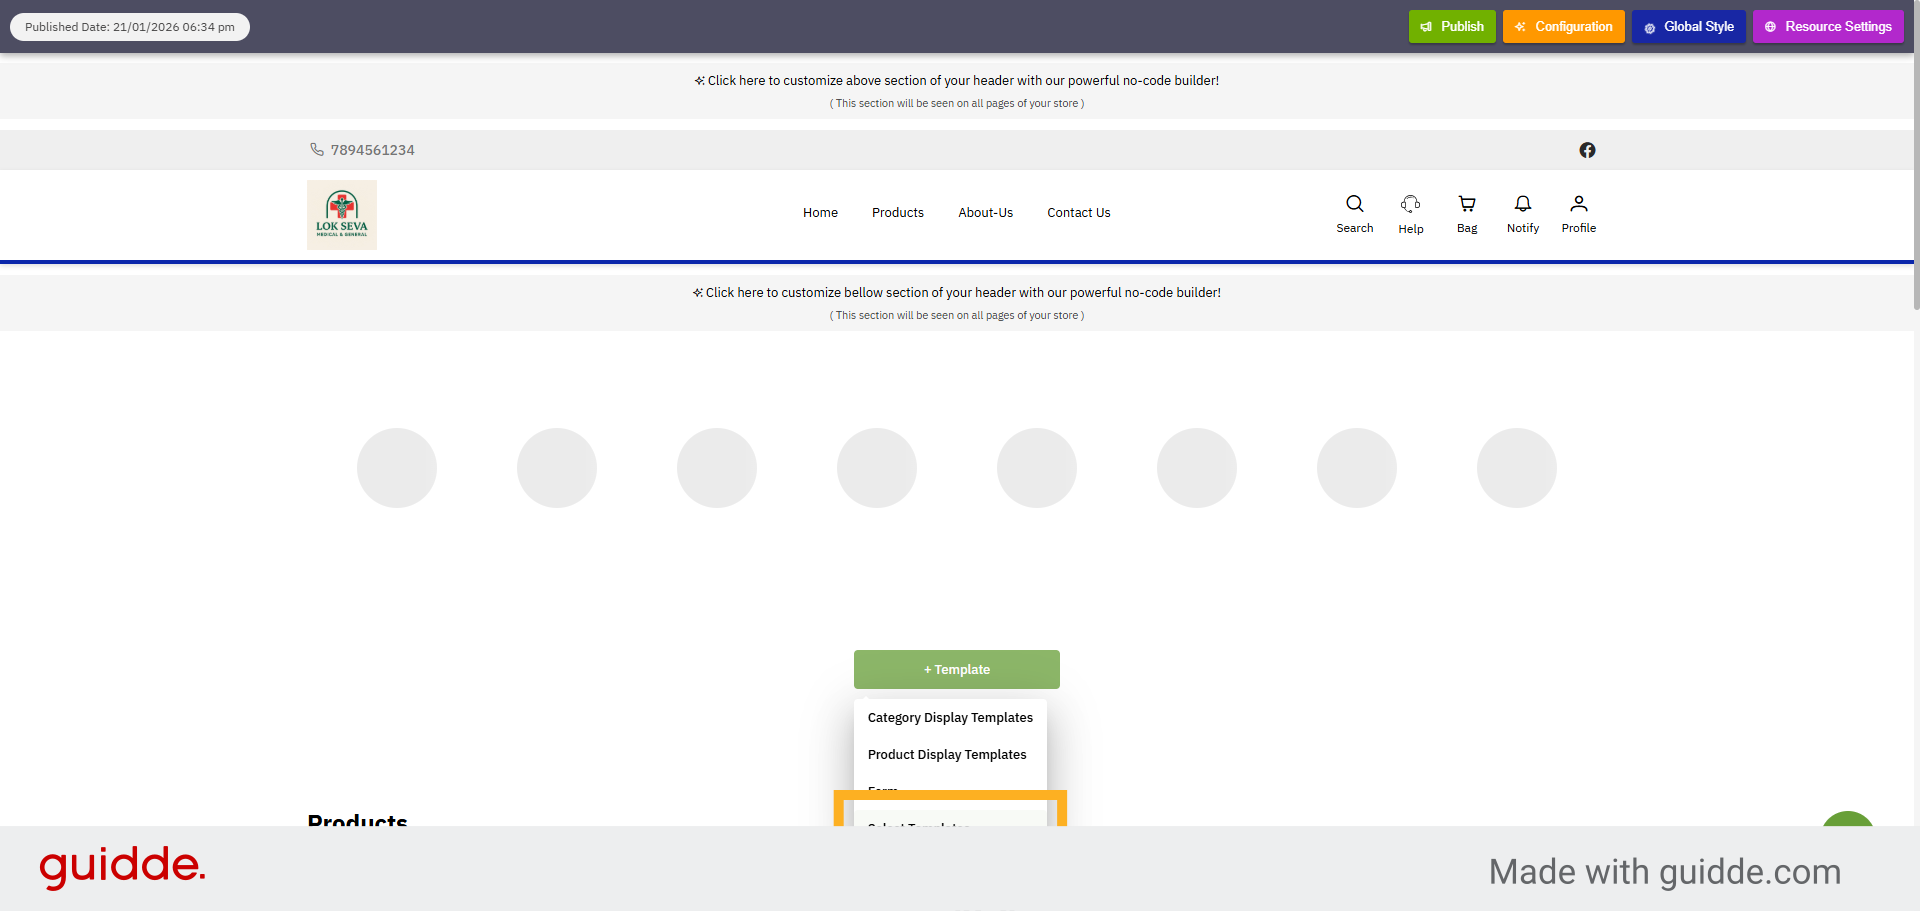
27. Open Template Selection
Click Select Templates to view available website design options.
28. Template Selection
Click Use Template to confirm and apply the chosen website design template.

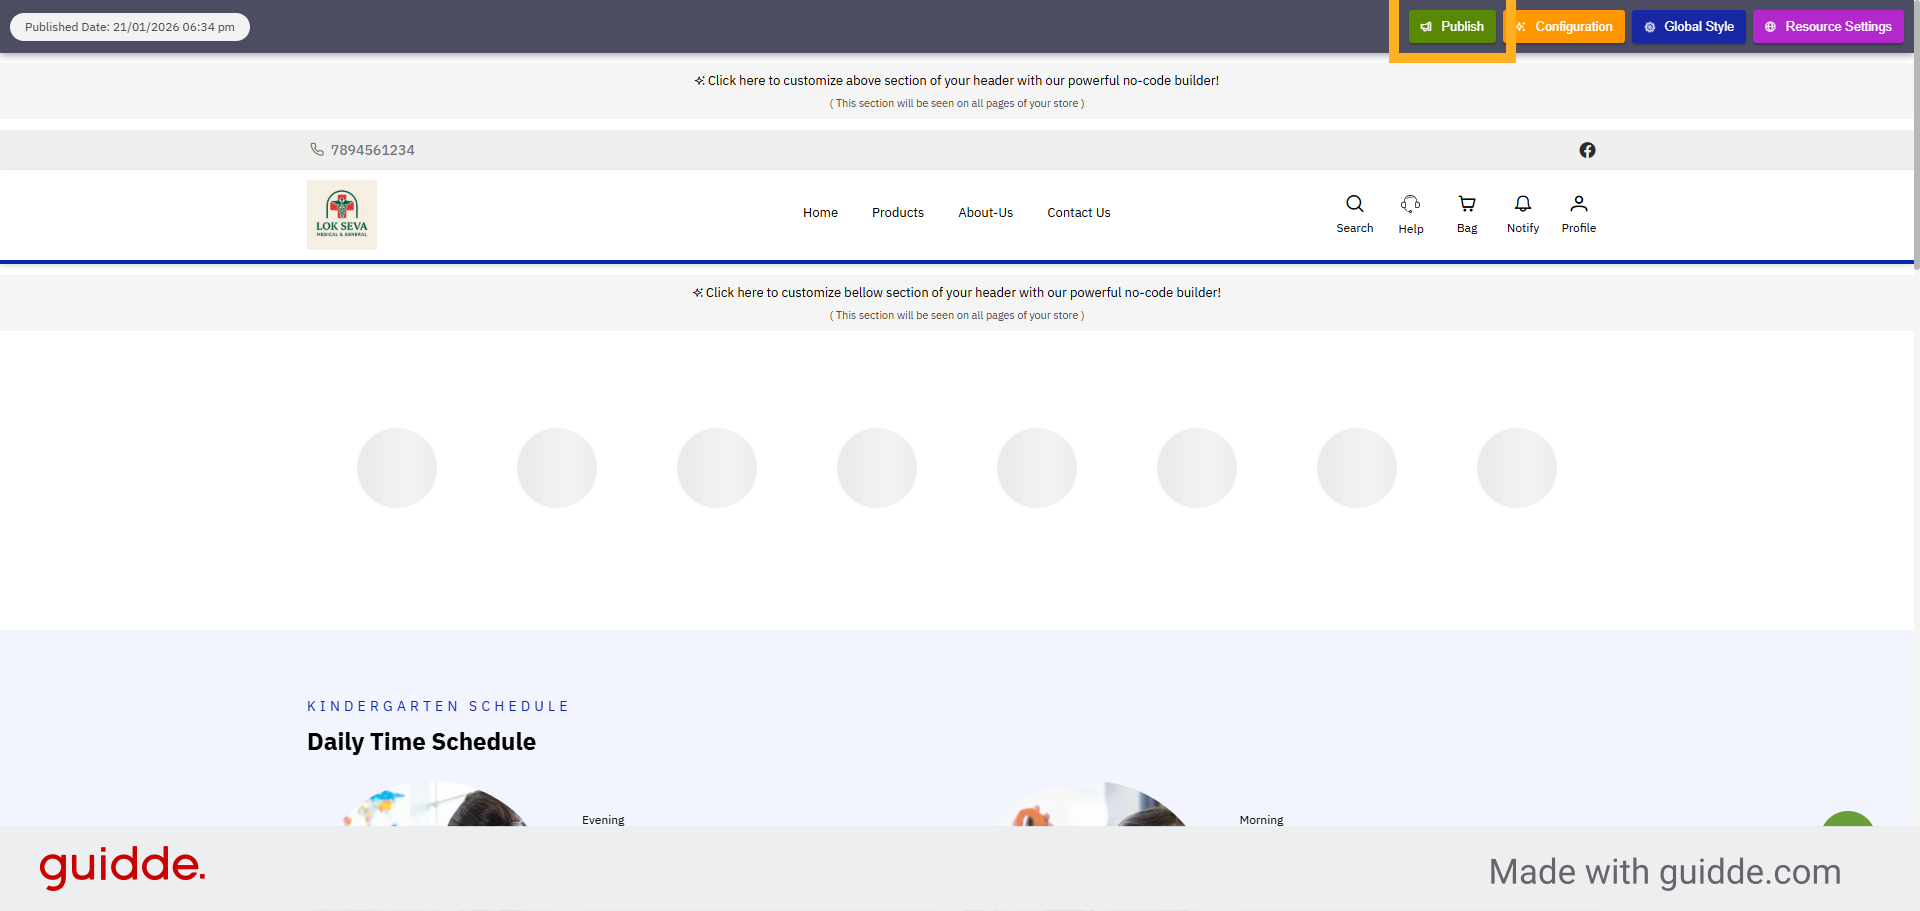
29. Publish Website
Click Publish to make your Q-commerce website live and accessible to customers.
30. Confirm Publish Action
Click Yes to confirm publishing your website and finalize the setup.

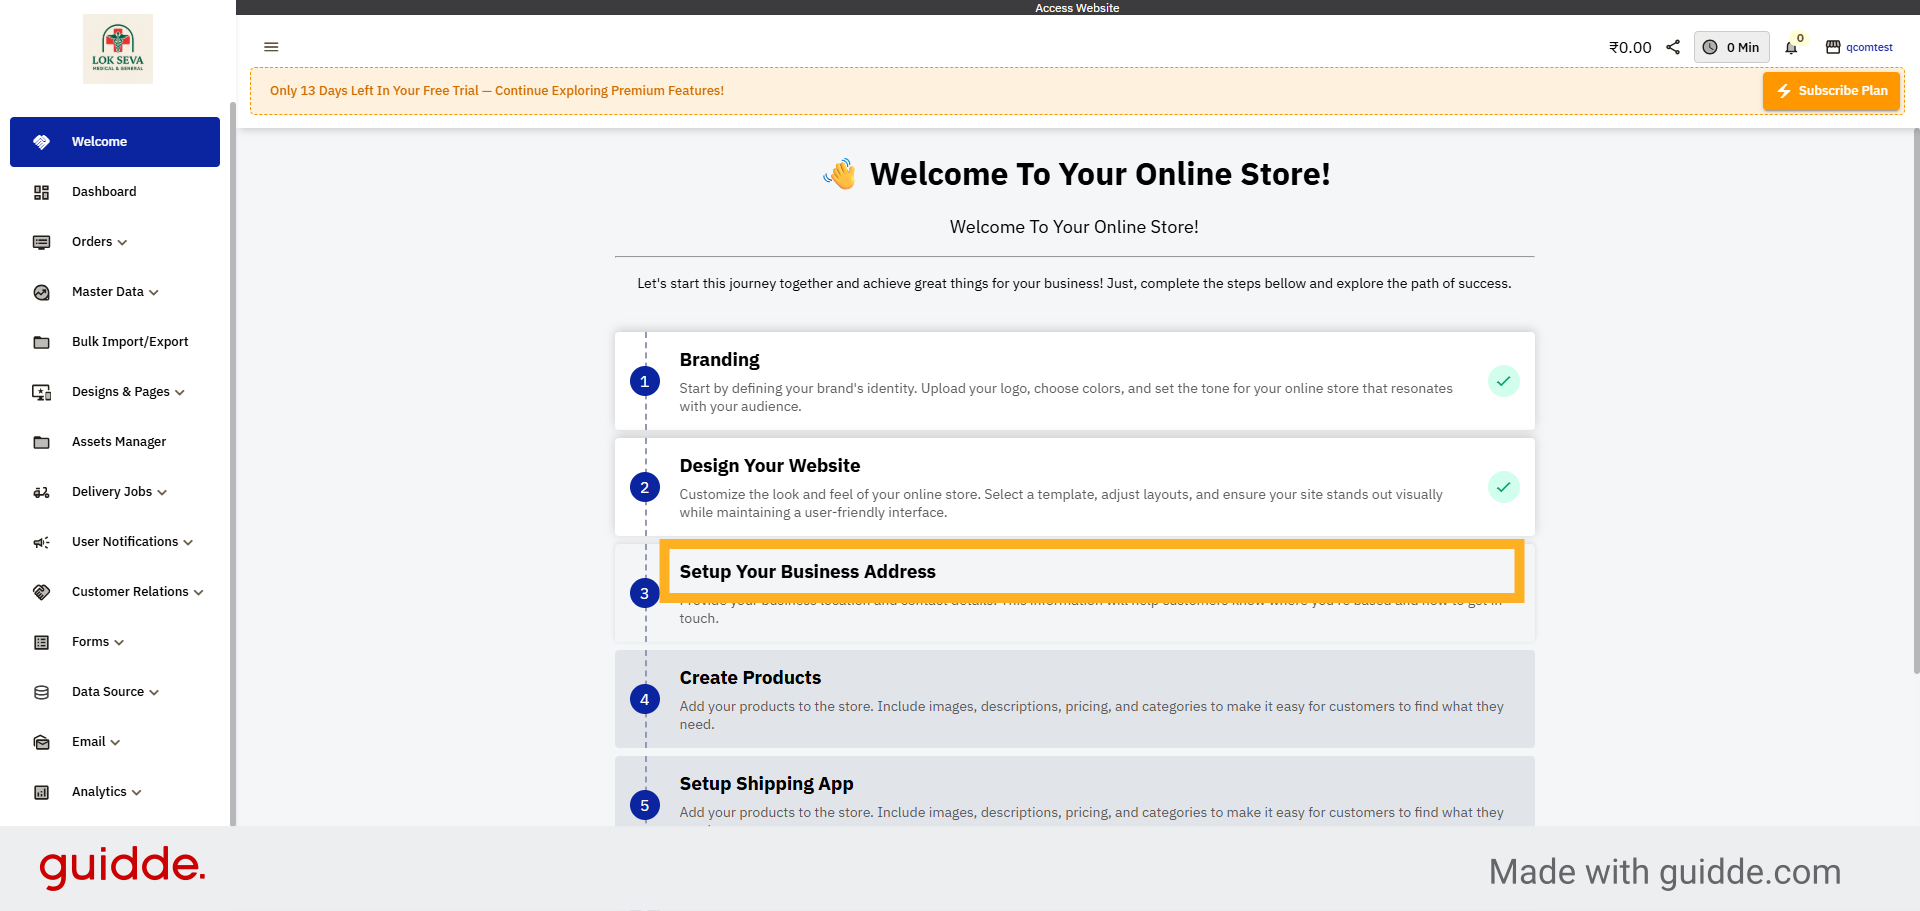
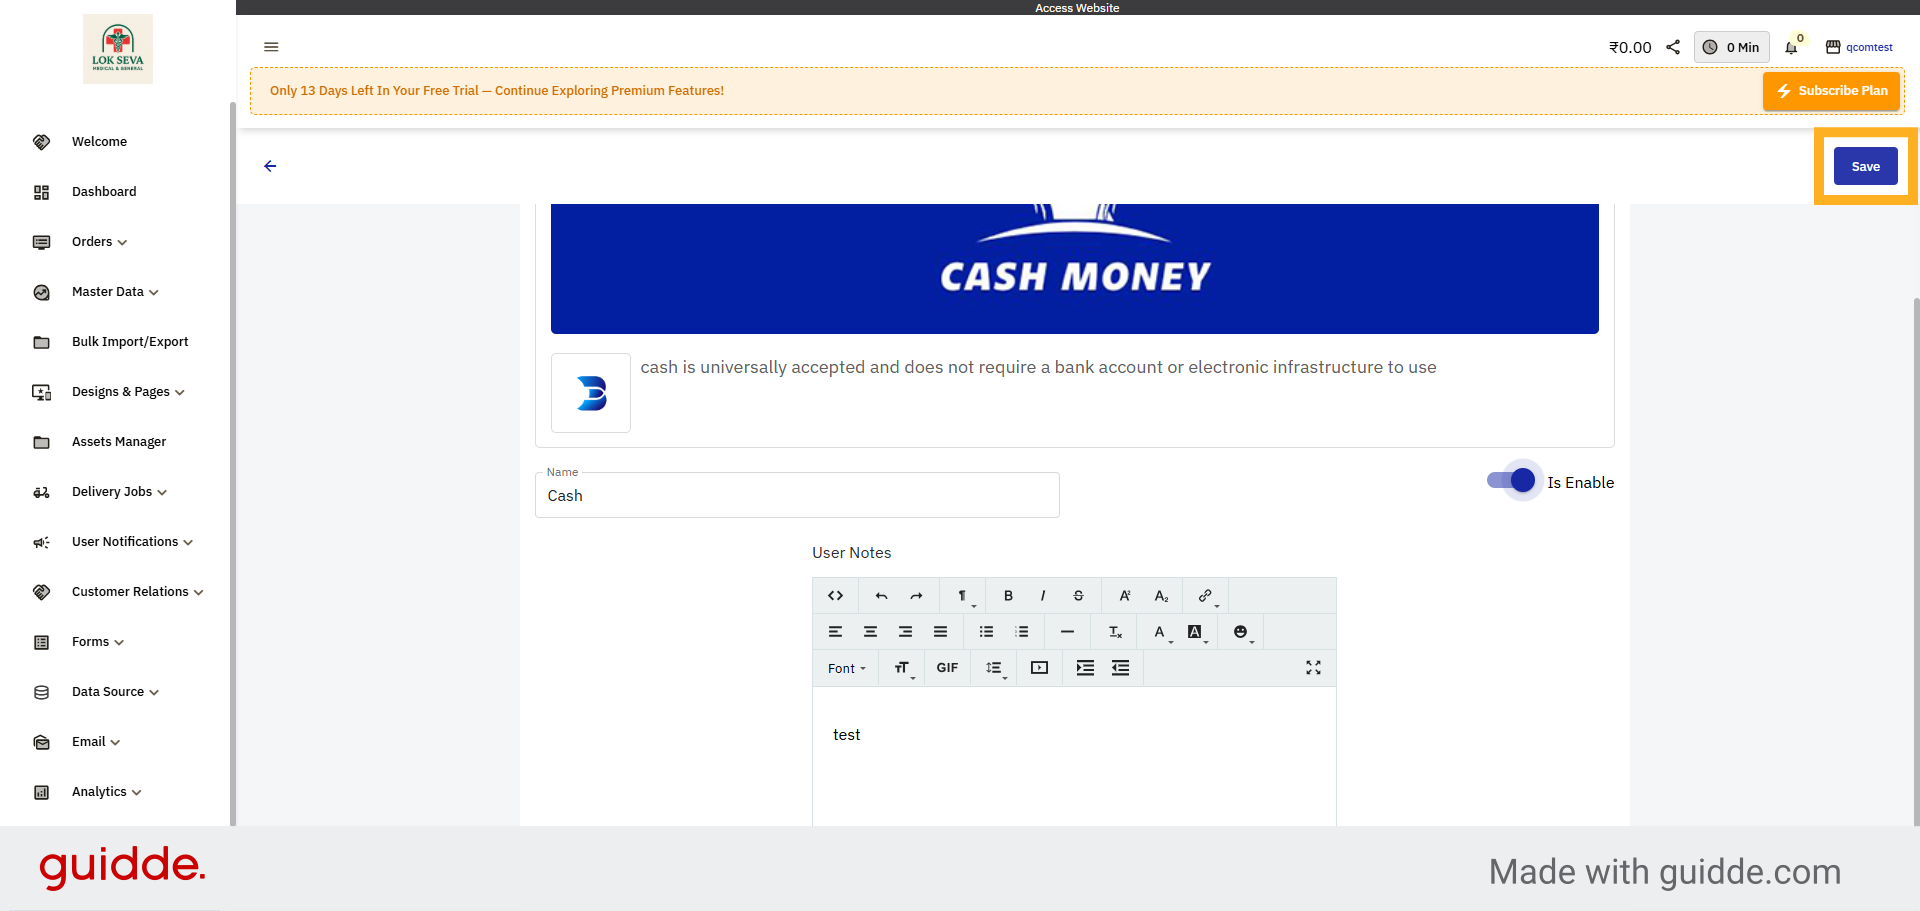
31. Open Business Address Setup
Click Setup Your Business Address to enter your physical location details for the store.
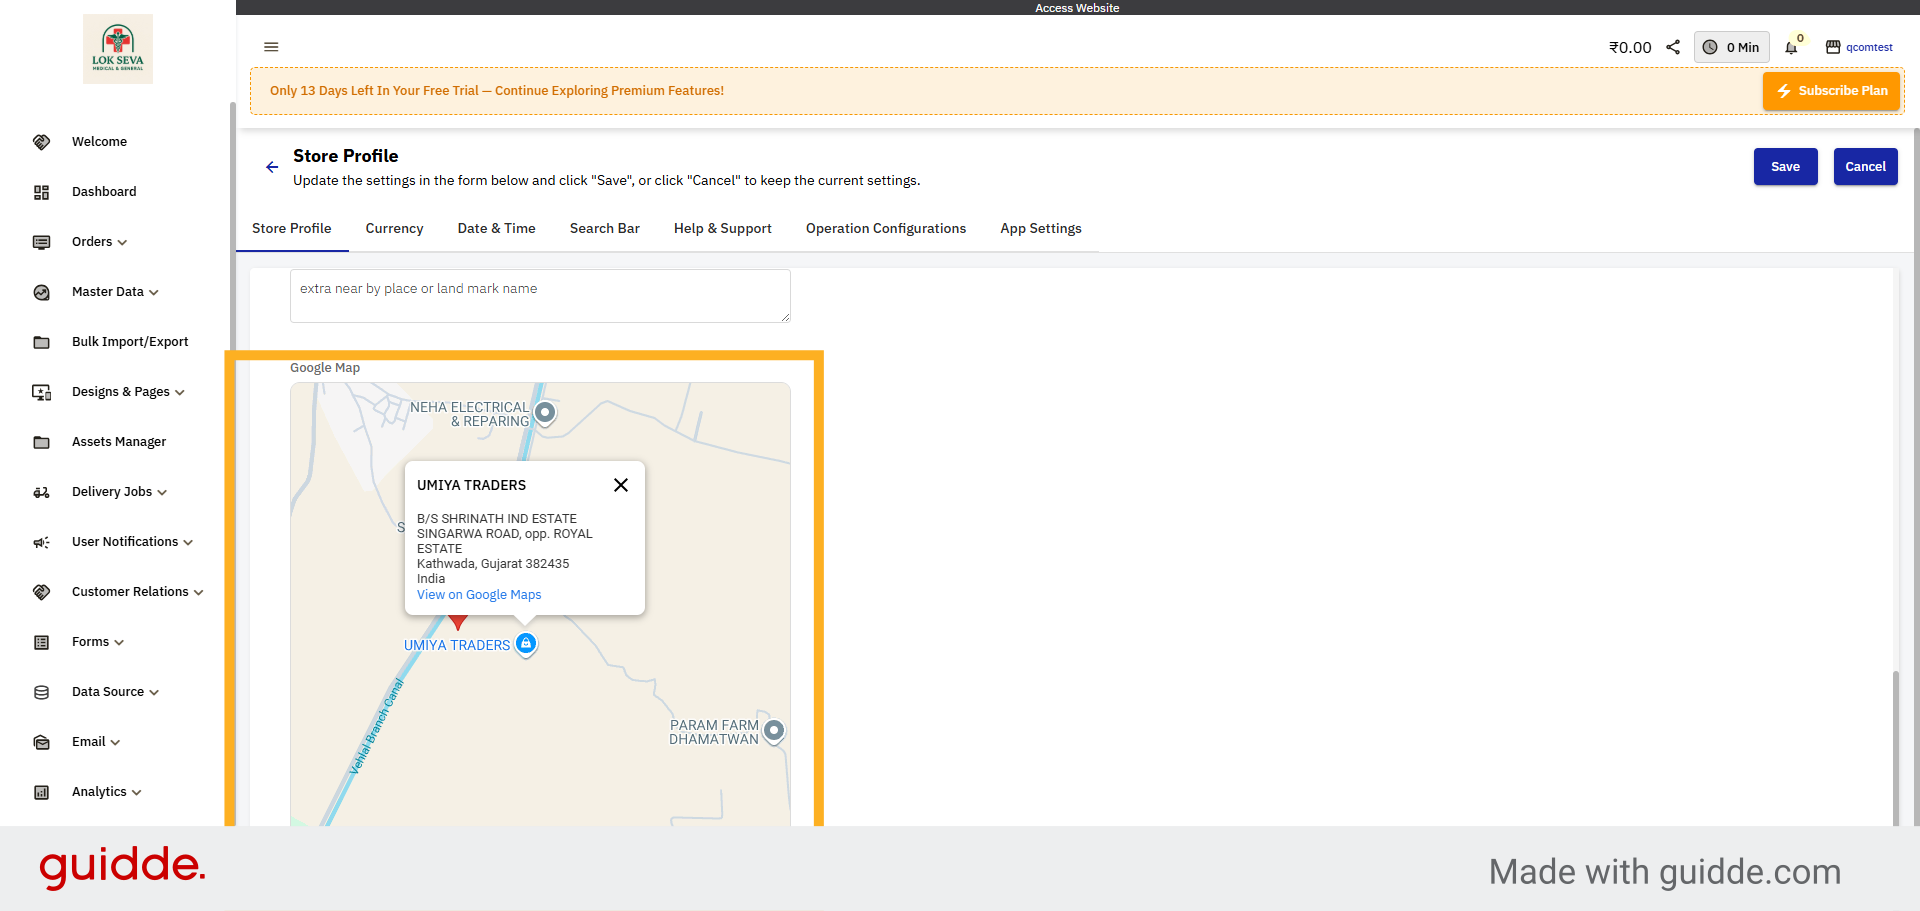
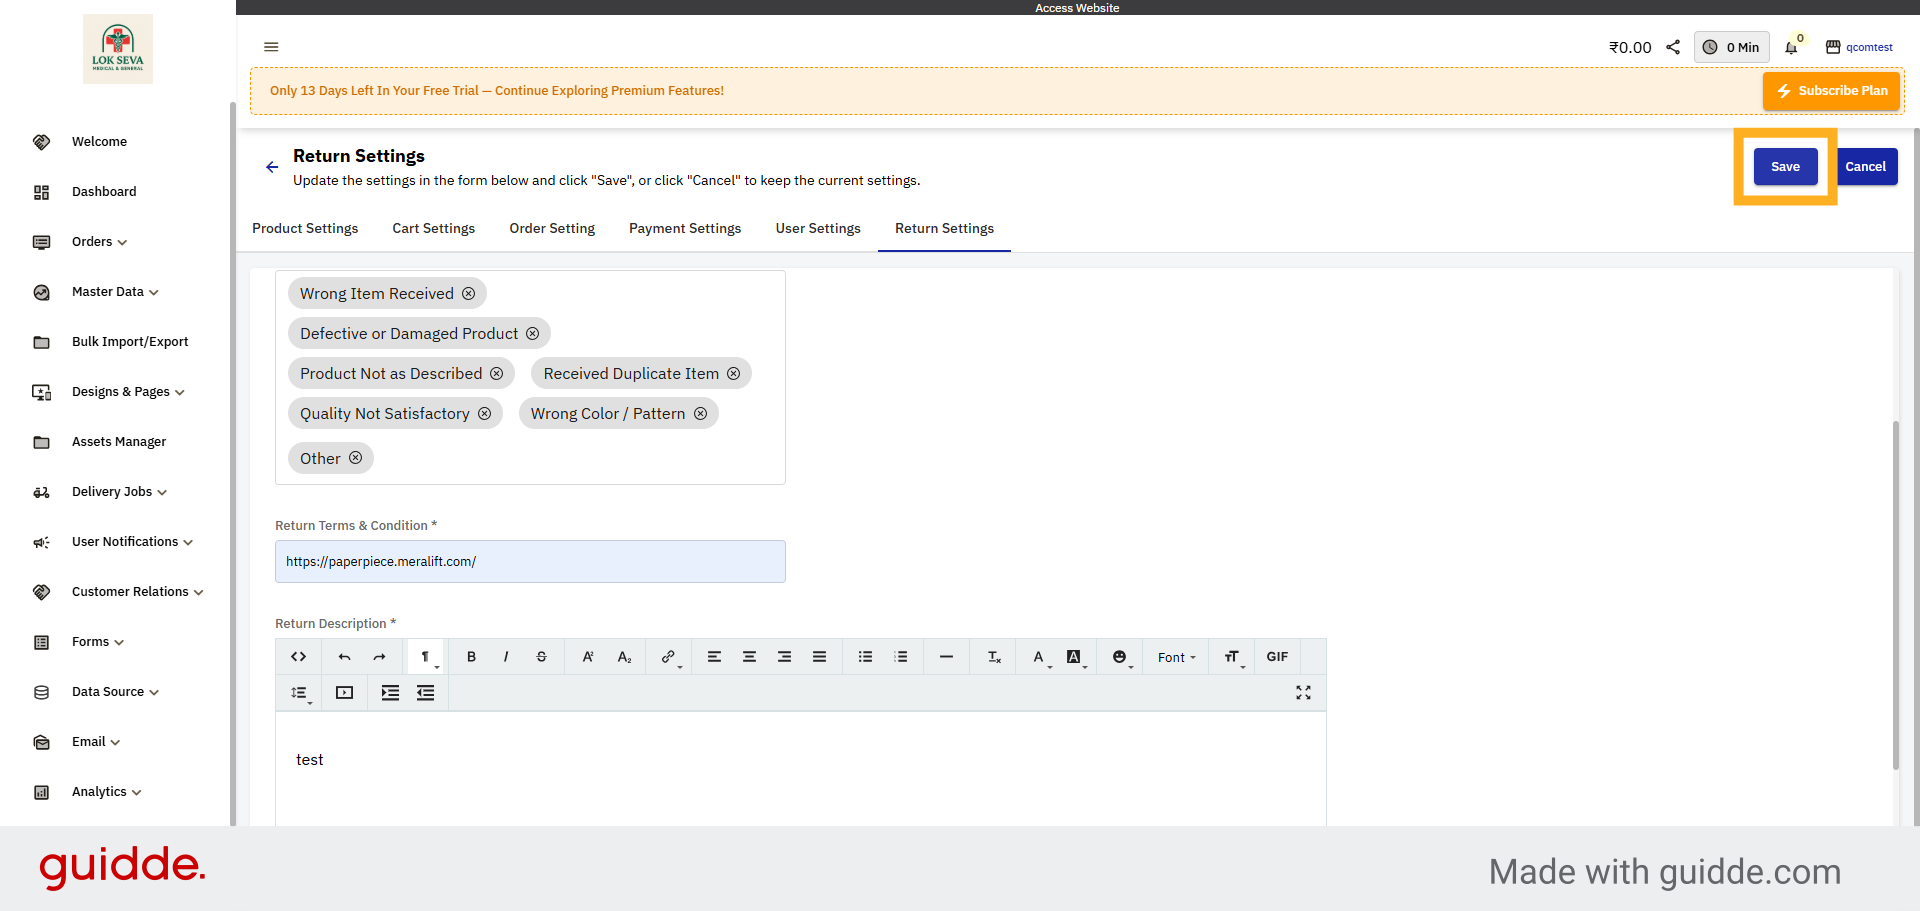
32. setup address in map
double click in map to set location
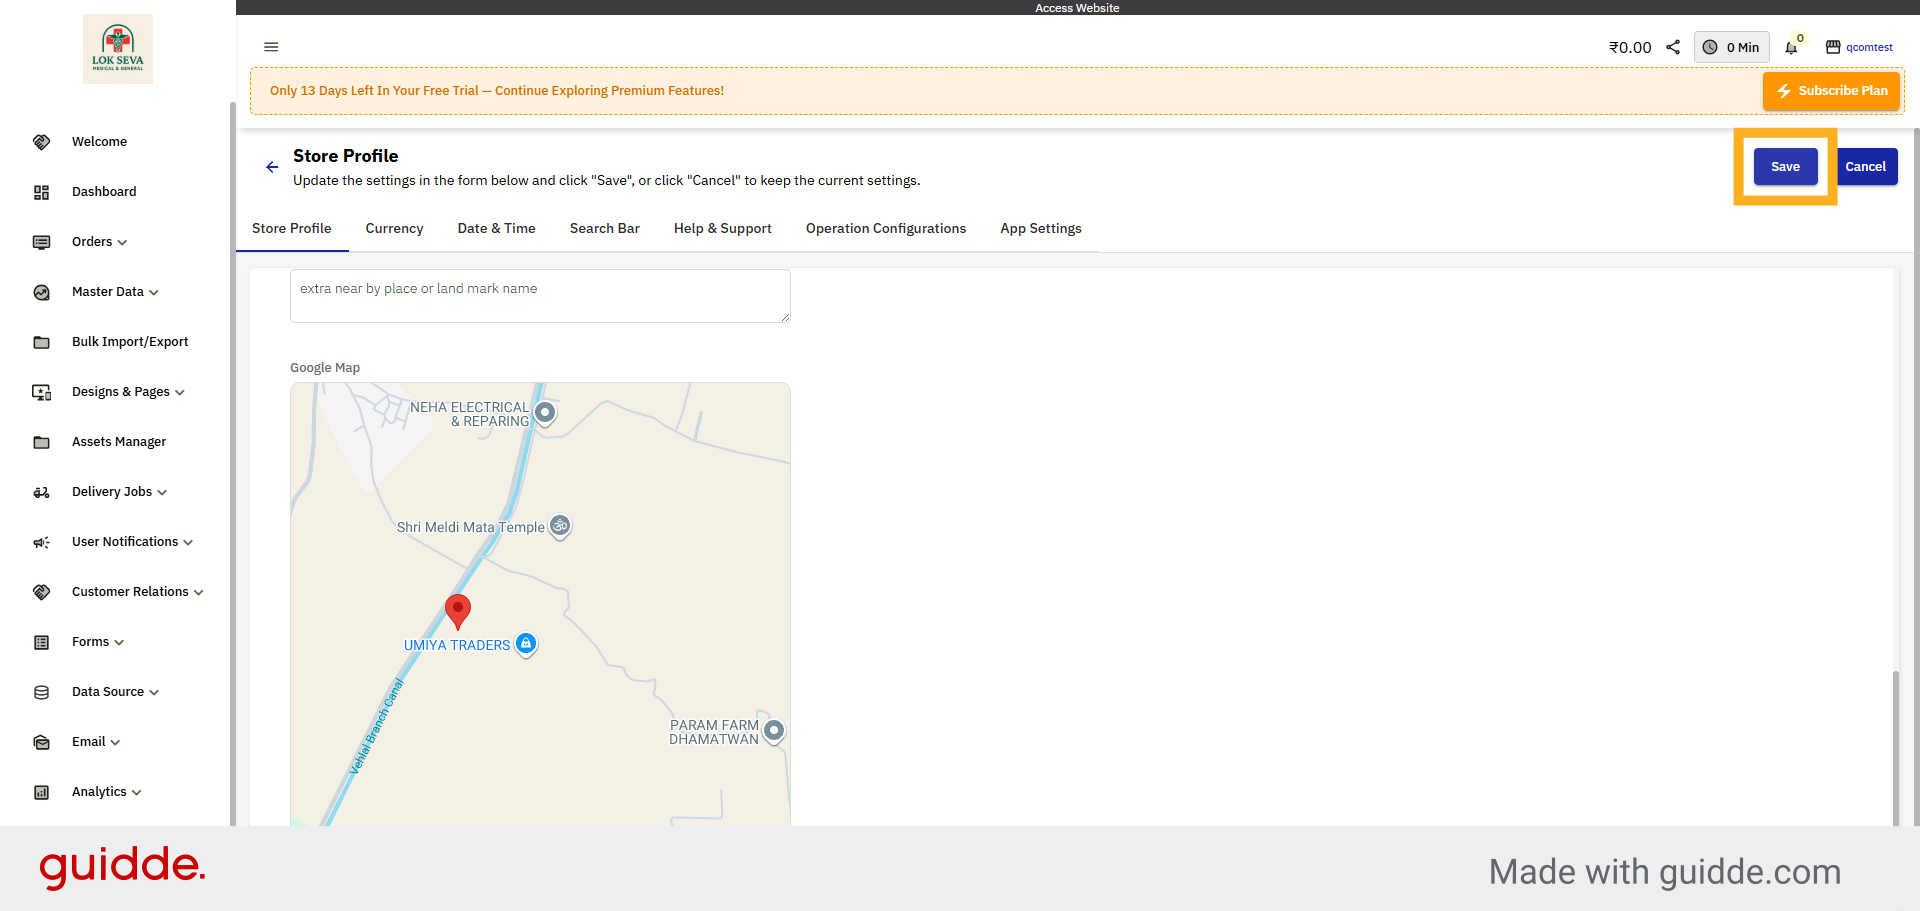
33. Save Business Address
Click Save to store your business address information within the platform.
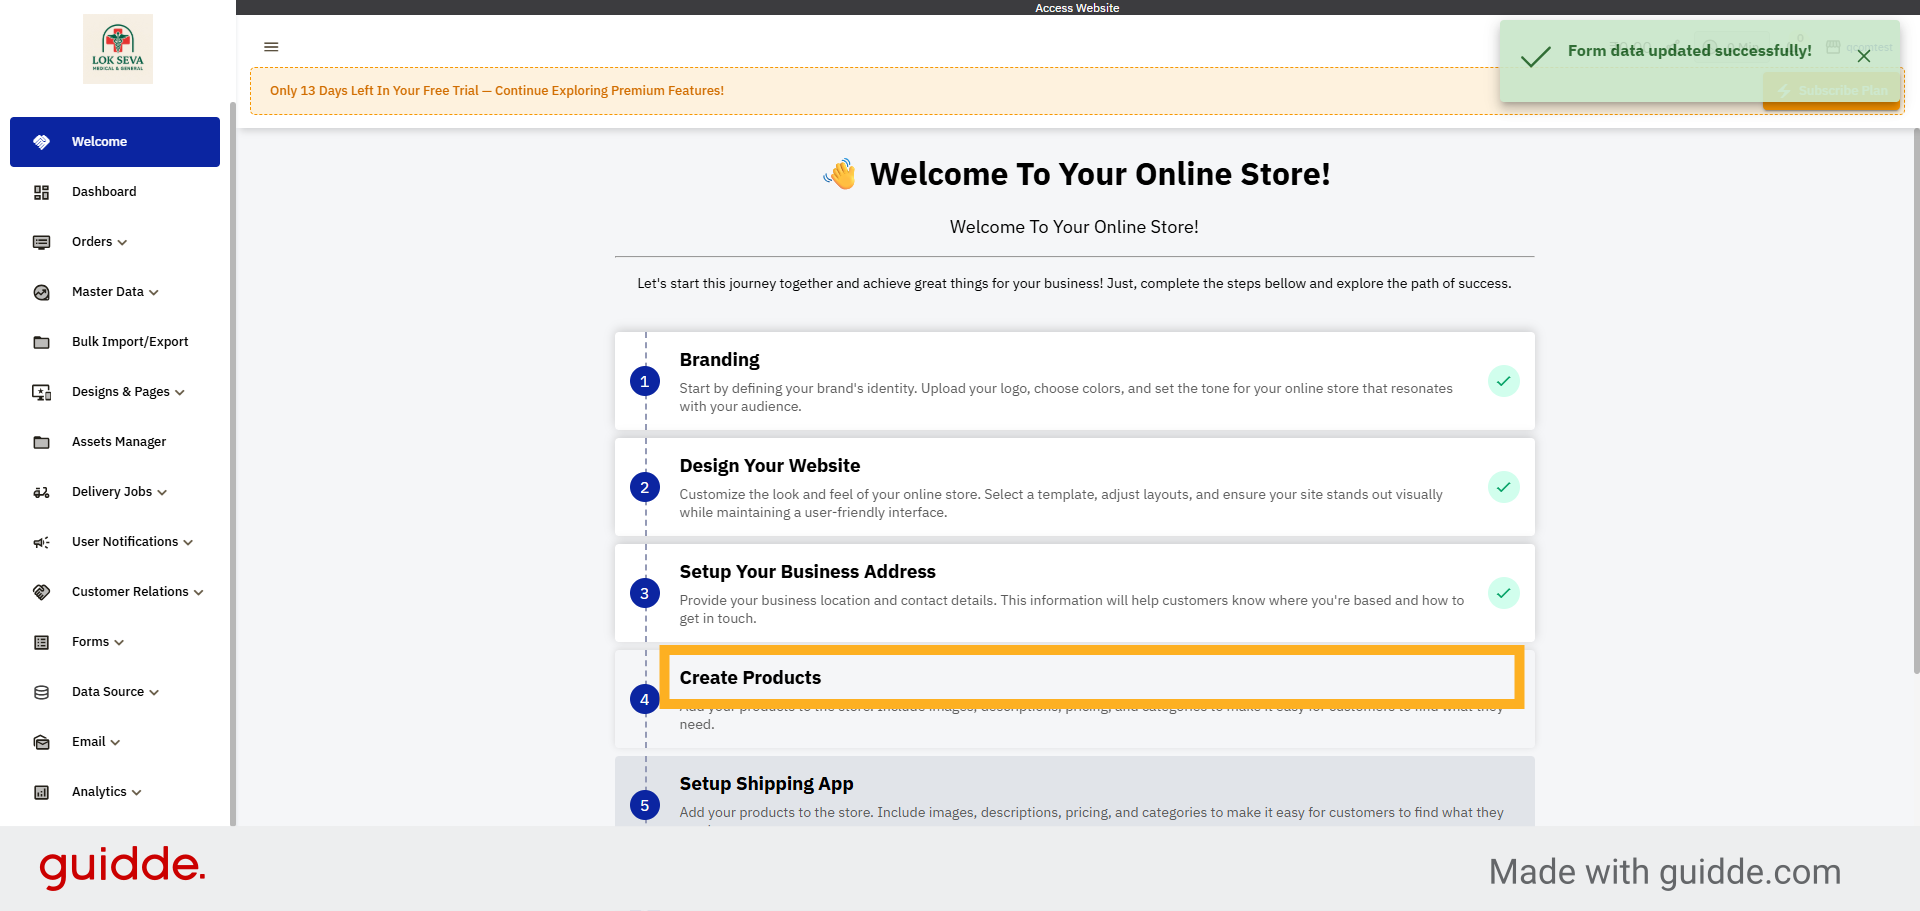
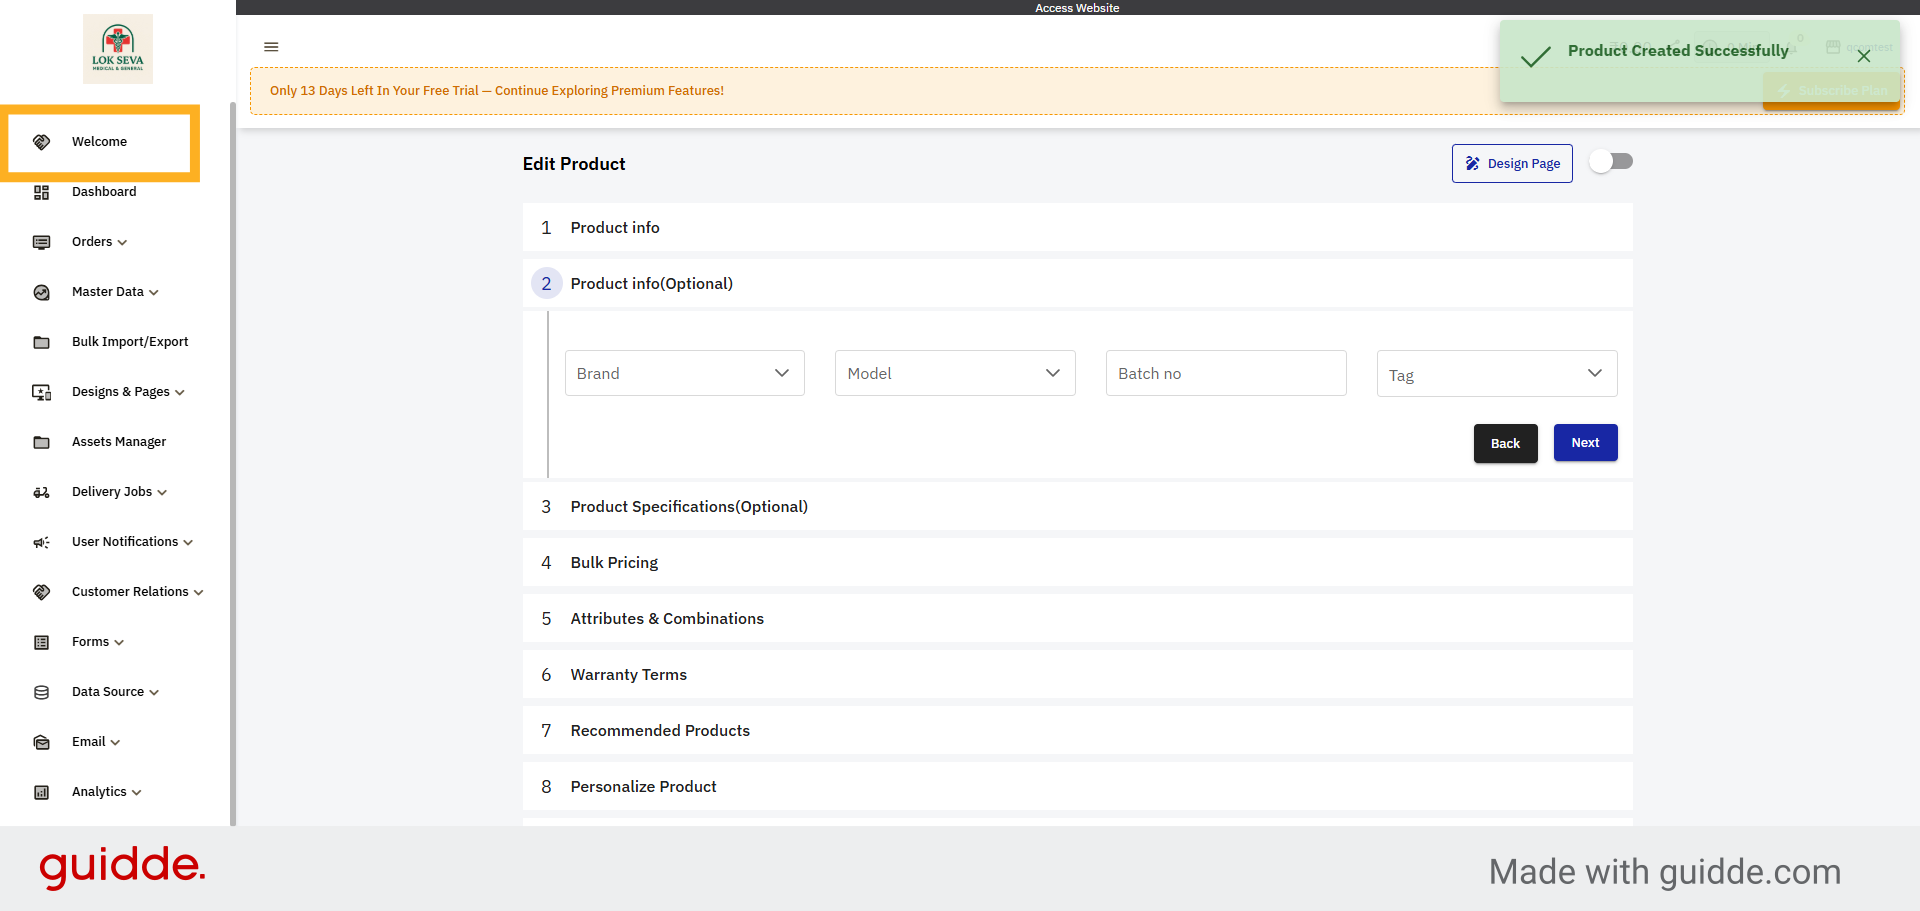
34. Open Product Creation
Click Create Products to start adding items to your Q-commerce store inventory.
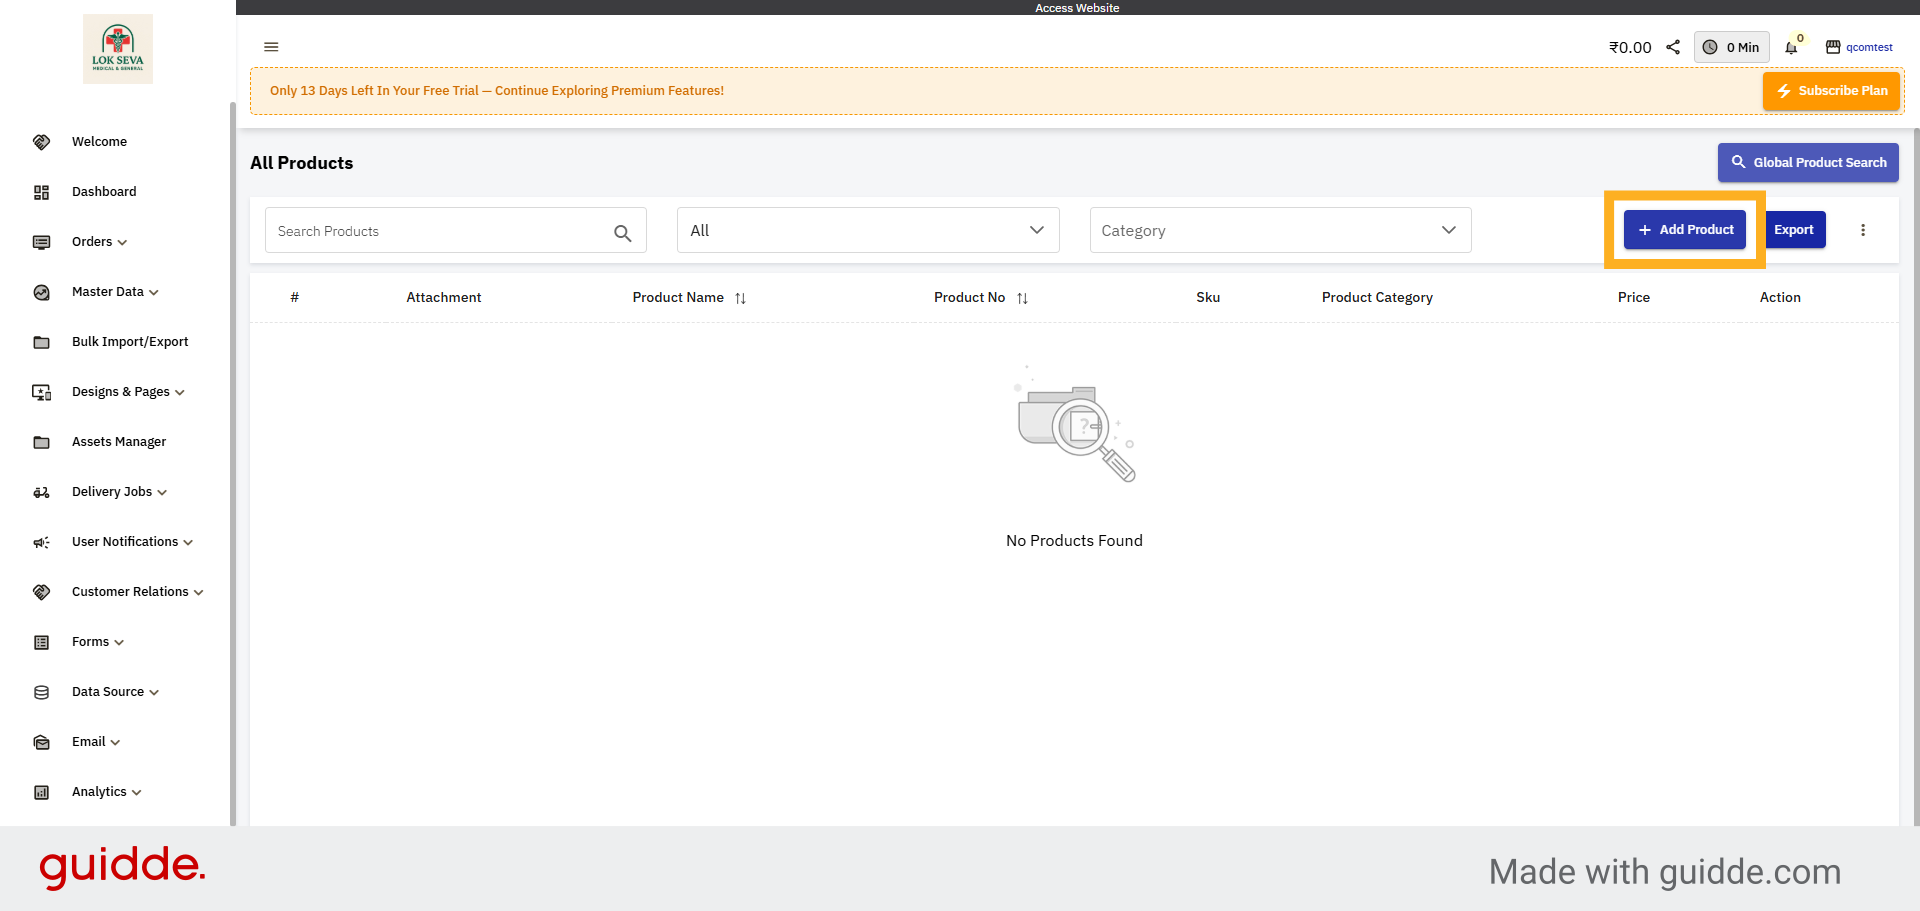
35. Add New Product
Click Add Product to begin entering details for a new item in your inventory.
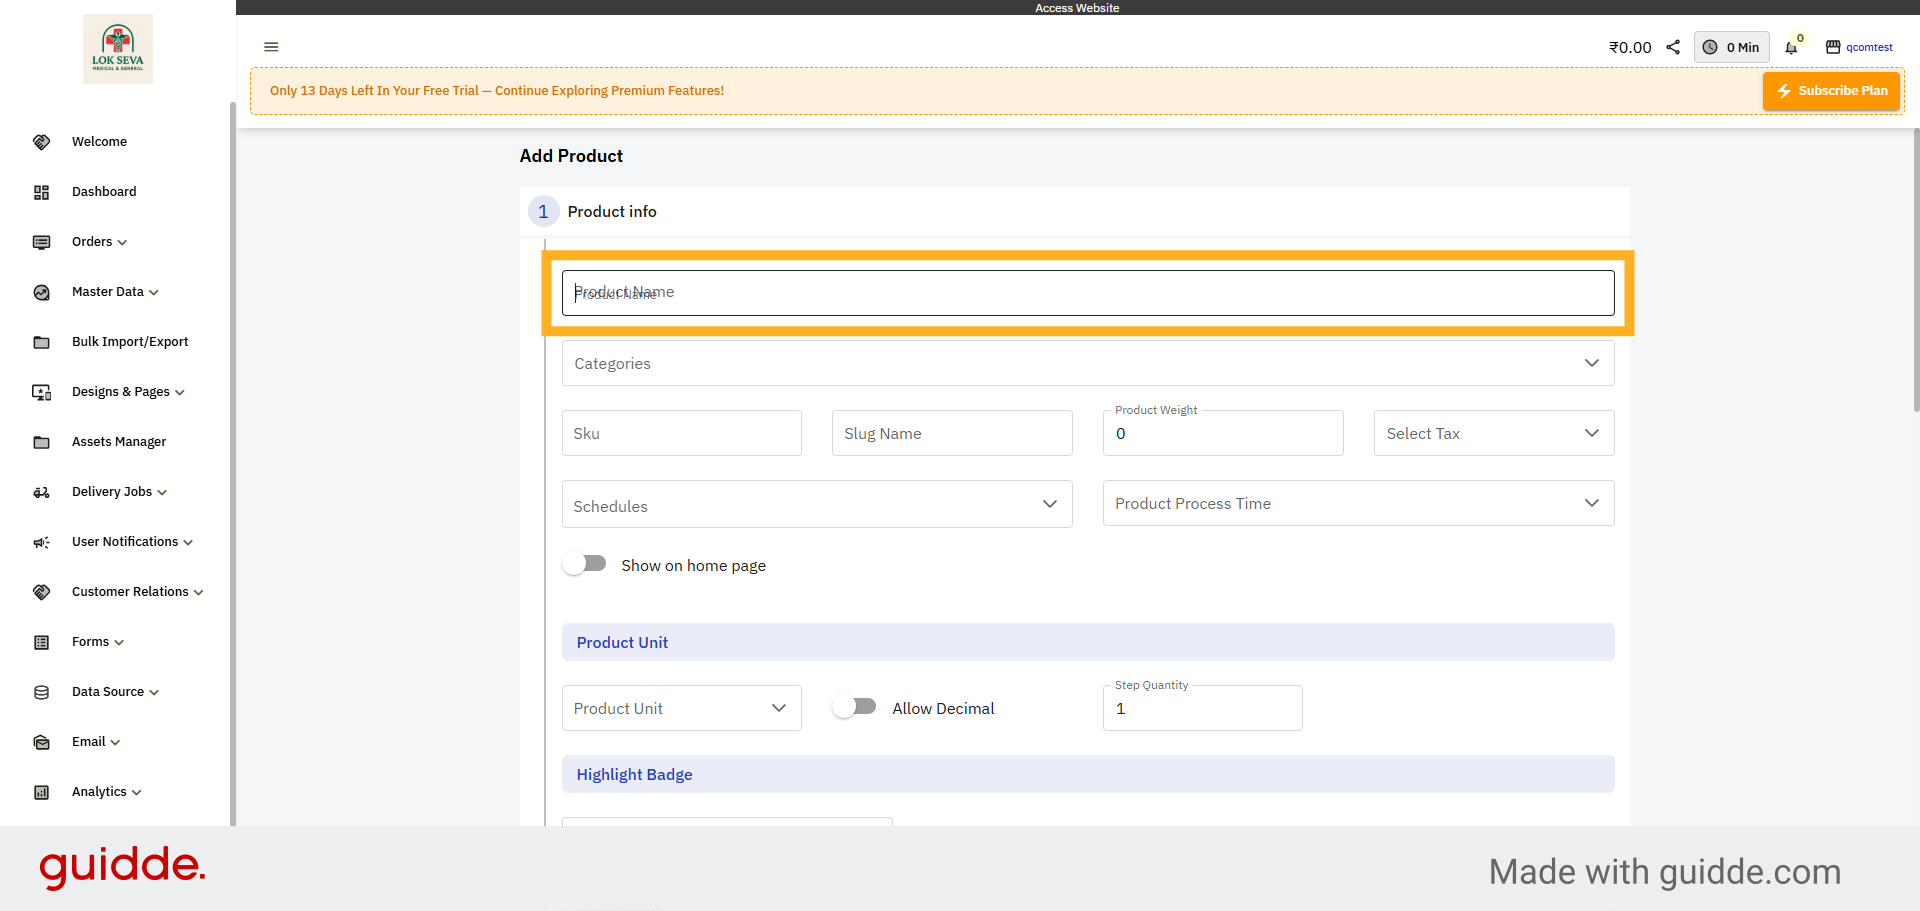
36. Select Product Name Field
Click the Product Name field to input the name of your new product.
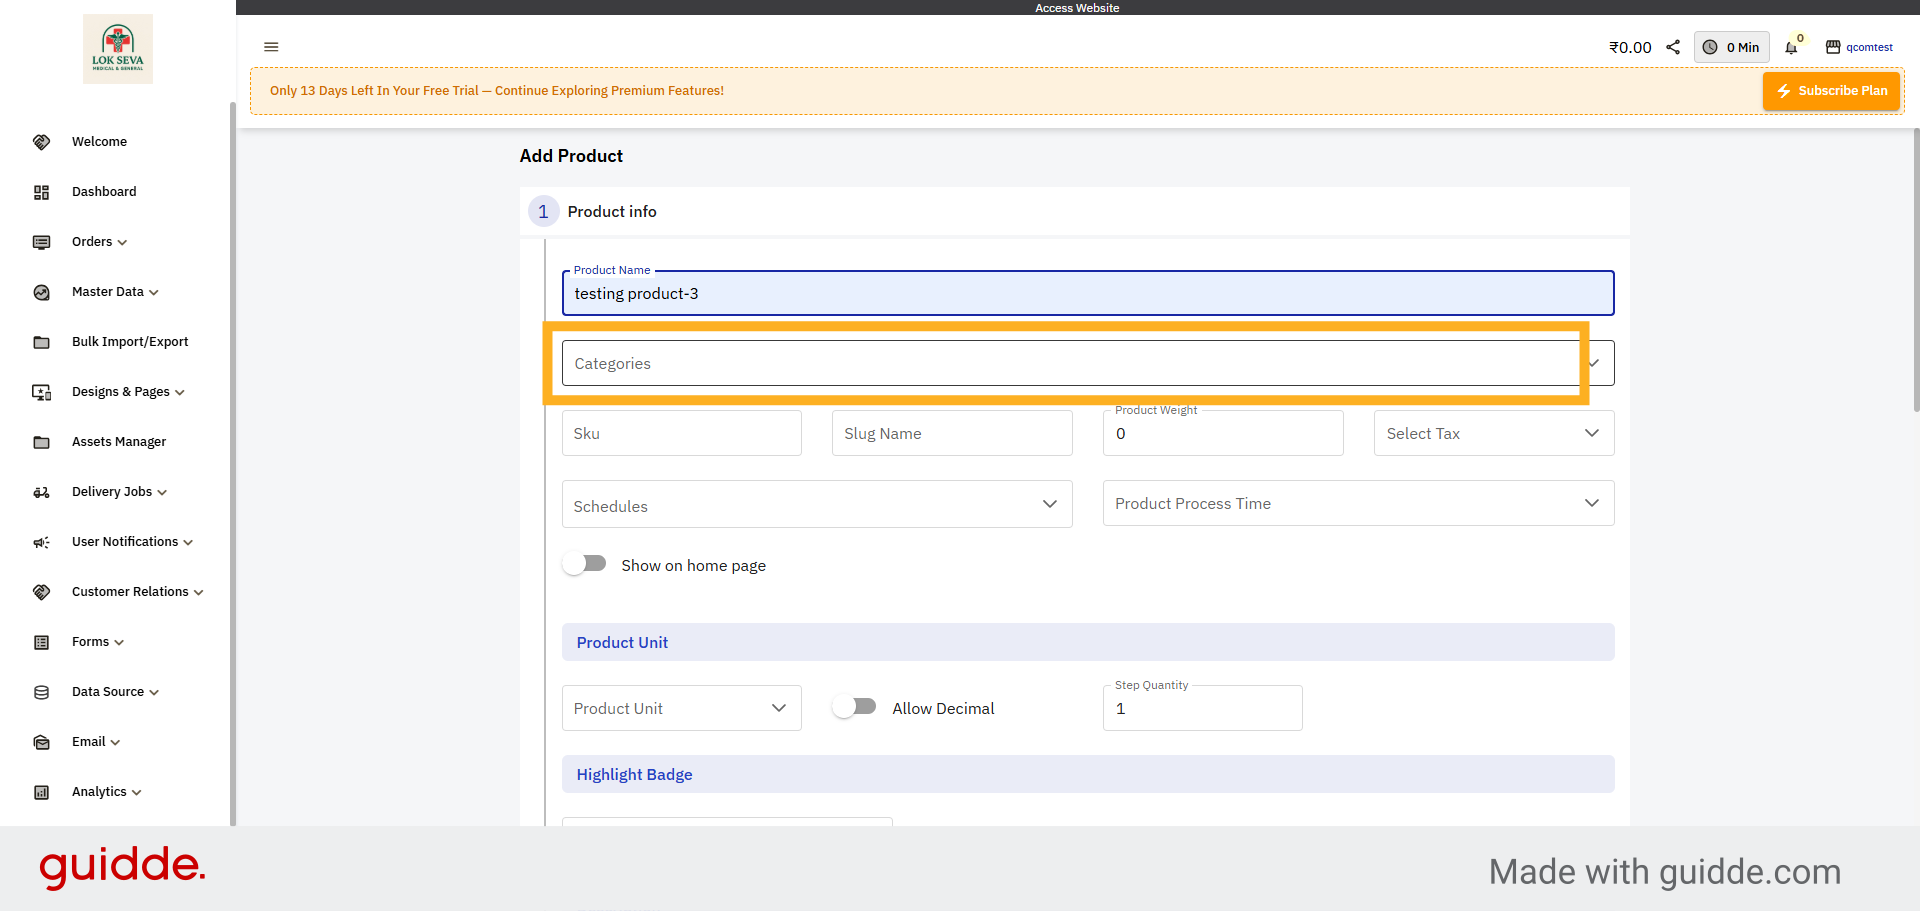
37. Open Categories Section
Click Categories to organize your product into relevant groups for easier browsing.
38. Add New Category
Click Add Category to create a new classification for your products.
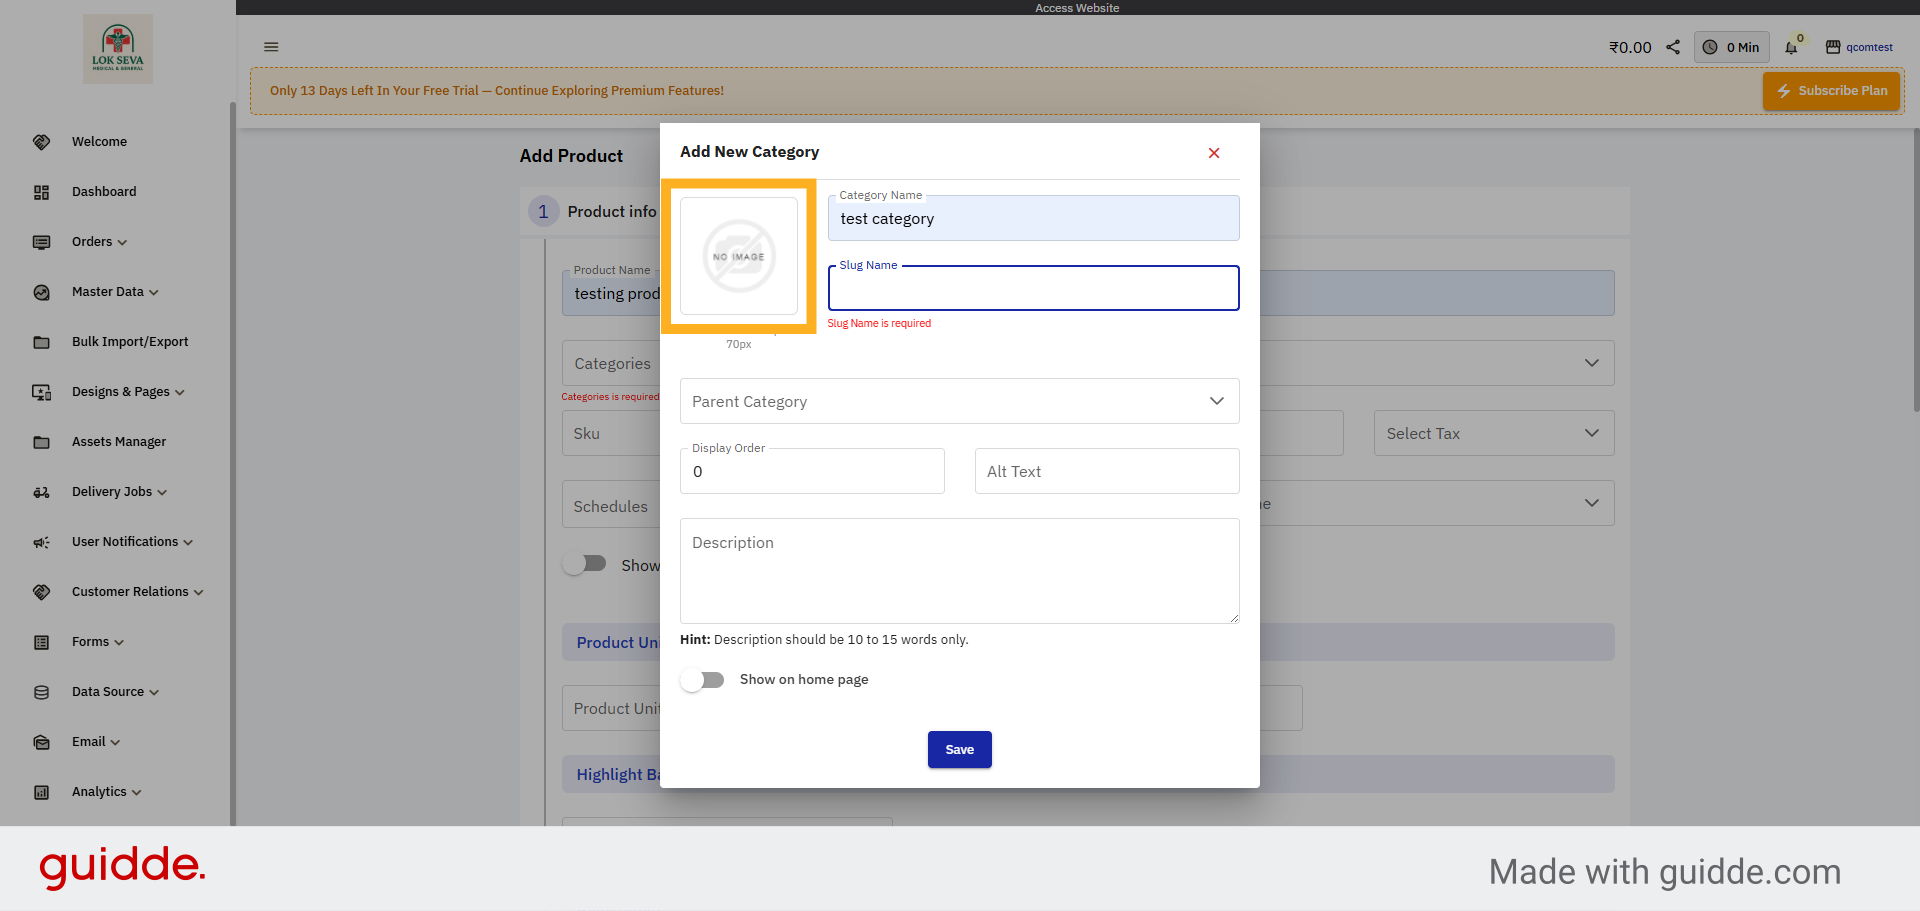
39. Select Category Name Field
Click the Category Name field to name your new product category.
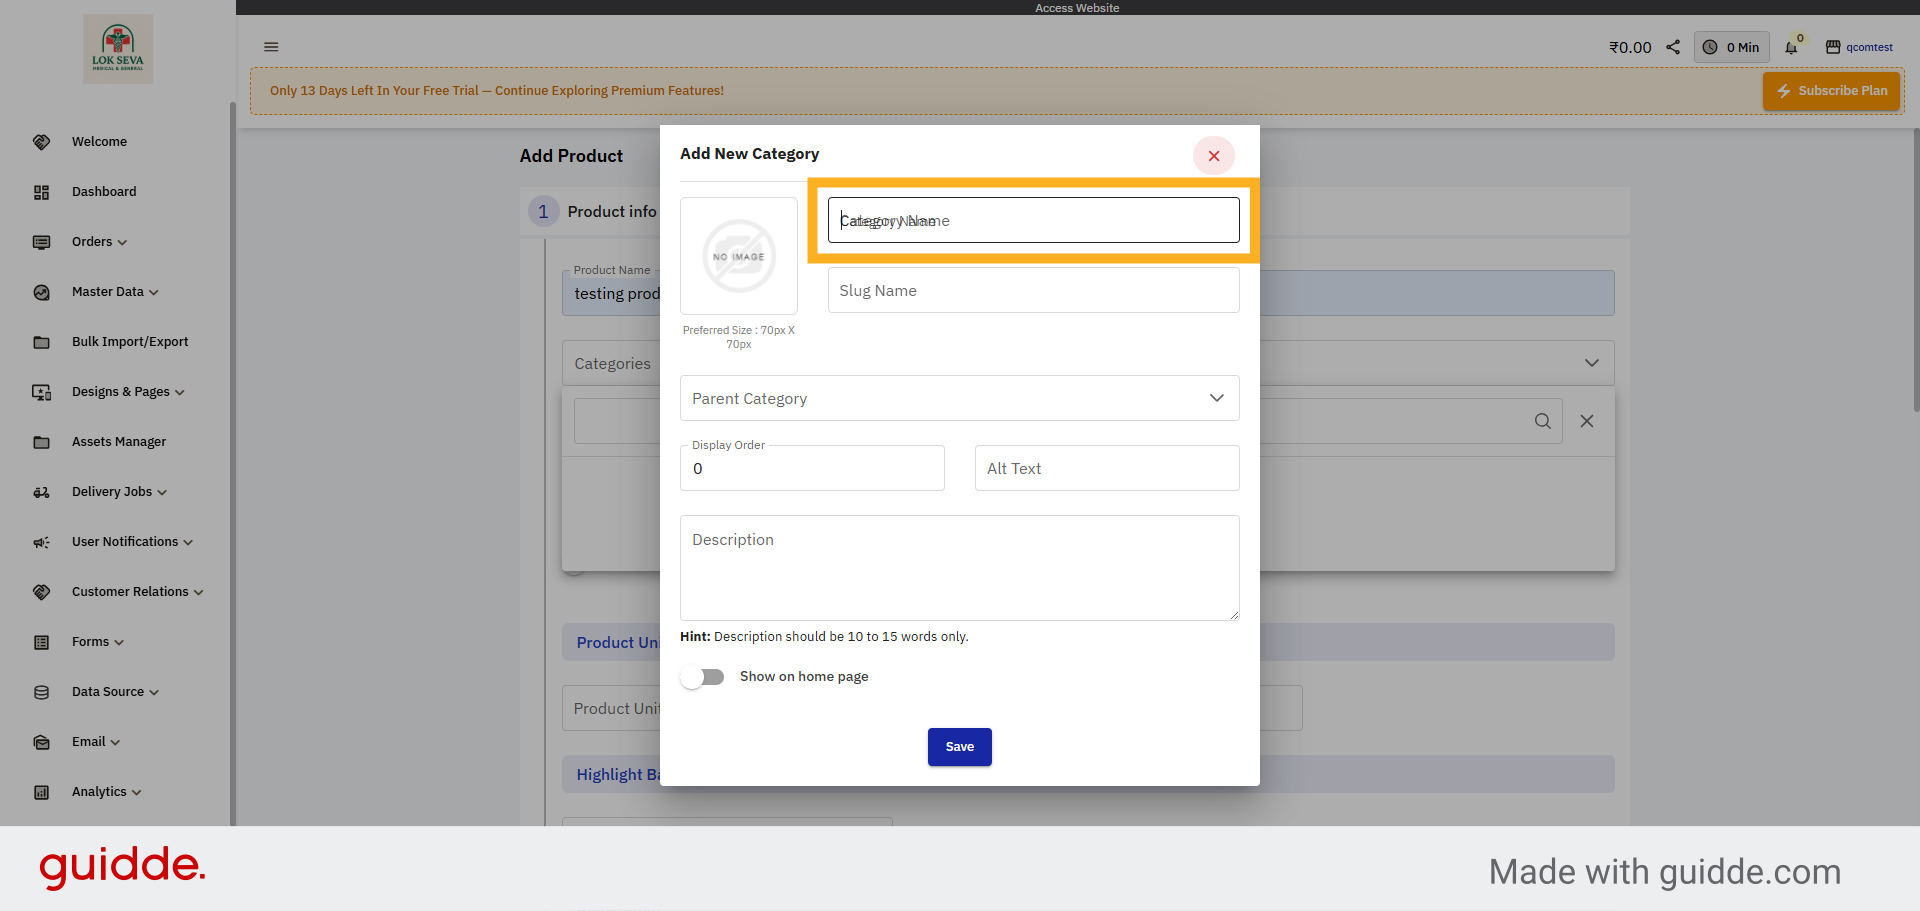
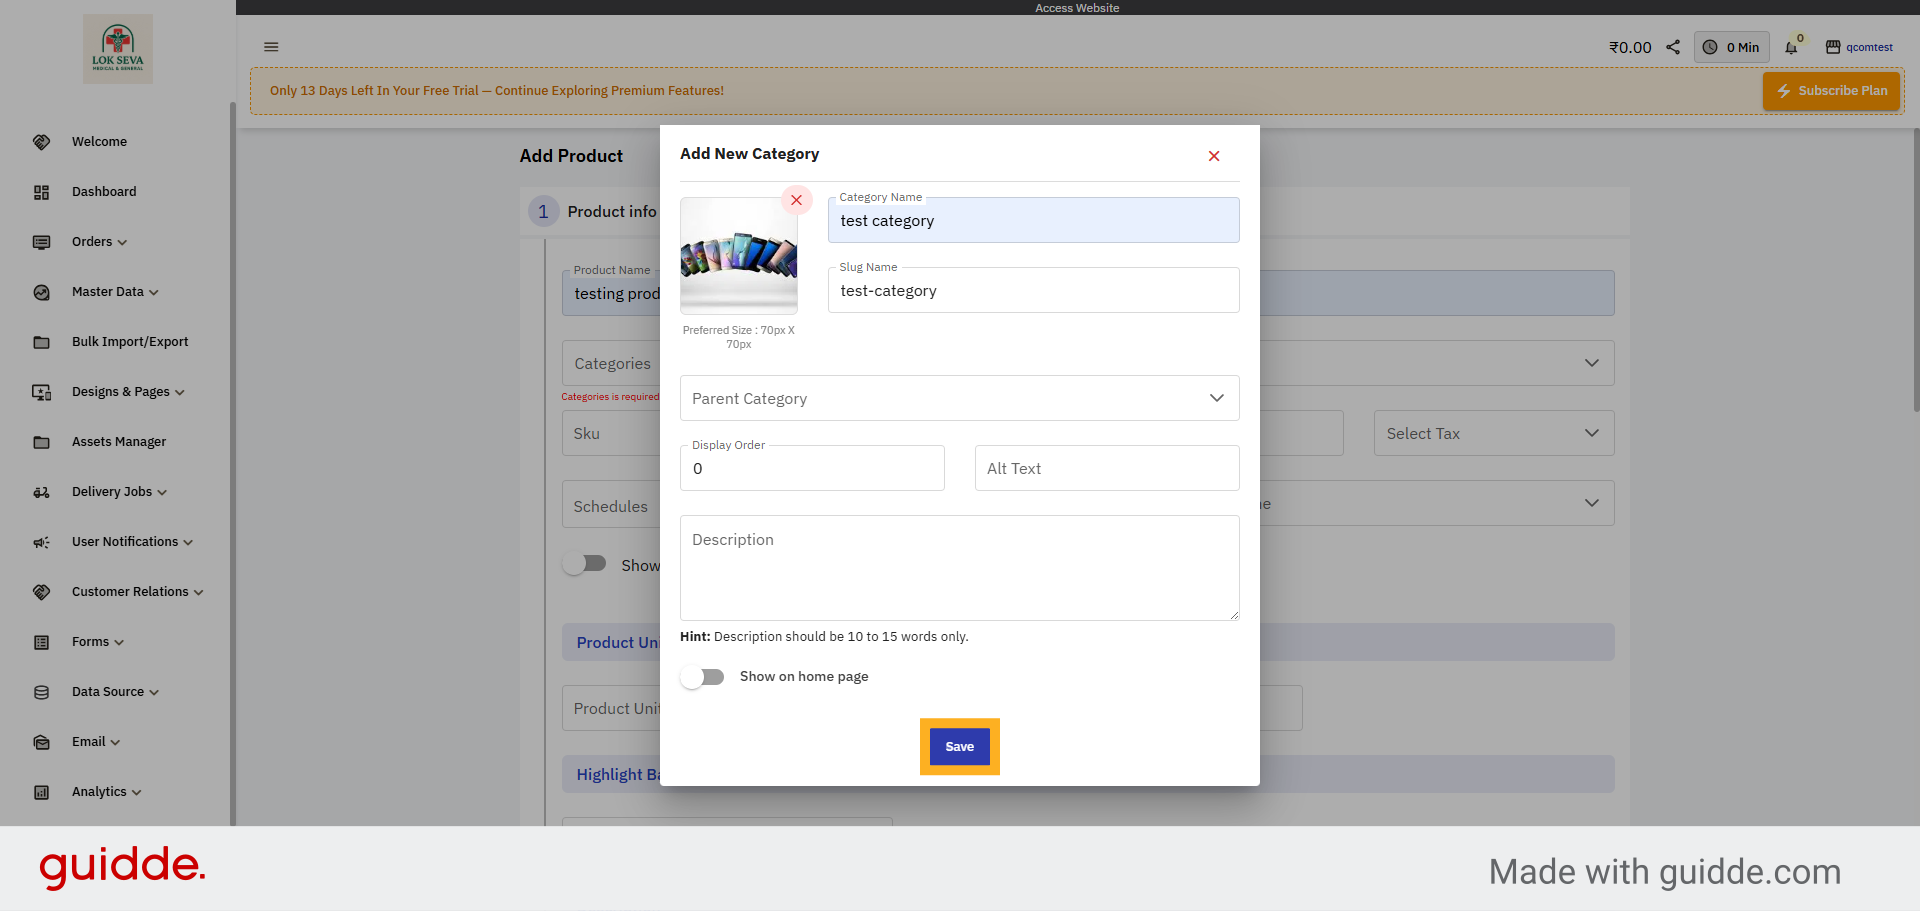
40. Upload Category Image
Click to focus on the product details area for further input.
41. Save Category Details
Click Save to store your product information and make it available in your store.
42. Select Product Unit Field
Click the Product Unit field to specify the measurement unit for your product.
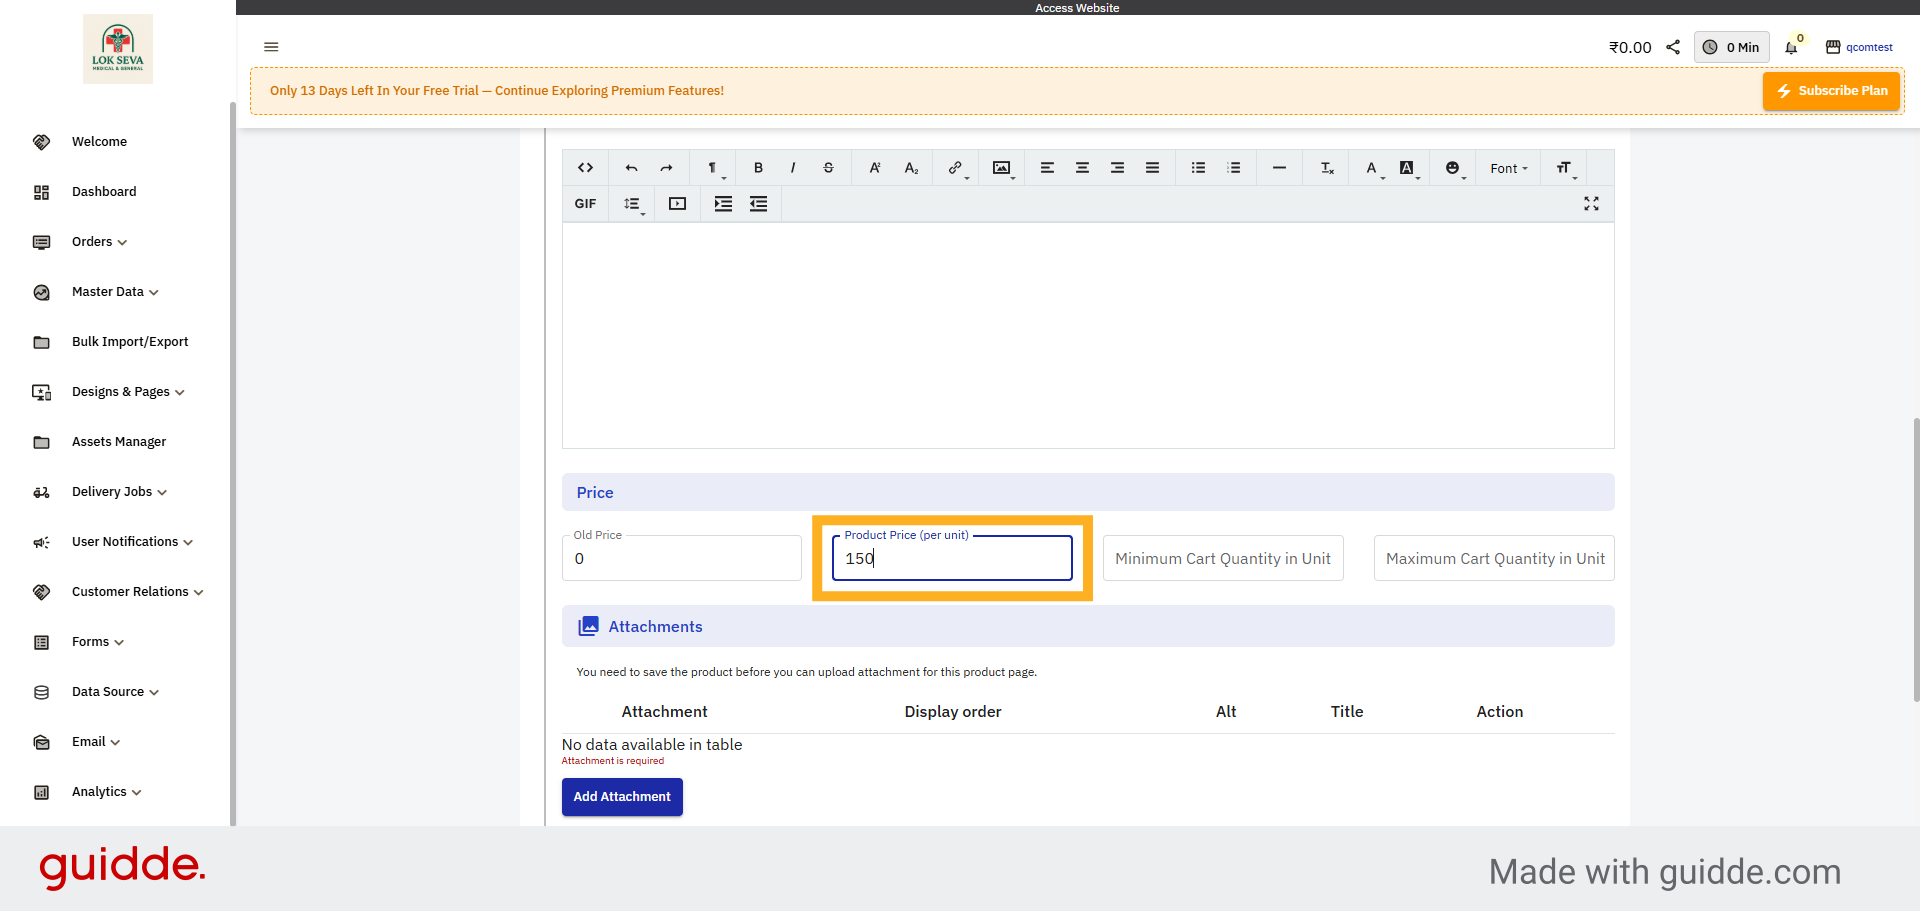
43. Enter Product Price
Enter the price per unit to define the cost customers will pay for the product.
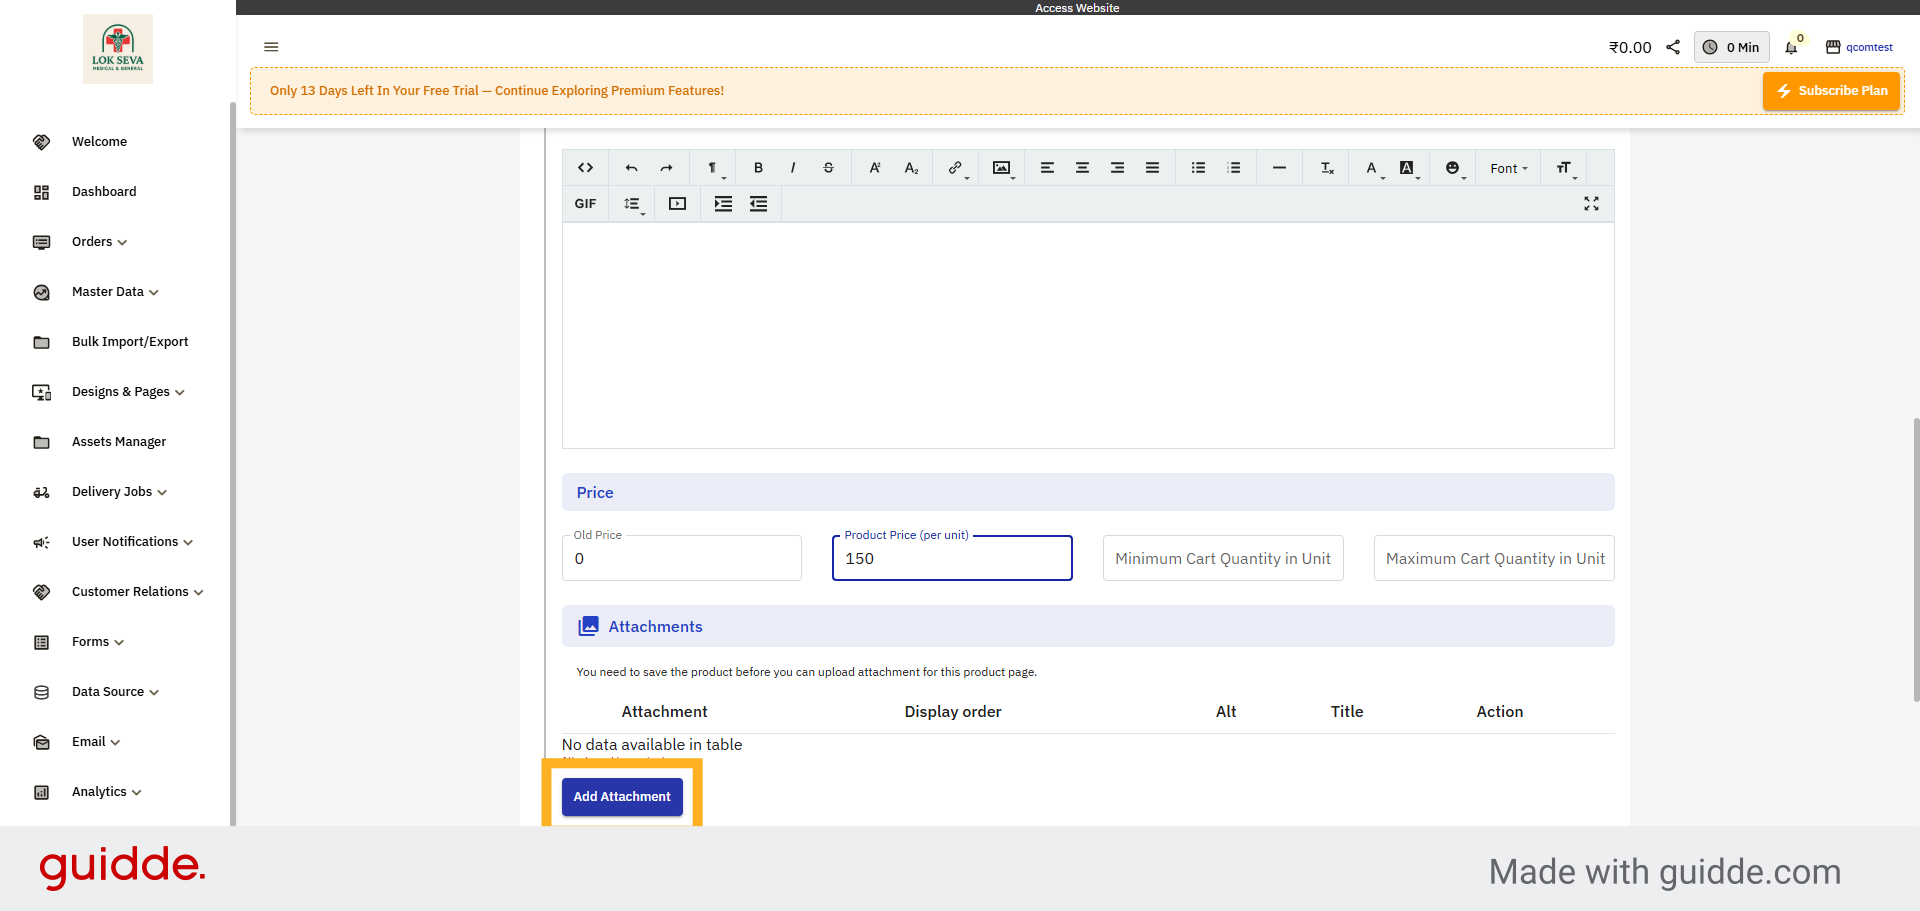
44. Add Product Attachment
Click Add Attachment to include additional files or images related to your product.
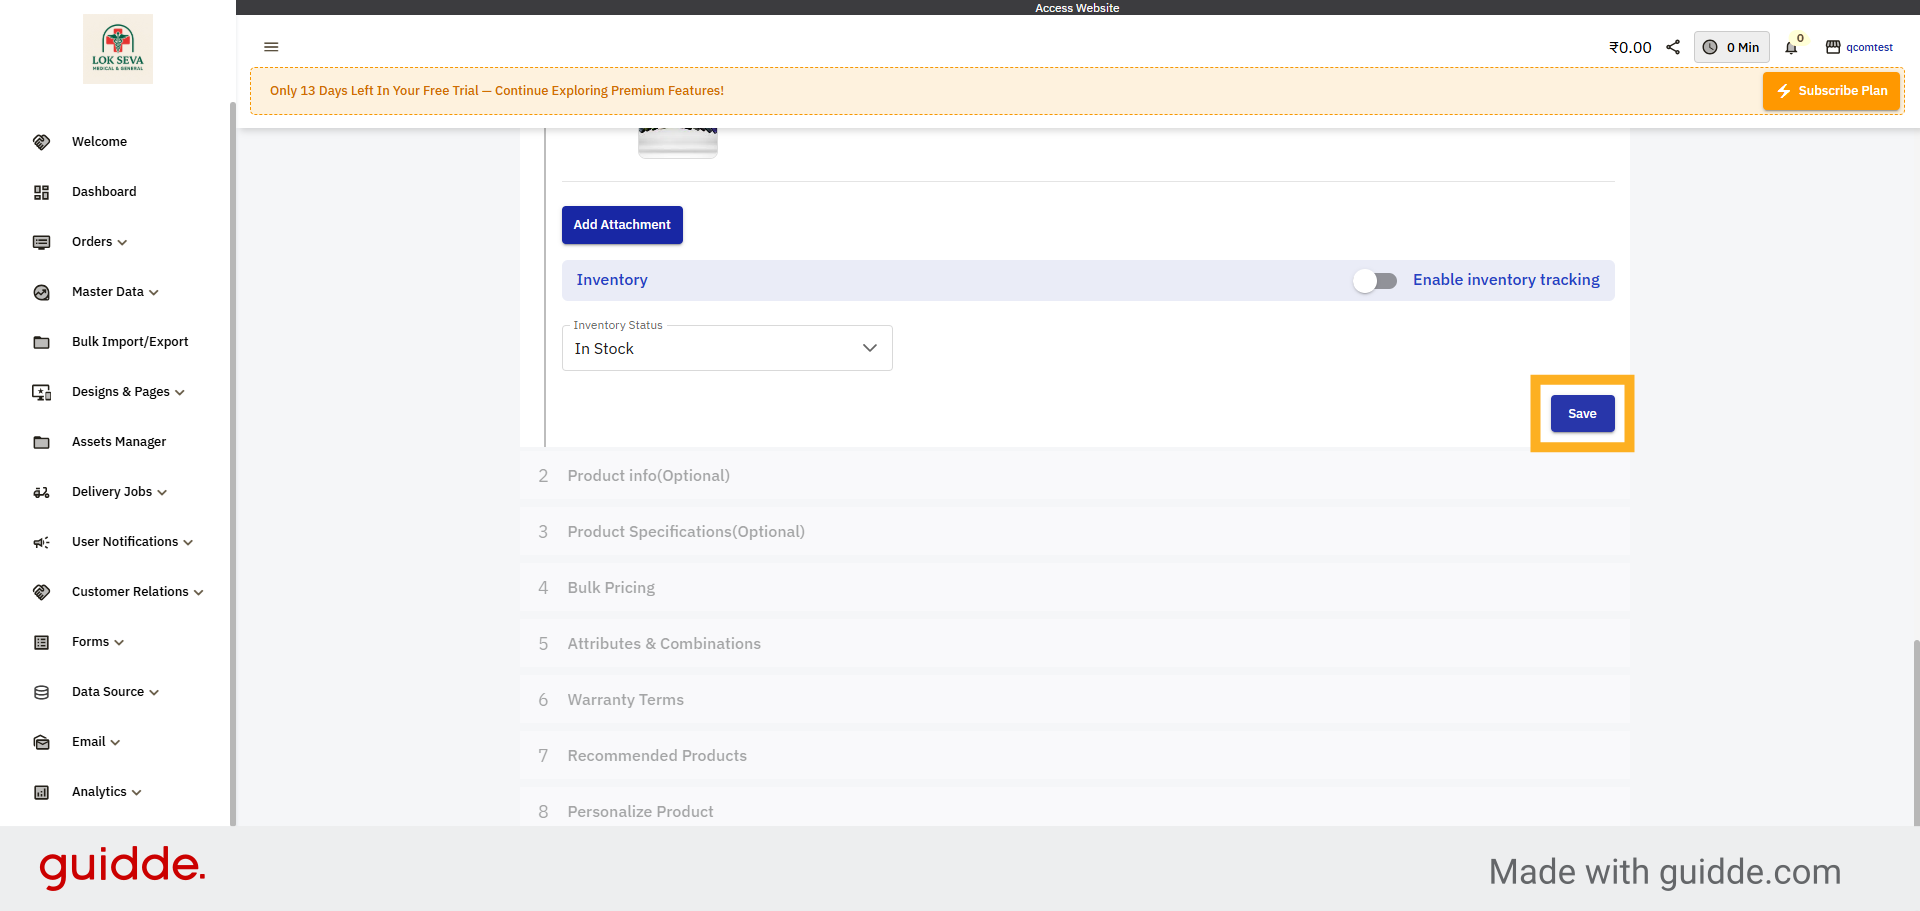
45. Save Product Updates
Click Save to apply all changes and updates to your product information.
46. Return To Welcome Screen
Click Welcome to go back to the main dashboard of your Boniii account.
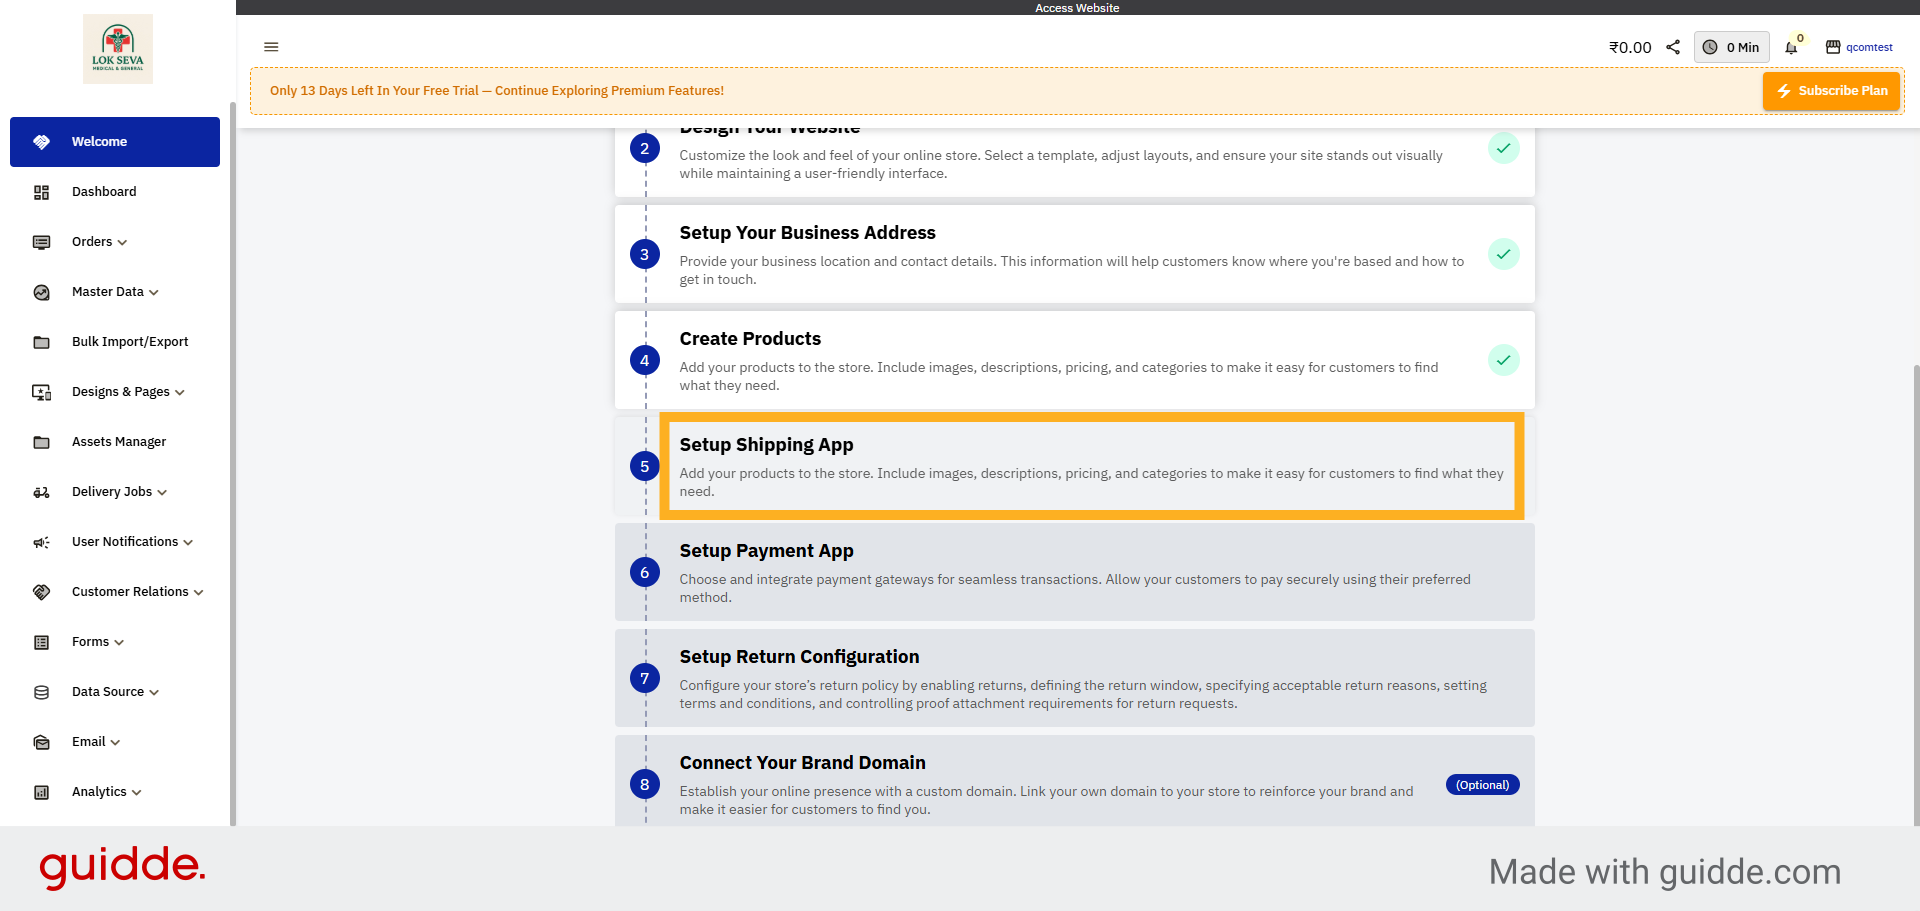
47. Setup Shipping Apps
Click Setup Shipping App to configure delivery options and add your products to the store with
descriptions and pricing.
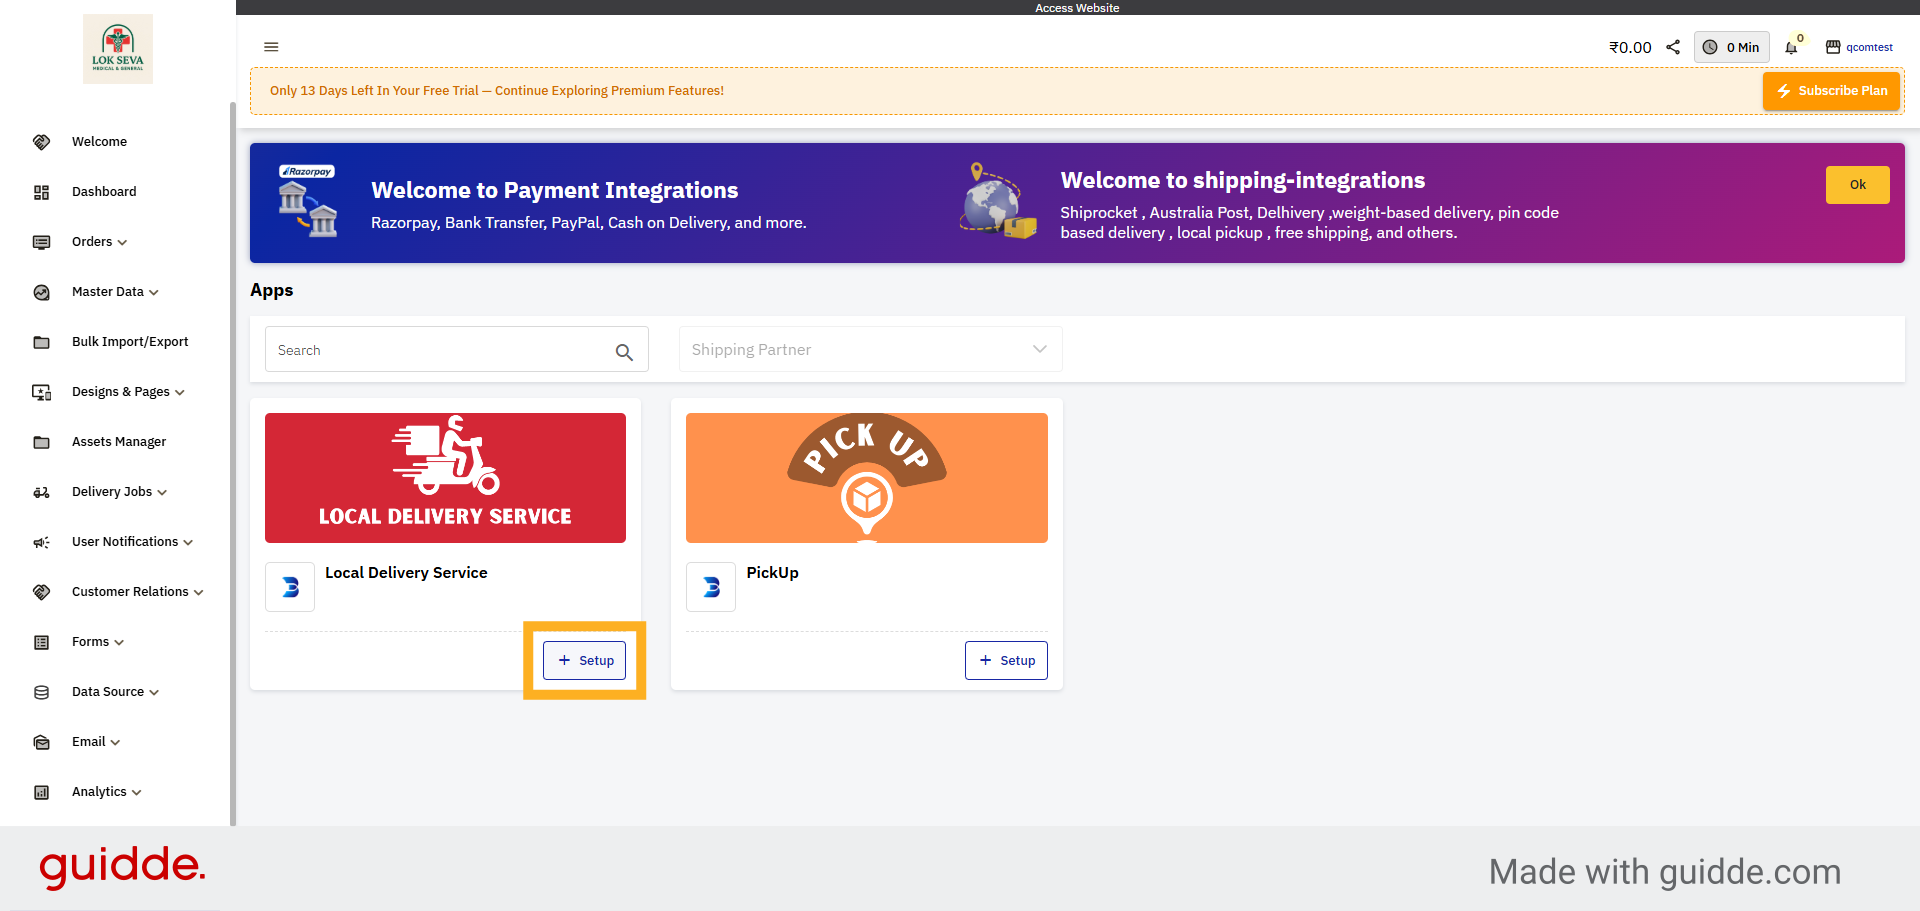
48. Add Shipping Setup
Click Setup to begin configuring shipping parameters for your Q-commerce site.
49. Enter Minimum Order Amount Field
Click the field to enter the minimum order amount required for shipping eligibility.

50. Origin Address Field
Click the origin address field again to ensure the correct address is entered.
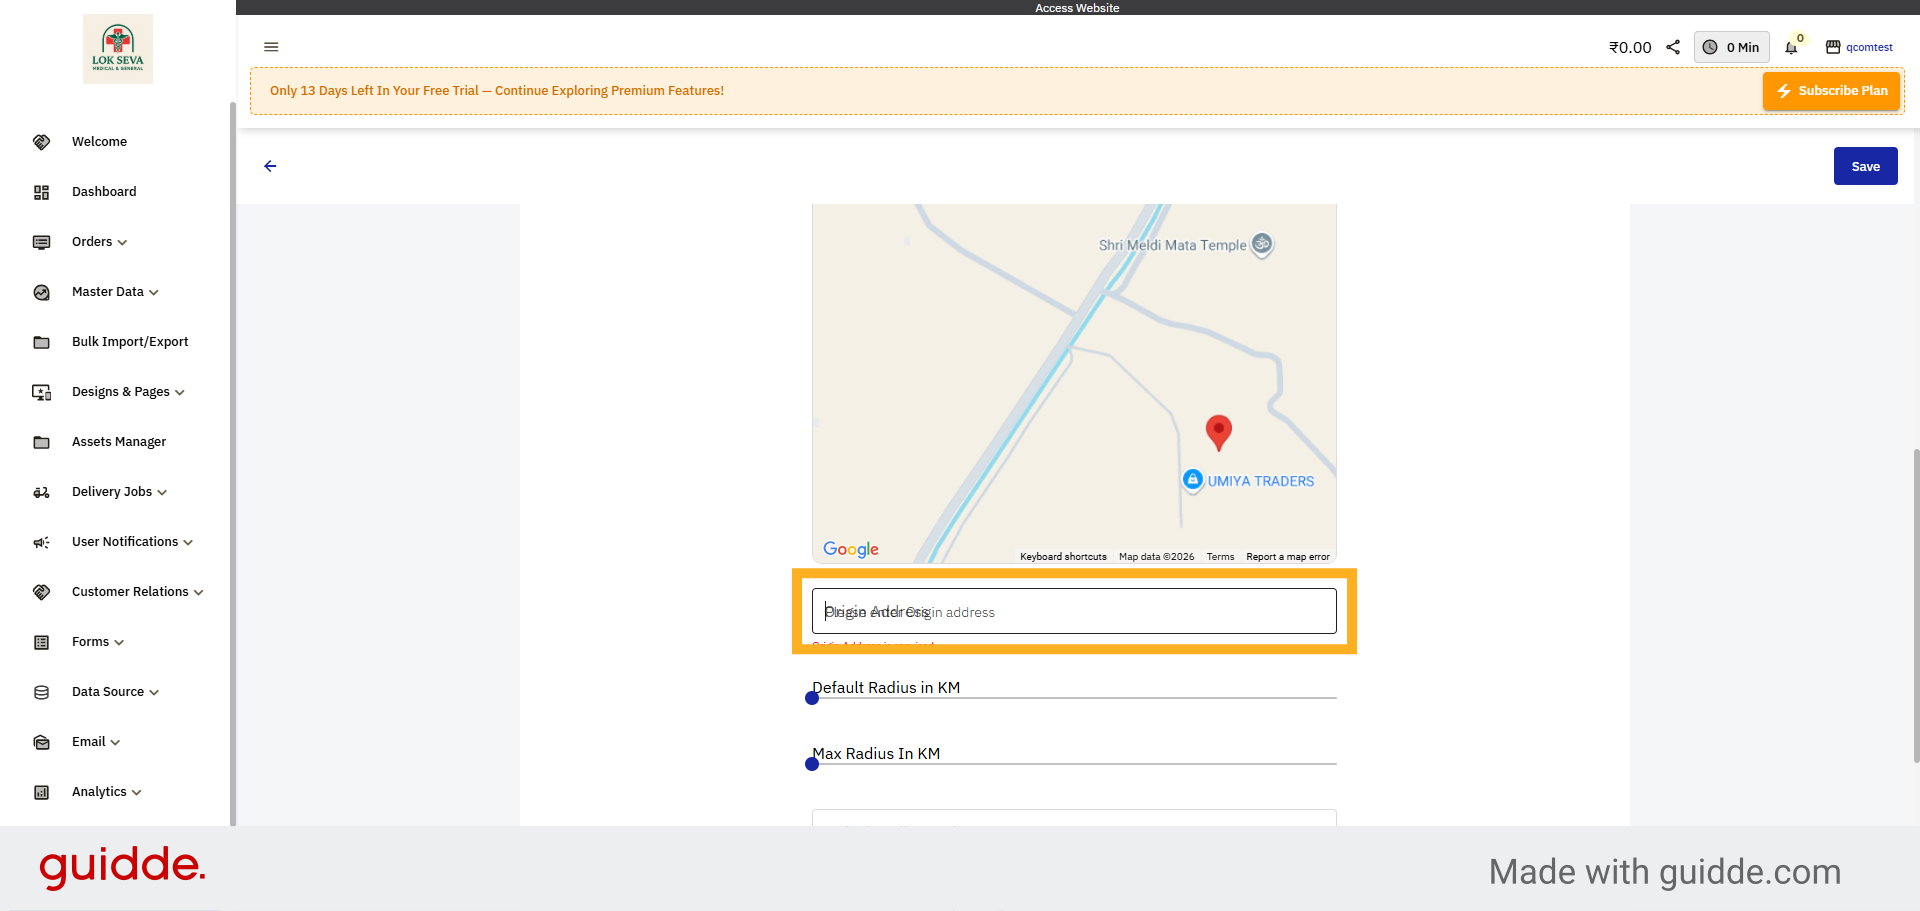
51. Setup Default Radius
Set the default delivery radius to define how far orders can be delivered from your store location.
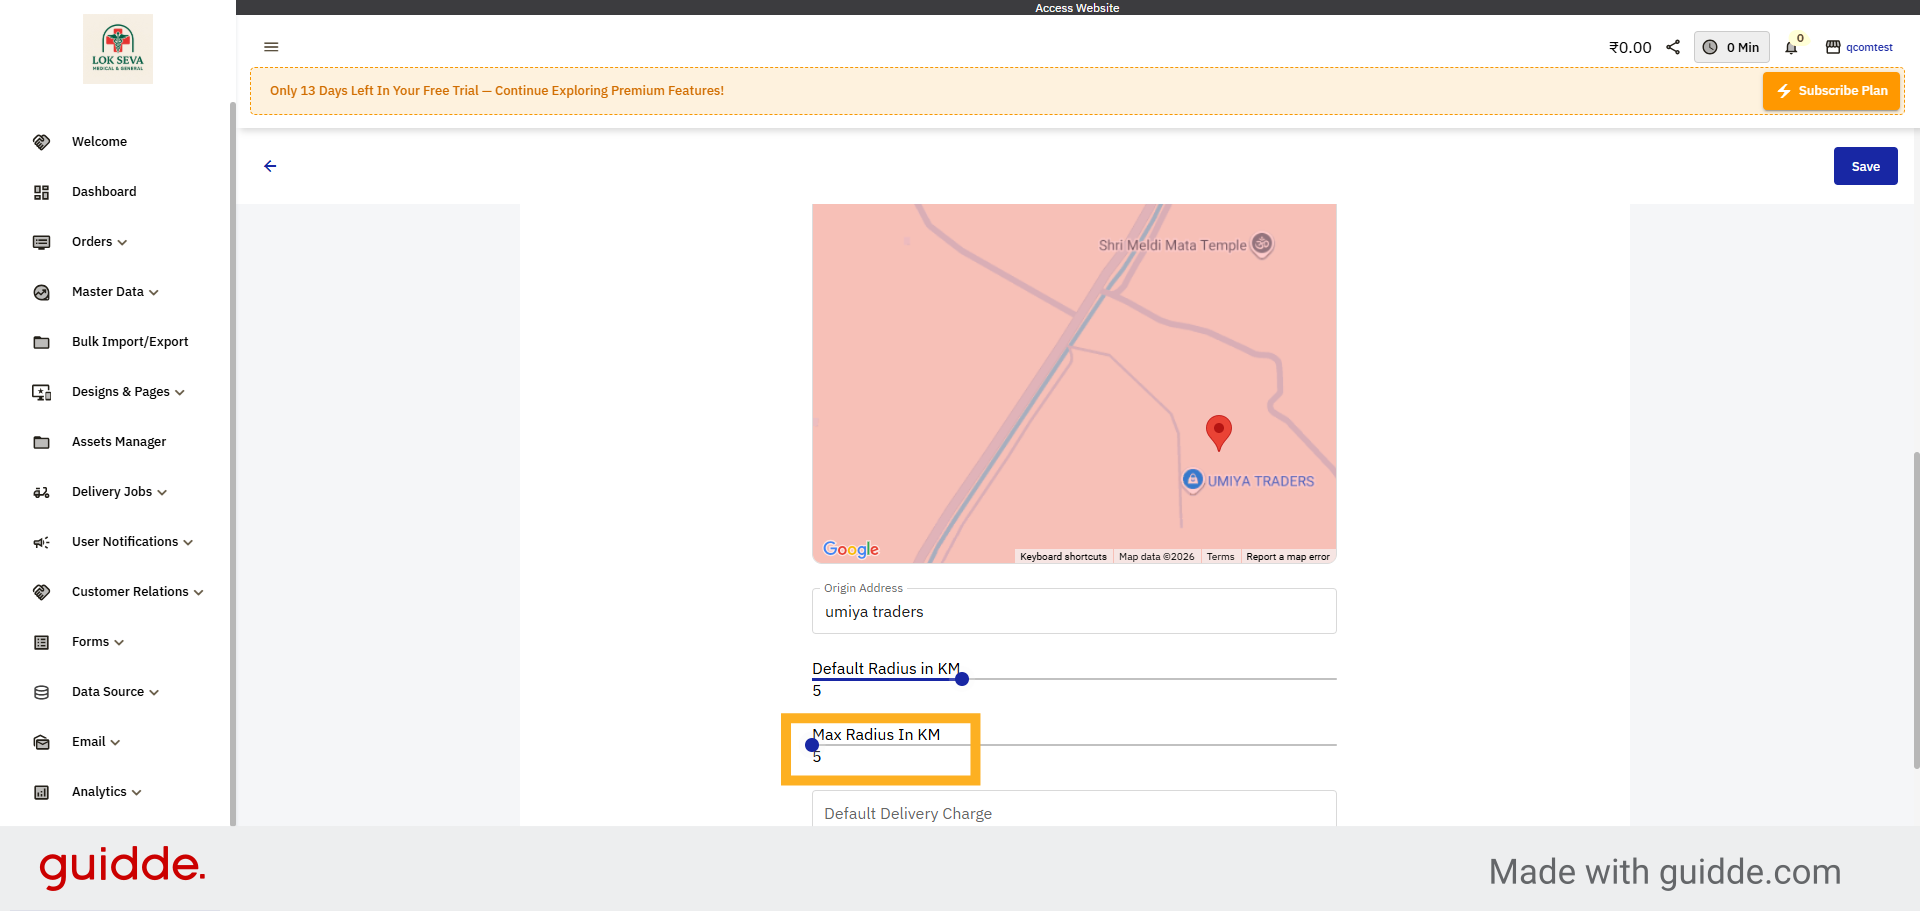
52. Setup Max Radius
Set the maximum delivery radius to limit the farthest distance your store will deliver orders.
53. Enter Delivery Charge
Click the field to enter the default delivery charge for your shipping setup.

54. Enter Additional Delivery Charge
Add an extra delivery fee that will be applied to orders beyond the default delivery radius.
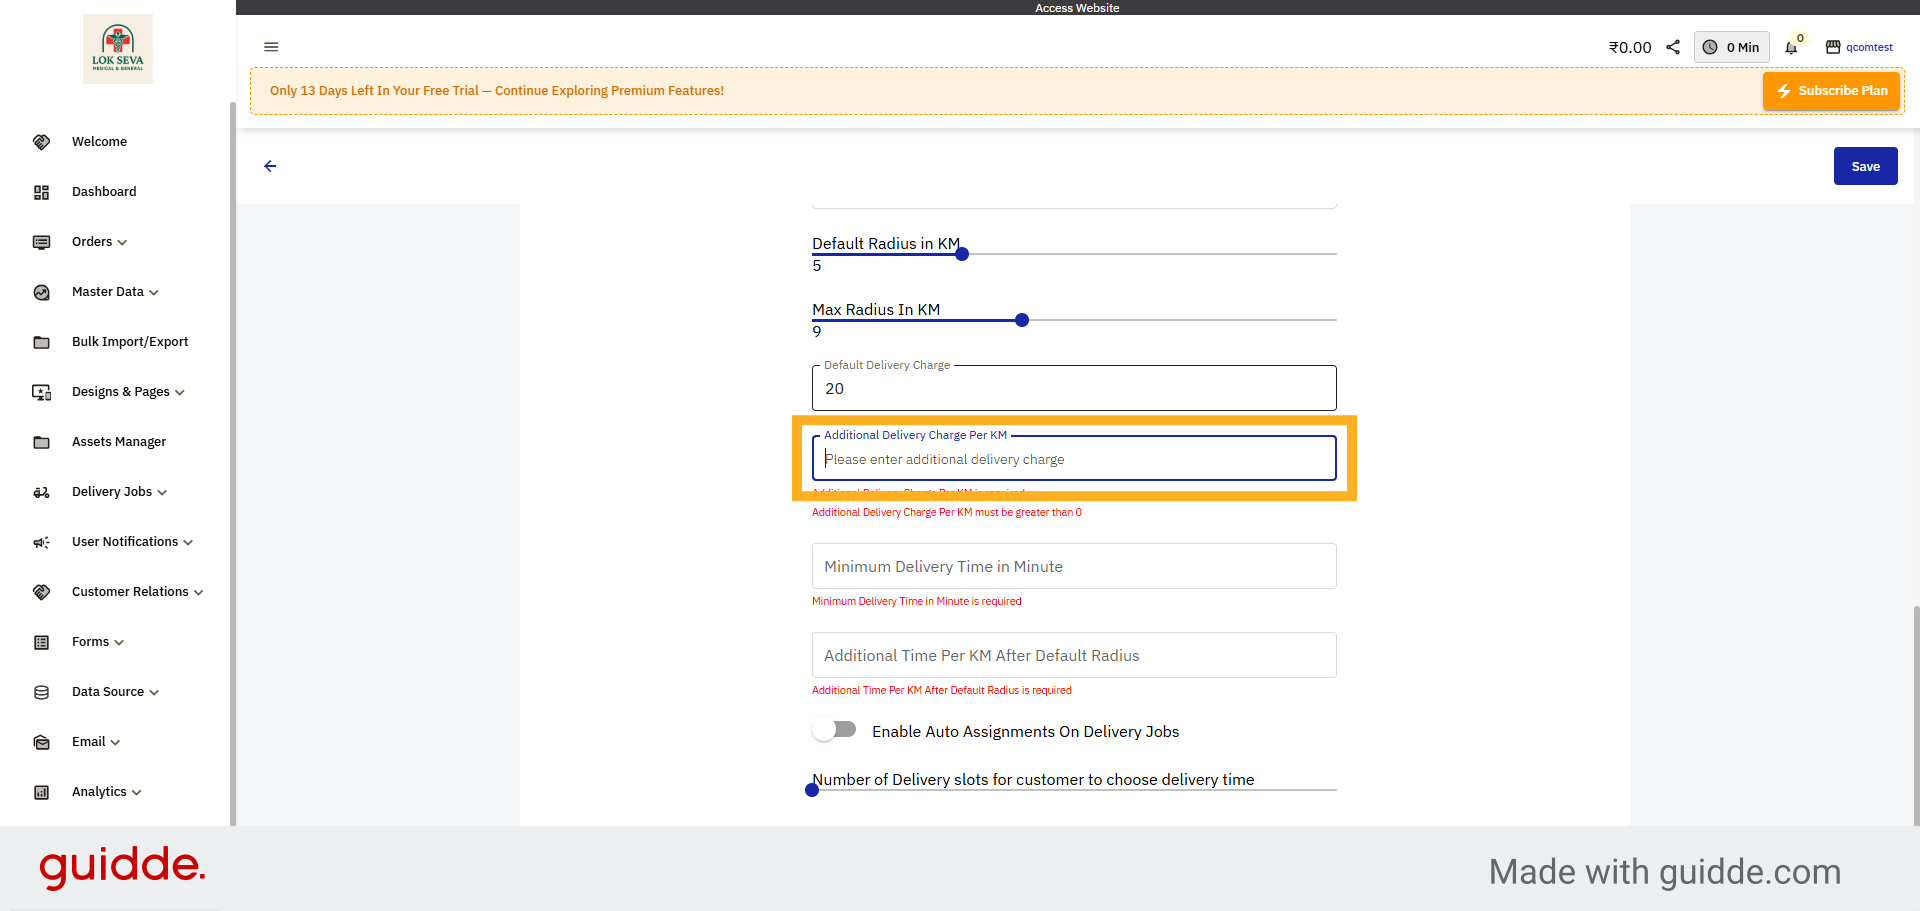
55. Minimum Delivery Time
Enter the minimum delivery time (in minutes) required to prepare and deliver an order.
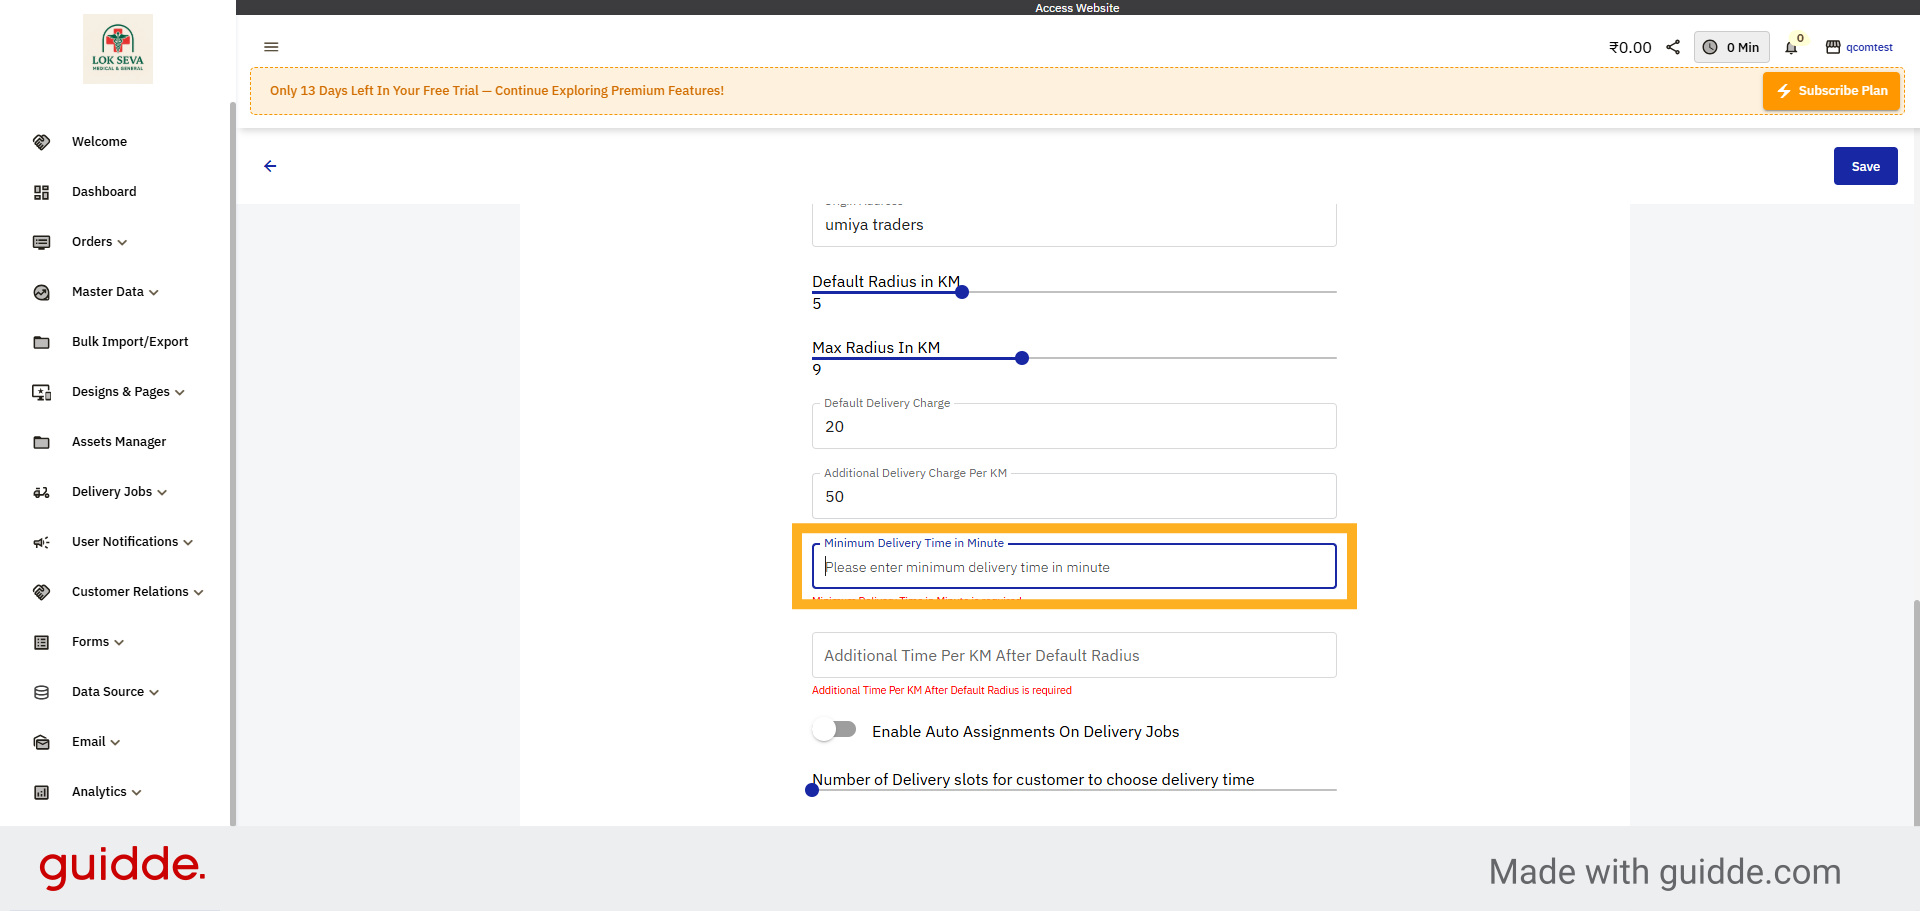
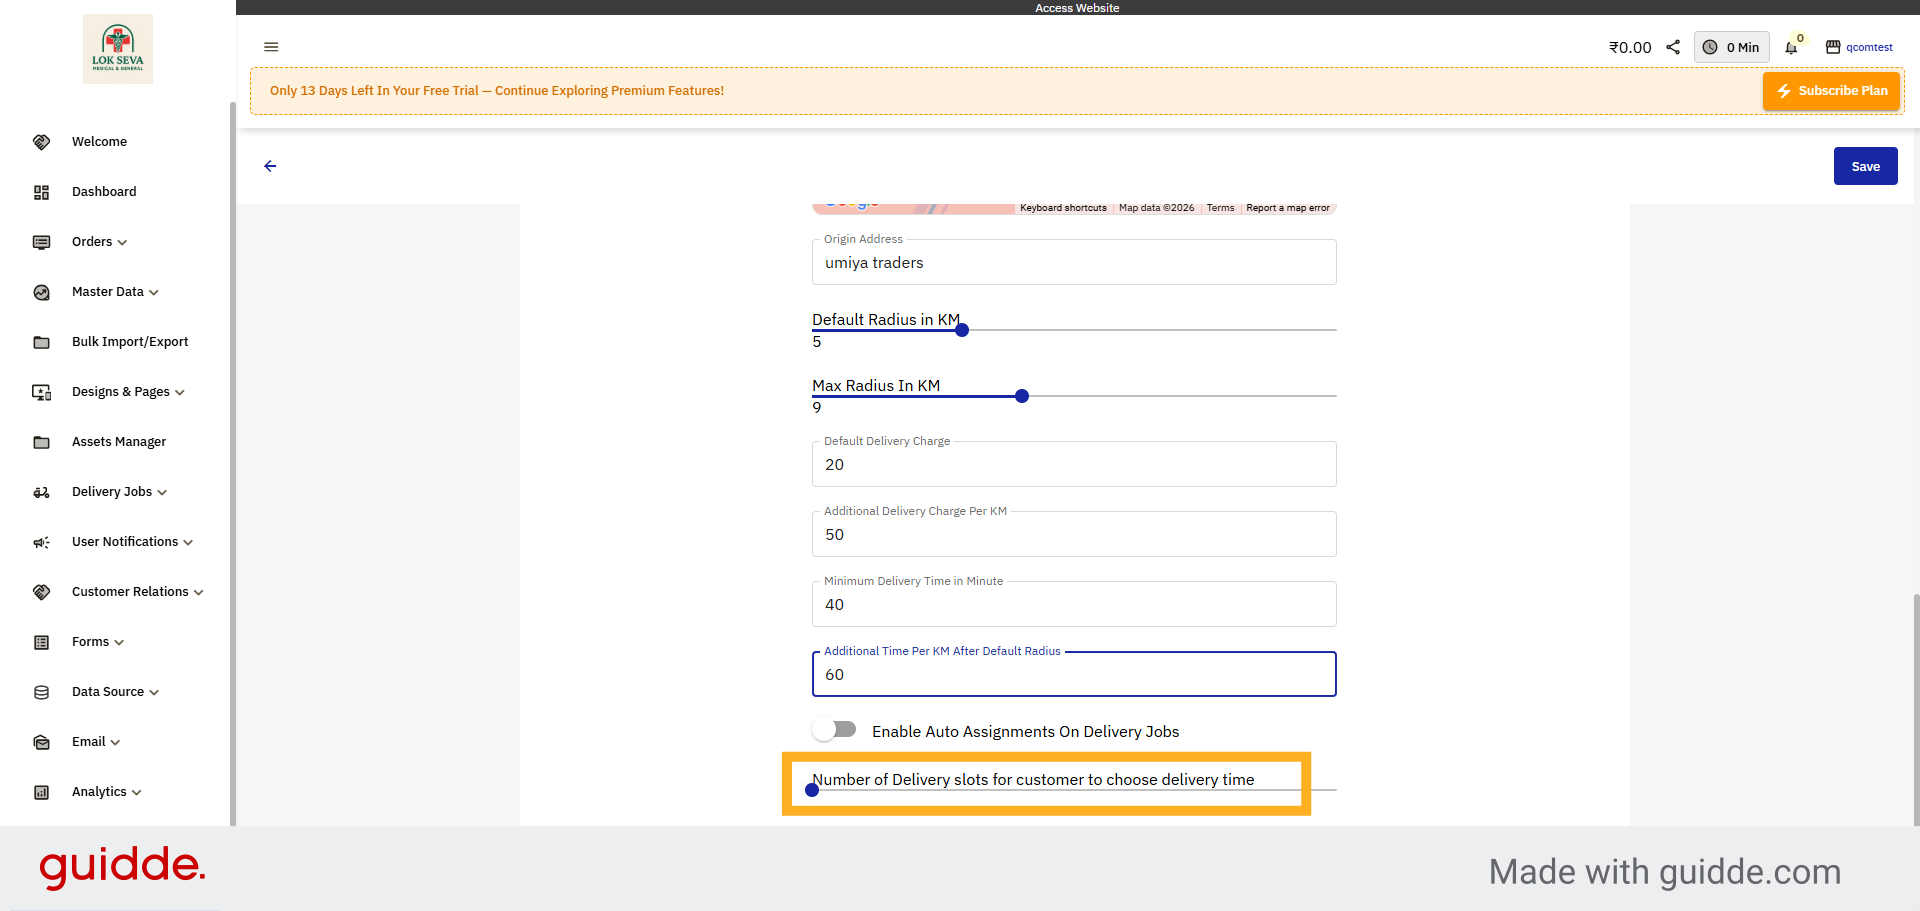
56. Enter Additional Time Per KM Setting
Set the extra delivery time added for each kilometer based on the customer’s distance from the store.
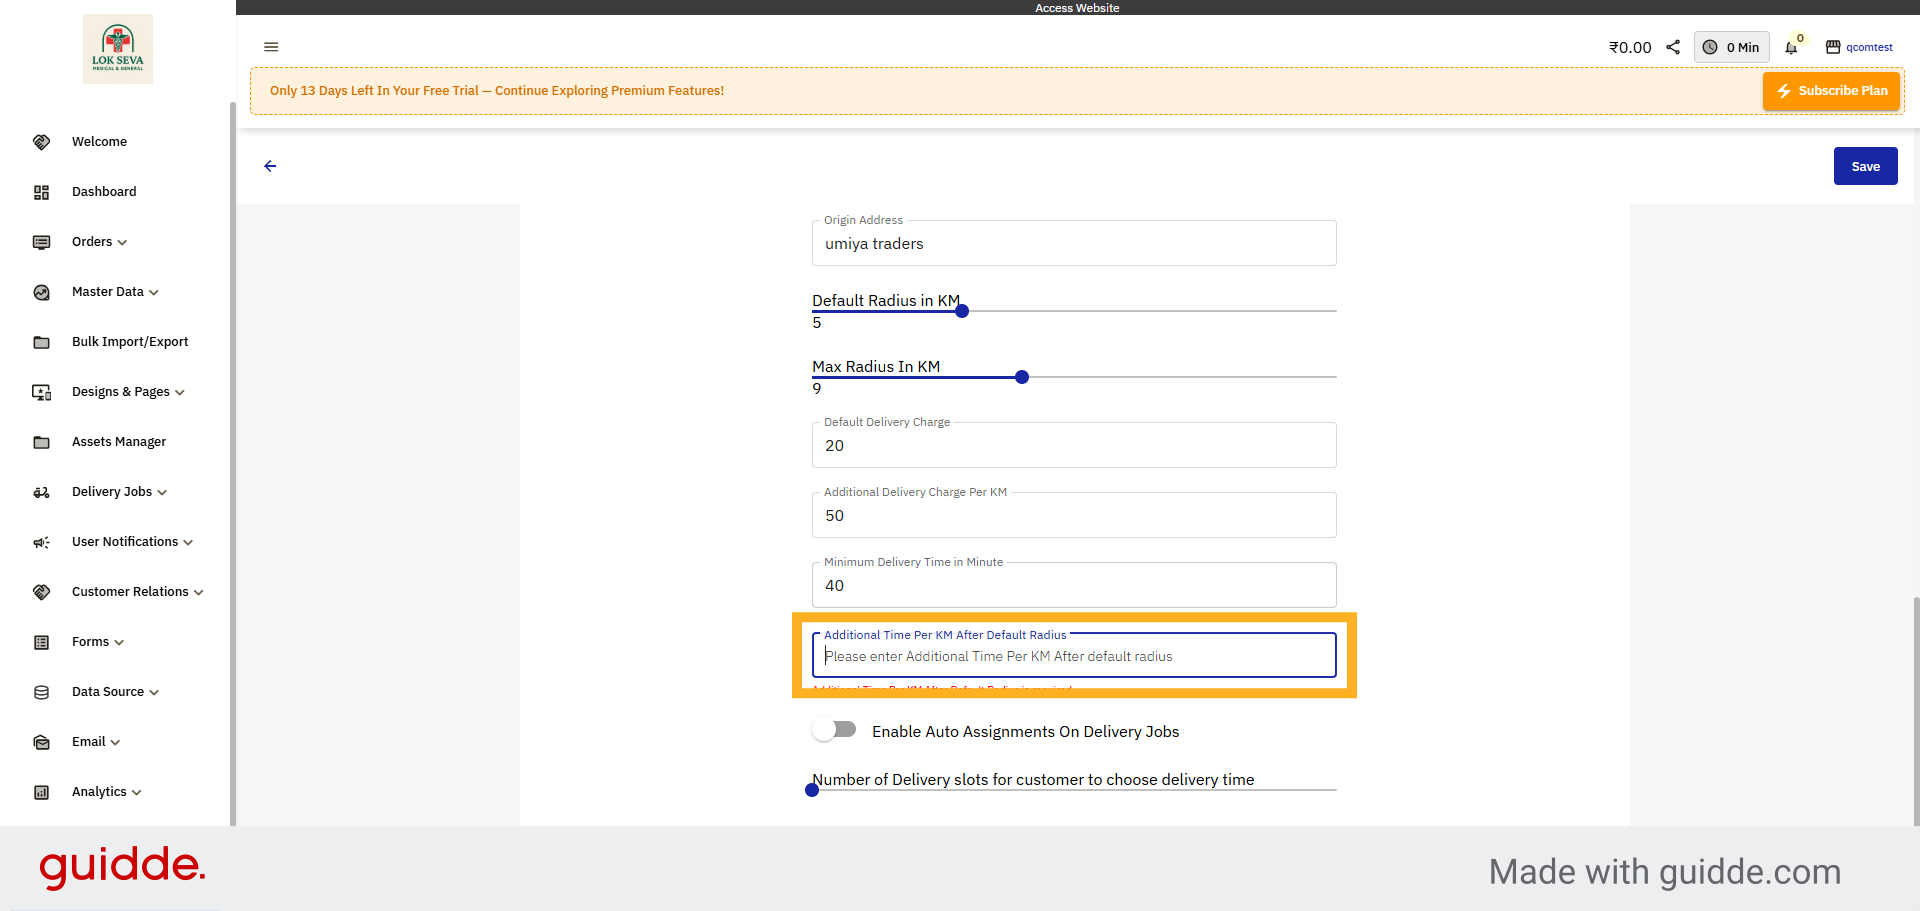
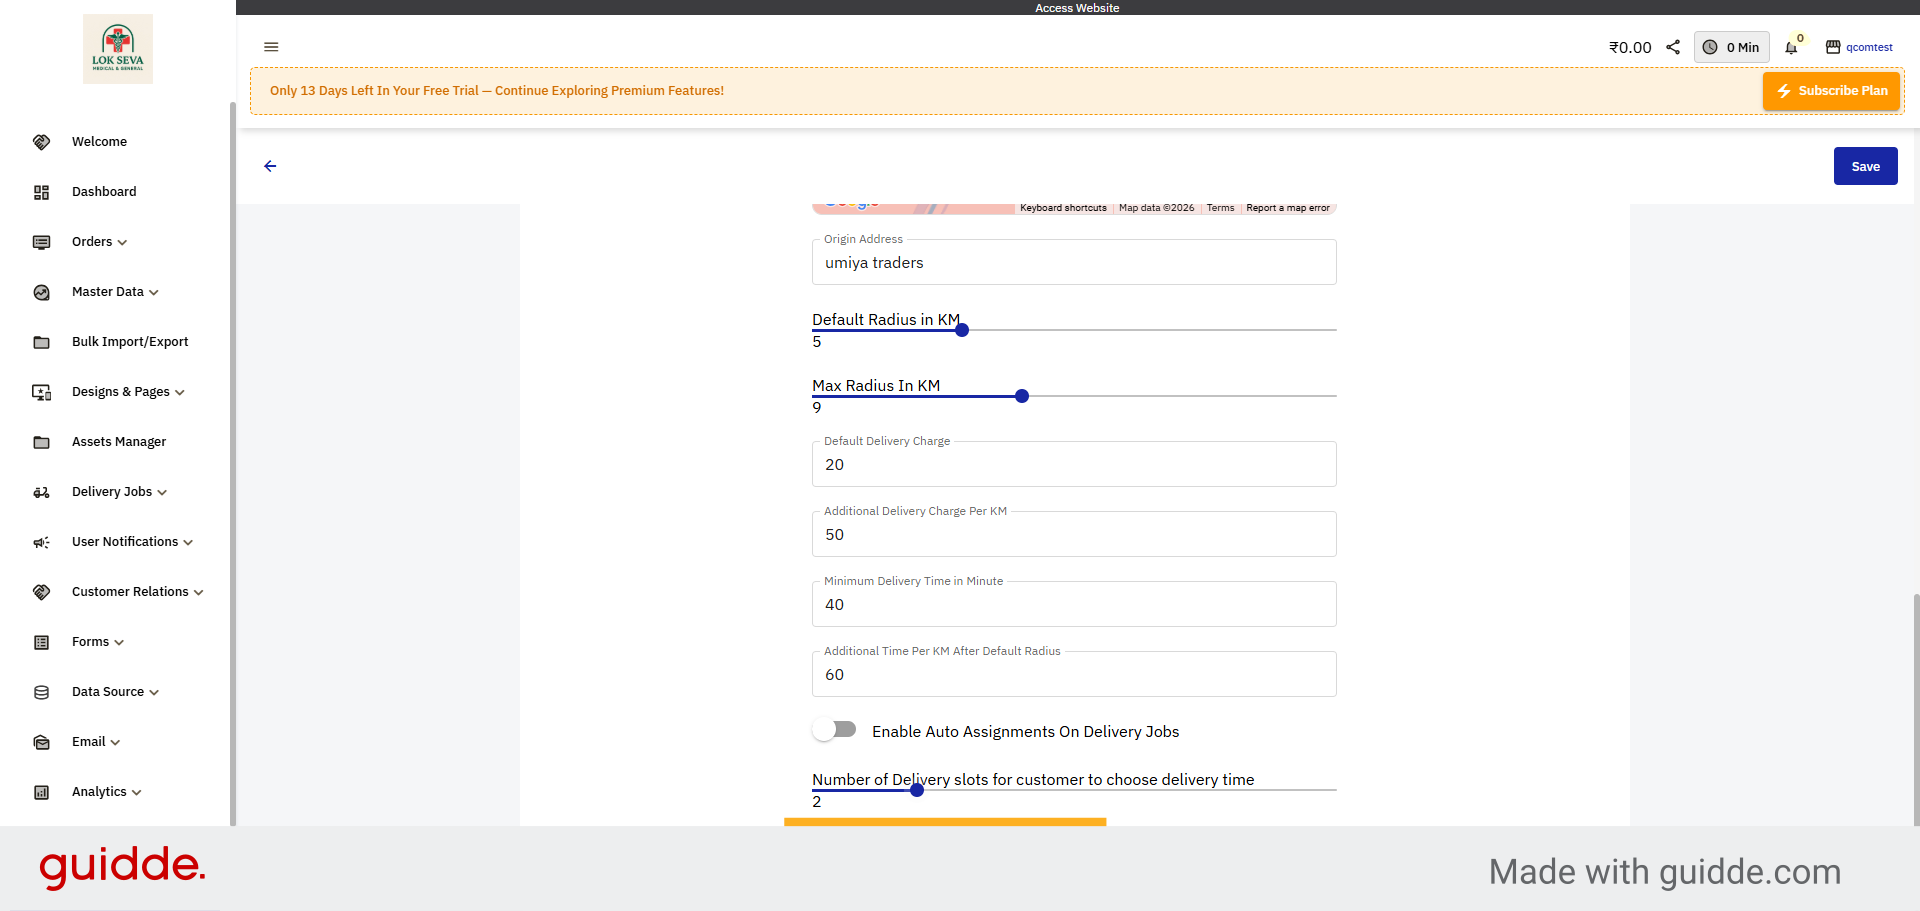
57. Set Delivery Time Slots
Define how many delivery time slots customers can choose from when selecting their preferred delivery
time.
58. Set Slot Step
Set the time interval between each delivery slot (e.g., every 5, 10 or 30 minutes).
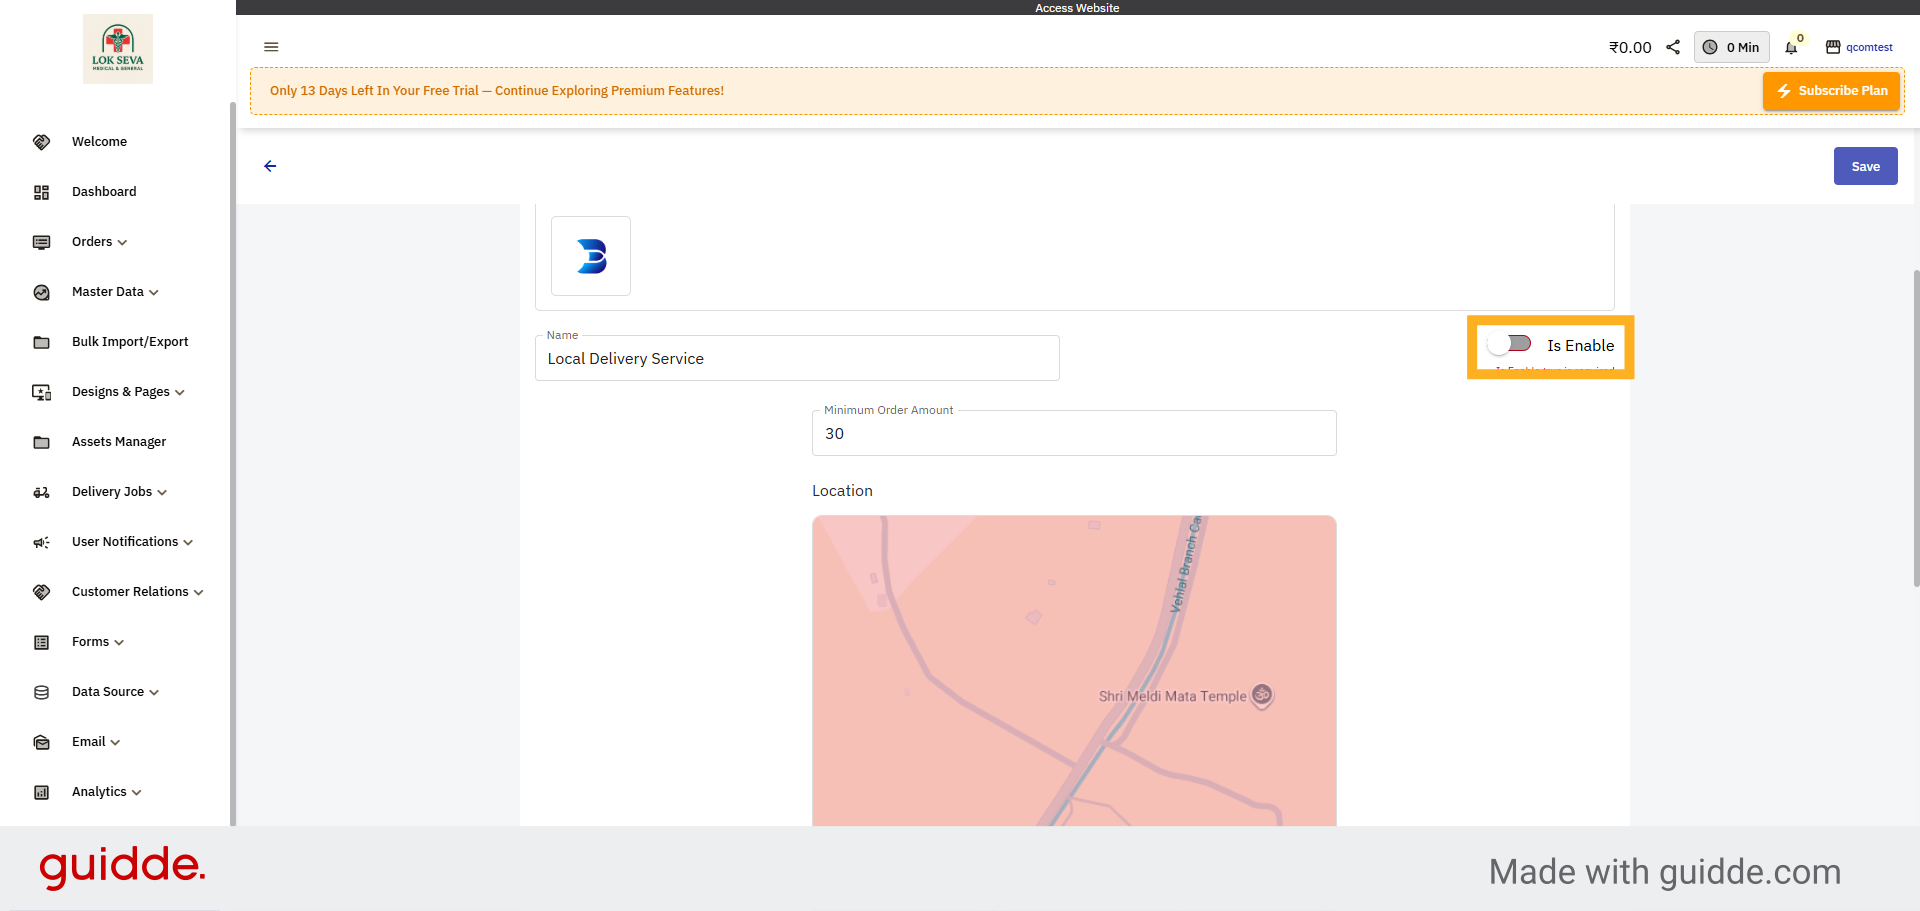
59. Enable Shipping App
Click the Is Enable option to activate the shipping application for your store.
60. Save Shipping App Settings
Click Save to finalize and apply your shipping app configuration.
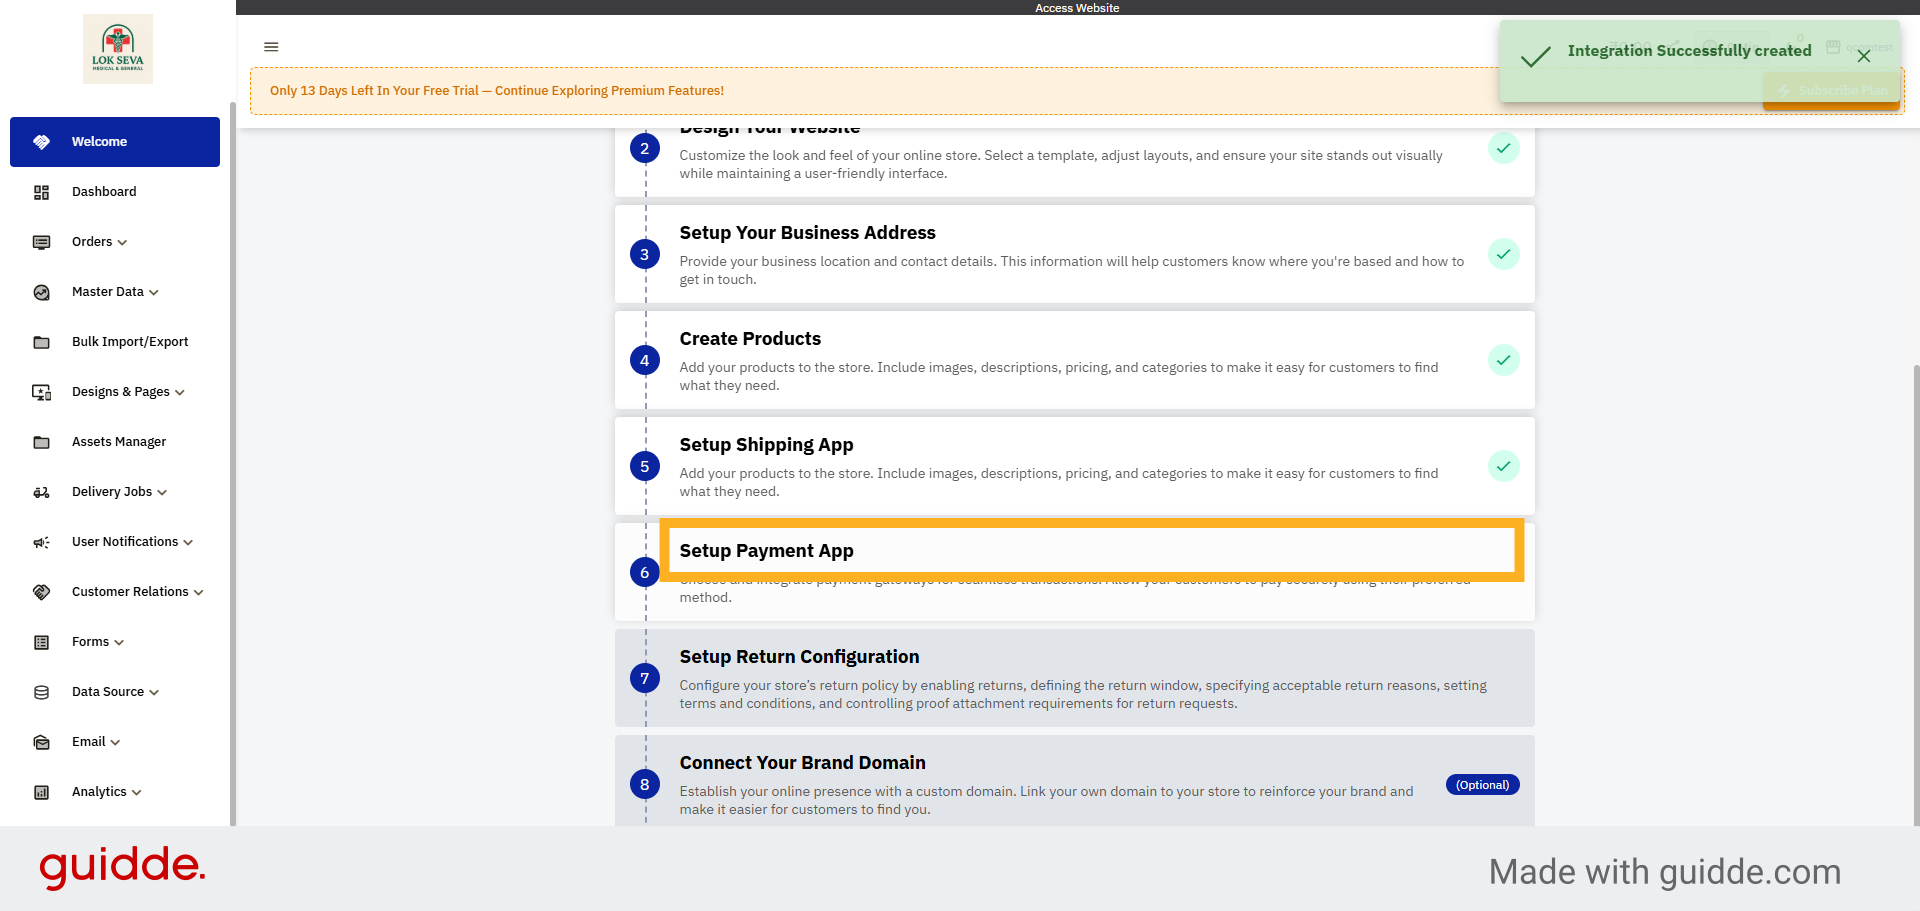
61. Access Payment App Setup
Click Setup Payment App to begin configuring payment options for your store.
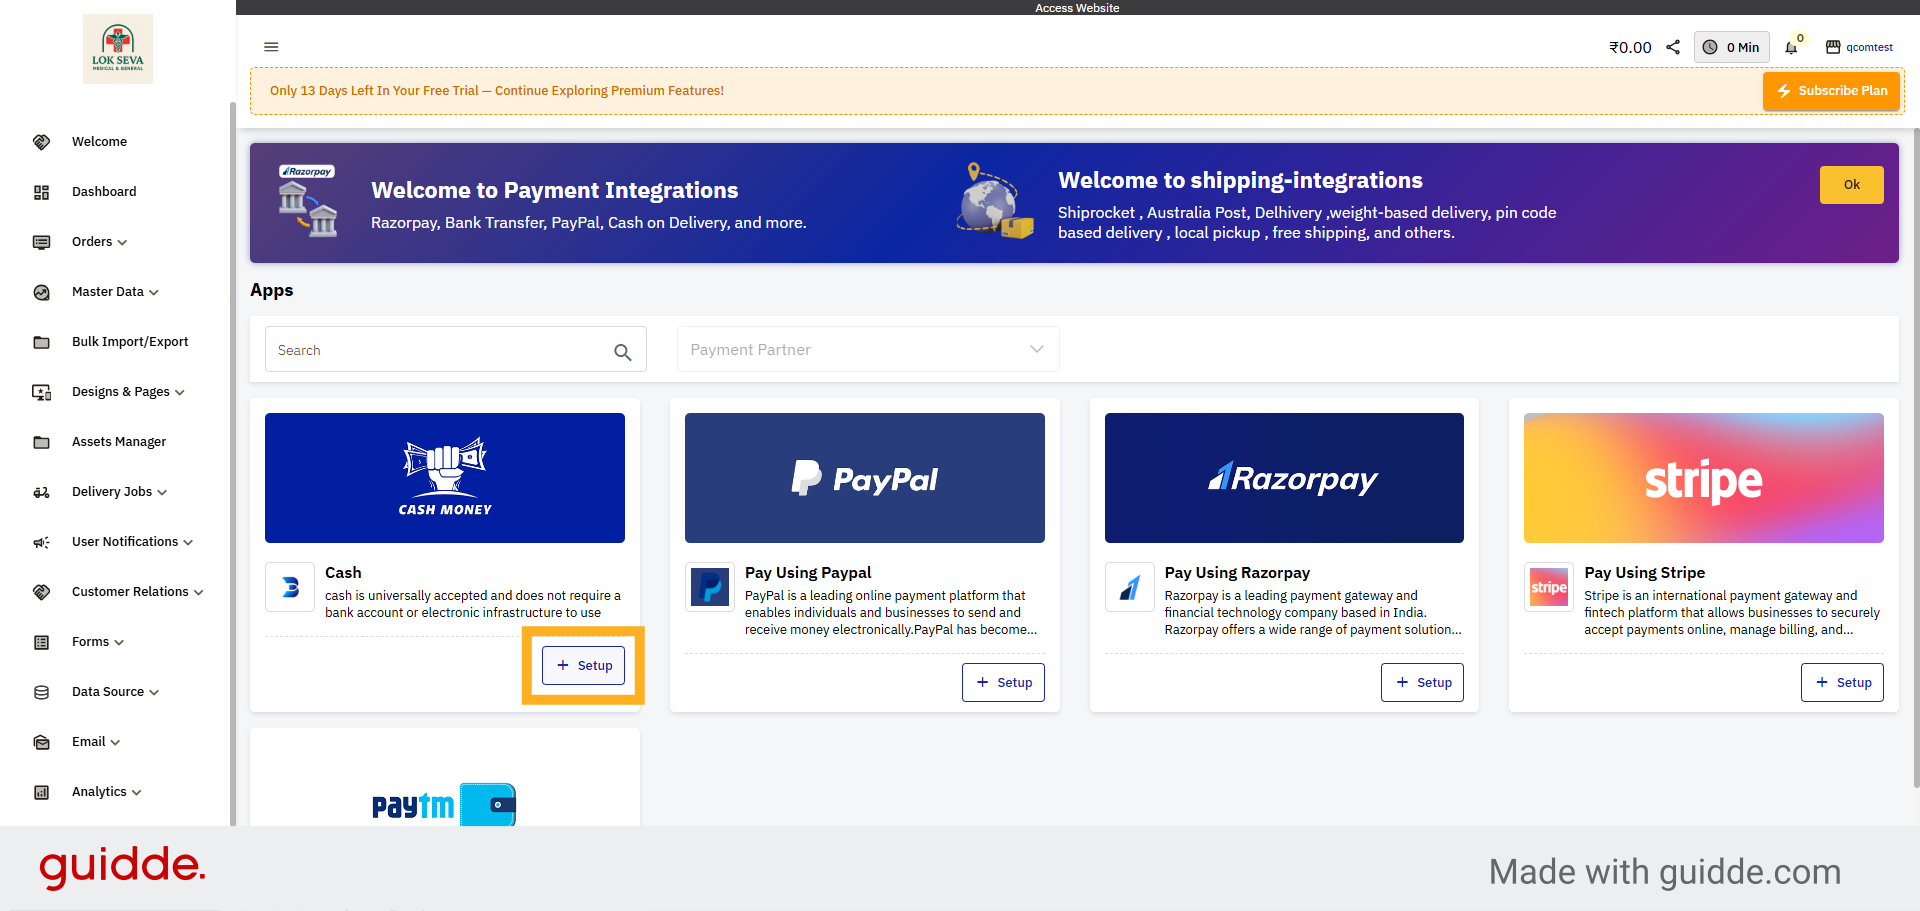
62. Setup Payment App
Click setup within the Apps section to begin configuring your payment methods.
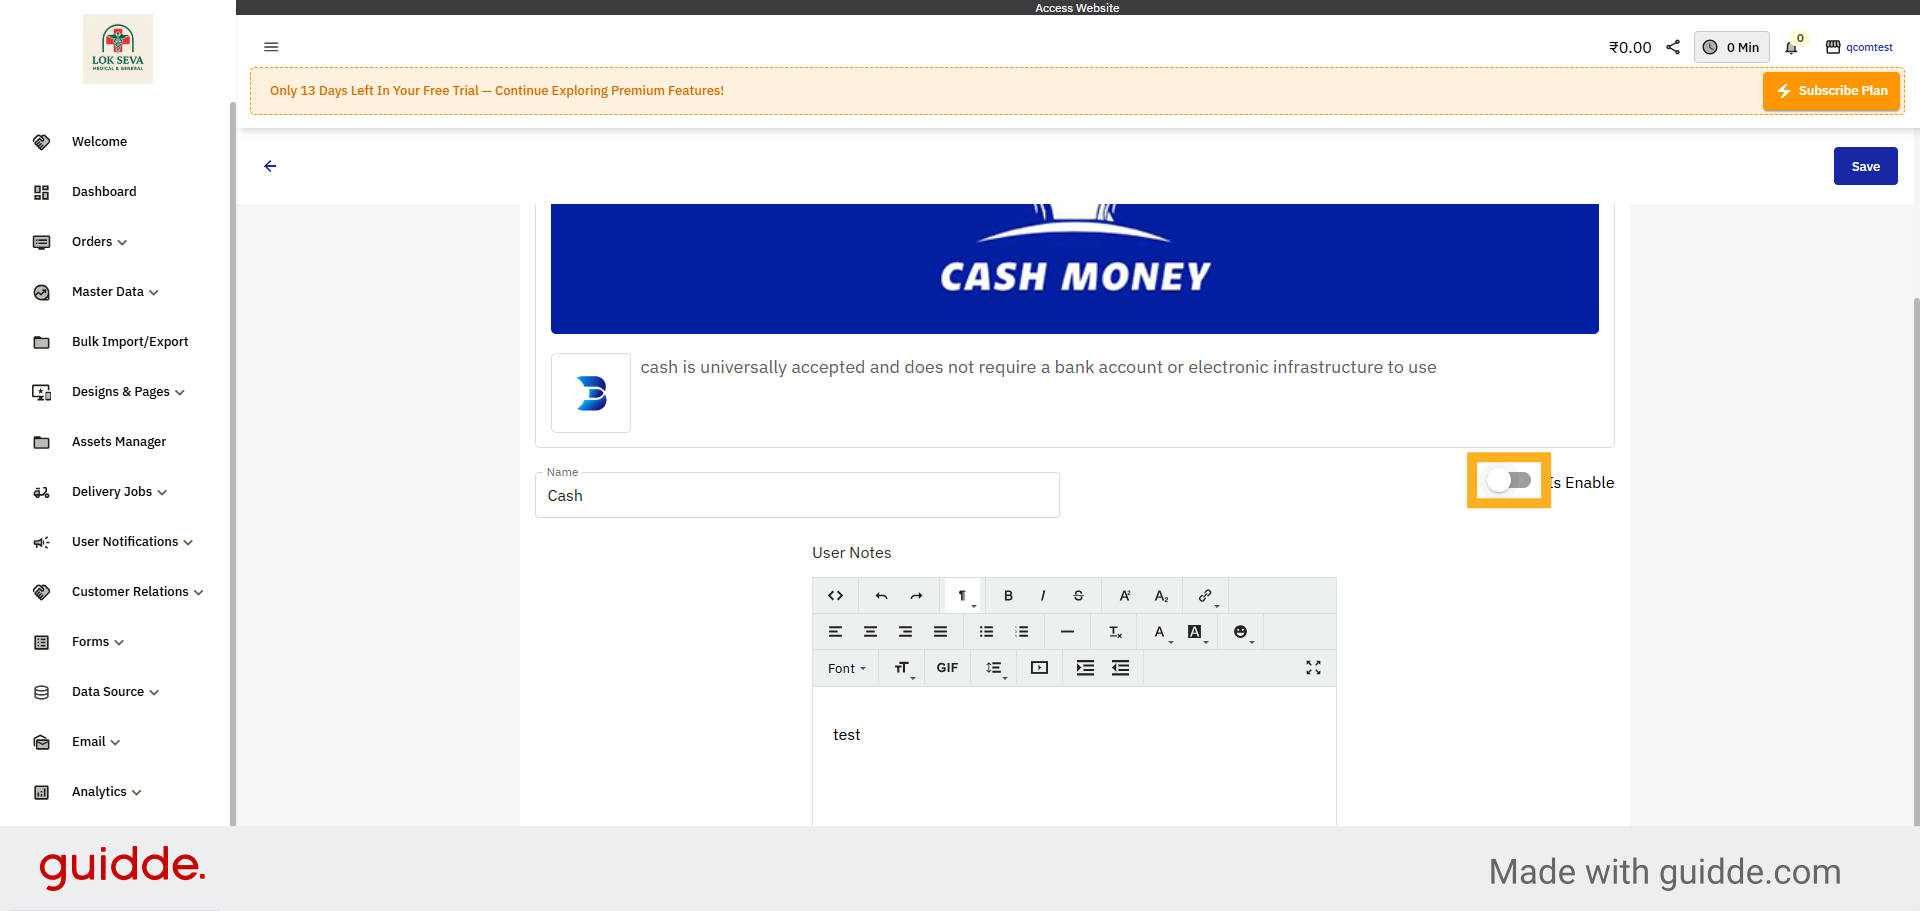
63. Enable Payment app
Activate the payment app to indicated area to continue with the payment setup process.
64. Save Payment Settings
Click Save to store your payment app configuration.
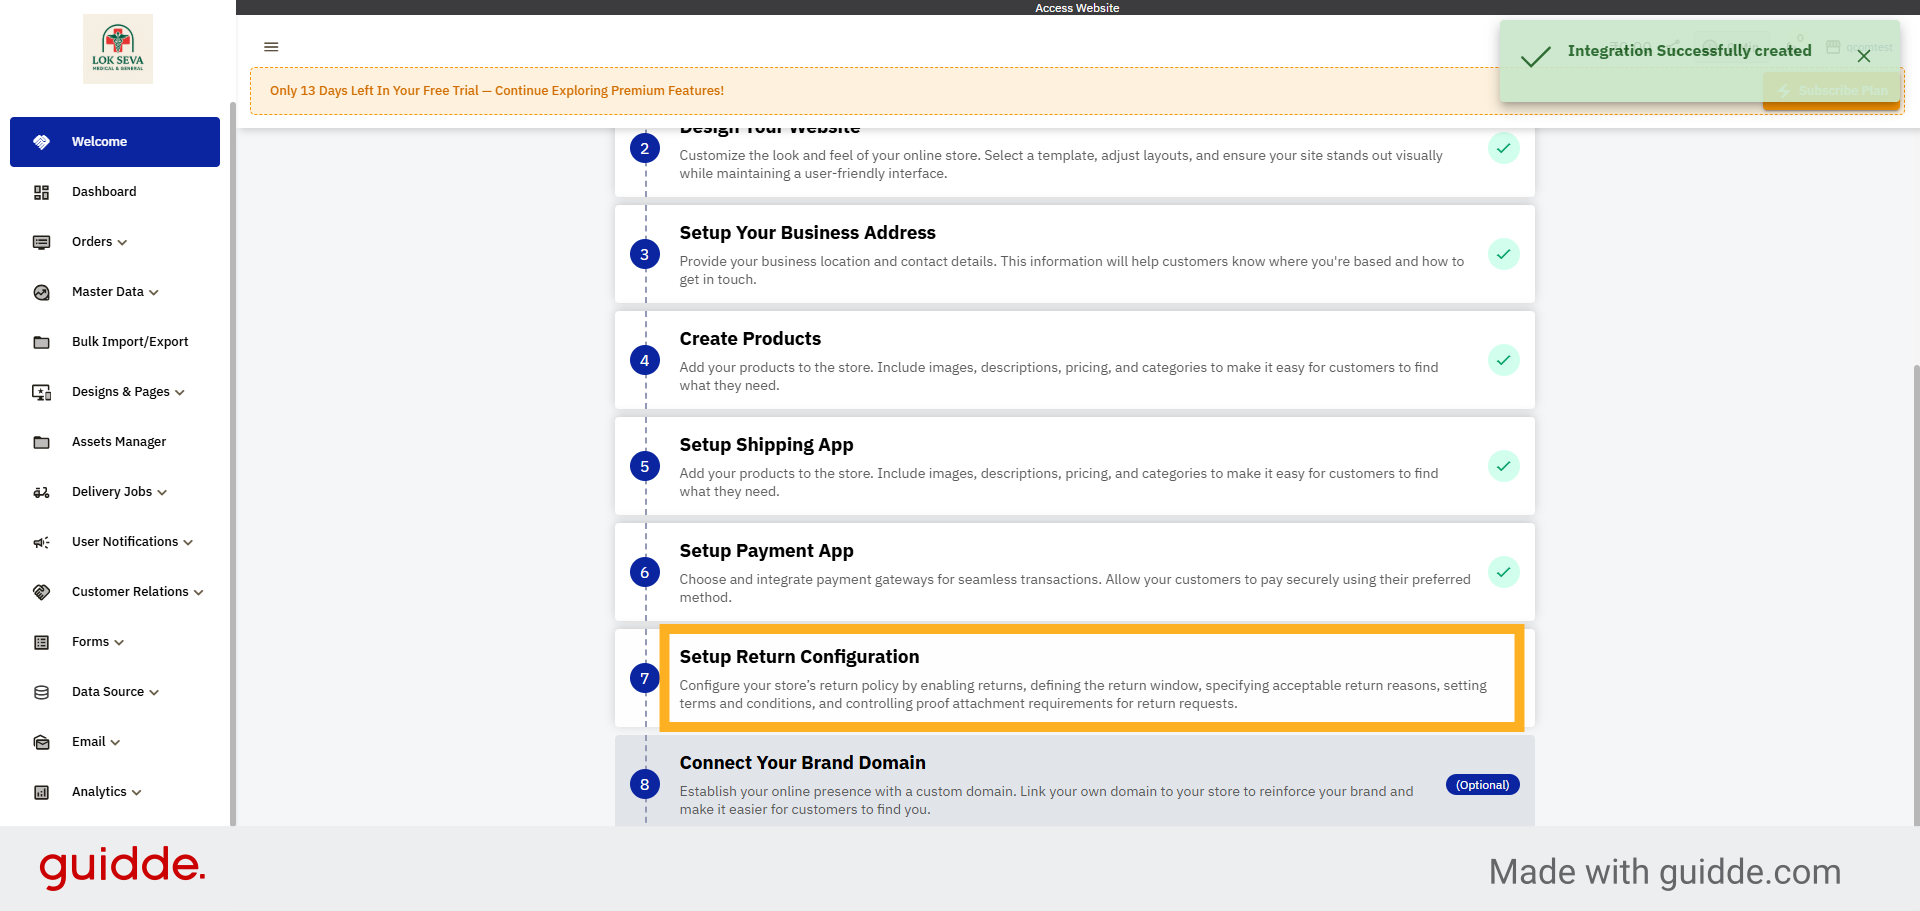
65. Return Configuration
Configure your store’s return configuration by enabling returns, defining the return window, specifying
acceptable return reasons, setting terms and conditions, and controlling proof attachment requirements.
66. Enter Return Terms & Condition URL
Enter the URL for your return terms & condition to provide customers with detailed information about
returns.
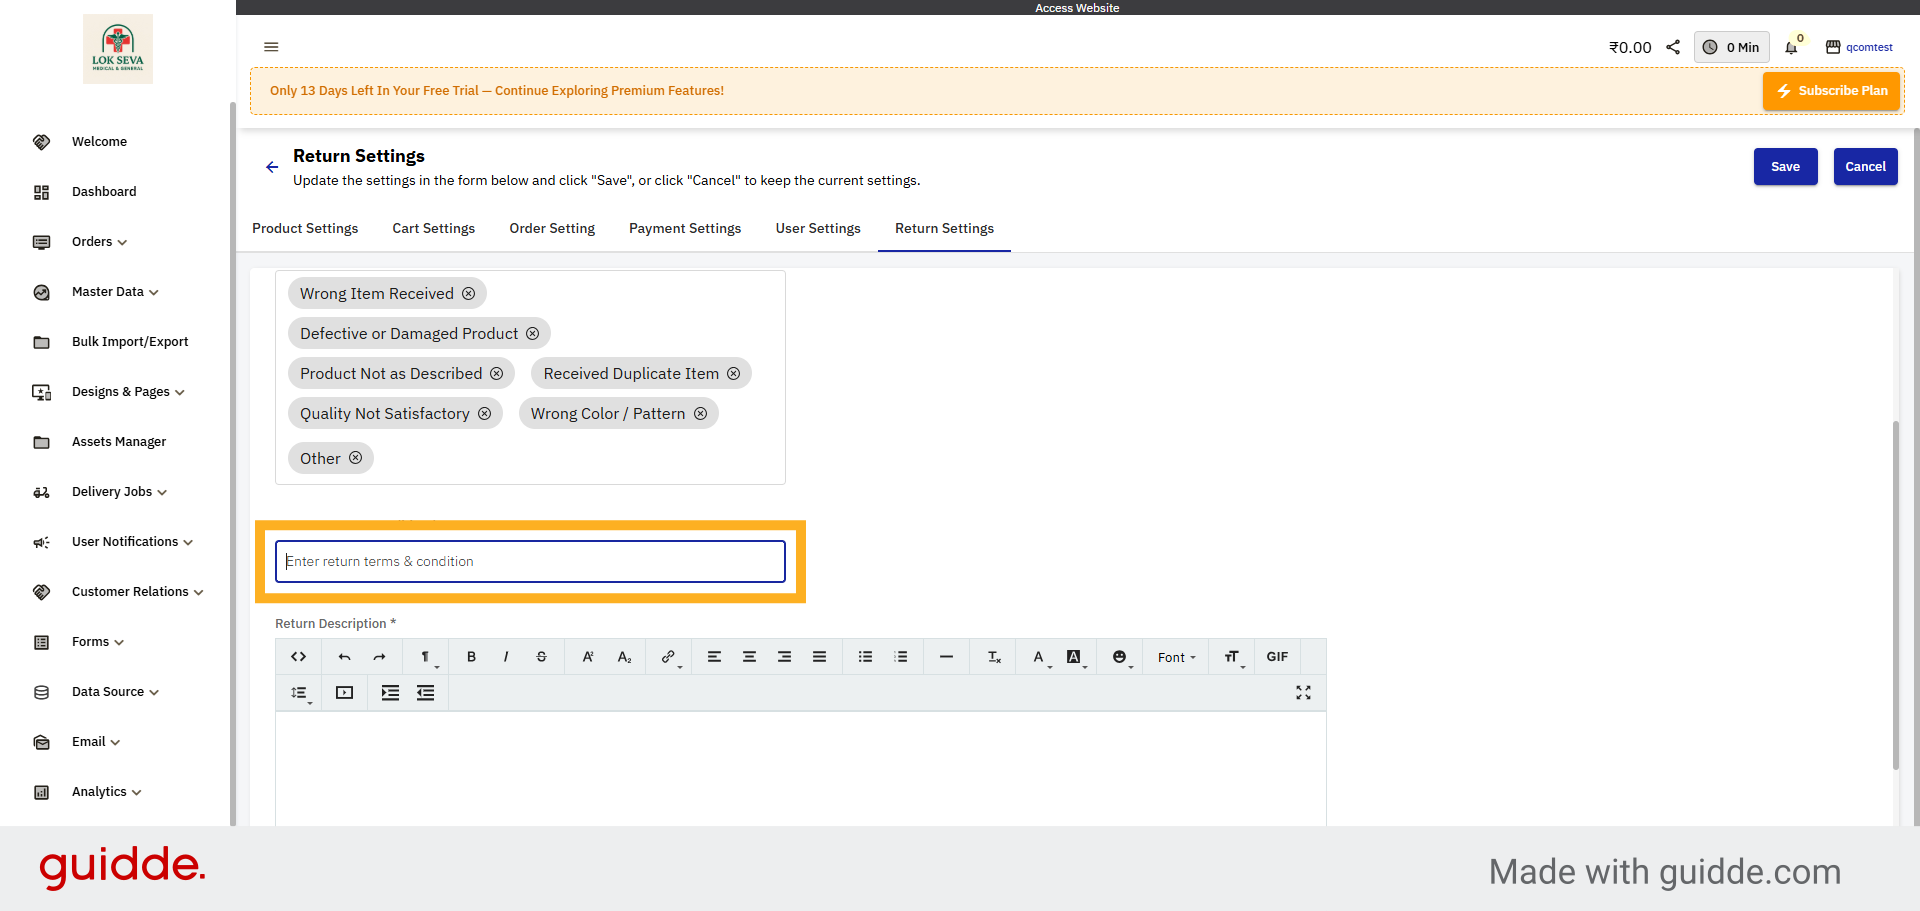
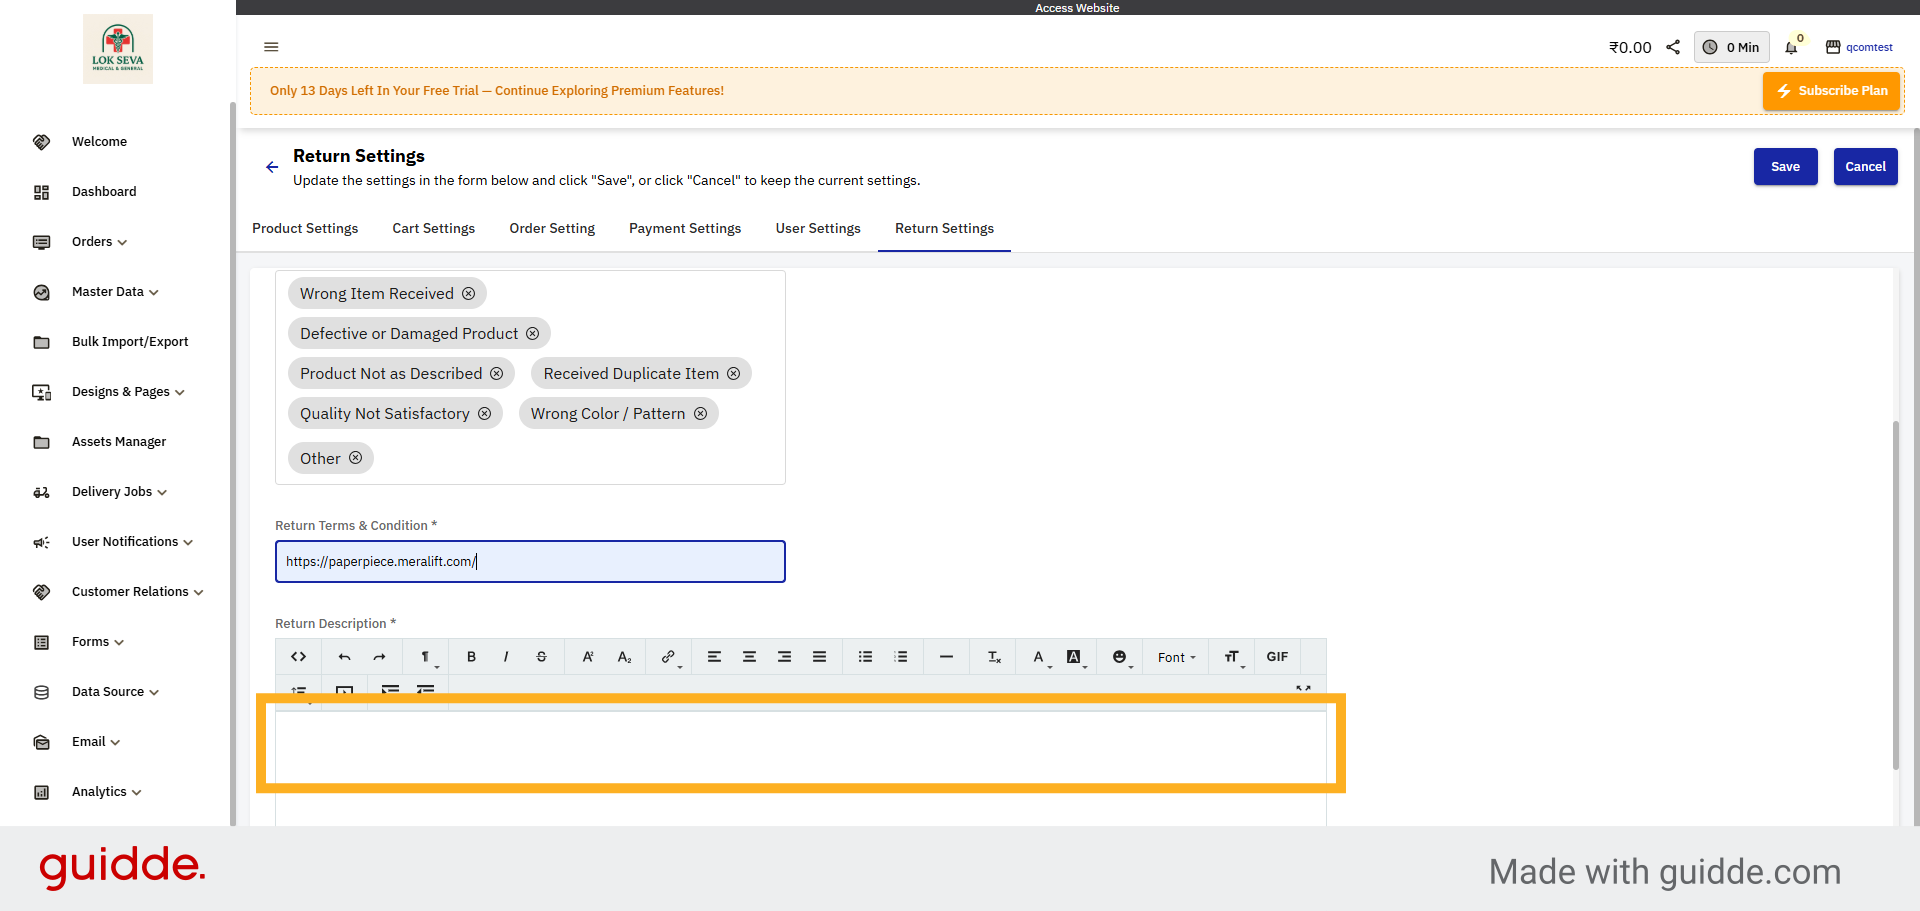
67. Enter Return Description
Enter the content describing your return to inform customers about the terms and conditions.
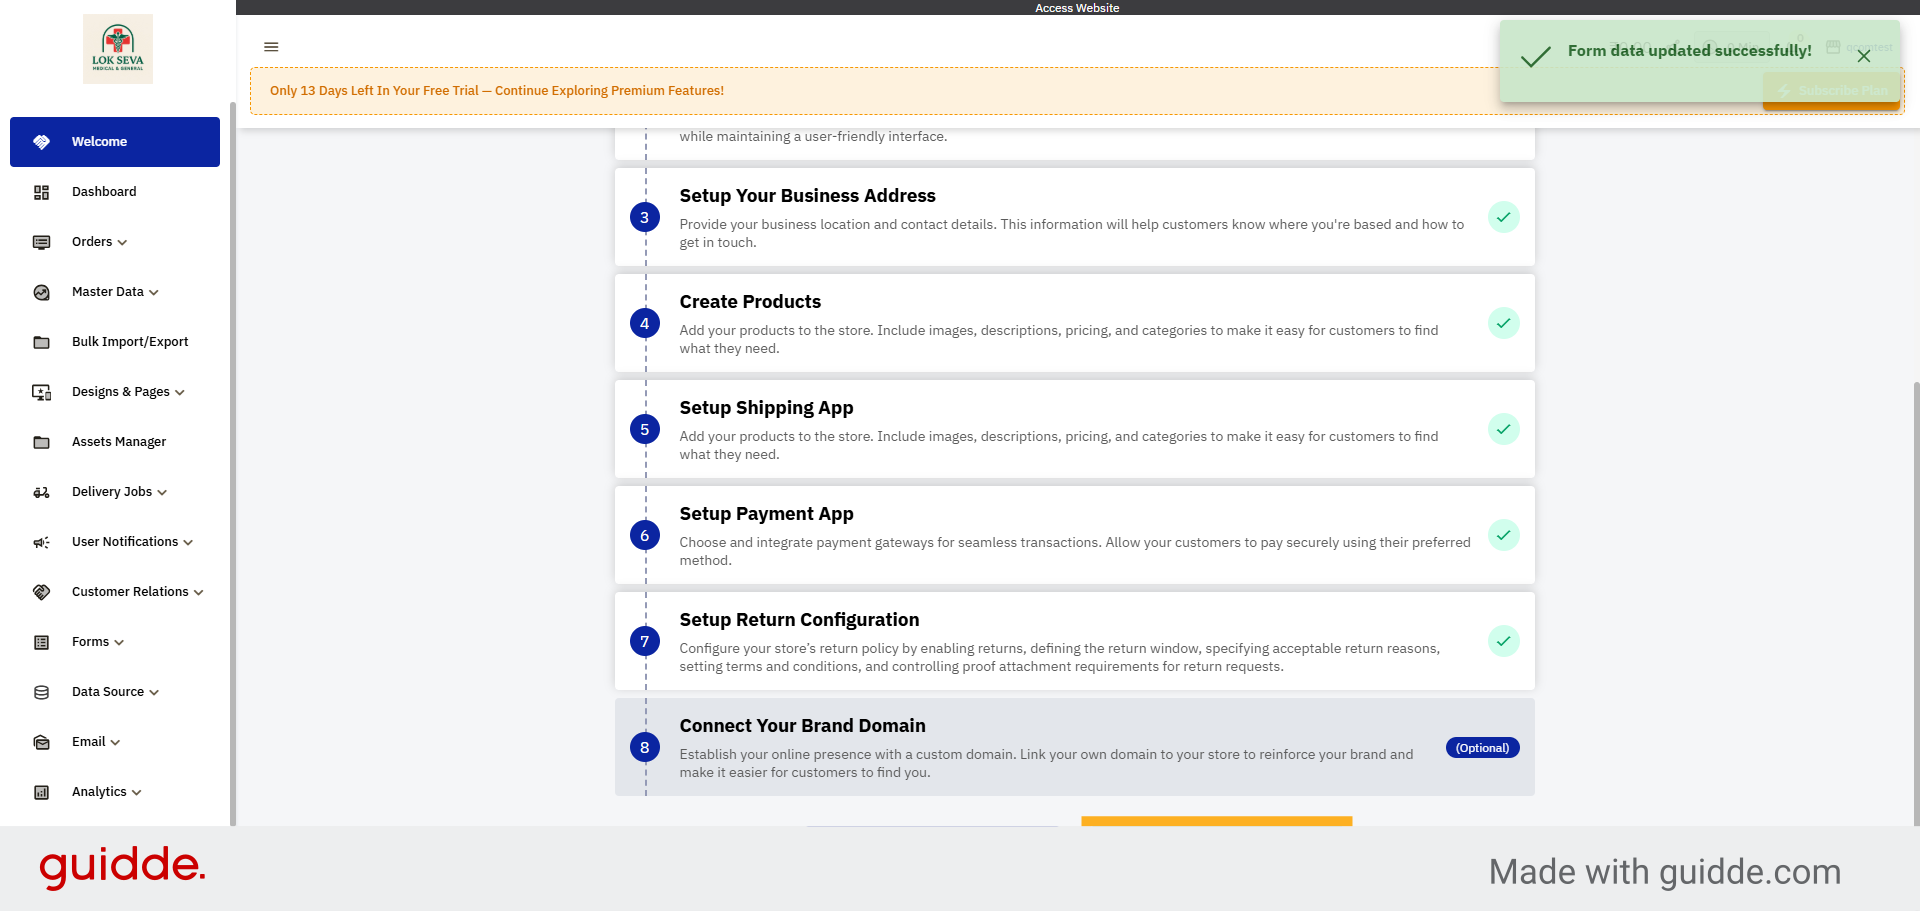
68. Save Return Configuration
Click Save to apply your return configuration changes.
69. Click Launch Website Button
Click Launch Your Website to begin making your online store live.
70. Click Access Website
Click Access Website to view your launched Q-commerce site.
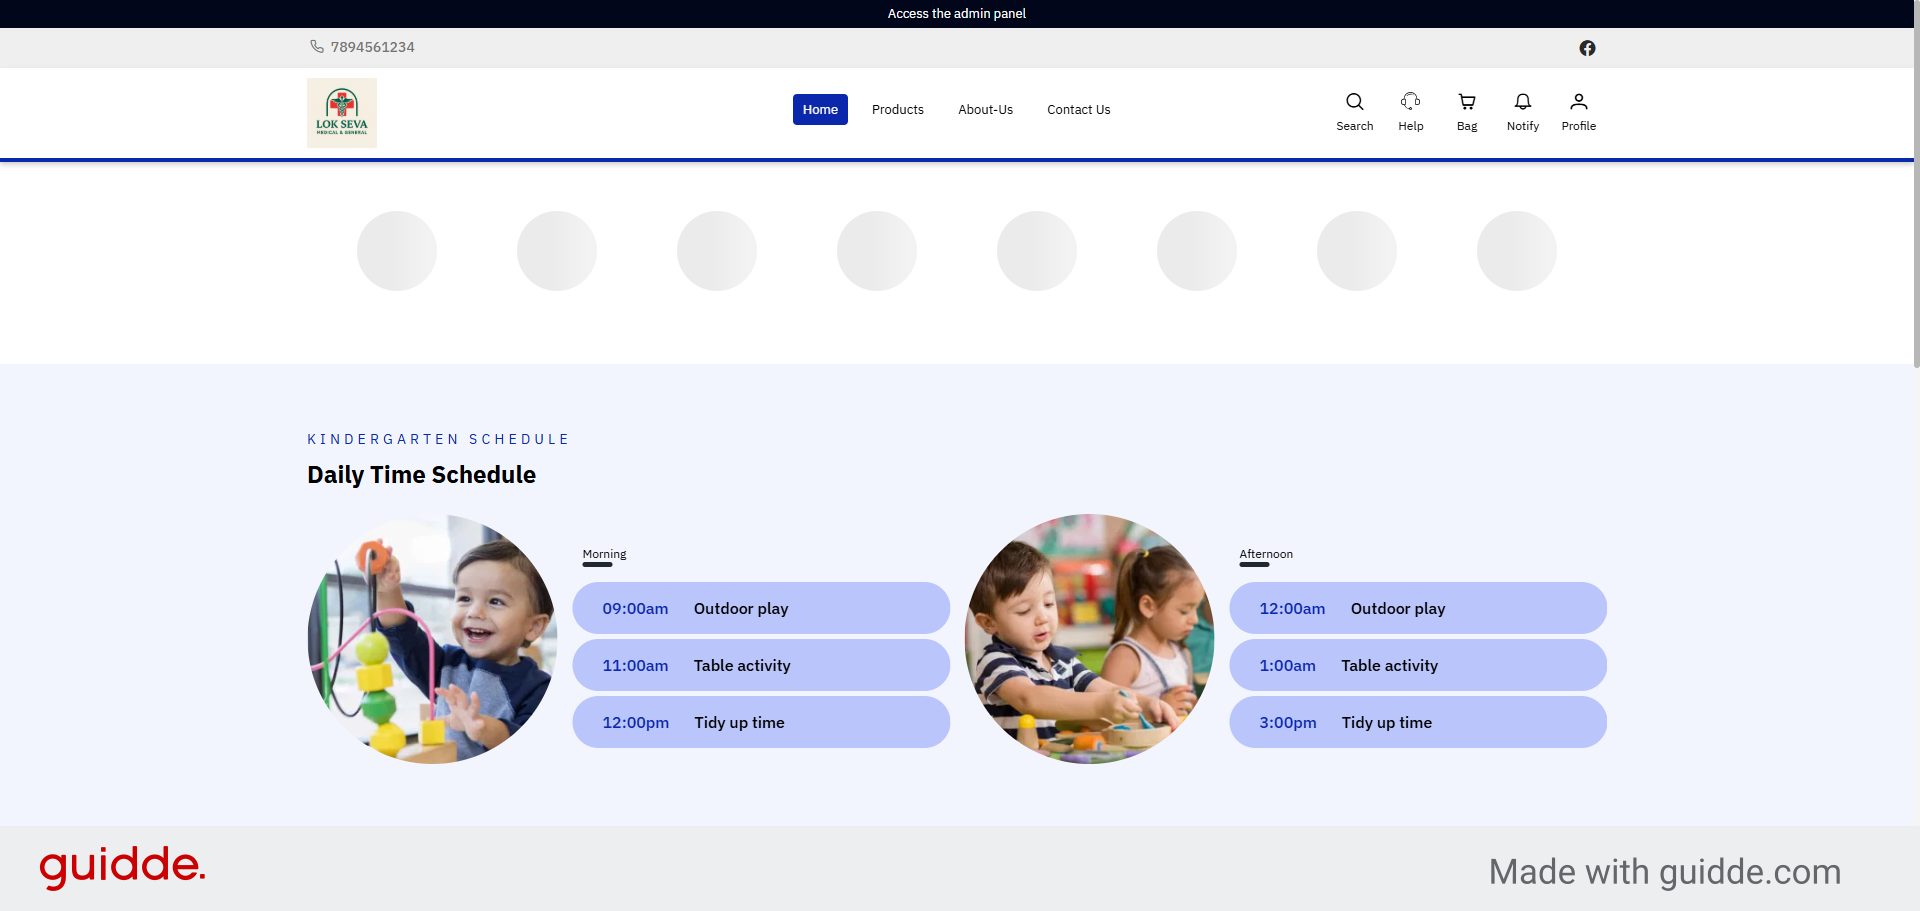
71. Your Website Is Live
Congratulations! Your website has been successfully launched and is now live and ready to use.
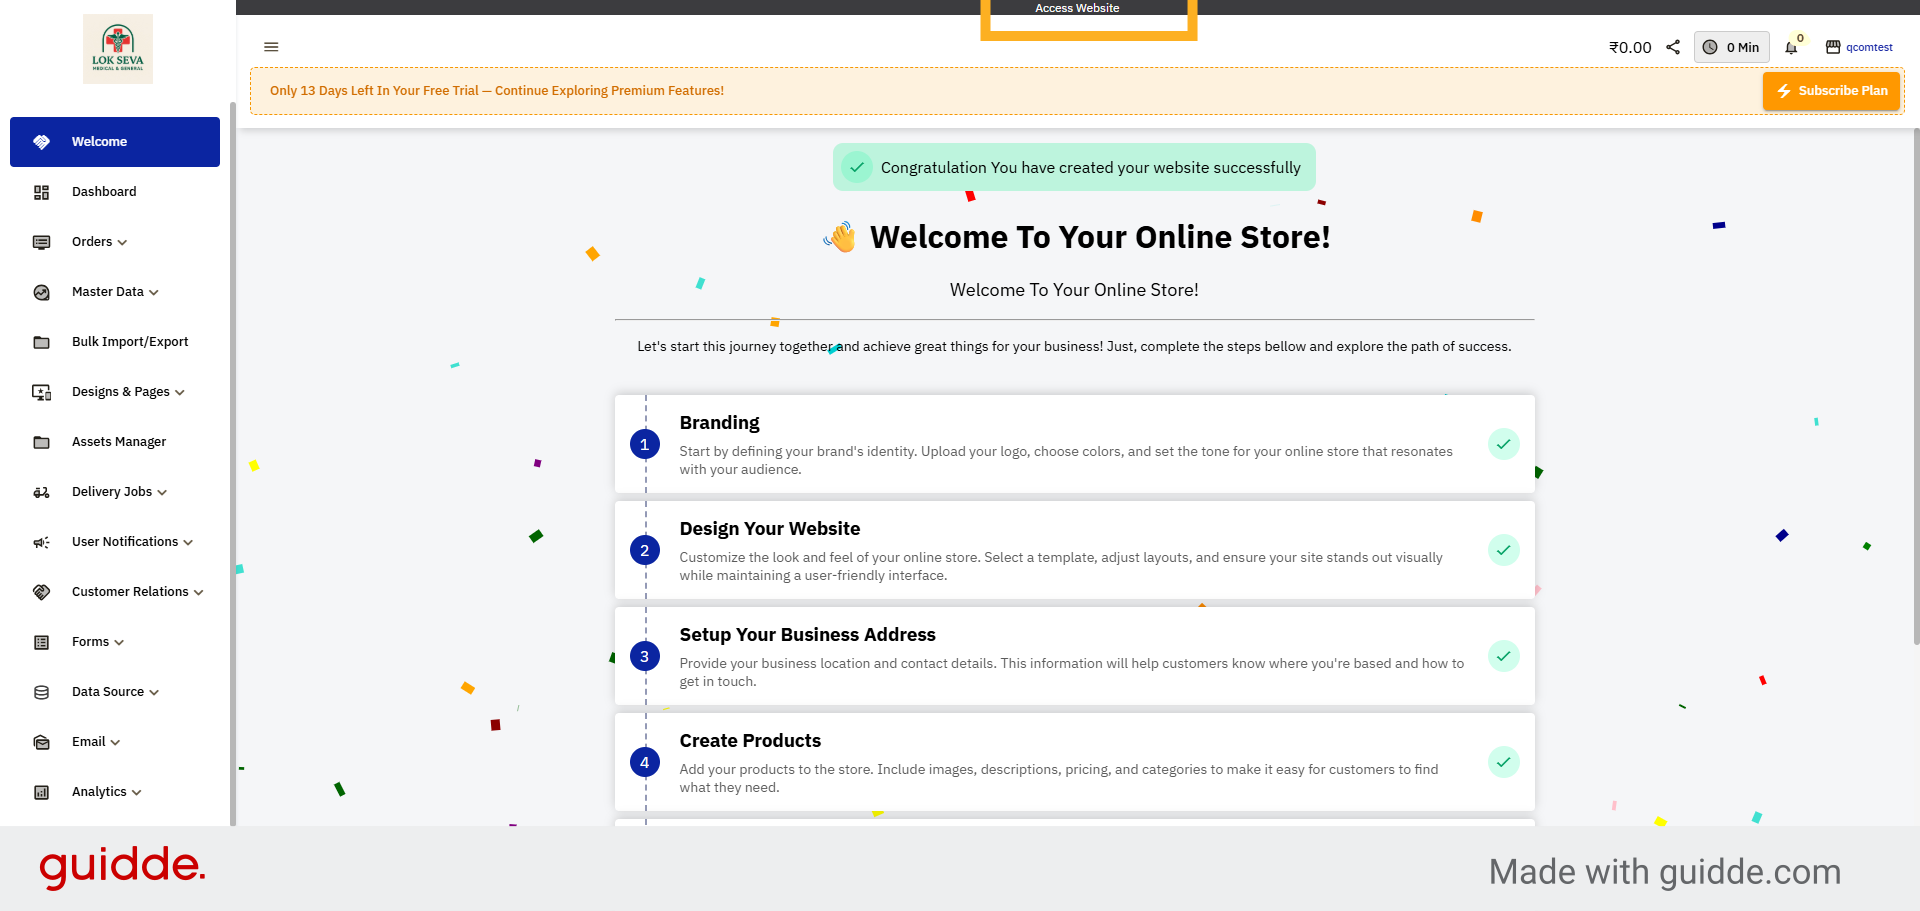
You have successfully created and configured your Q-commerce website using Boniii, including business
details, branding, product listings, and shipping settings. Next, explore marketing tools and customer
management features to grow your online store.
Uploading...