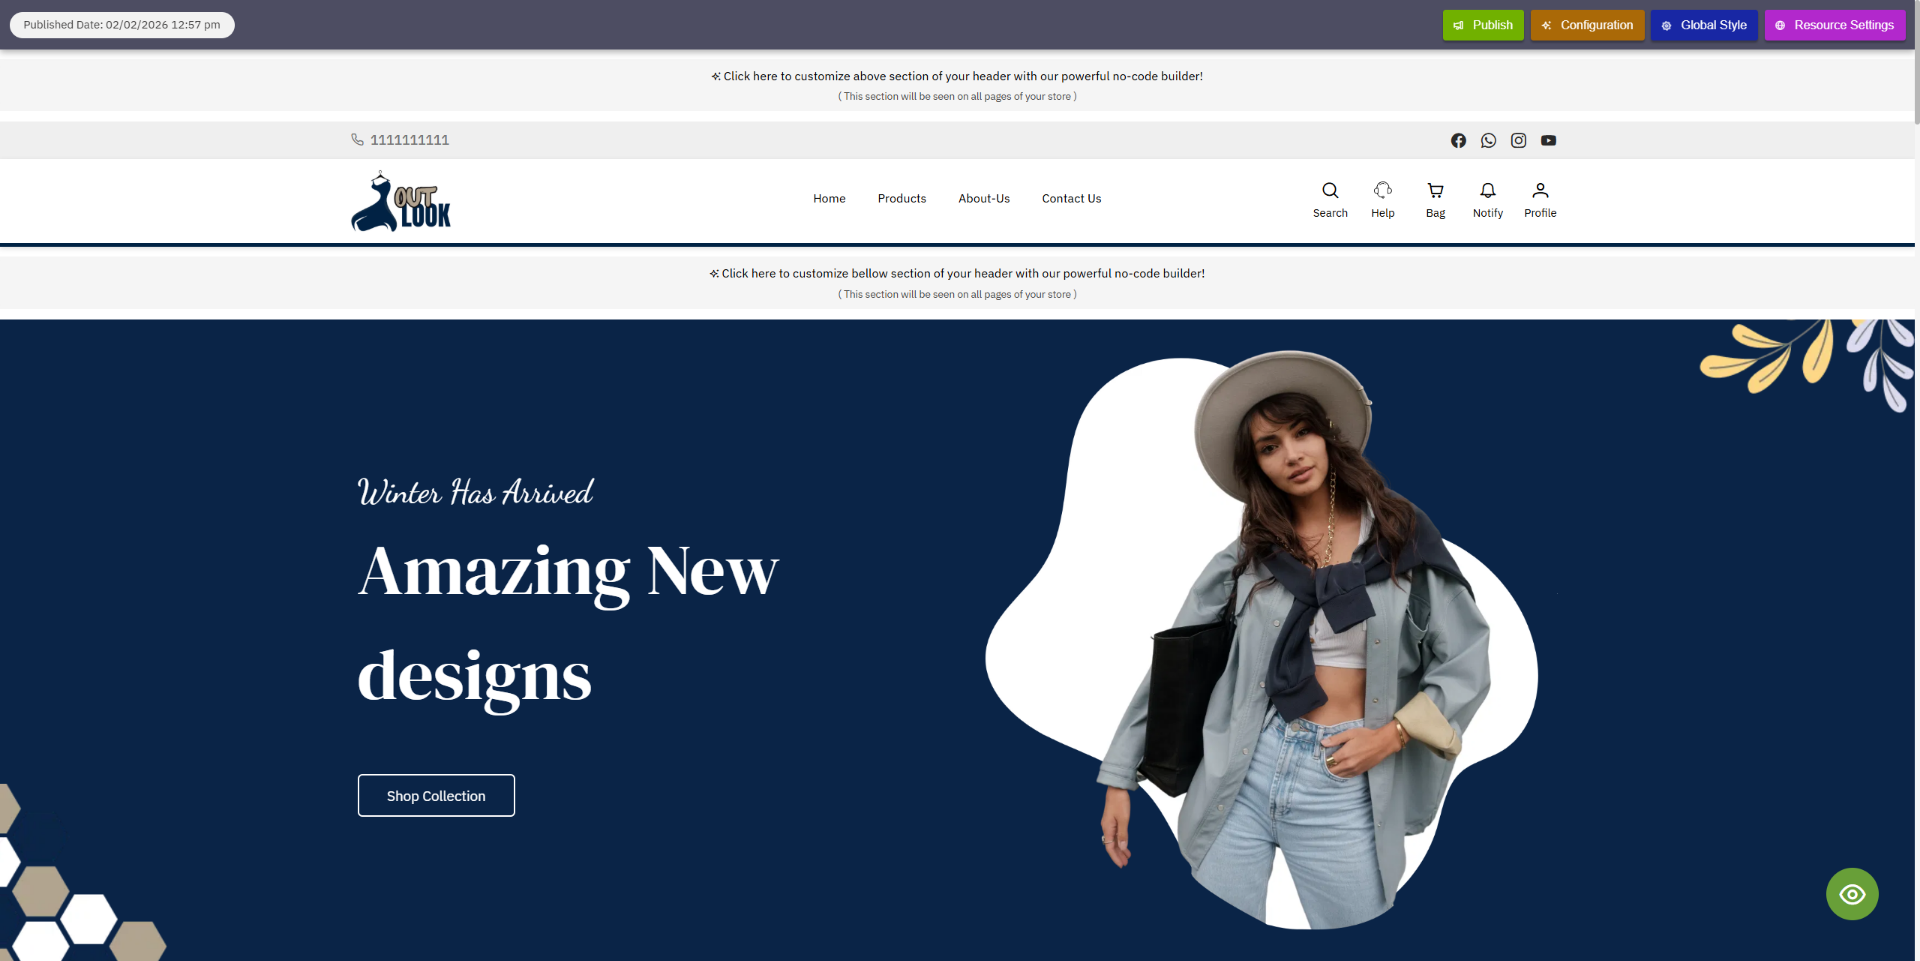
2 - How to use Configuration
1. Open Configuration Menu
Open the main configuration menu in Boni to begin customizing your settings.
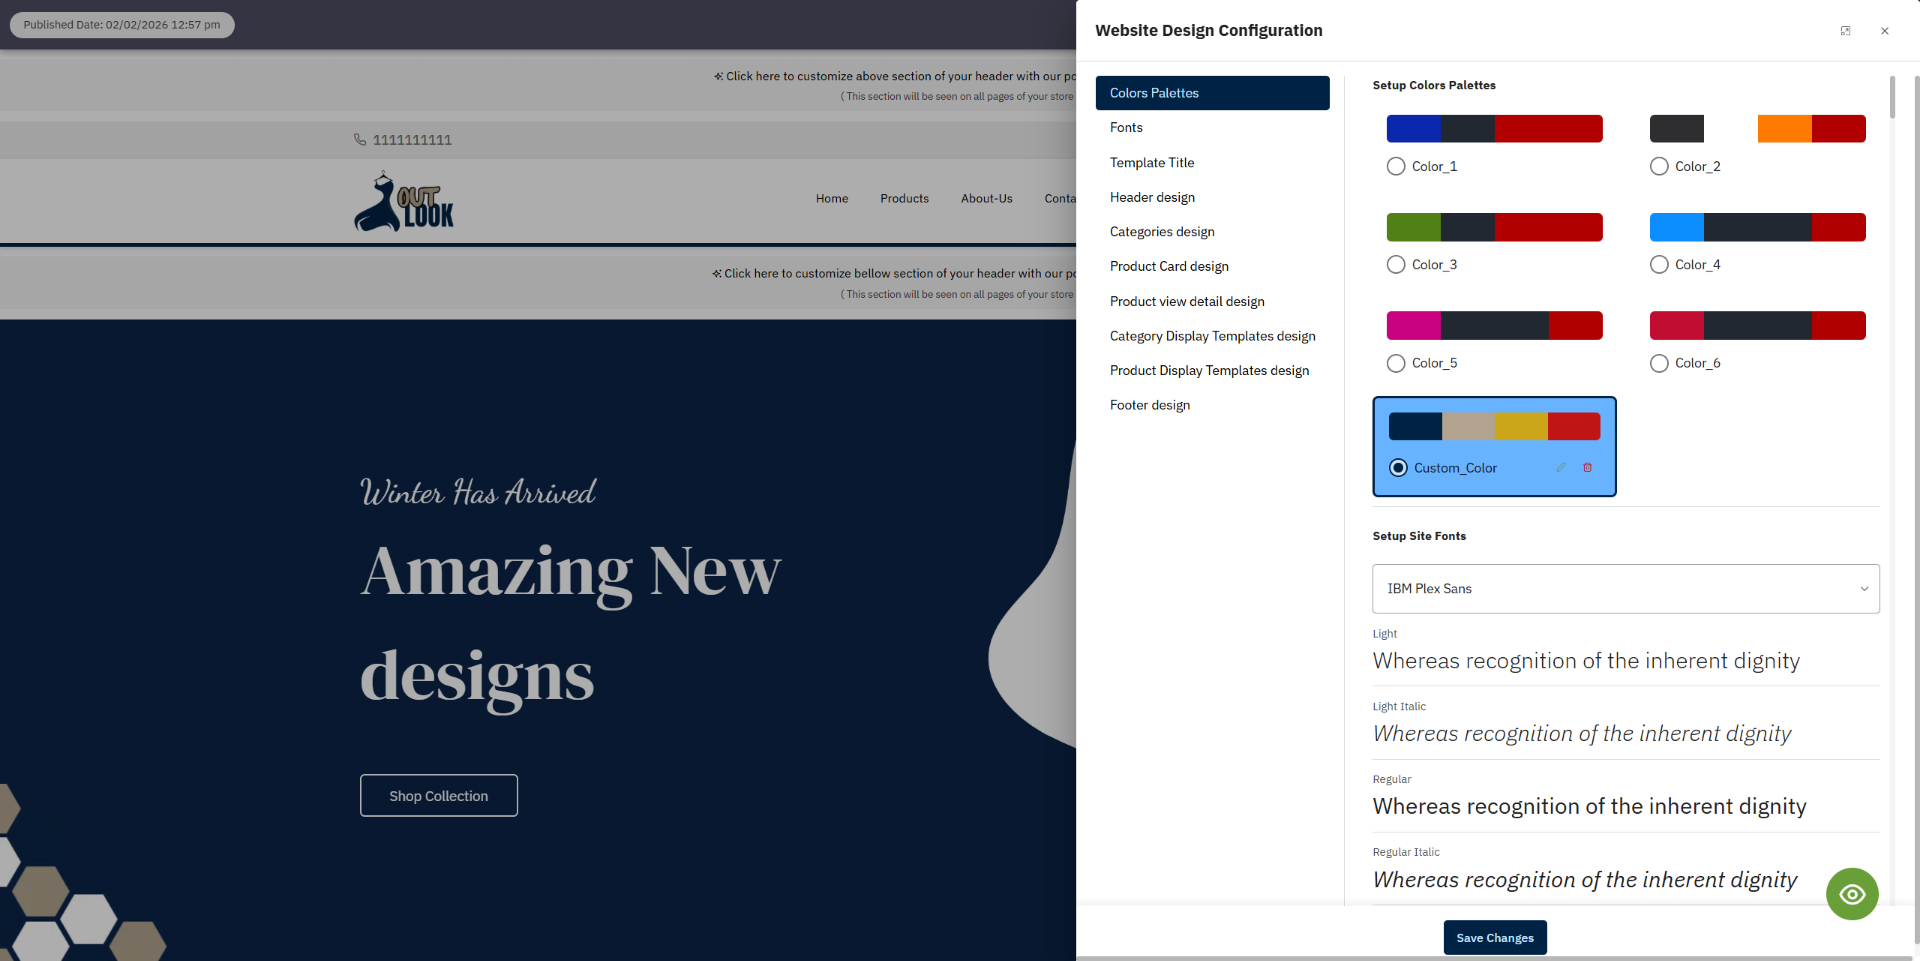
2. Access Color Palettes
Color Palettes enable you to configure your website’s theme colors in alignment with your brand
identity. You can select and manage both primary and secondary colors to ensure a cohesive design
throughout the entire website. These theme colors will automatically be applied to elements such as
buttons, links, backgrounds, and sections, contributing to a polished and professional appearance.
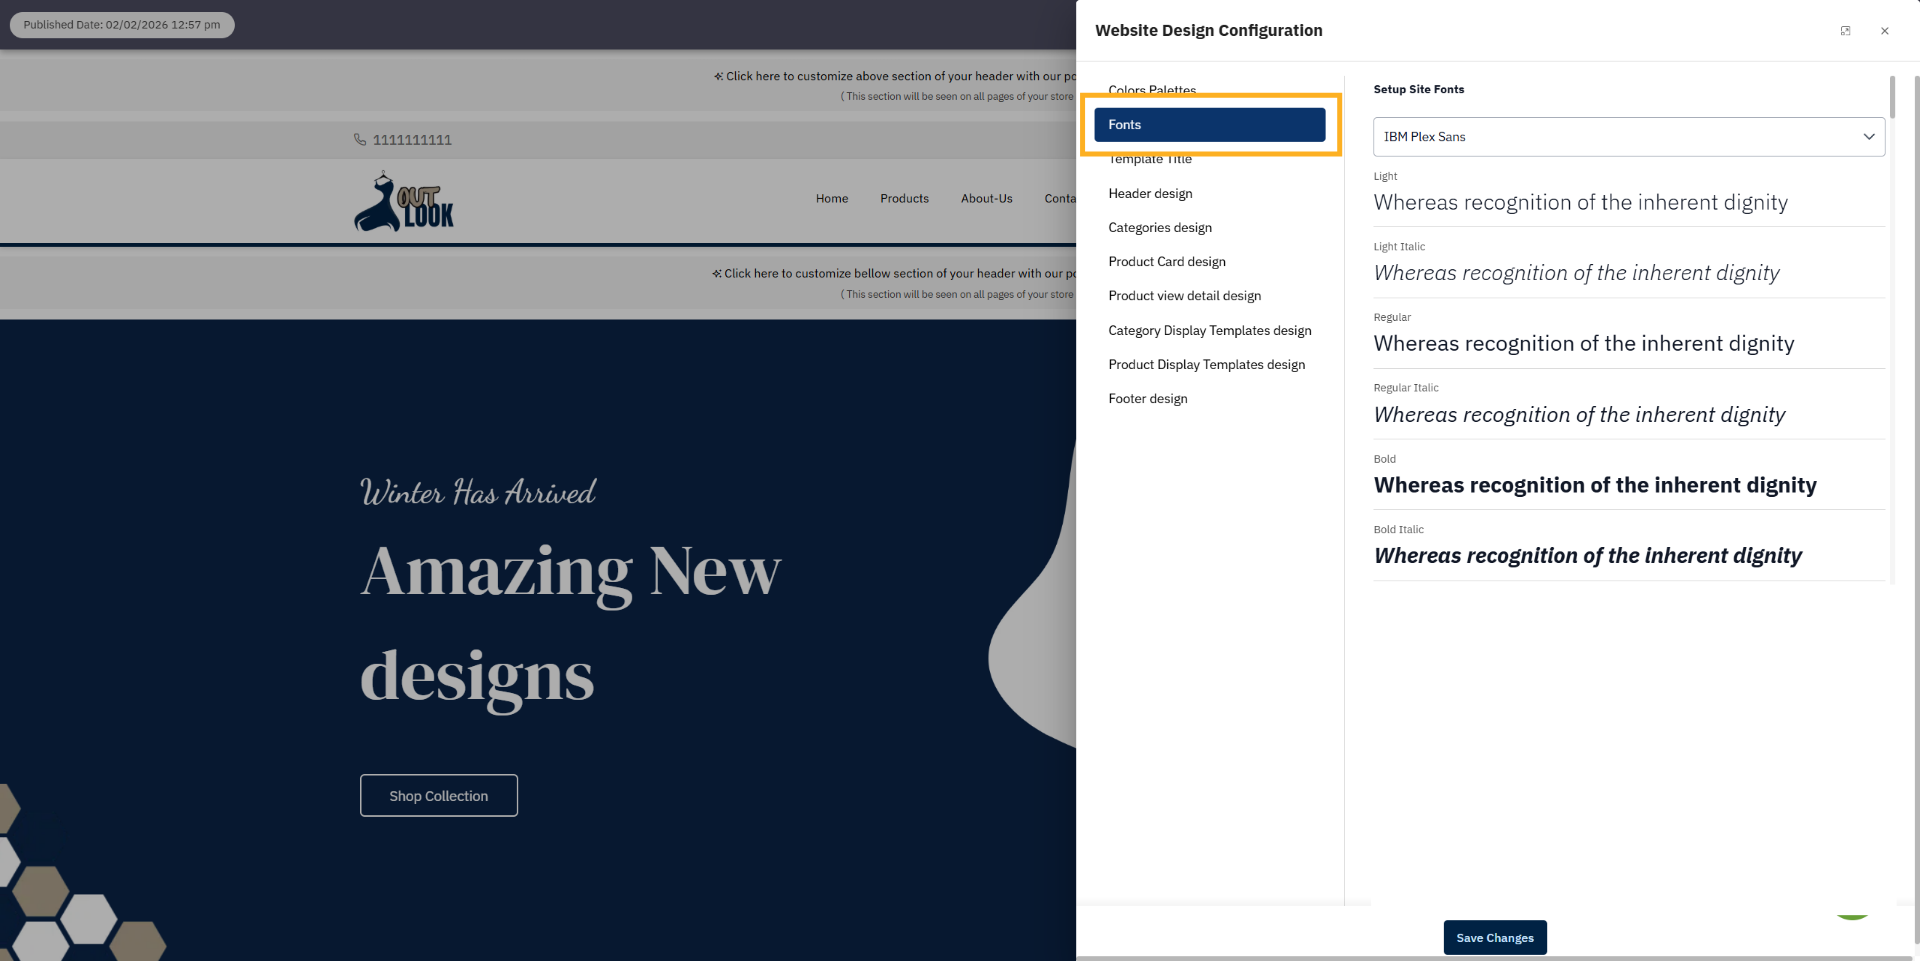
3. Navigate to Fonts Section
Fonts & Typography enables you to choose and implement fonts throughout your website. You can manage the
font styles for headings and body text to ensure your design remains consistent and easy to read.
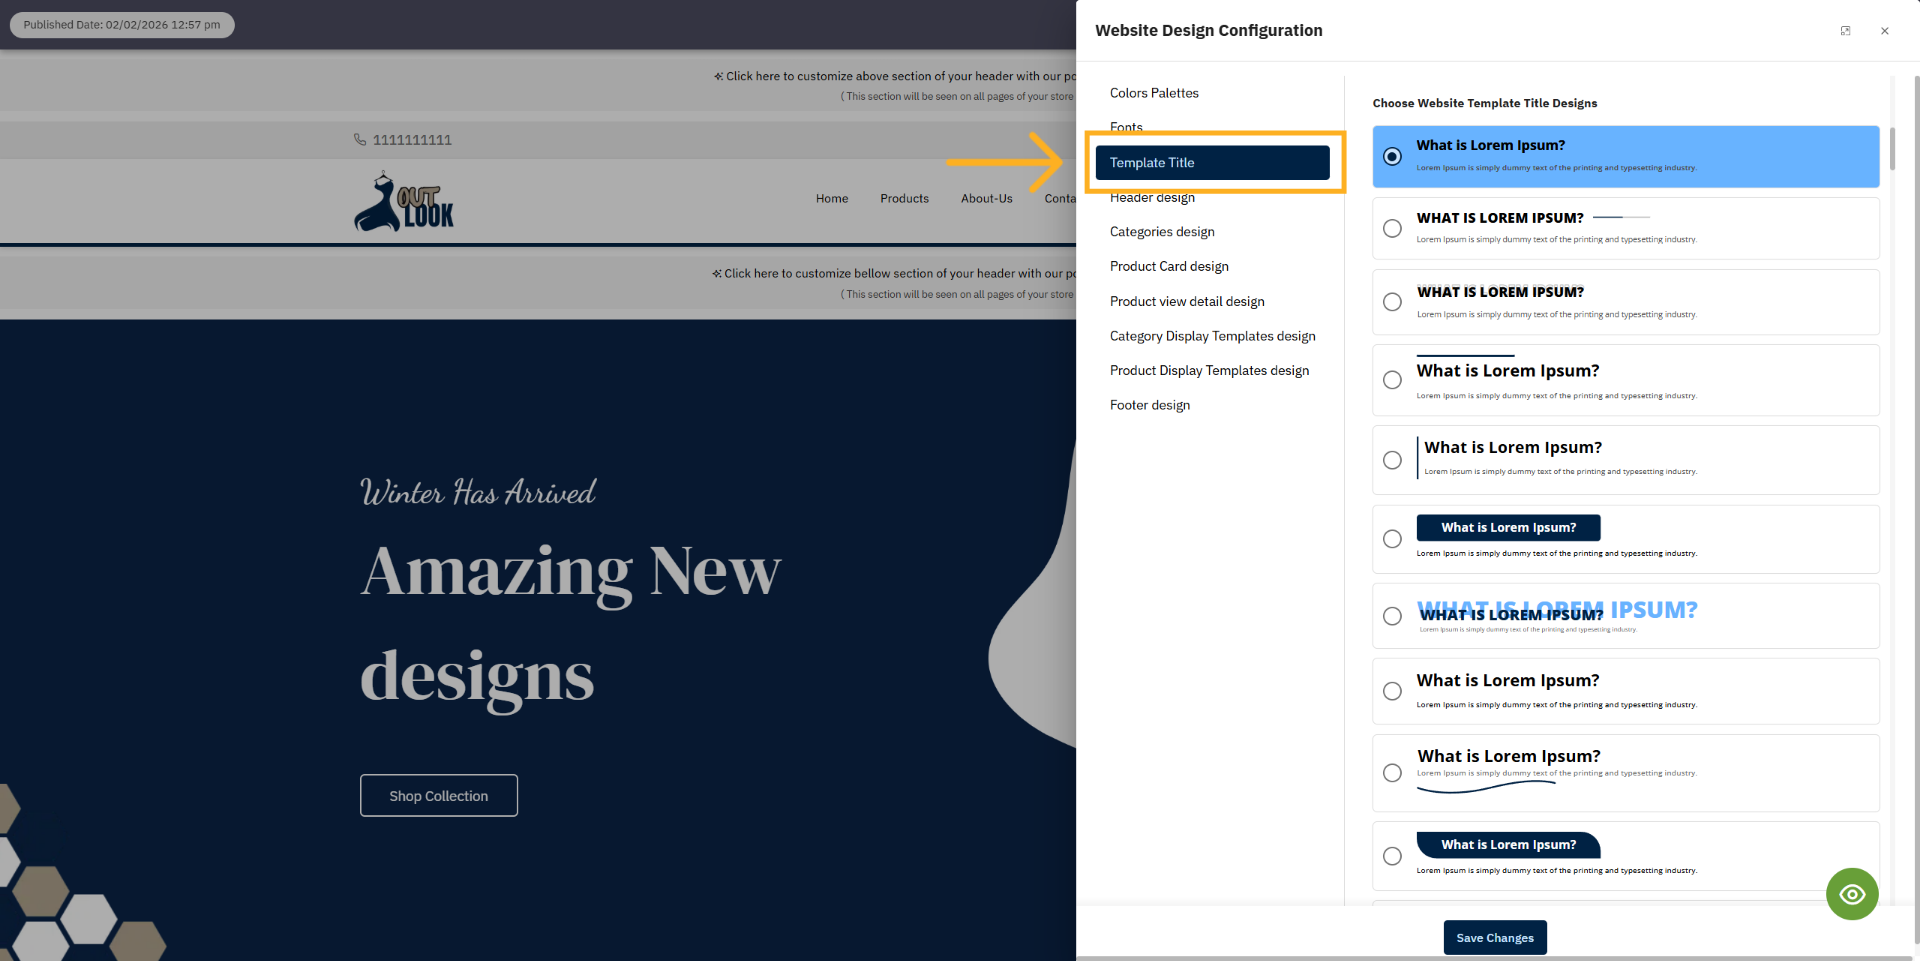
4. Access Title Design Options
The Section Title Template enables you to select the design style for your website's section titles. You
can choose from various title layouts to align with your website's aesthetics and branding. This ensures
that section headings remain clear, appealing, and consistent throughout your pages.
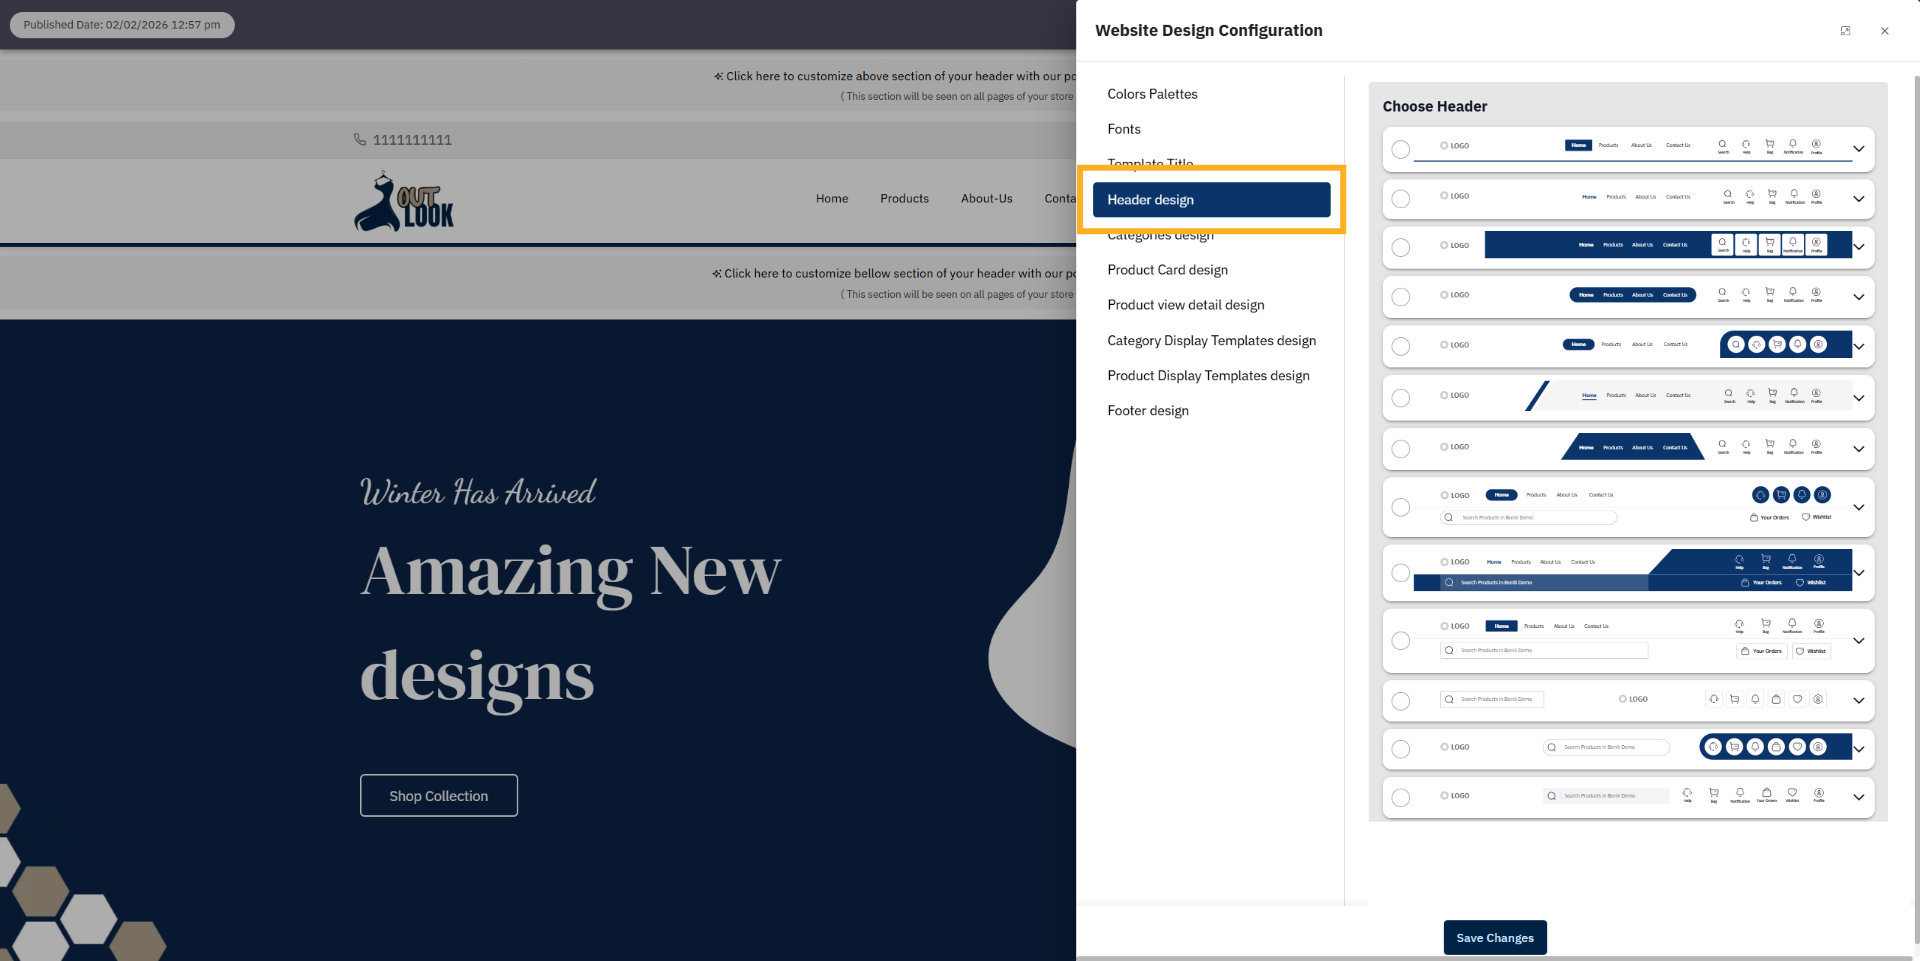
5. Open Header Design Menu
Header Design Templates allow you to choose a header style for your website and customize its layout.
You can set up the navigation menu, dropdown menus, and action buttons according to your needs. This
helps create a clear, user-friendly, and professional website header.
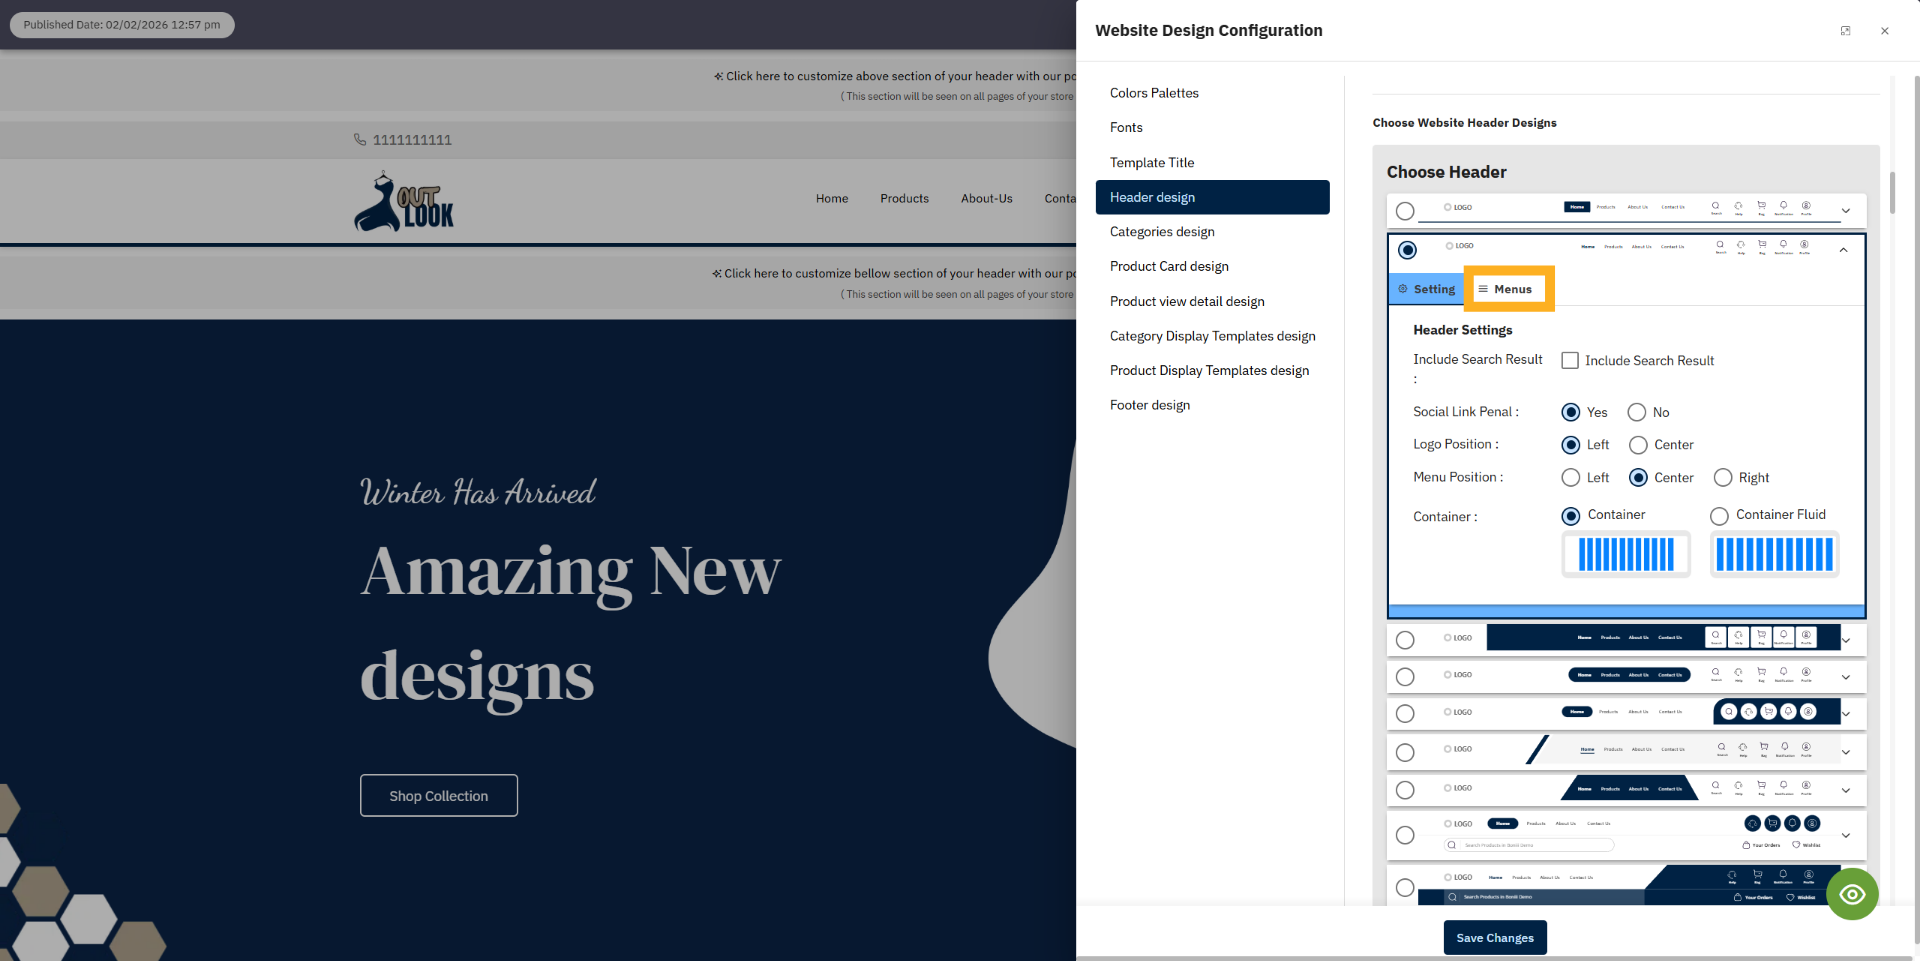
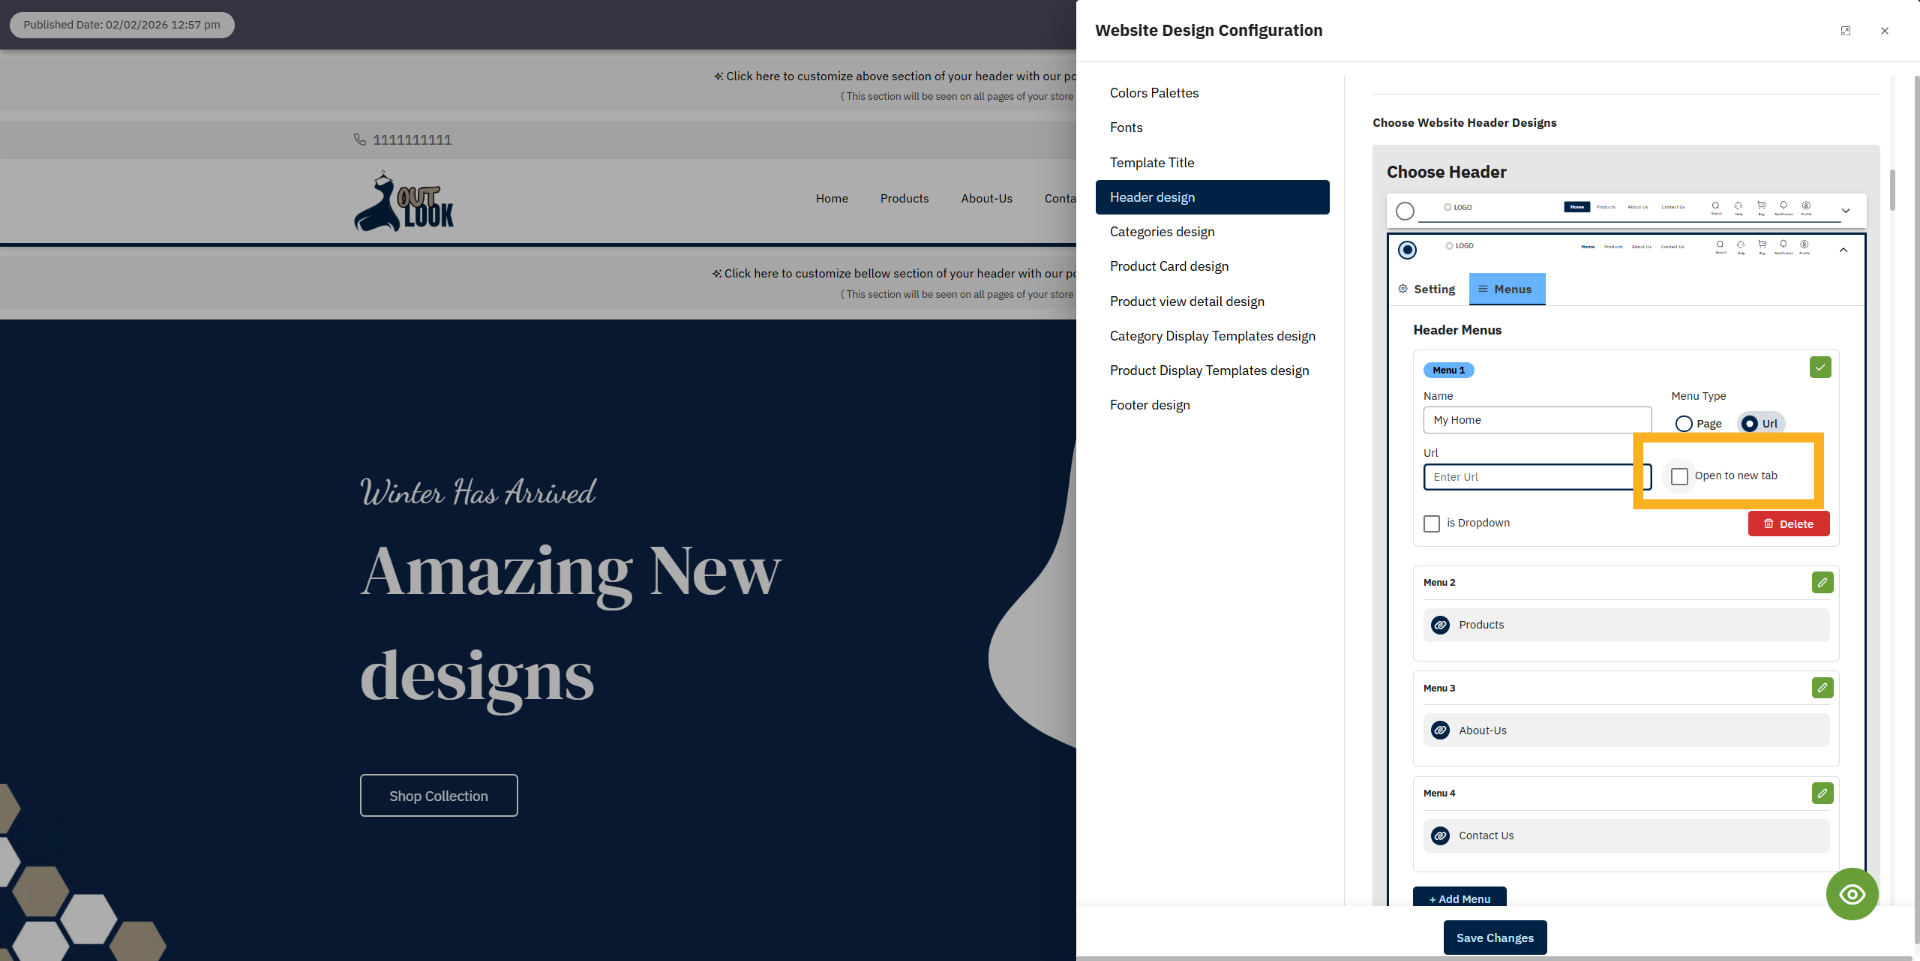
6. Header Menus
Header Navigation Menus allow you to create and manage your website’s main menus and dropdown menus. You
can easily add menu items, organize them into dropdowns, and link them to different pages or sections.
This helps visitors navigate your website quickly and easily.
7. Edit Menu Item Settings
The Edit Menu feature enables you to effortlessly update and manage your website's navigation. You can
configure menu links, link them to your site pages, and create dropdown menus for improved organization.
This functionality allows visitors to navigate various sections of your website quickly and seamlessly.
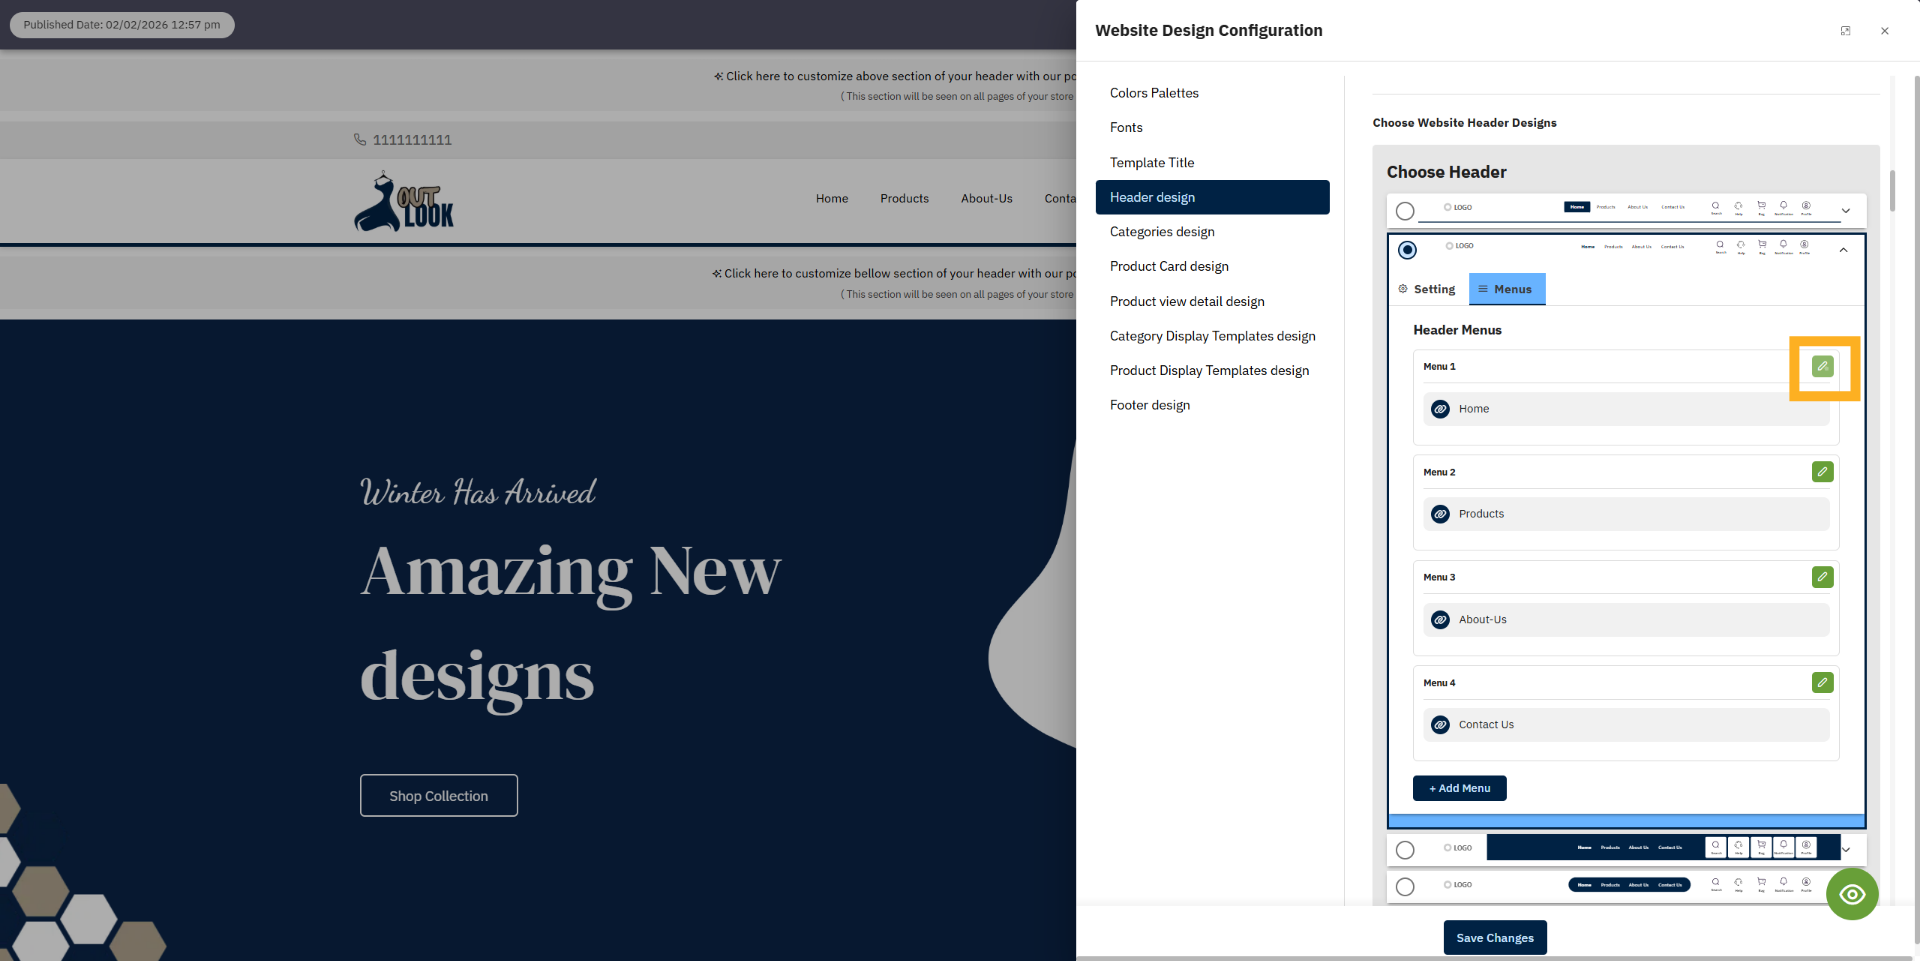
8. Select Menu Name Field
Select the menu name text box and update your menu name as needed.
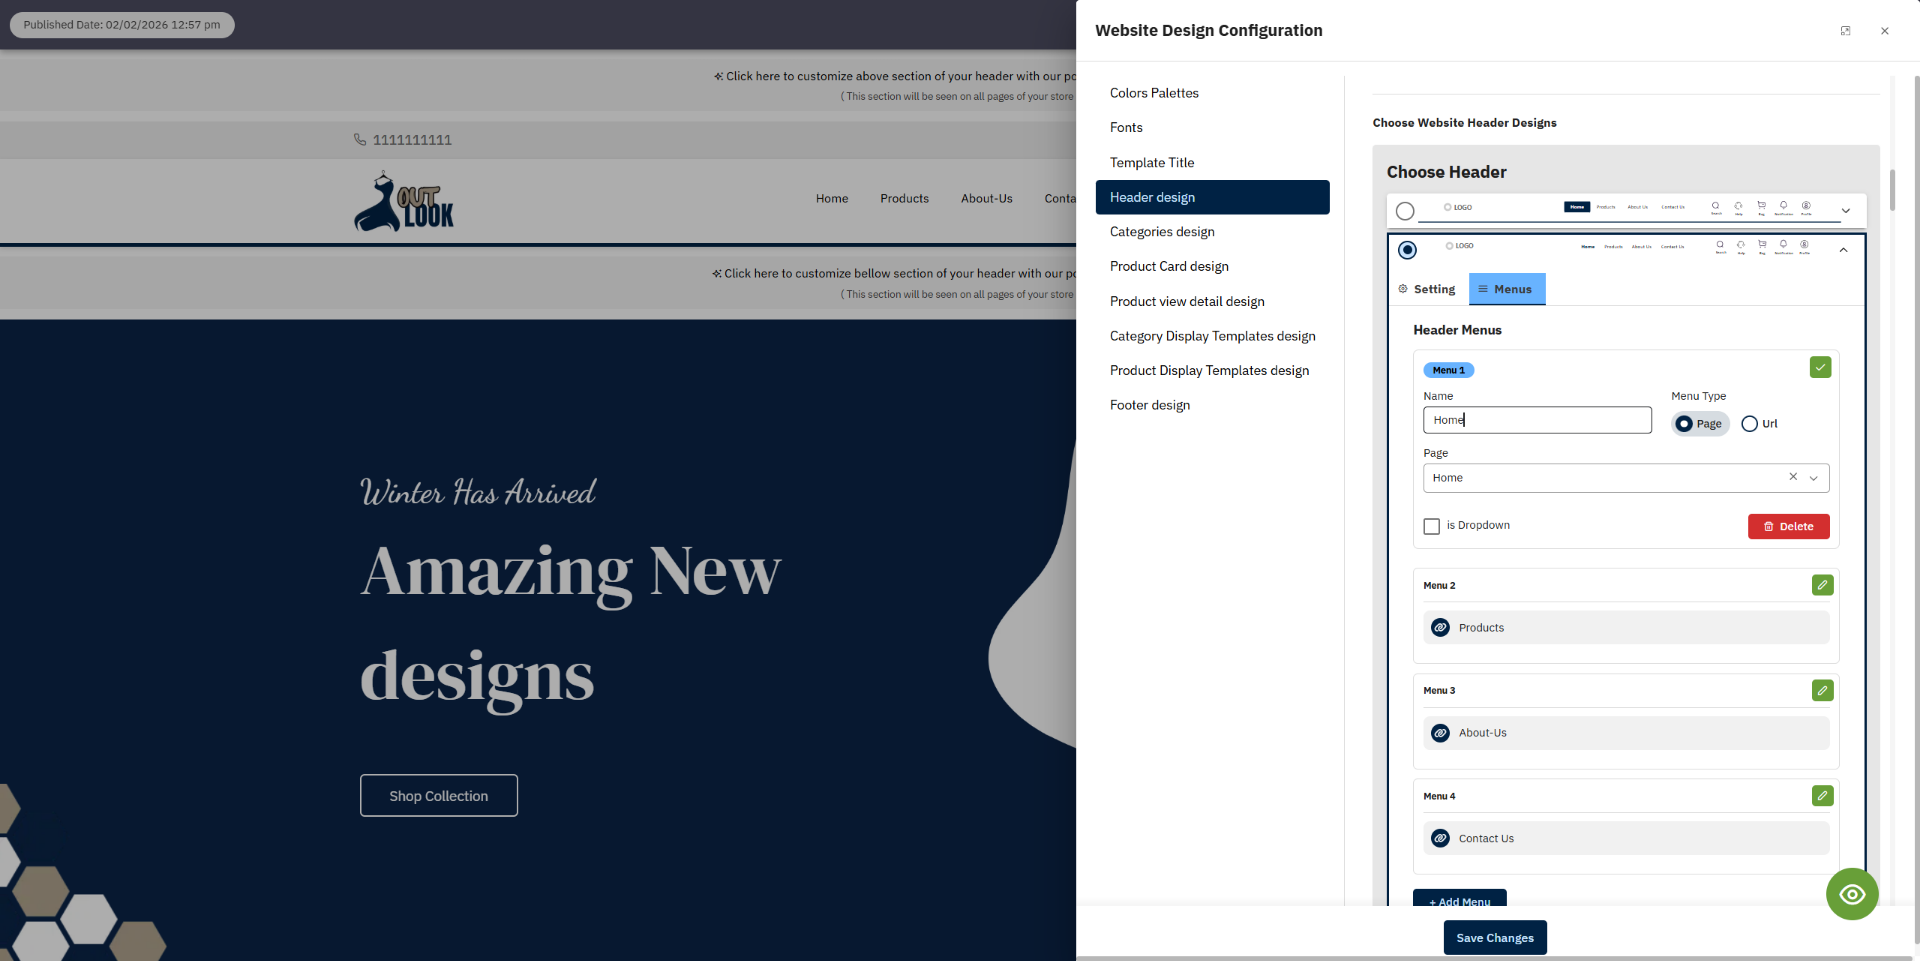
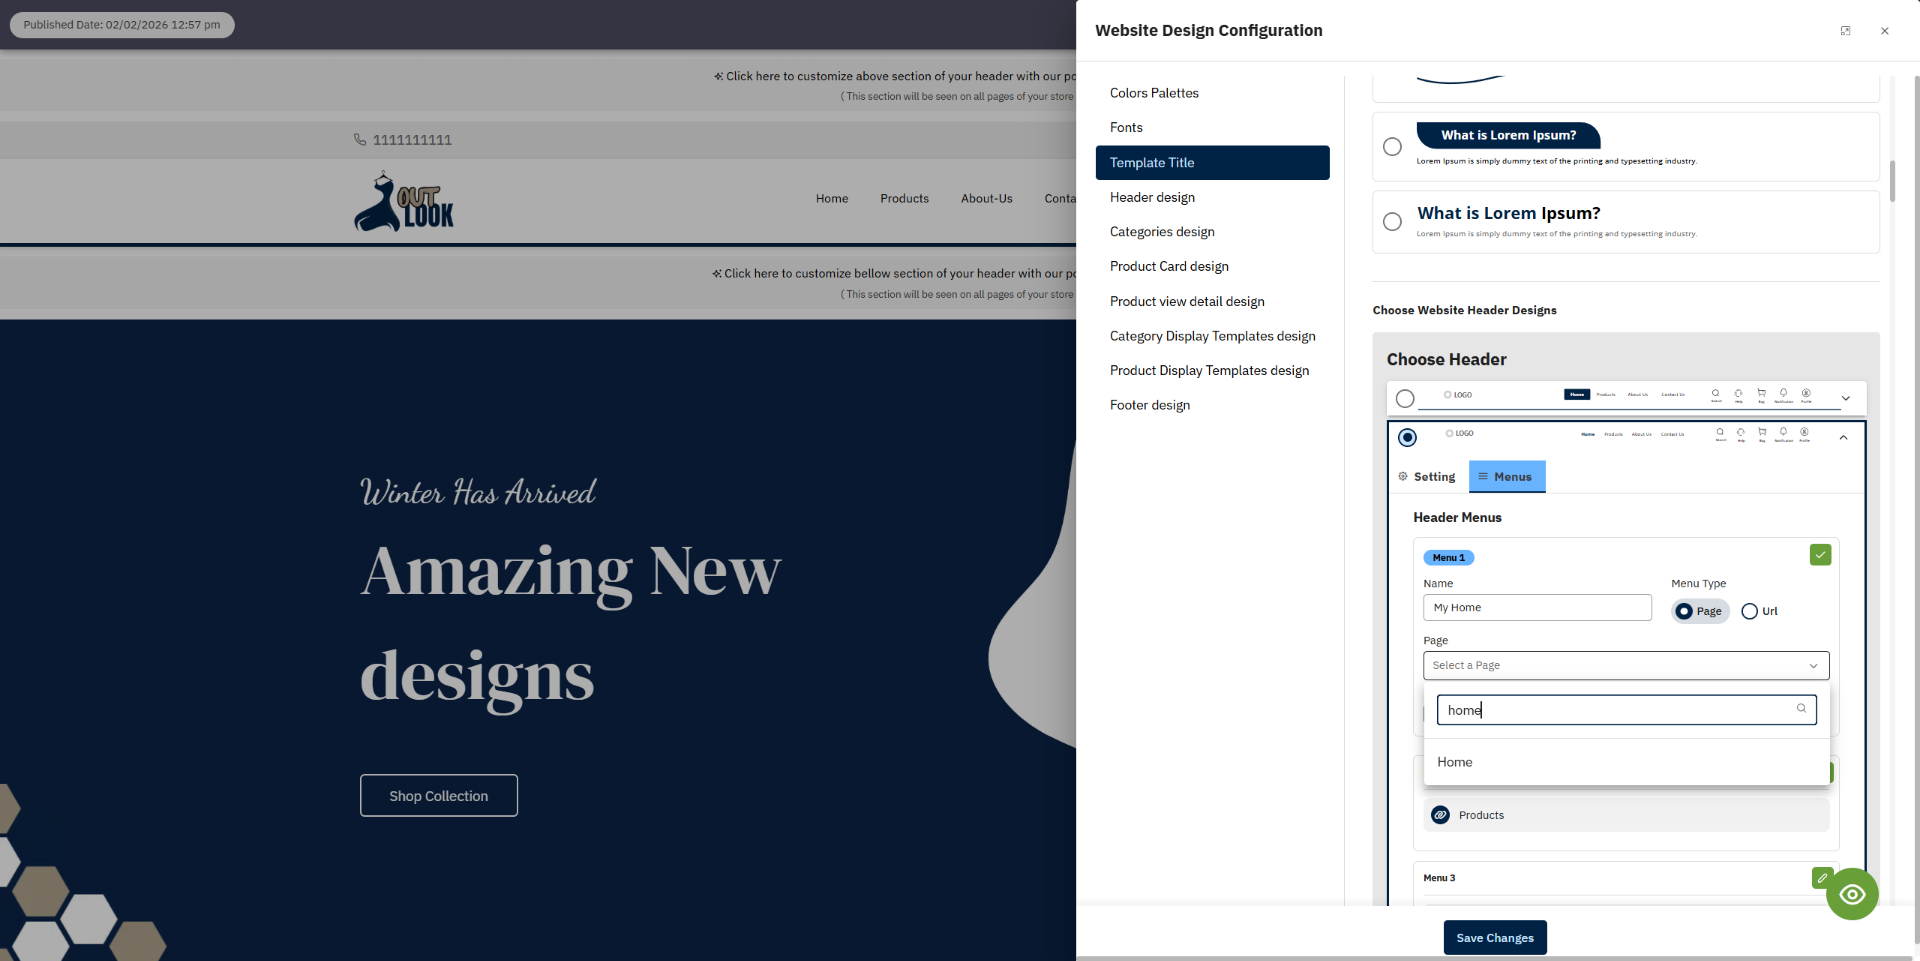
9. Set to menu type
You can set the menu type according to your needs. If you select the Page option, a dropdown will appear
showing all the pages available on your website. From this list, you can easily choose and link any page
to the menu. This helps create quick navigation to different pages of your site.

10. Select URL
If you select the URL type, a link text box will appear. Simply enter the desired URL, and the menu will
automatically transform into a navigation link to that address. This feature enables you to connect your
menu to external pages or custom URLs.

11. Additional Menu Options
Additional Menu Options let you control how a menu link opens. If checked, the link opens in a new tab;
if unchecked, it opens on the same page.
12. Page dropdown
If you select the Page menu type, a dropdown list of your website pages will appear below. From this
list, you can choose and set any page for the menu link.

13. Search your page
A search box is also available in the page list dropdown, allowing you to quickly search and select the
page you want to set for the menu.
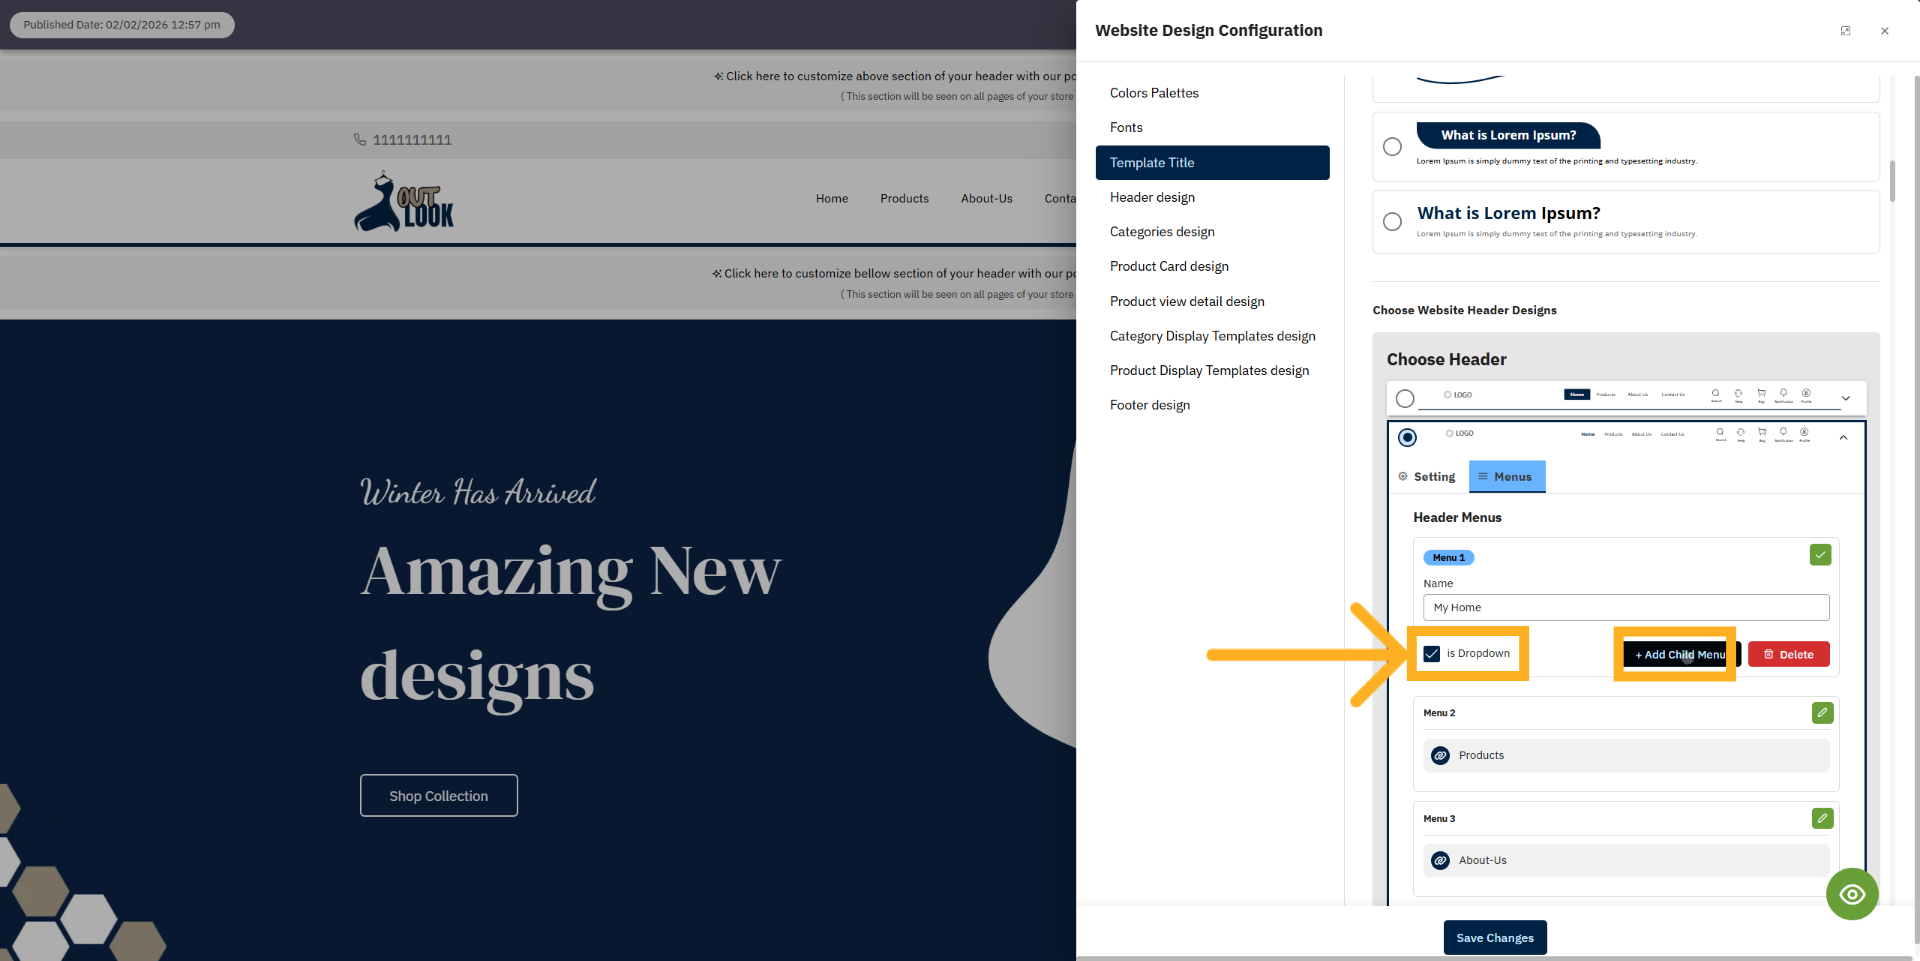
14. Add Child Menu Item
To create a dropdown menu item, check the “Is Dropdown” option. After enabling it, an Add Child Menu
button will appear. Click it to create a sub-menu, then set the menu name, page type, or link/page just
like the main menu. This allows you to easily create dropdown navigation menus.
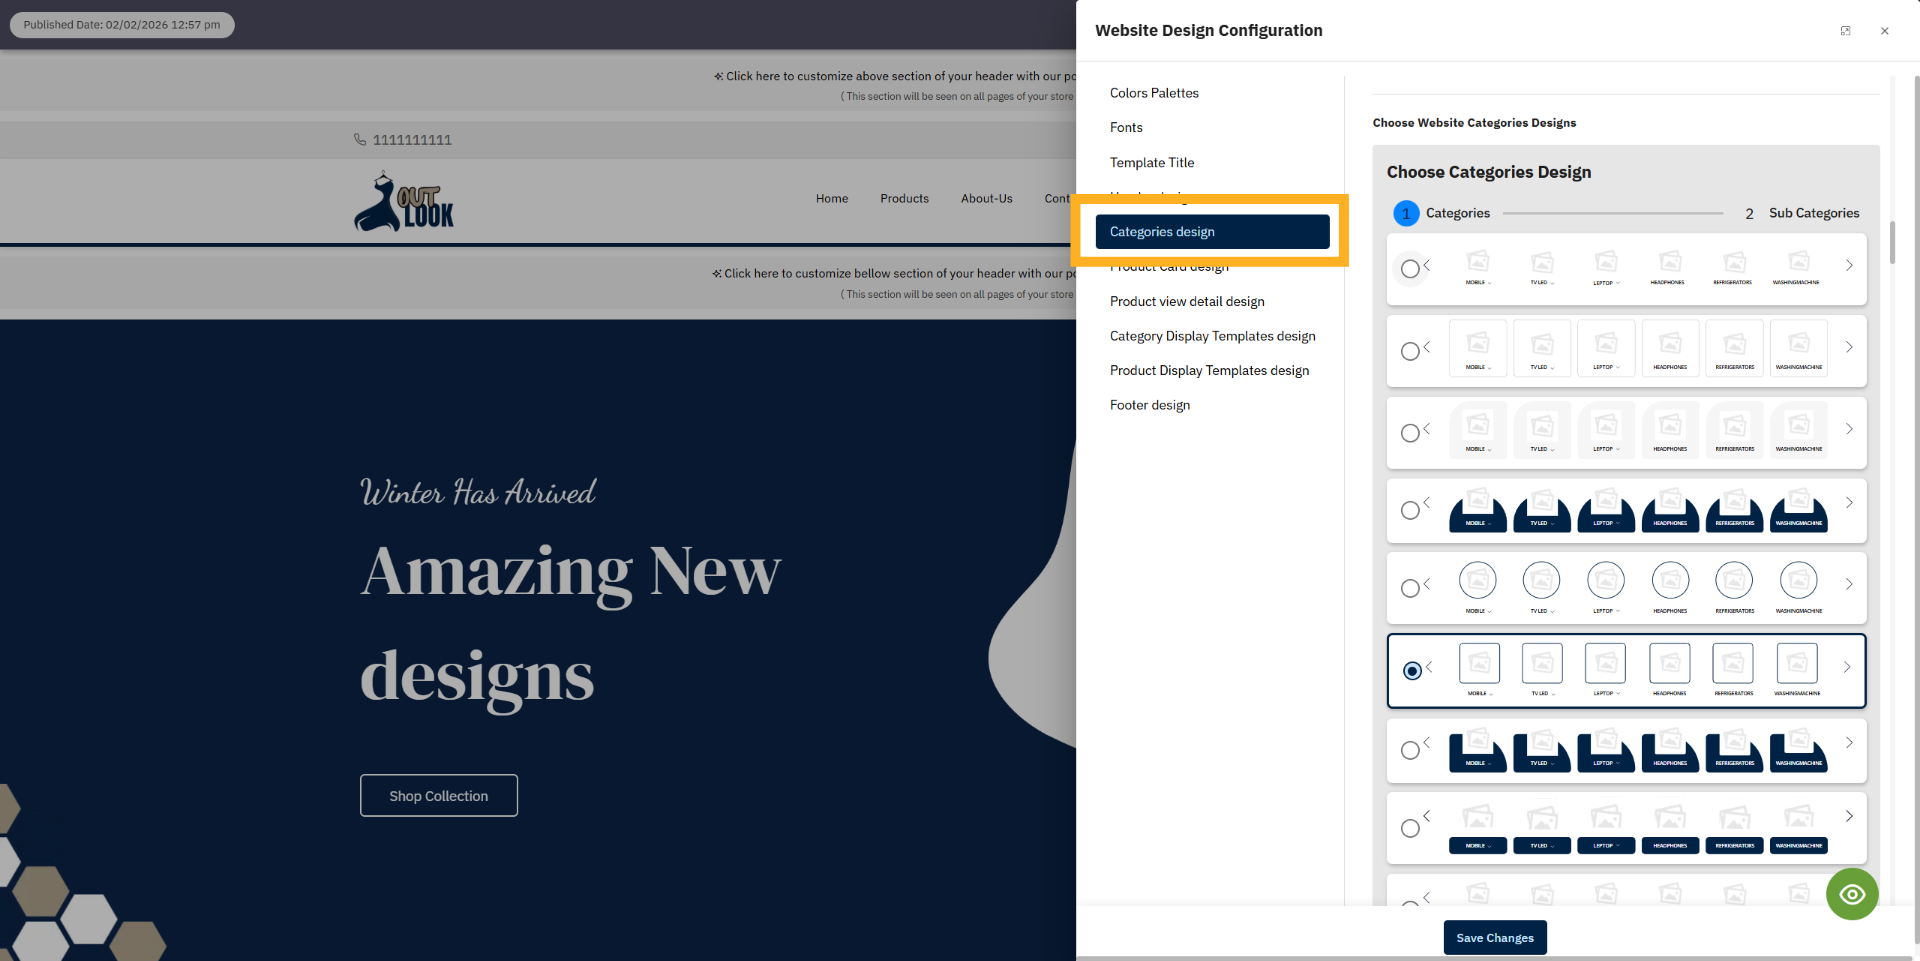
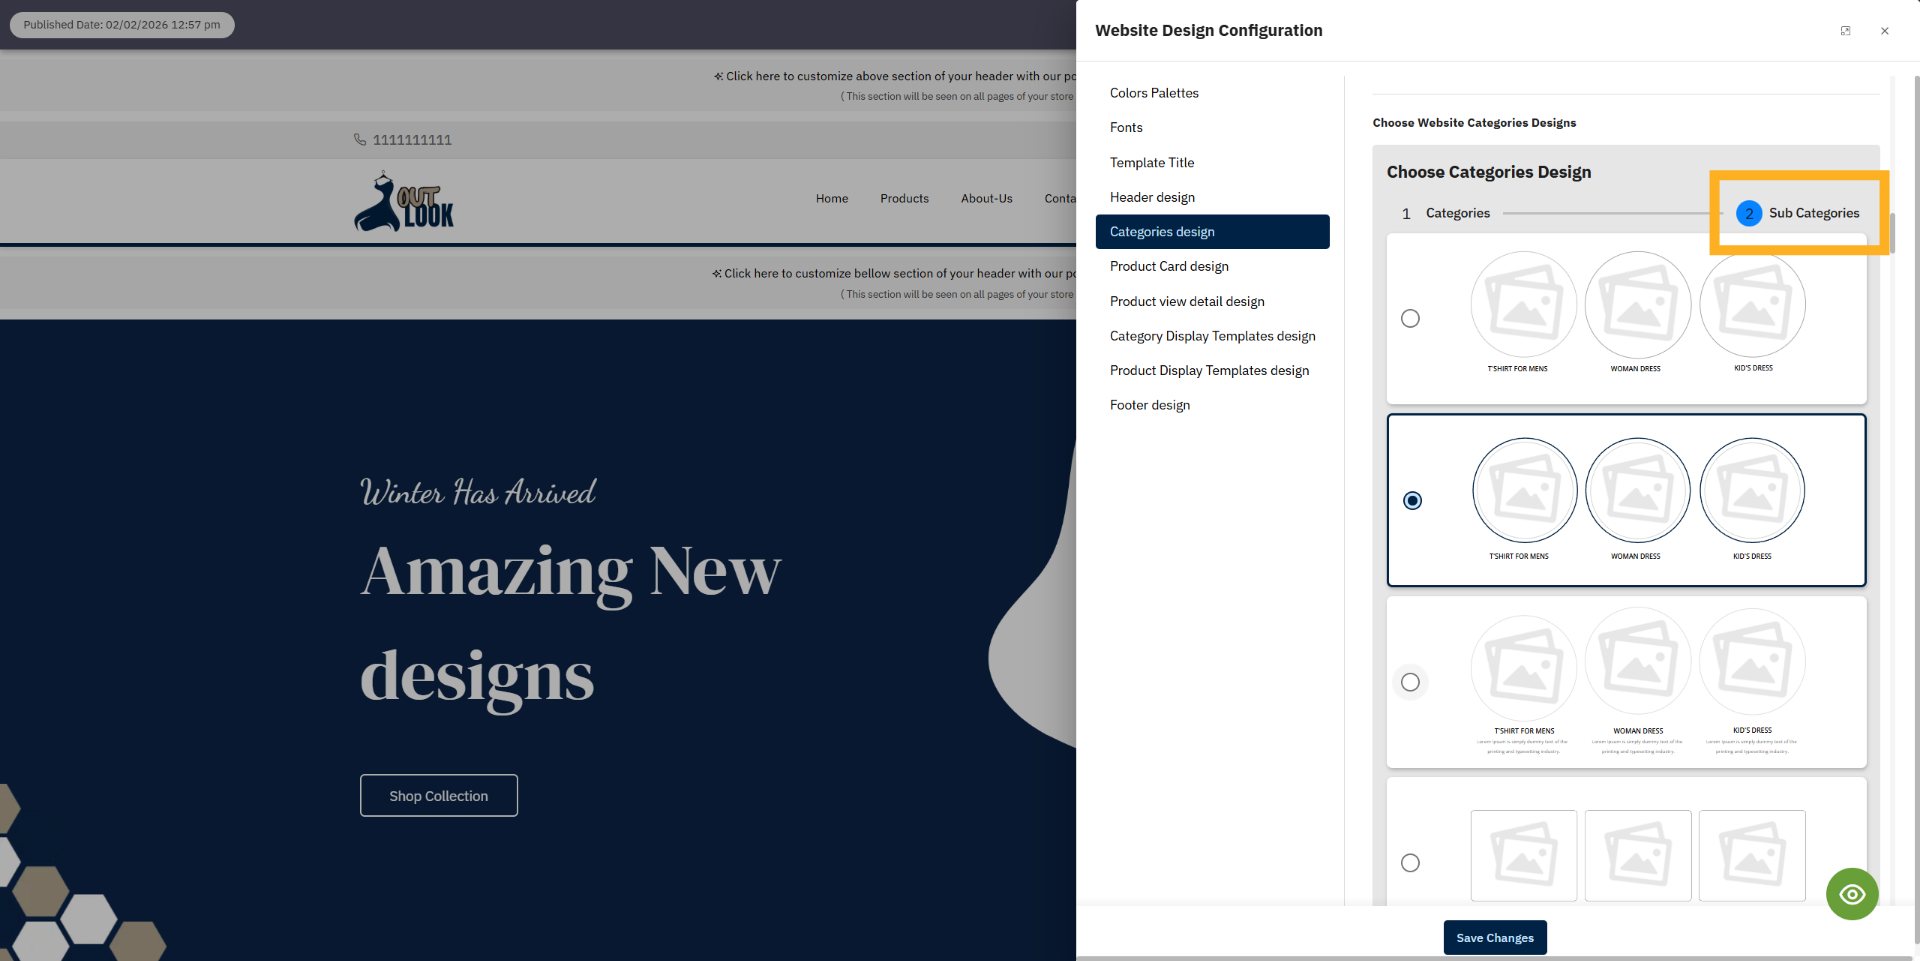
15. Select Categories Design
Select the Categories design option to modify category appearance.
16. Choose Sub Category Design
Modify the sub category template d display design
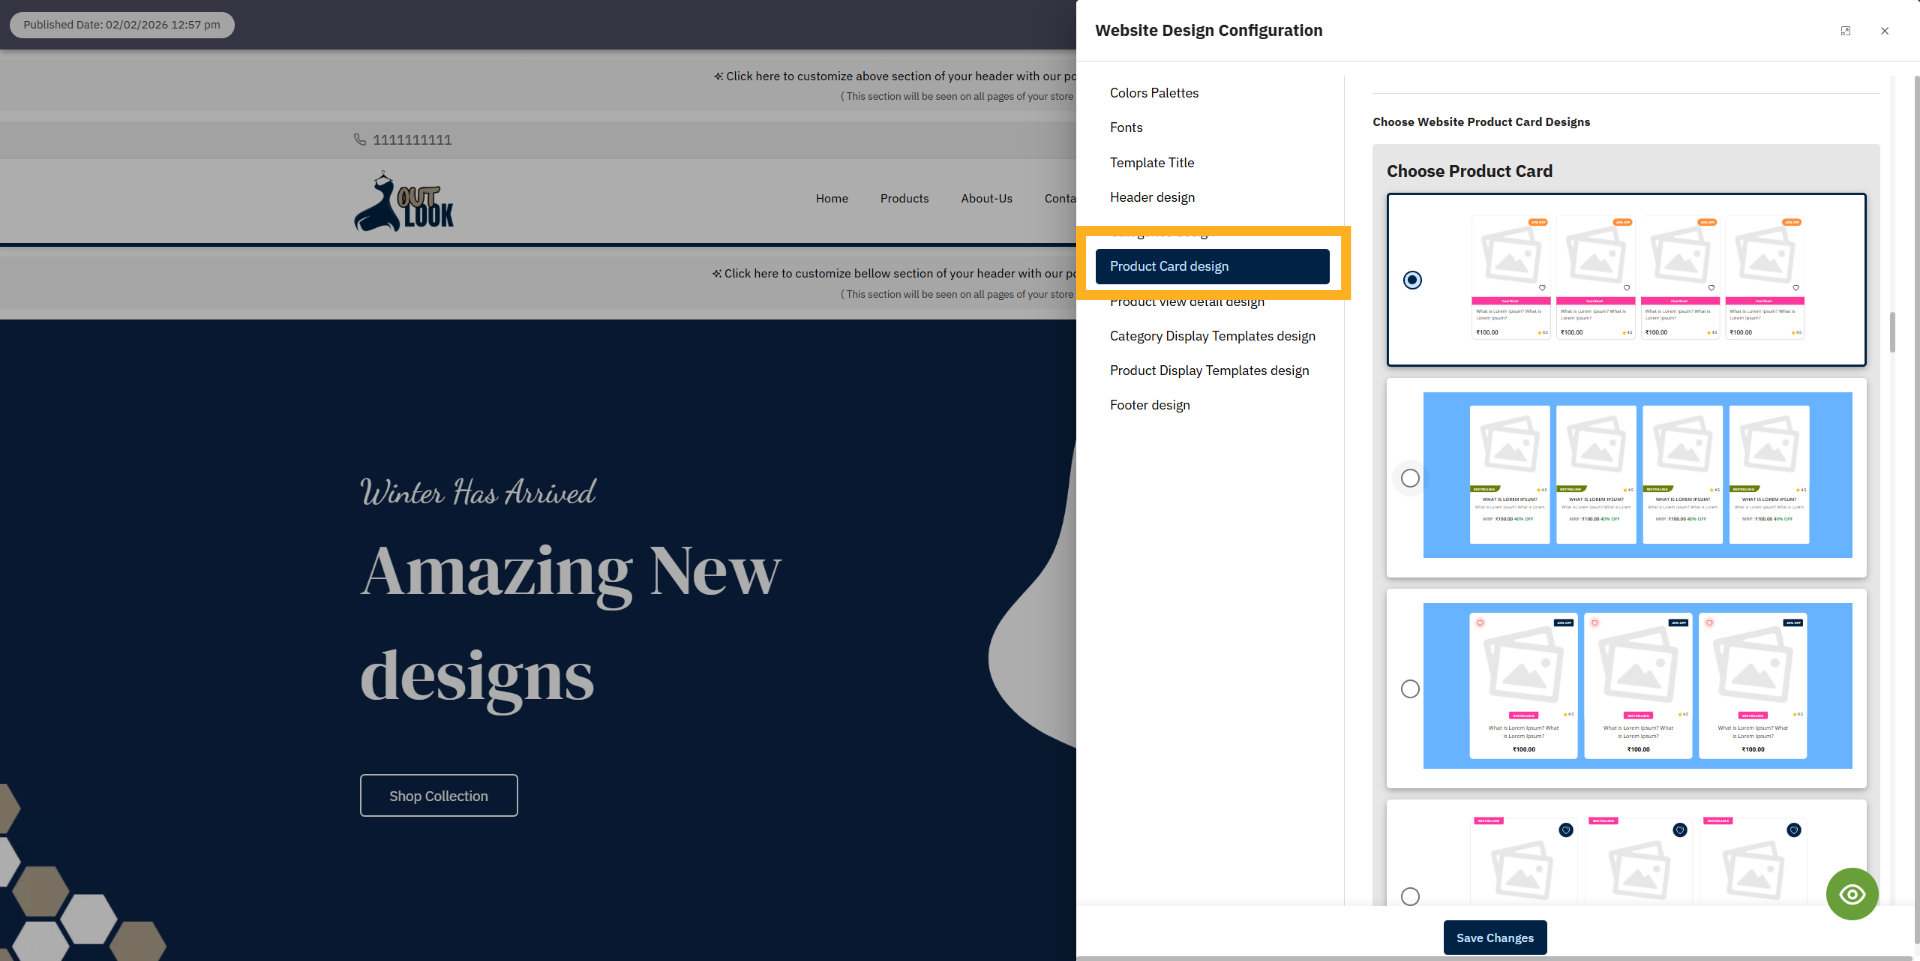
17. Product Card Design Options
Product Card Design allows you to choose a product card style from the available design list. You can
select the design that best fits your website layout and preferences.
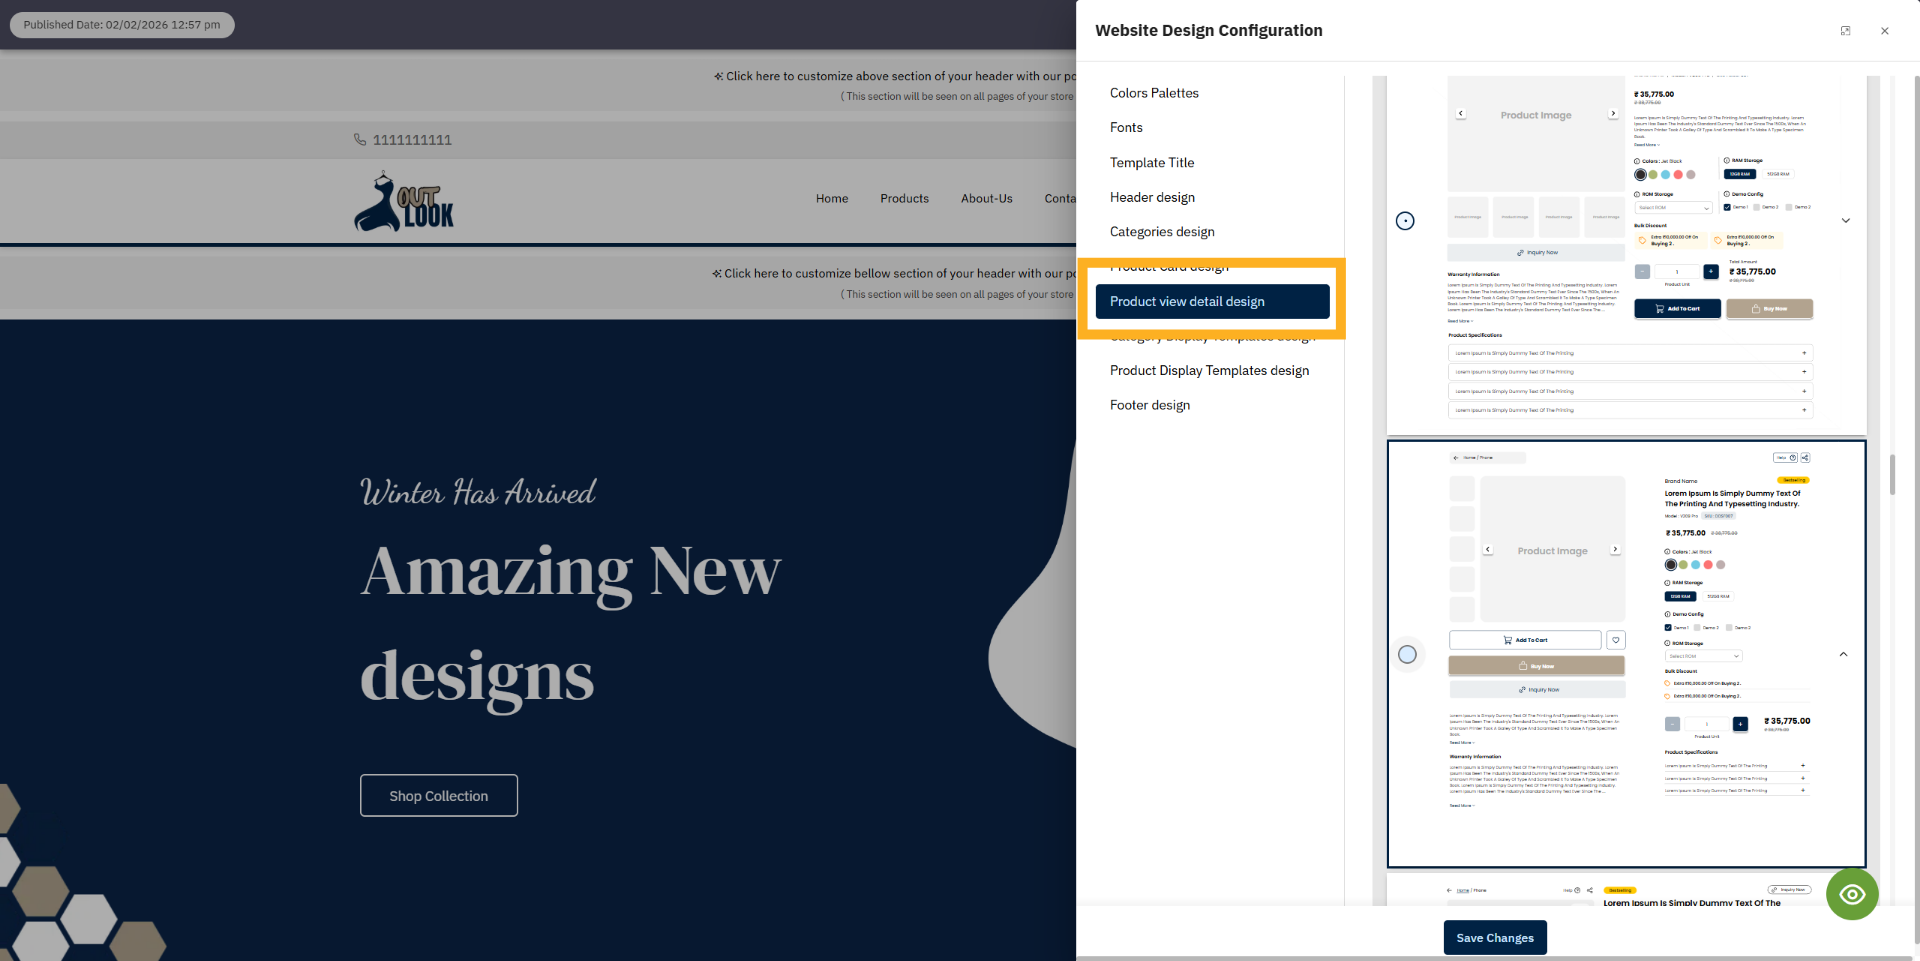
18. Open Product Detail Options
Product View Template allows you to select a product page design from the available template list. You
can choose the design that best suits your website layout and product display.
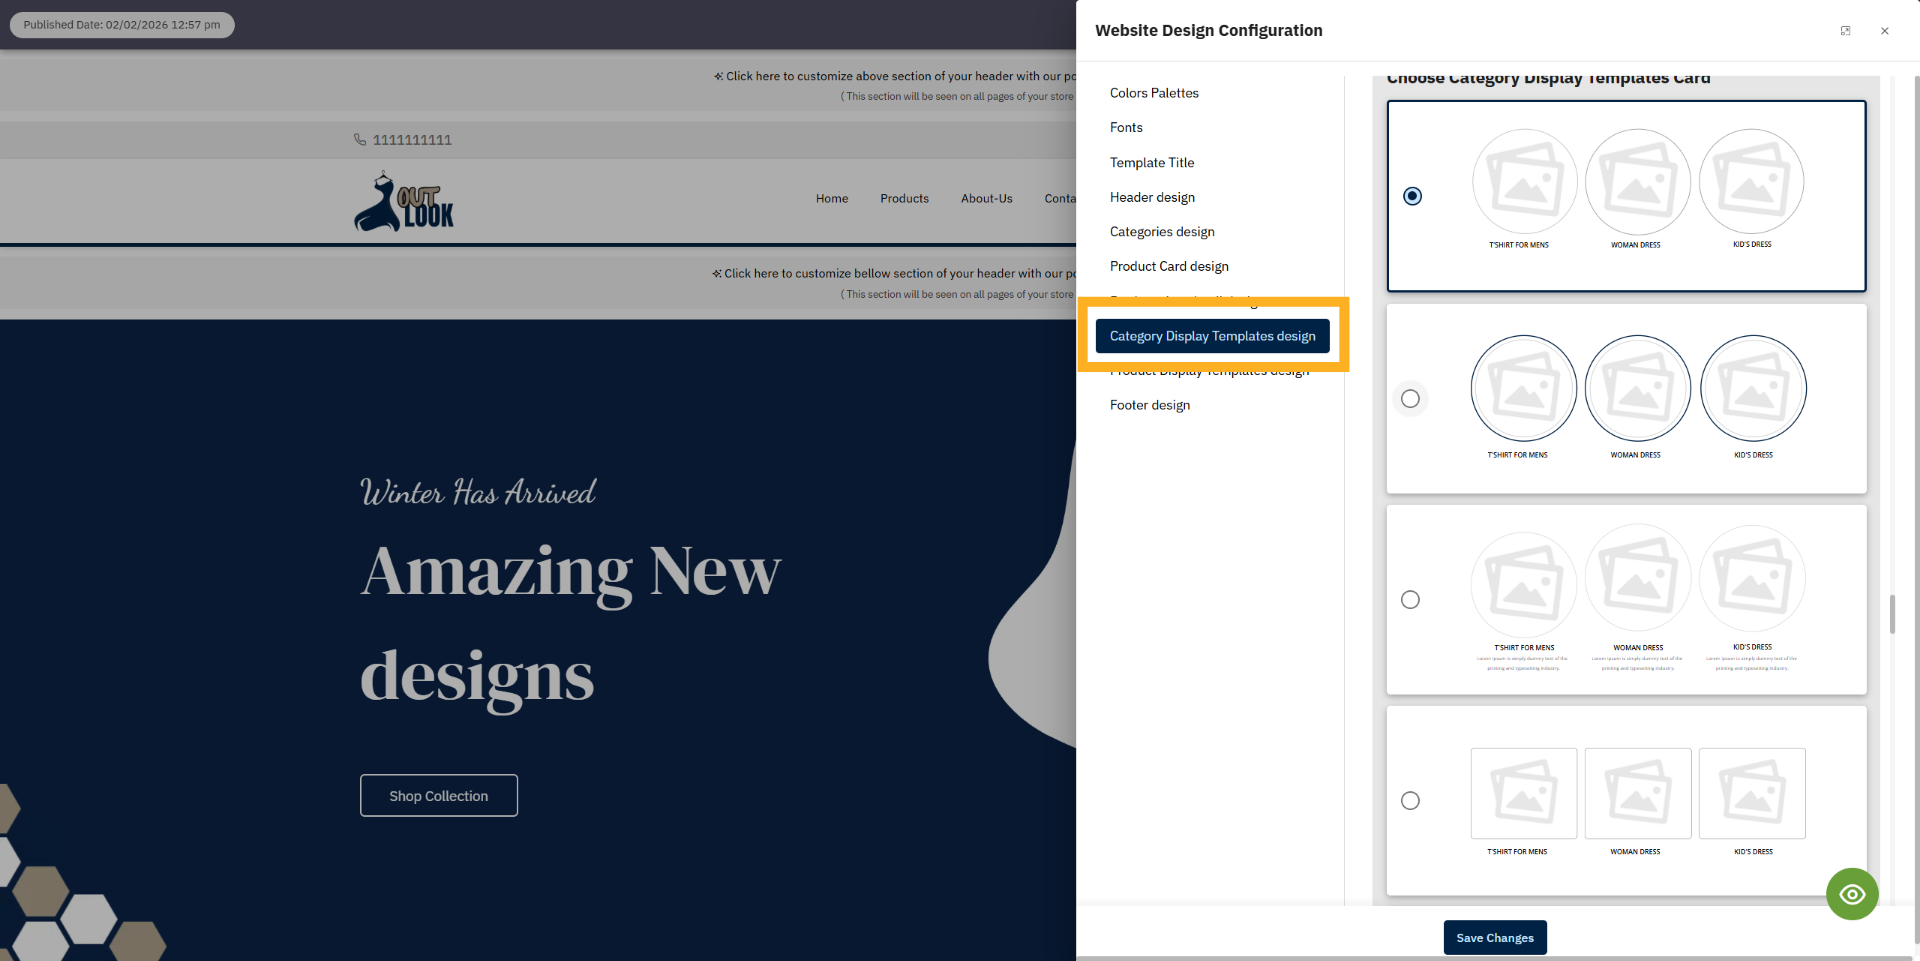
19. Open Top category template design
Top Category Template allows you to choose a category design from the available template list. You can
select the design that best fits your website layout and style.
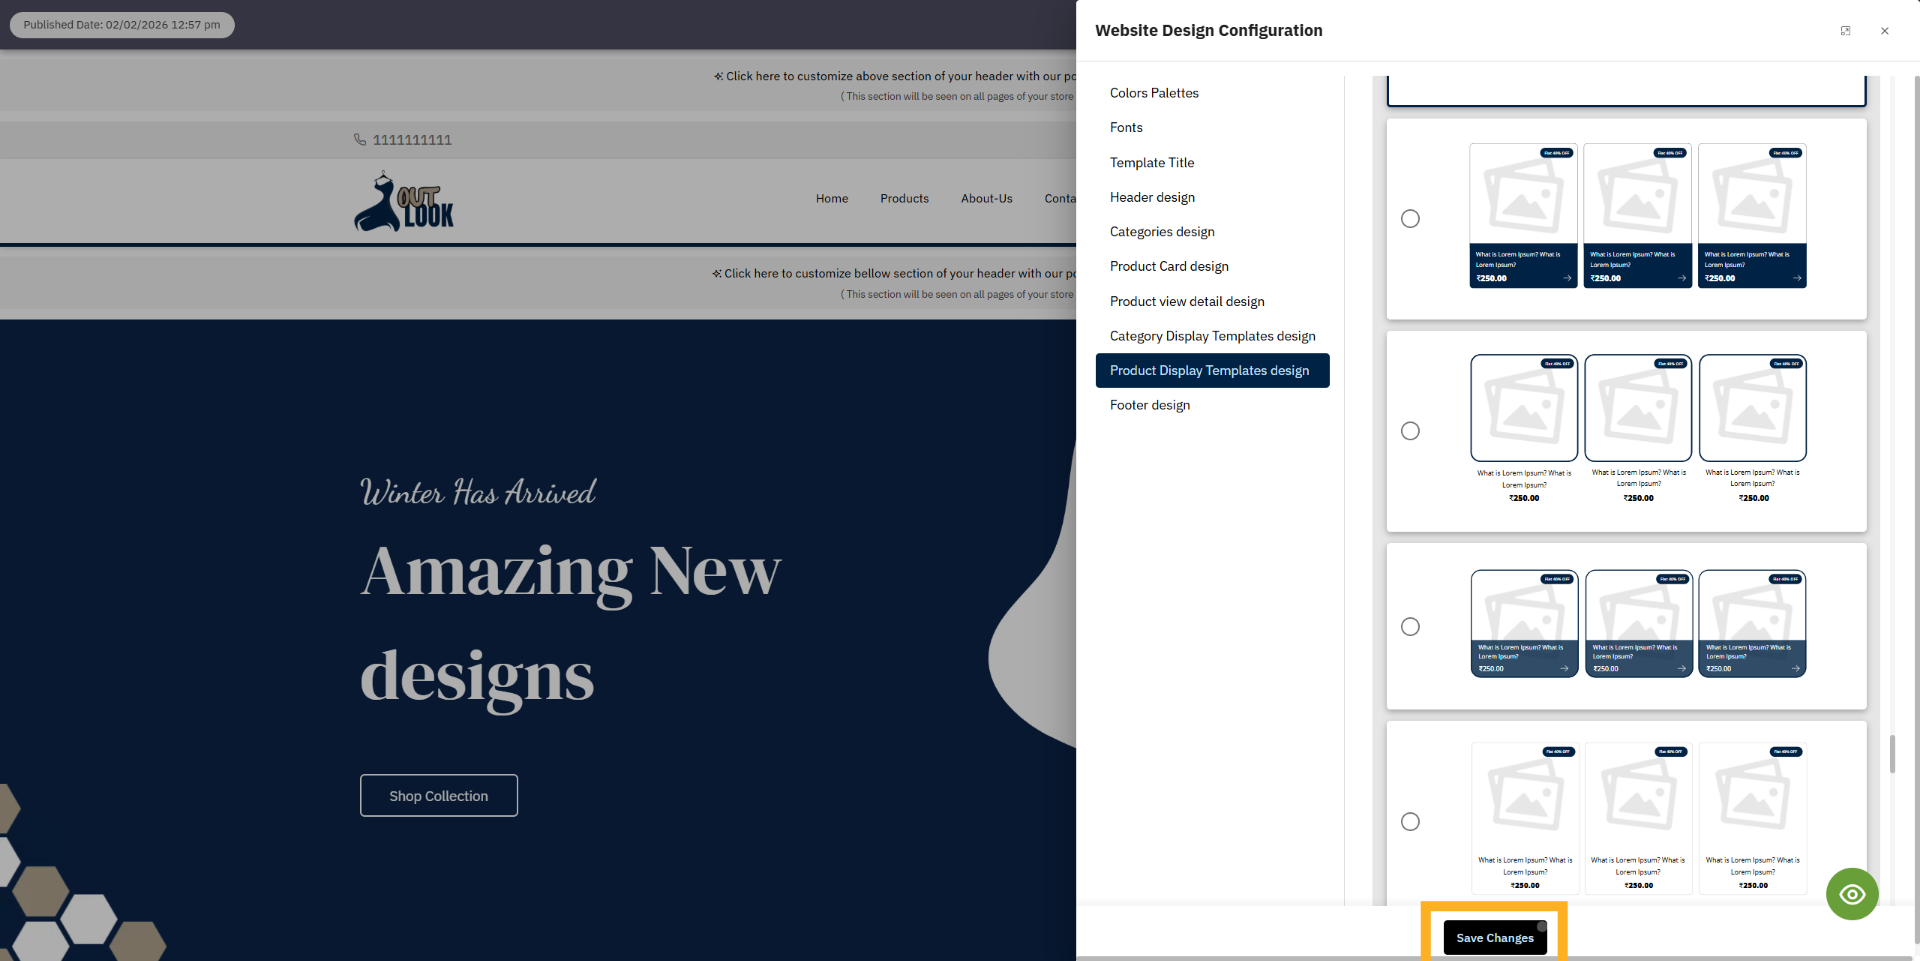
20. Open Top Product Template Design
Top Product Template lets you choose a design from the available template list. Select the one that best
fits your website layout and product display.

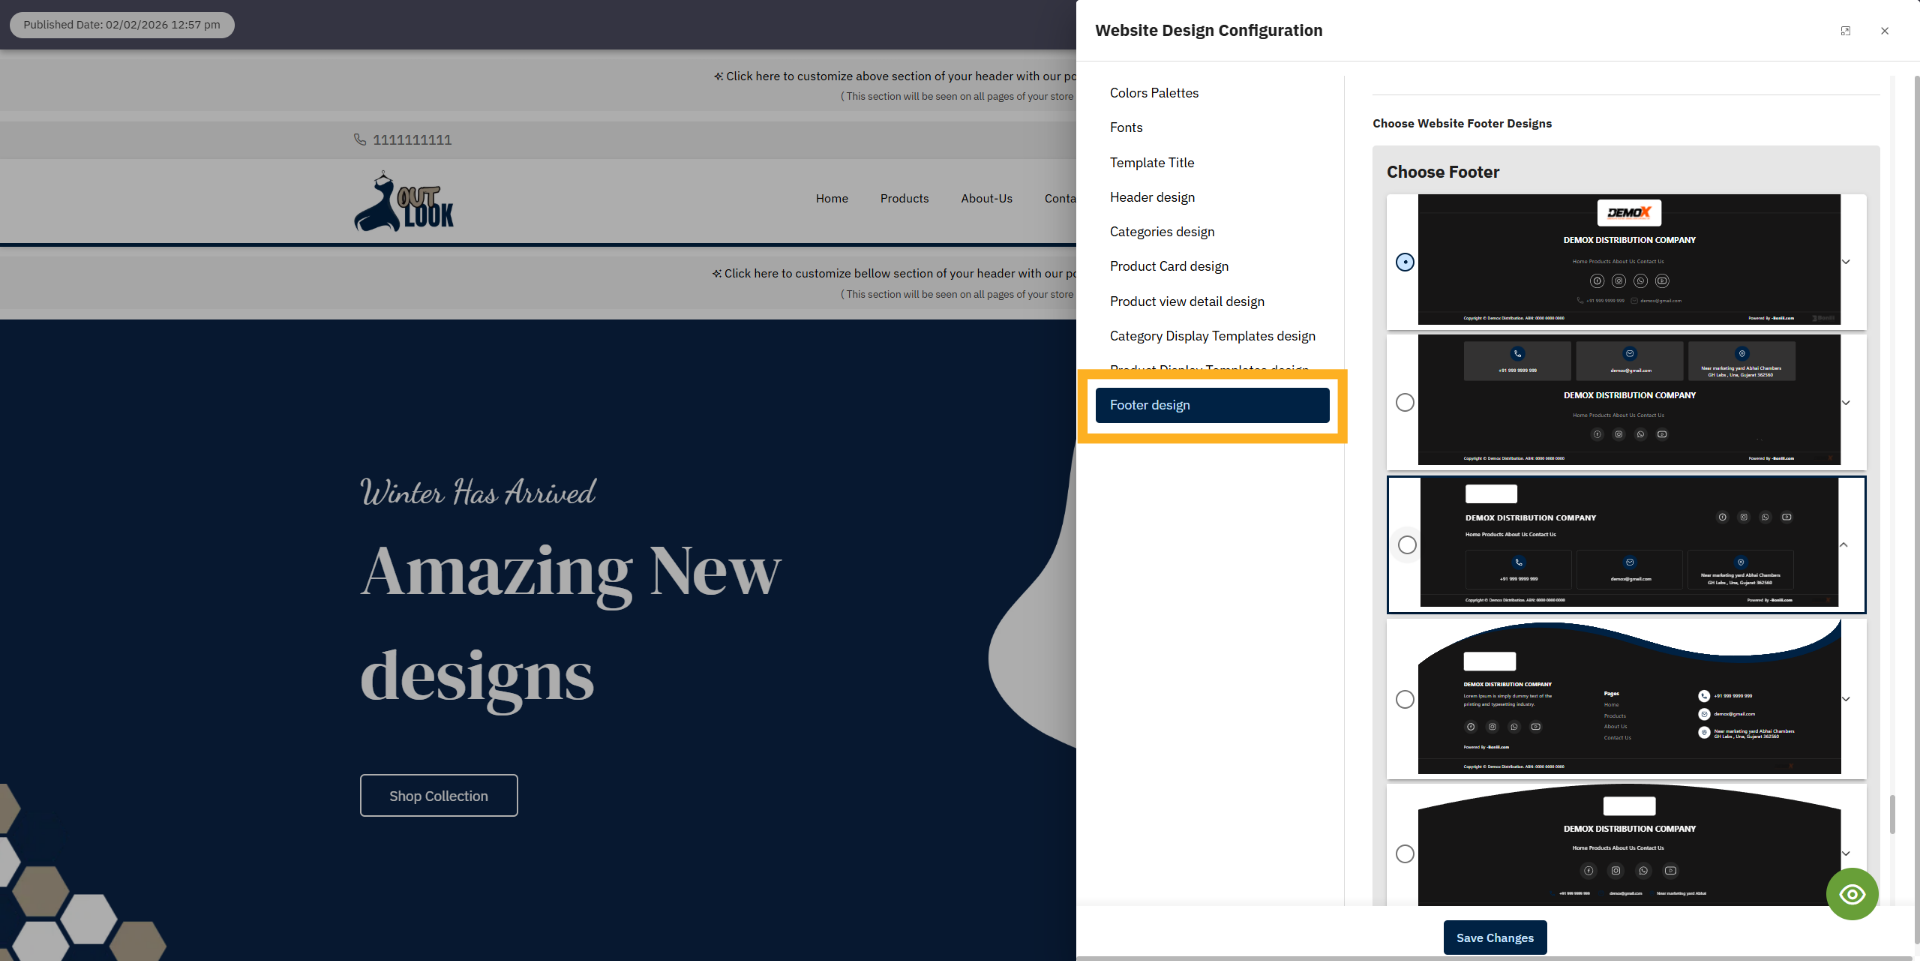
21. Open Footer Template Design
Footer Template lets you choose a footer design from the available template list. Select the design that
best matches your website layout and style.
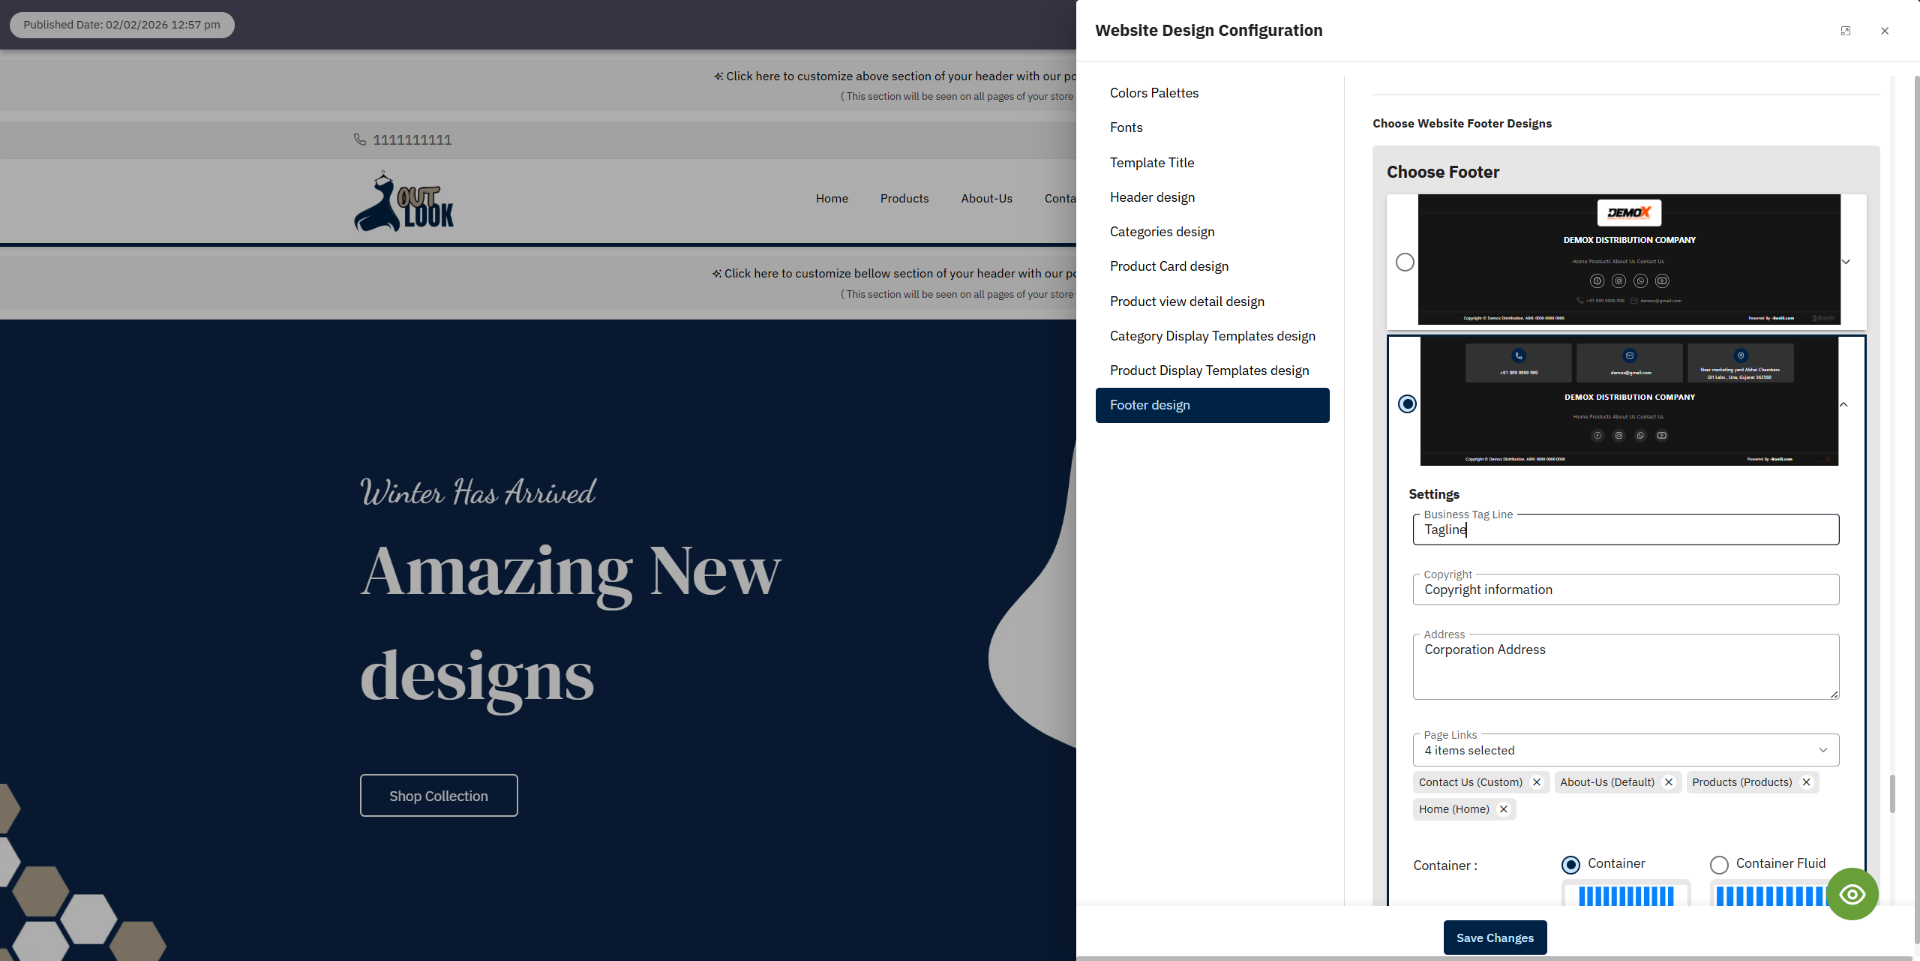
22. Open Footer Settings
When you click on the Footer, the footer settings panel will open. Here you can set options like
tagline, copyright content, and address. If you want to show links in the footer, you can also add page
links. Additionally, you can choose the footer container layout as per your design.
23. Save Configs
After completing all the configuration settings, you can save them by clicking the Save Config button
available at the bottom. This will apply and store all your changes.
You have successfully configured the Boni settings, including theme colors, fonts, header design and
menus, product design, top product design, category design, top category design, and footer design. All
selected templates and styles are now applied to your website, creating a consistent and professional
layout.
Uploading...