12 - How To Create Forms For CMS
1. Navigate to Forms
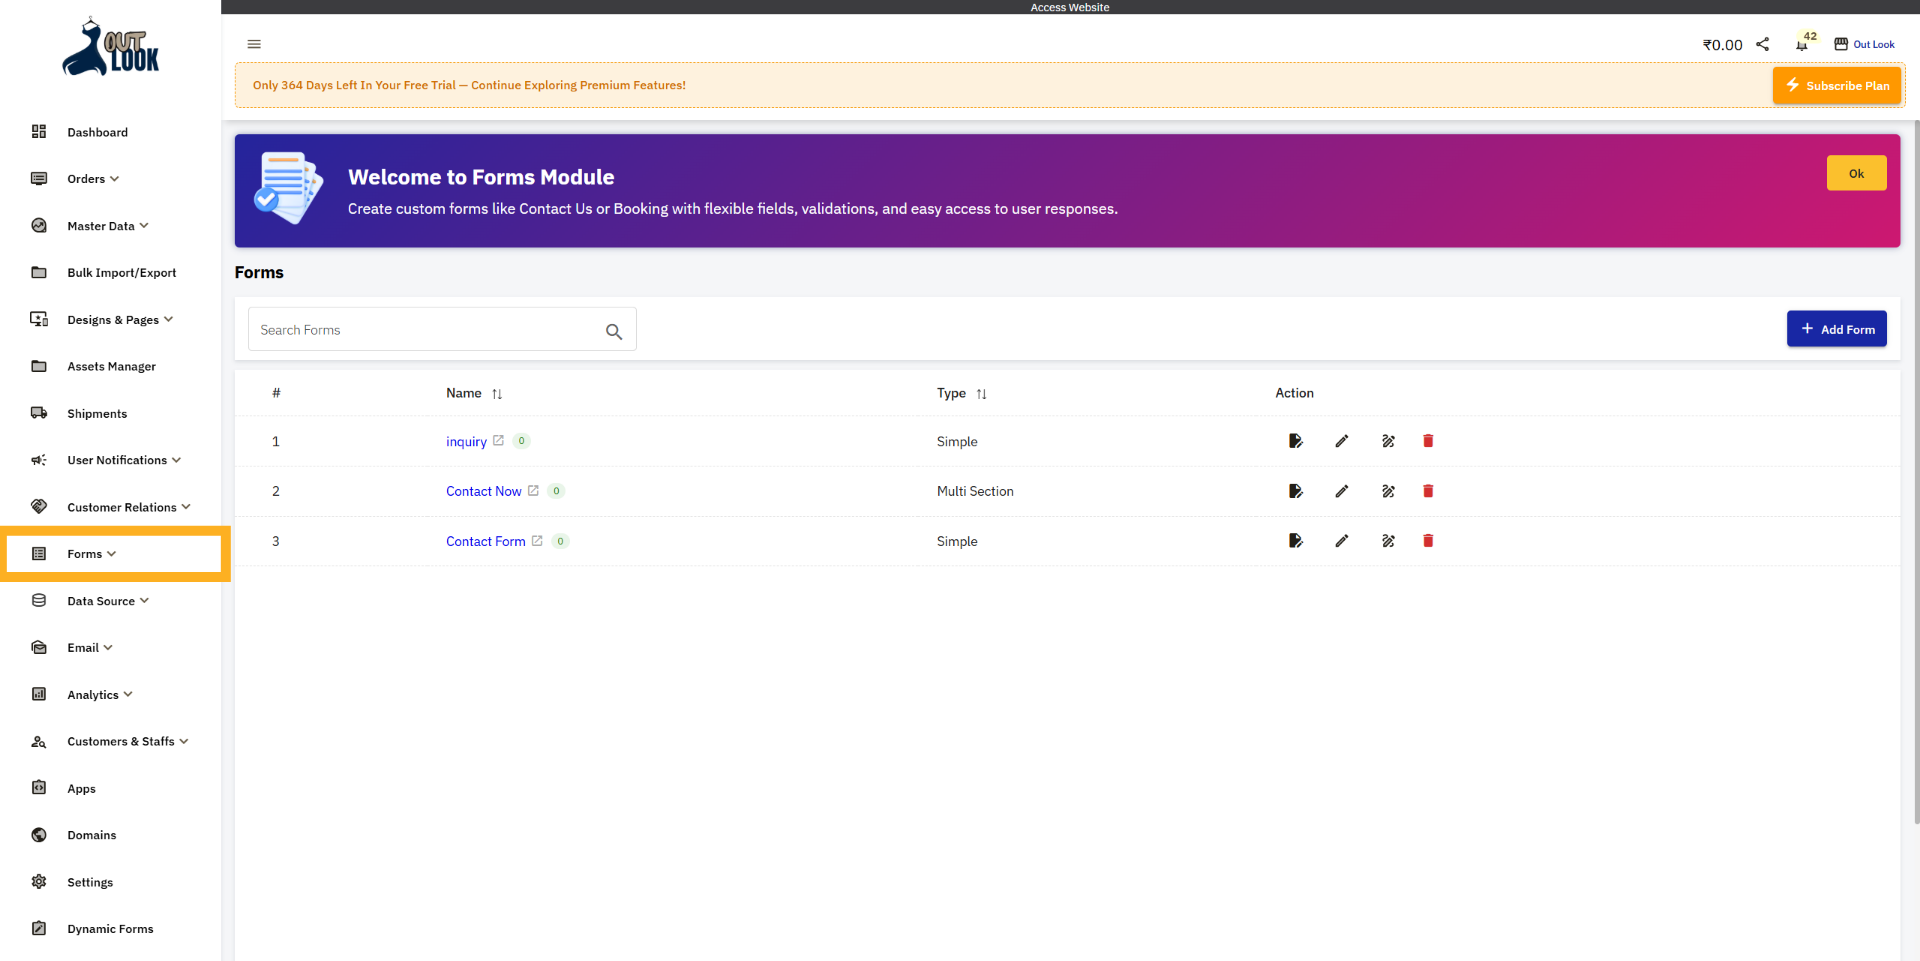
To create CMS Forms, go to the Admin Panel and click on the Forms option in the left menu bar. The Forms
section will open, where you can click Create New Form to create a new form.
2. Form Page
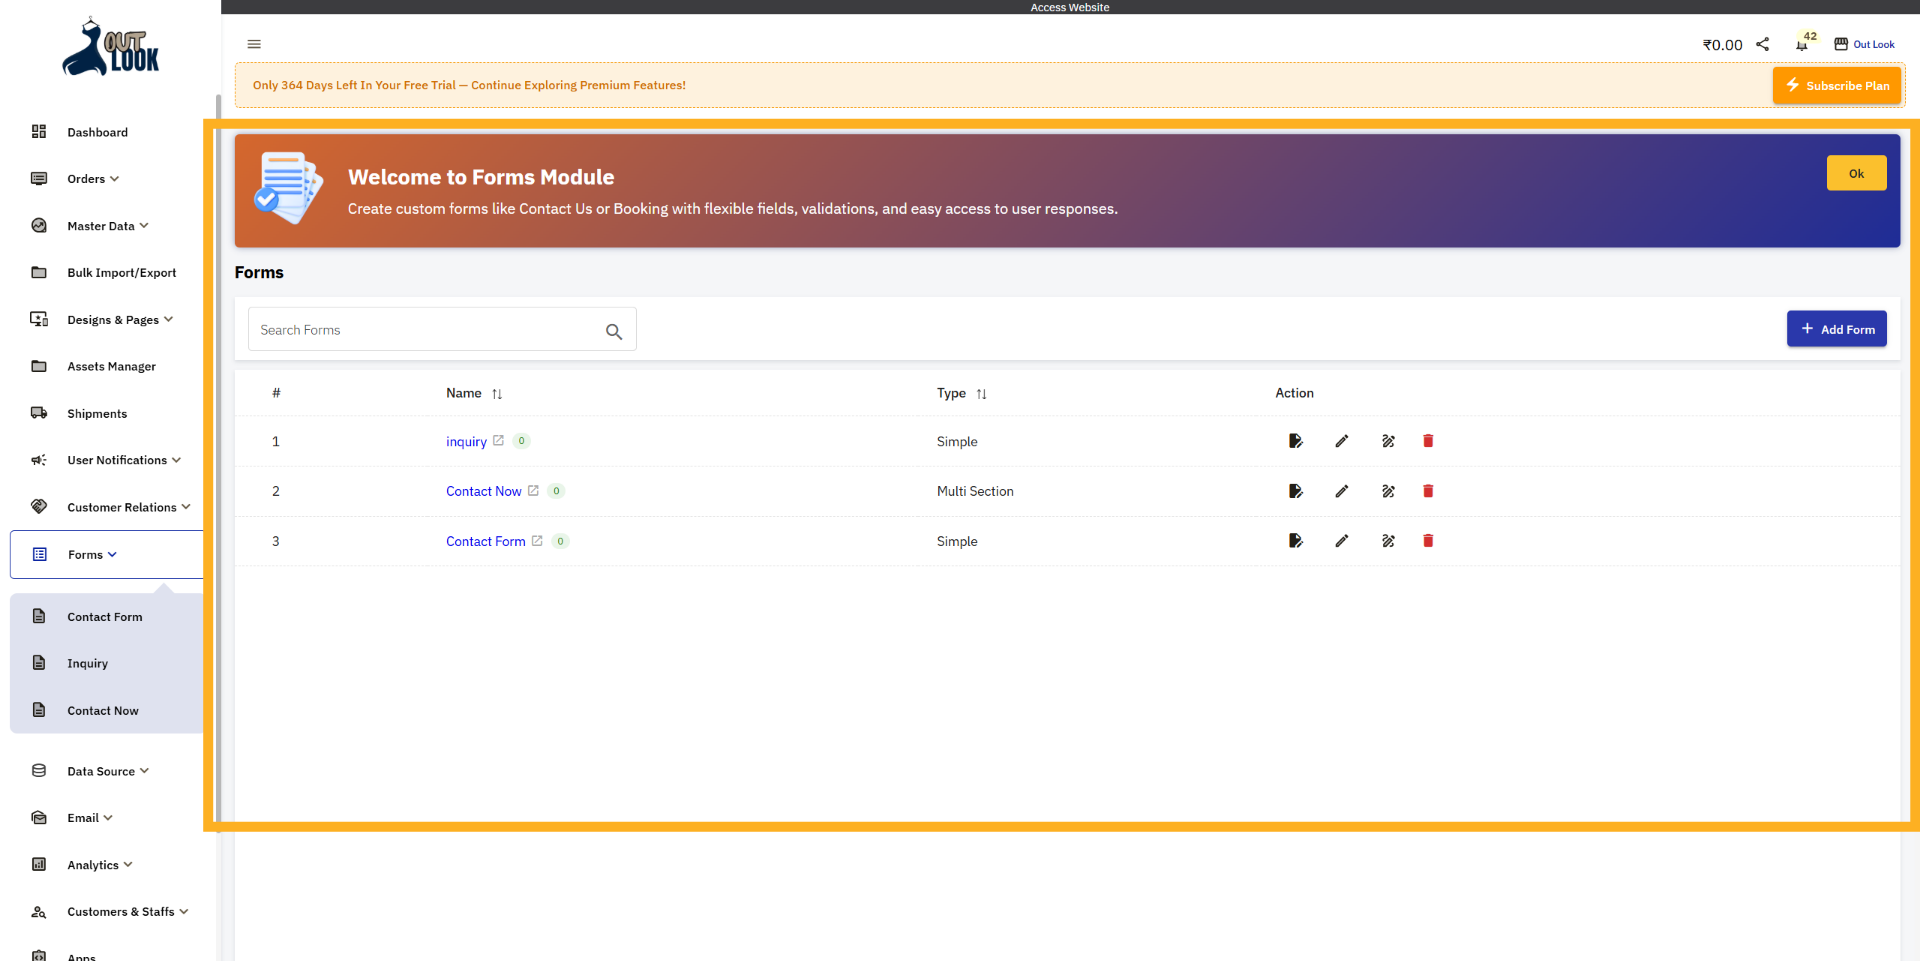
As you can see, after clicking the Forms menu, you are taken to the Forms page. Here you can view the
forms list and also find the Add New Form option to create a new form.
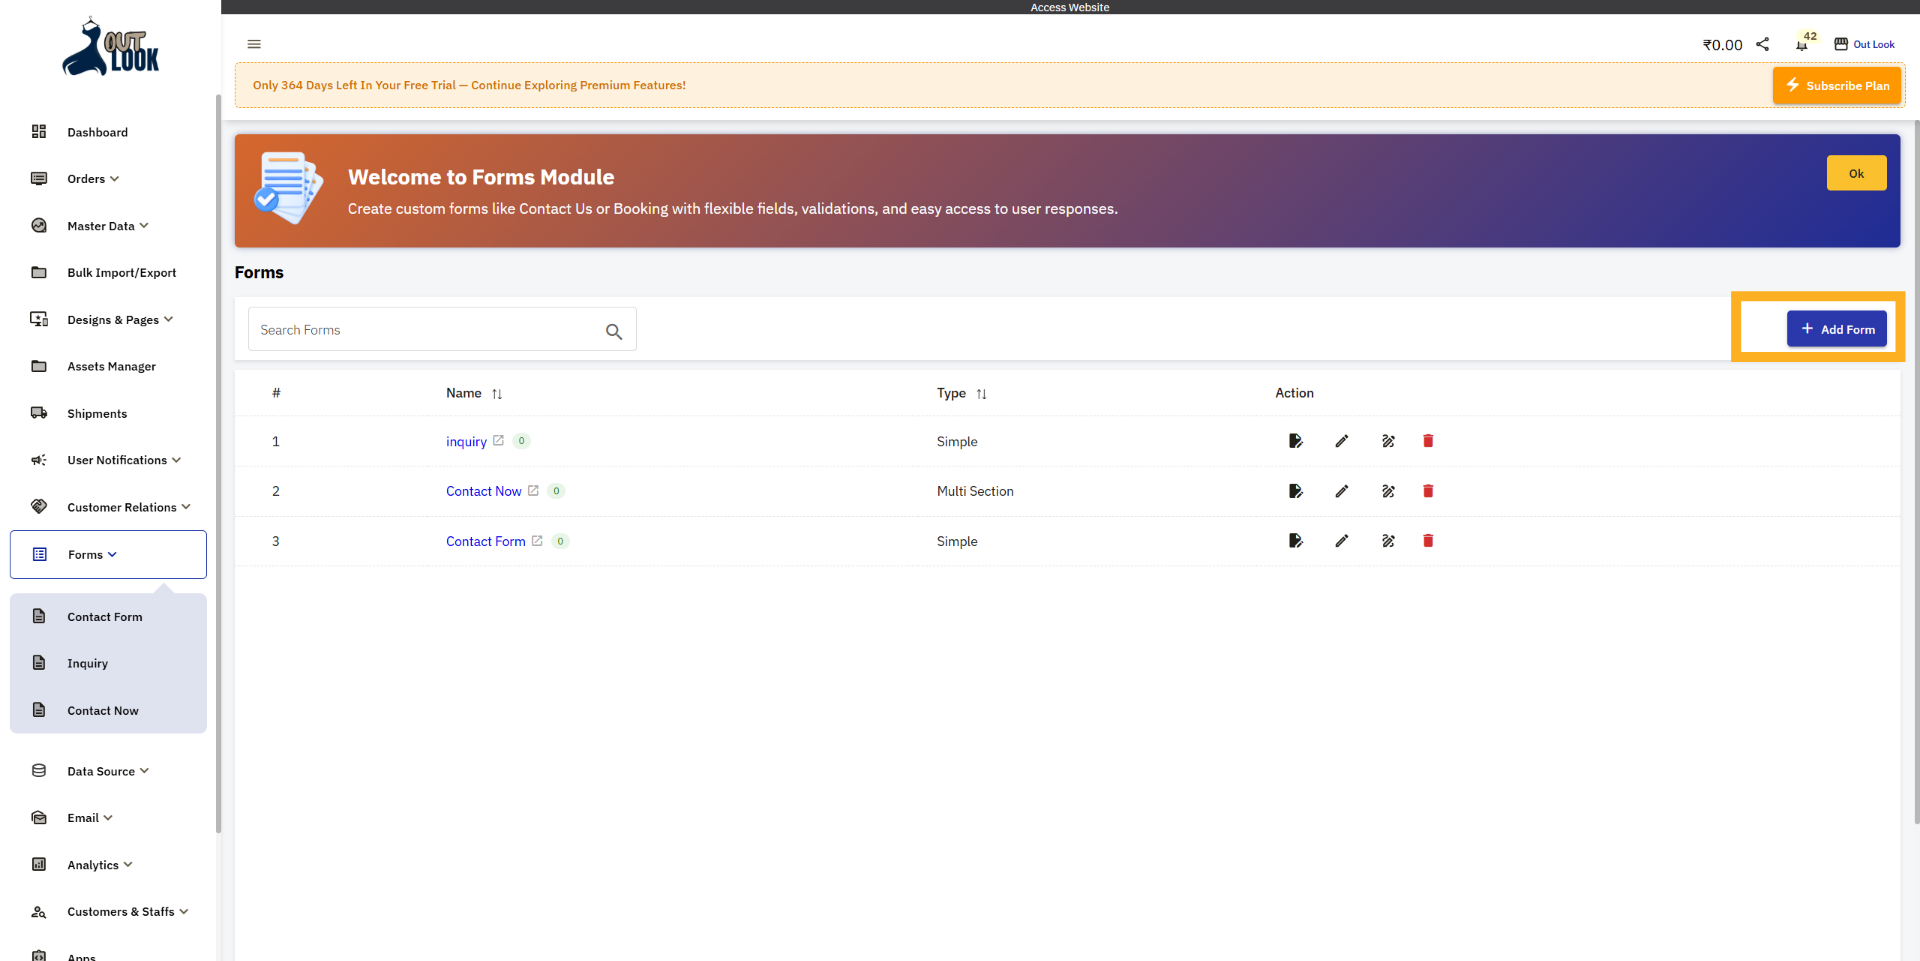
3. Form Creation
Click the Add Form button to start setting up a new form in the system.
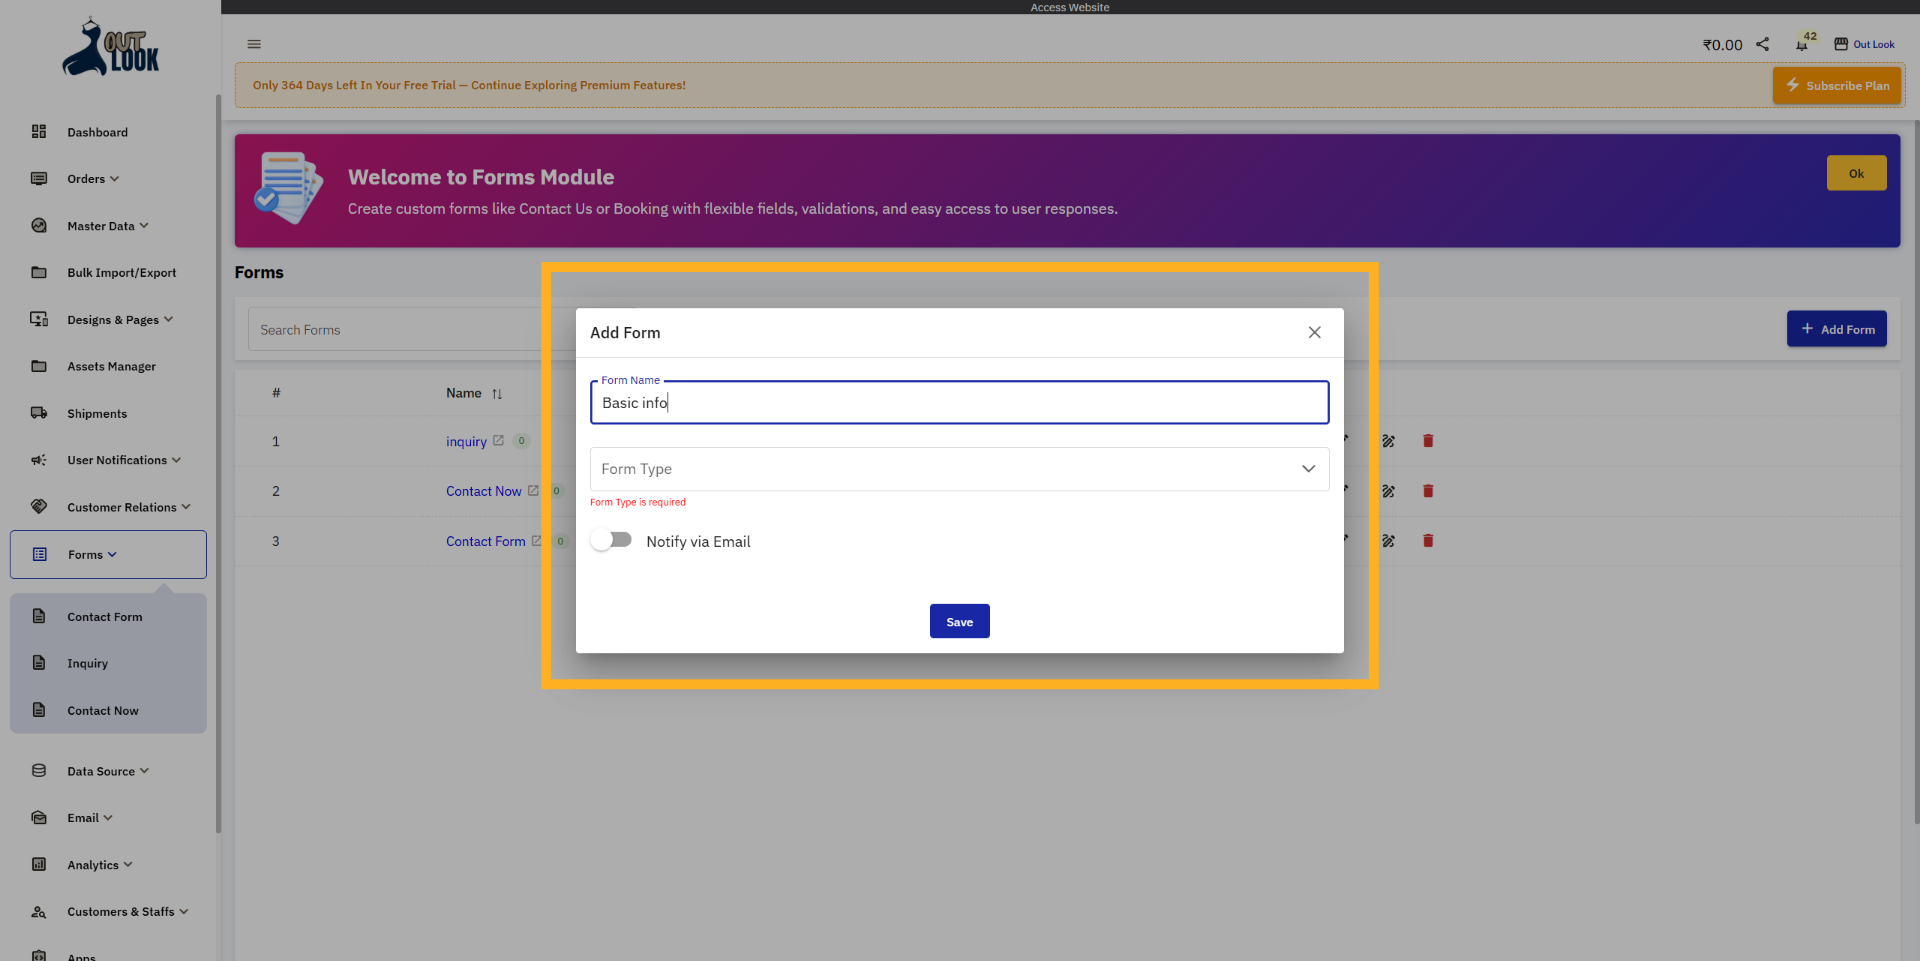
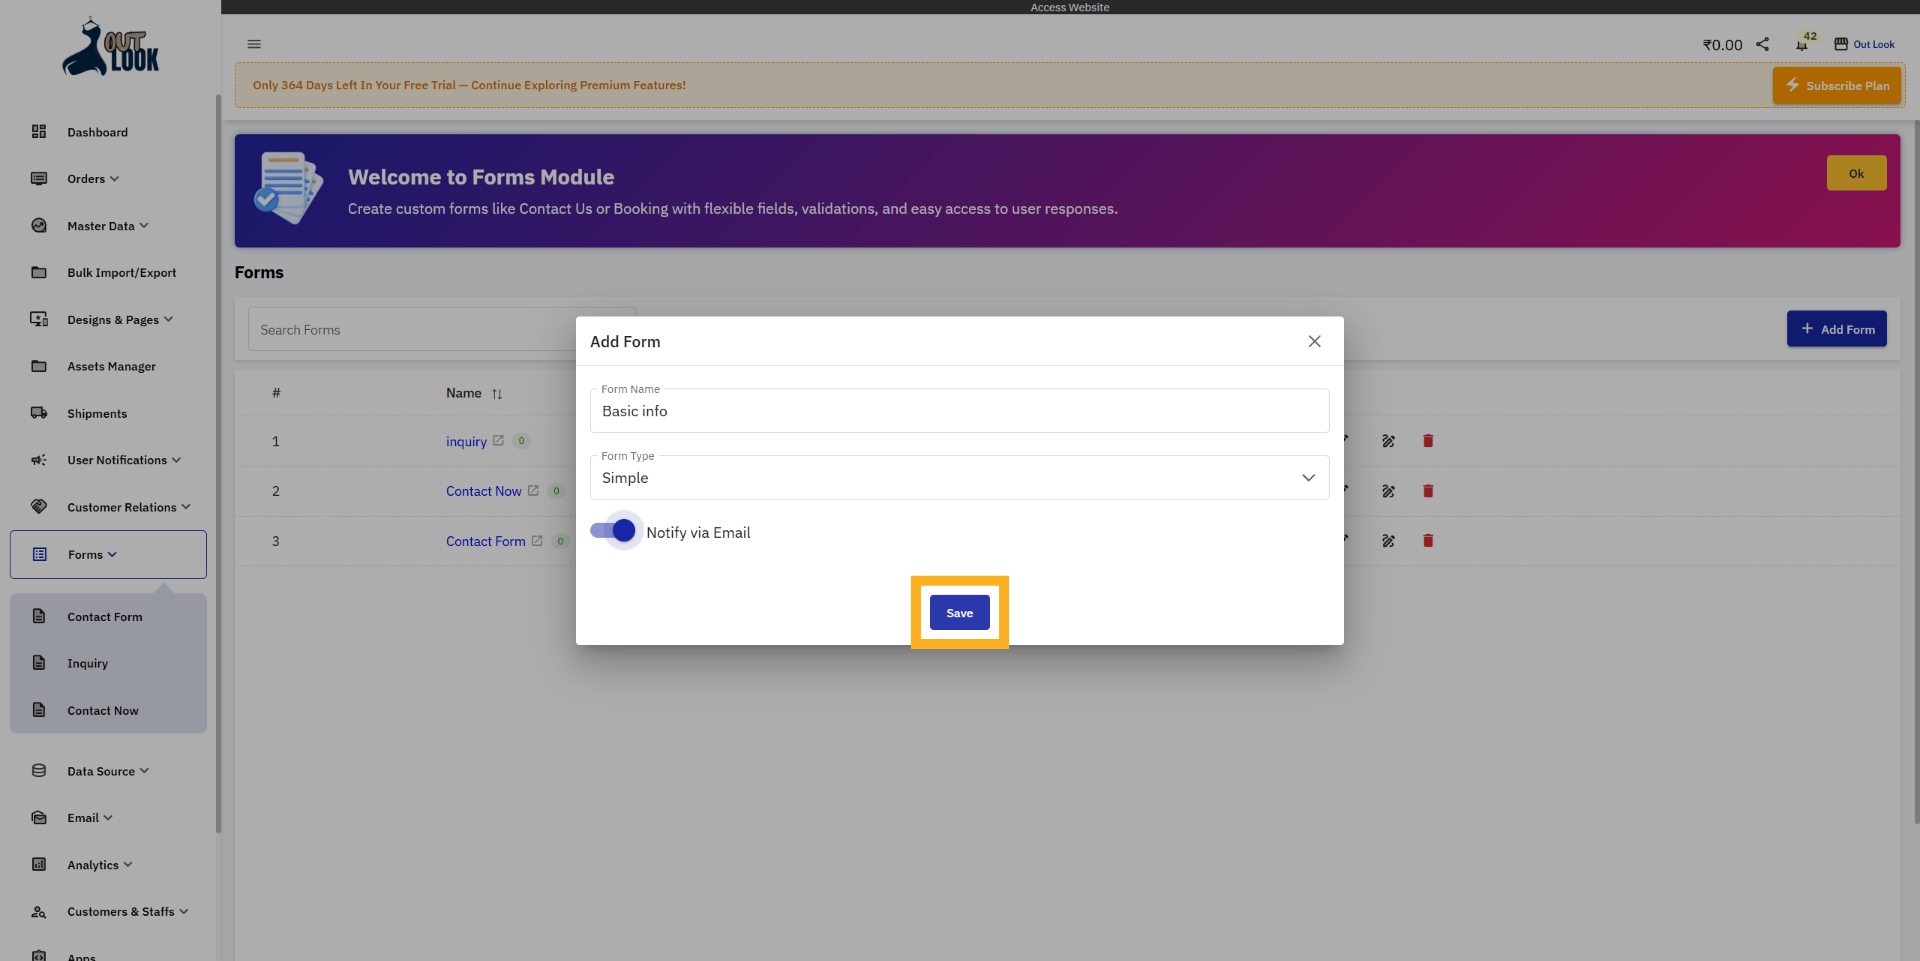
4. Enter Form Name
When you click Add Form, the Add Form modal will open. Here you need to enter the Form Name and Form
Type. If you want to receive submission notifications by email, turn on the Notify via Email option.
5. Save Initial Form Setup
After filling in all the details, you need to save the form to complete the form creation.
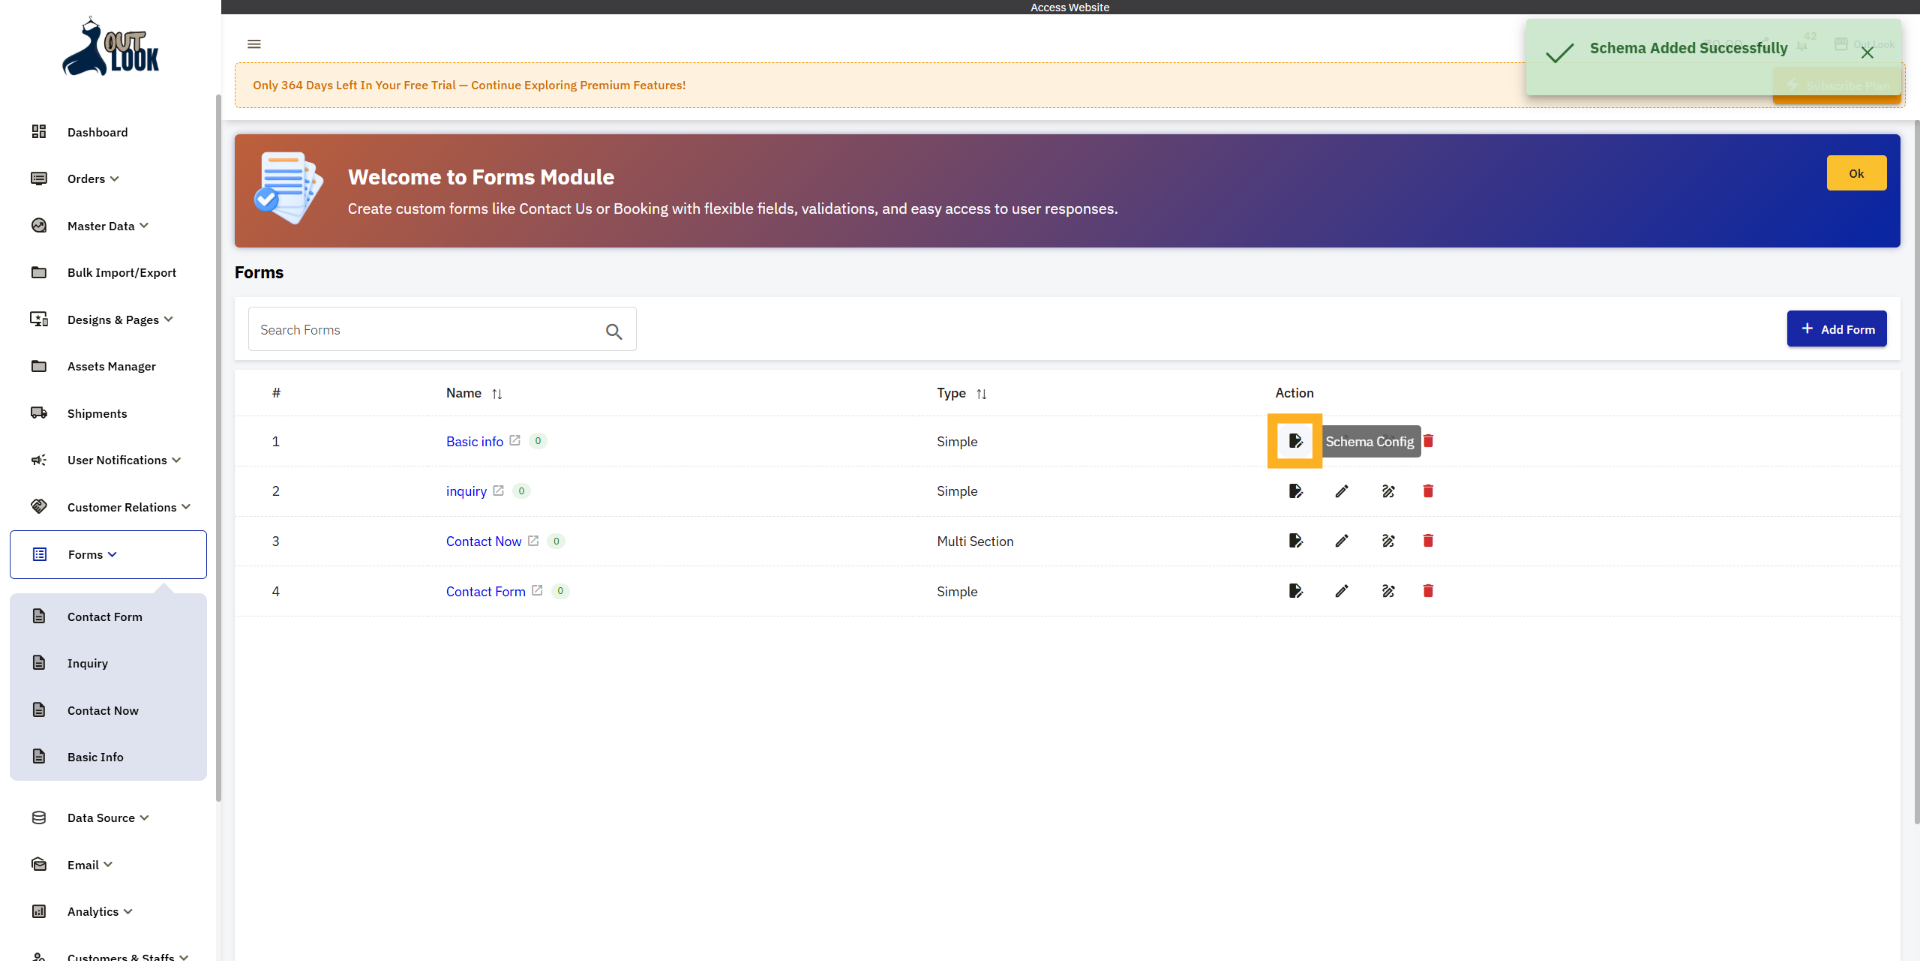
6. Schema Config
Once the form is saved, it will appear in the forms list. Now you need to configure the form fields
(Schema Config). For this, click the Schema Config icon in the Action button.
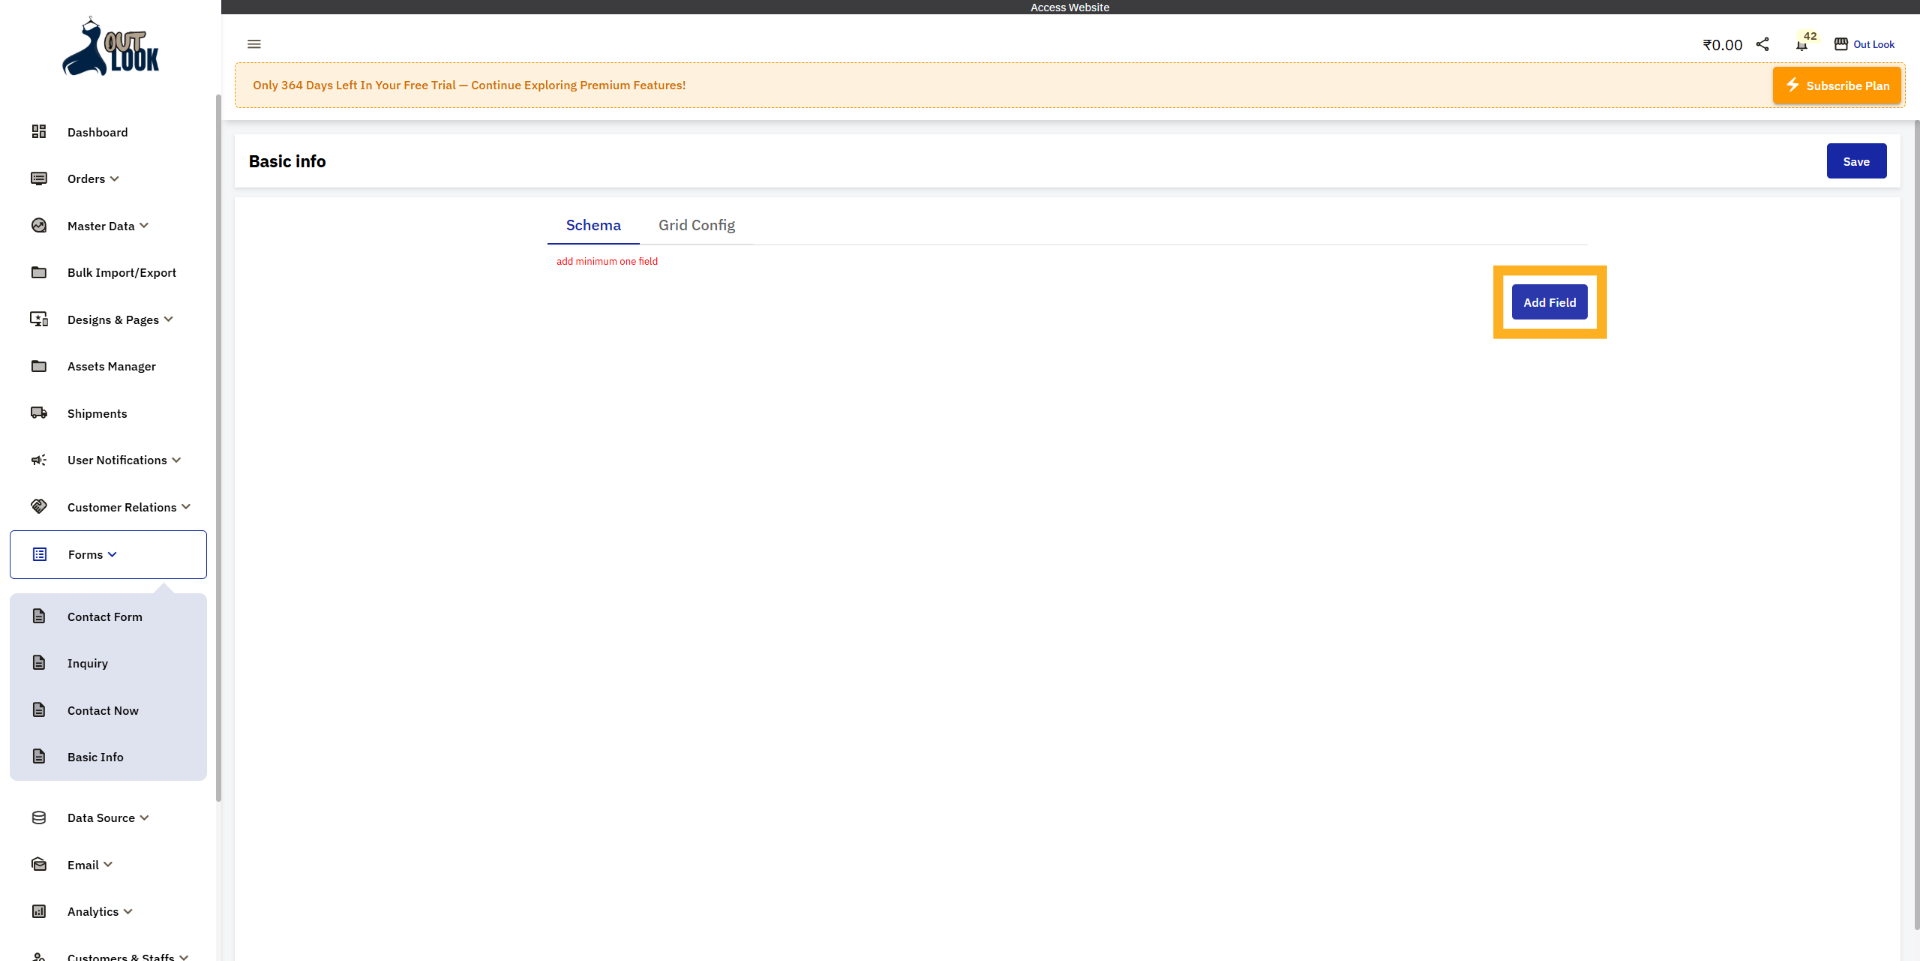
7. Add New Field to Form
When you click the Schema Config icon, you will be redirected to the Schema Configuration page. There
you will see the Add Field button. Click this button to create and add form fields (schema) for your
form.
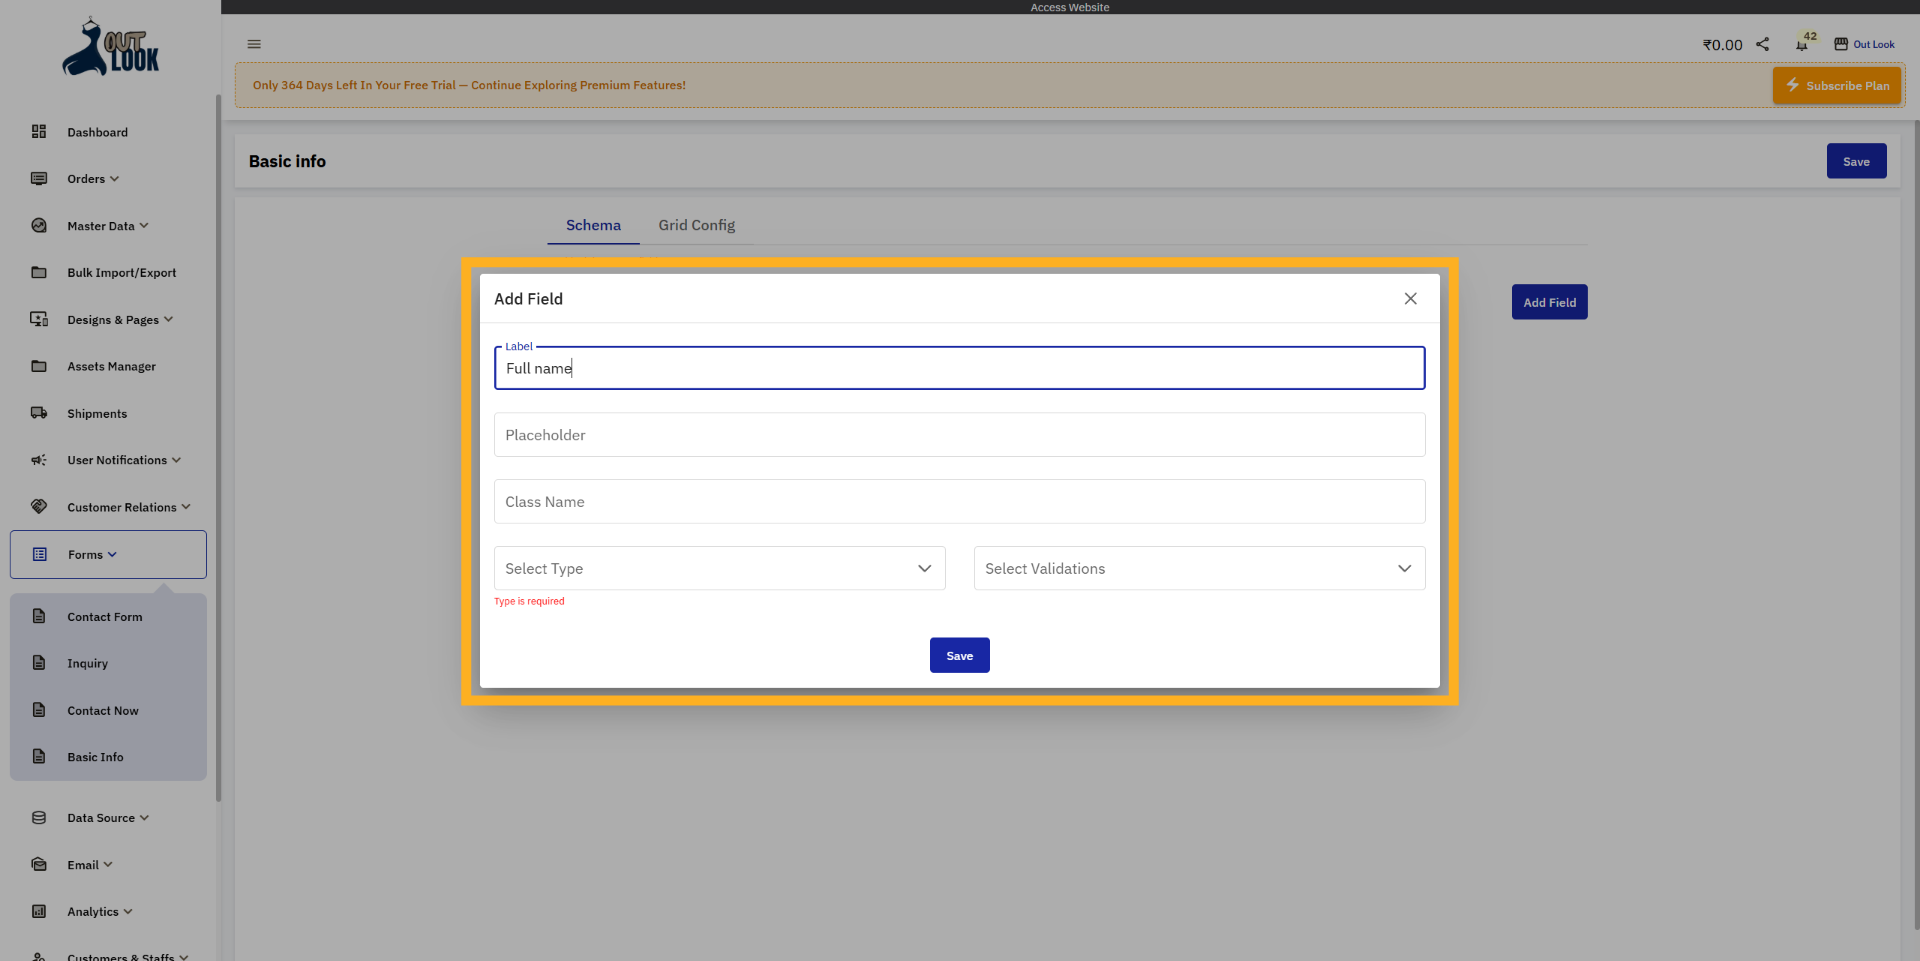
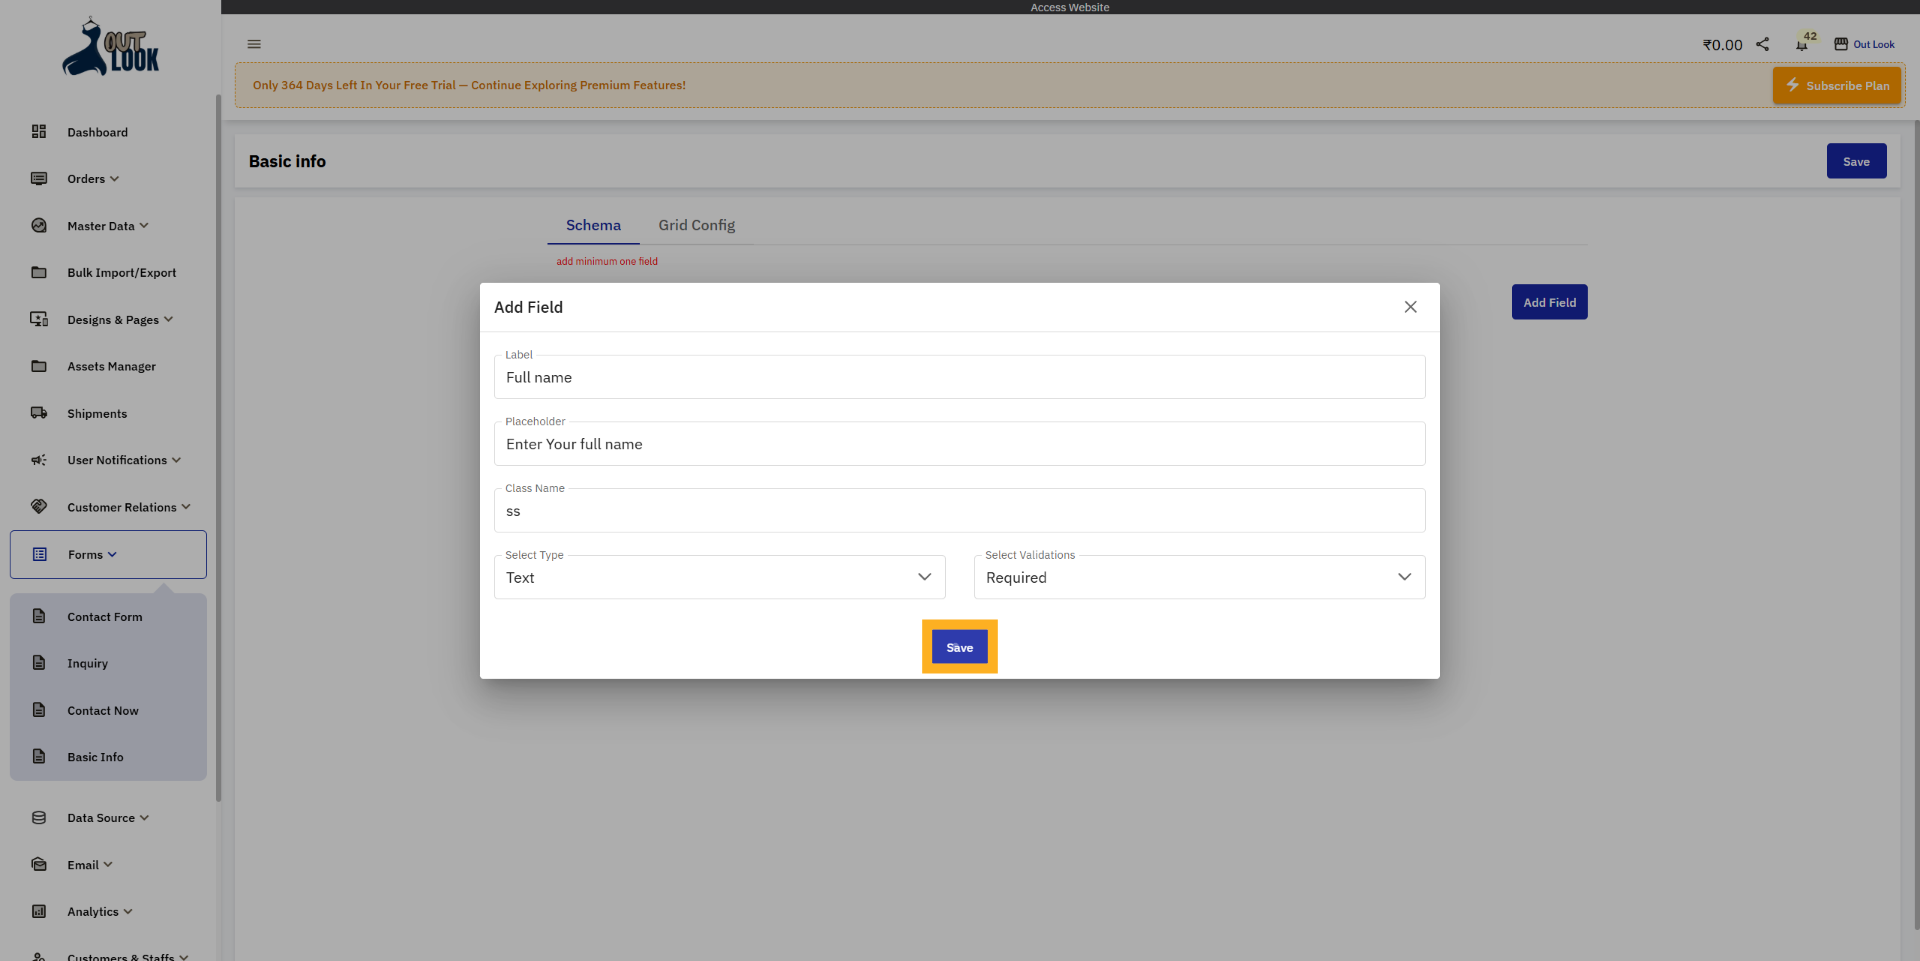
8. Add Field Model
After clicking the Add Field button, the Add Field modal will open. Here you need to enter details such
as Field Label, Placeholder, Class, select the Field Type, and if needed, choose Validation to apply
field validation.
9. Save Field
After filling in all the details, click the Save button to save the field. If you want to add more
fields, you can repeat the same process to create additional fields.
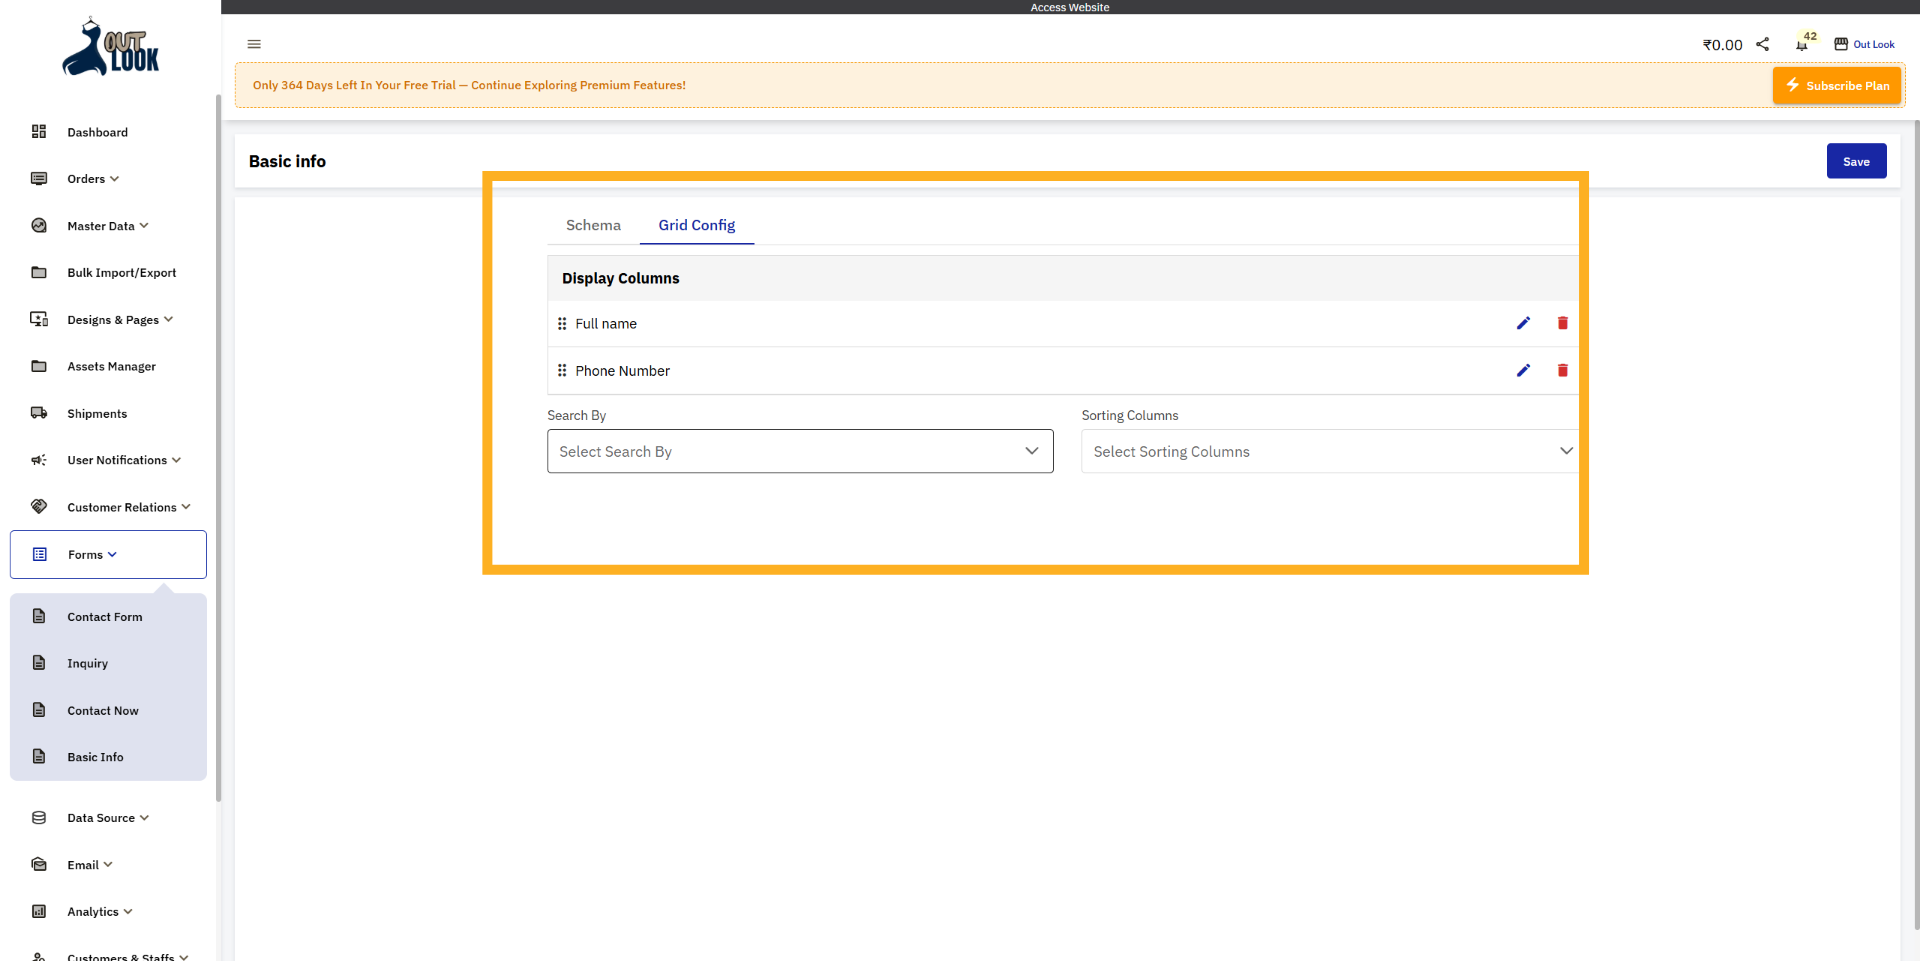
10. Access Grid Configuration
Click Grid Config to set up the Search By Columns and Sorting Columns, as these are required settings.
Only after completing this setup will you be able to save the form fields.
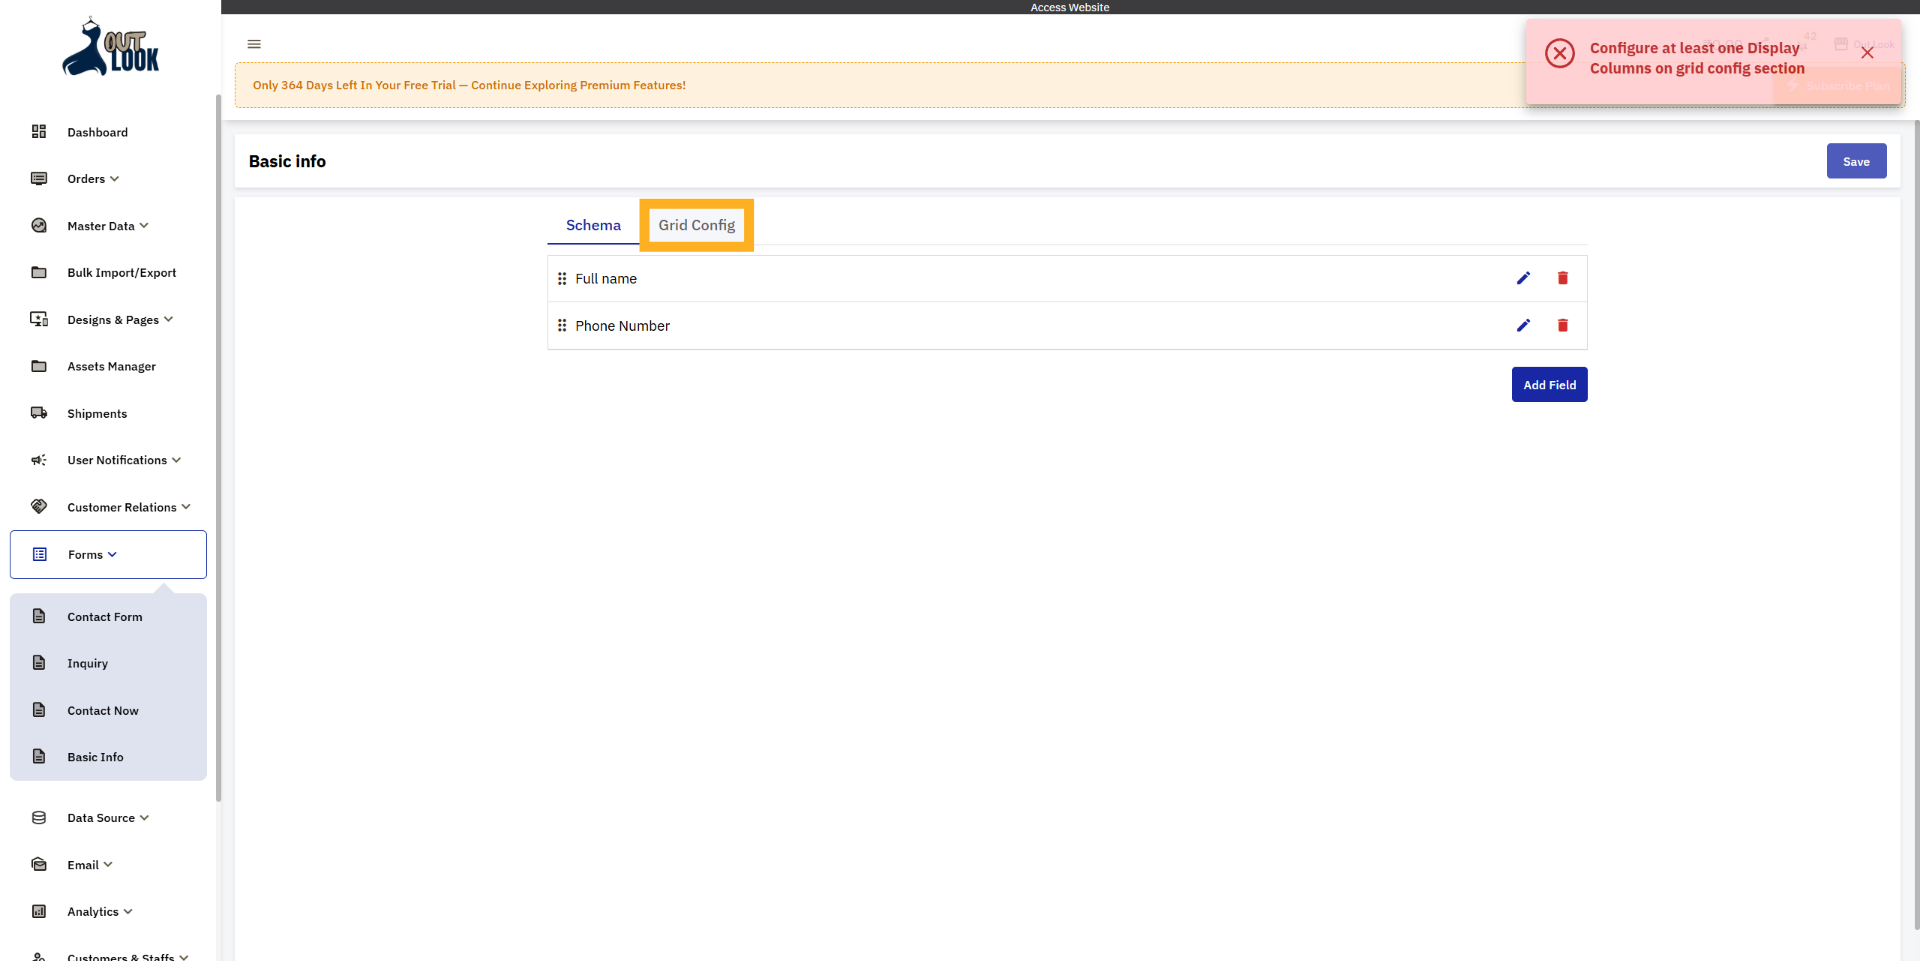
11. Grid Config
As you clicked on Grid Config, let’s understand what it is.
Grid Config is used to manage how your form data is displayed in table format. The fields you created in
the Schema come together to form the structure of your form, and when data is submitted, it is shown in
a table view.
In this table:
Each column represents a form field (like Name, Email, etc.).
You can select which columns to display.
You can set the order (index) to arrange columns front or back.
You can enable sorting (Sort By) on specific columns.
You can also define searchable columns for filtering data.
All these settings are managed through Grid Config, which controls how your data looks and behaves in
the table view.
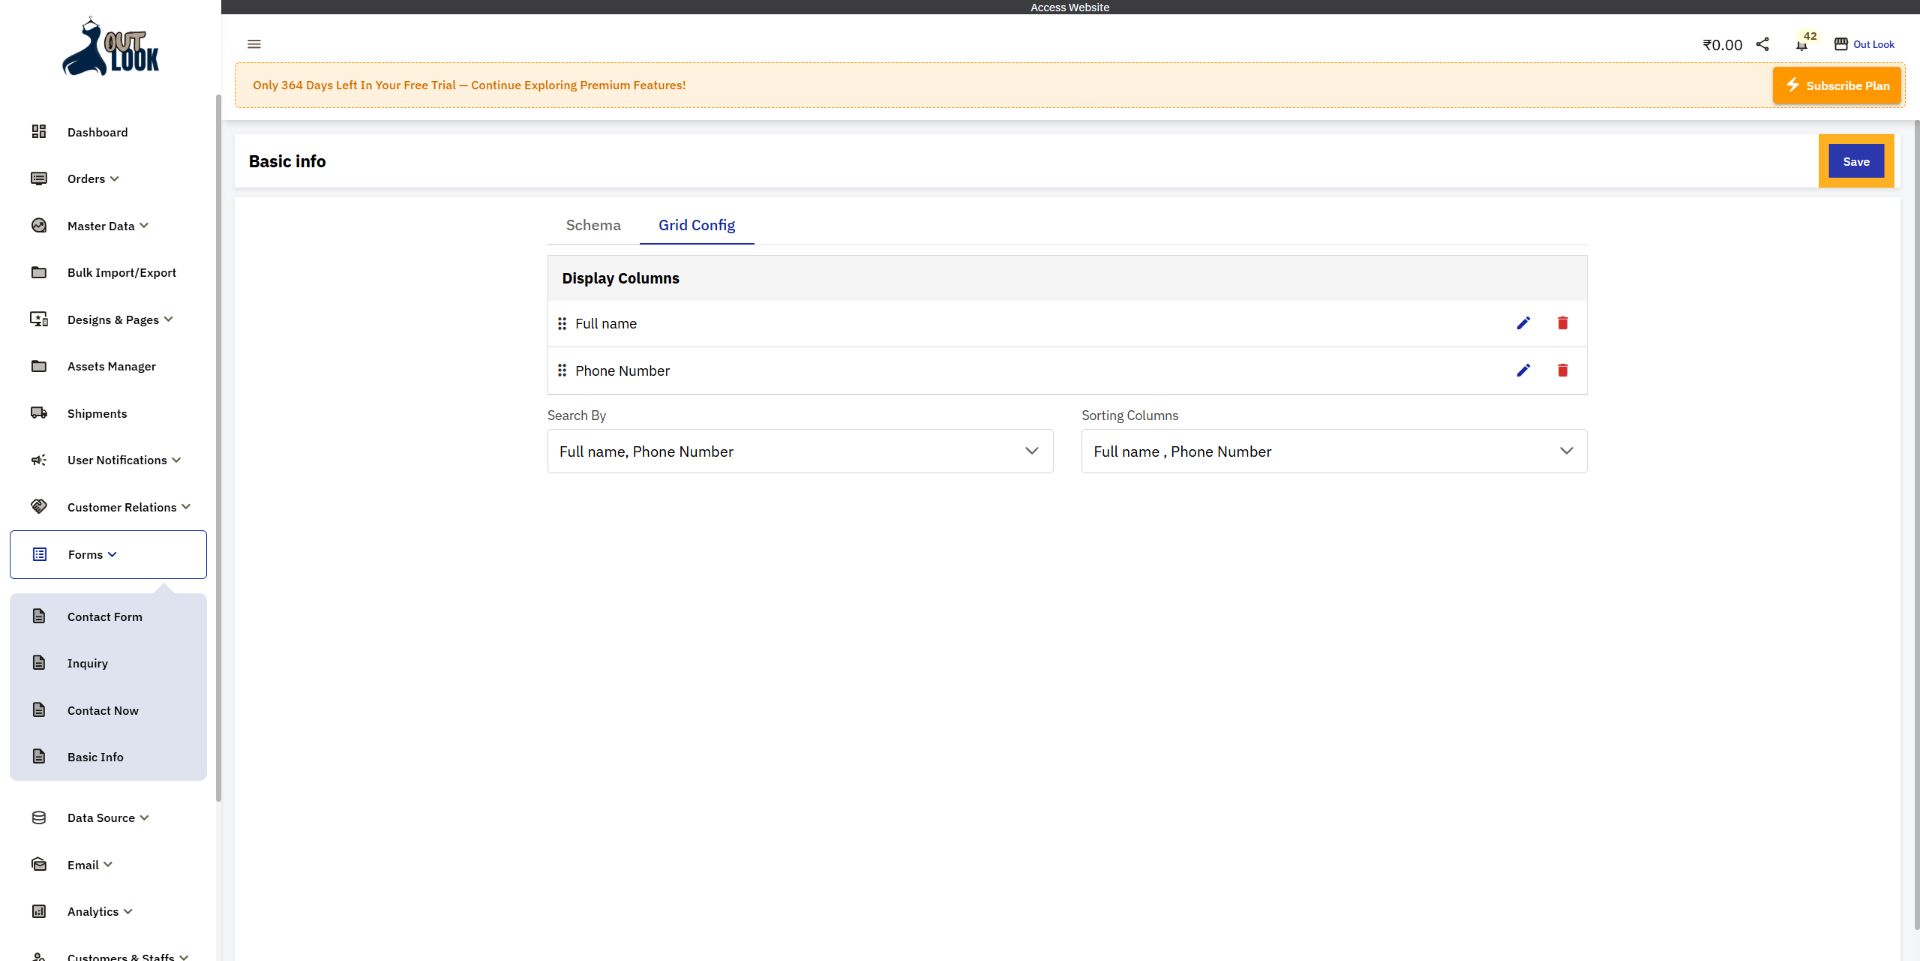
12. Save All Changes
Click the Save button to confirm and save all changes made to the form.
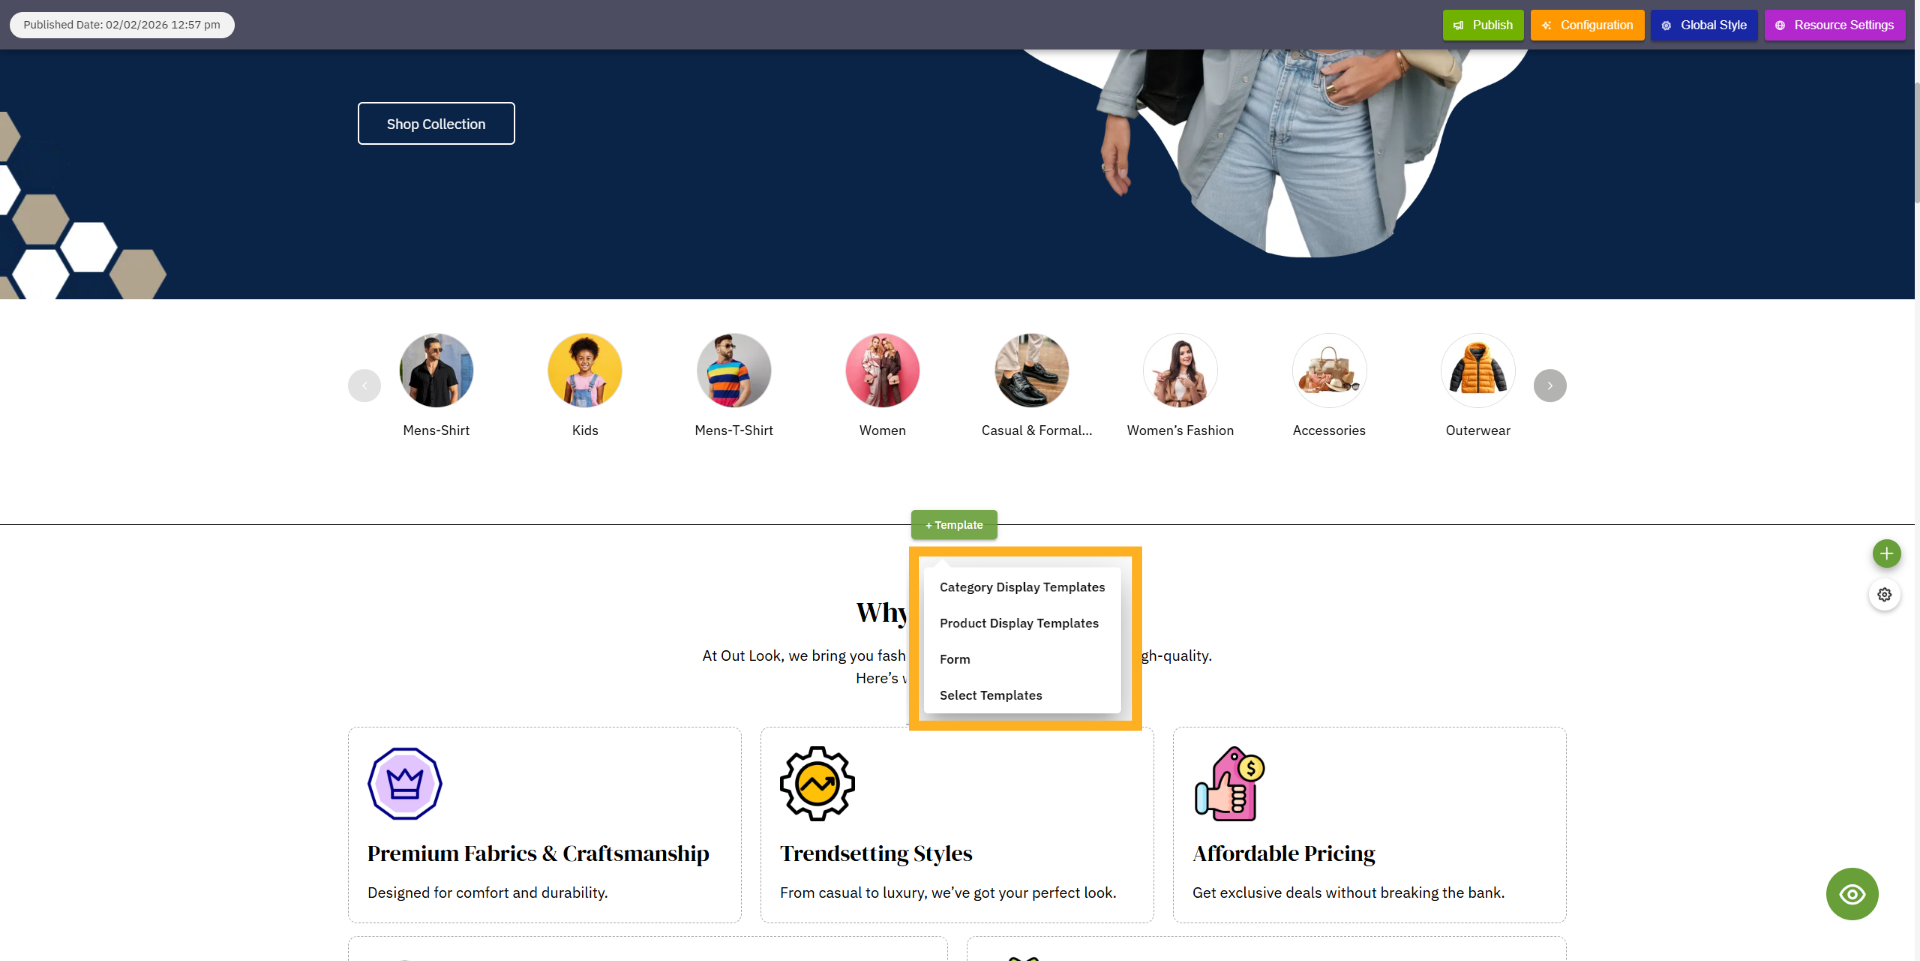
13. Add New Template
After saving the form, we return to the website page. Now to set and display the form on the page, you
need to click the Template button.

14. Open Template options
After clicking the Template button, you will see different template options. From these options, click
on Form.
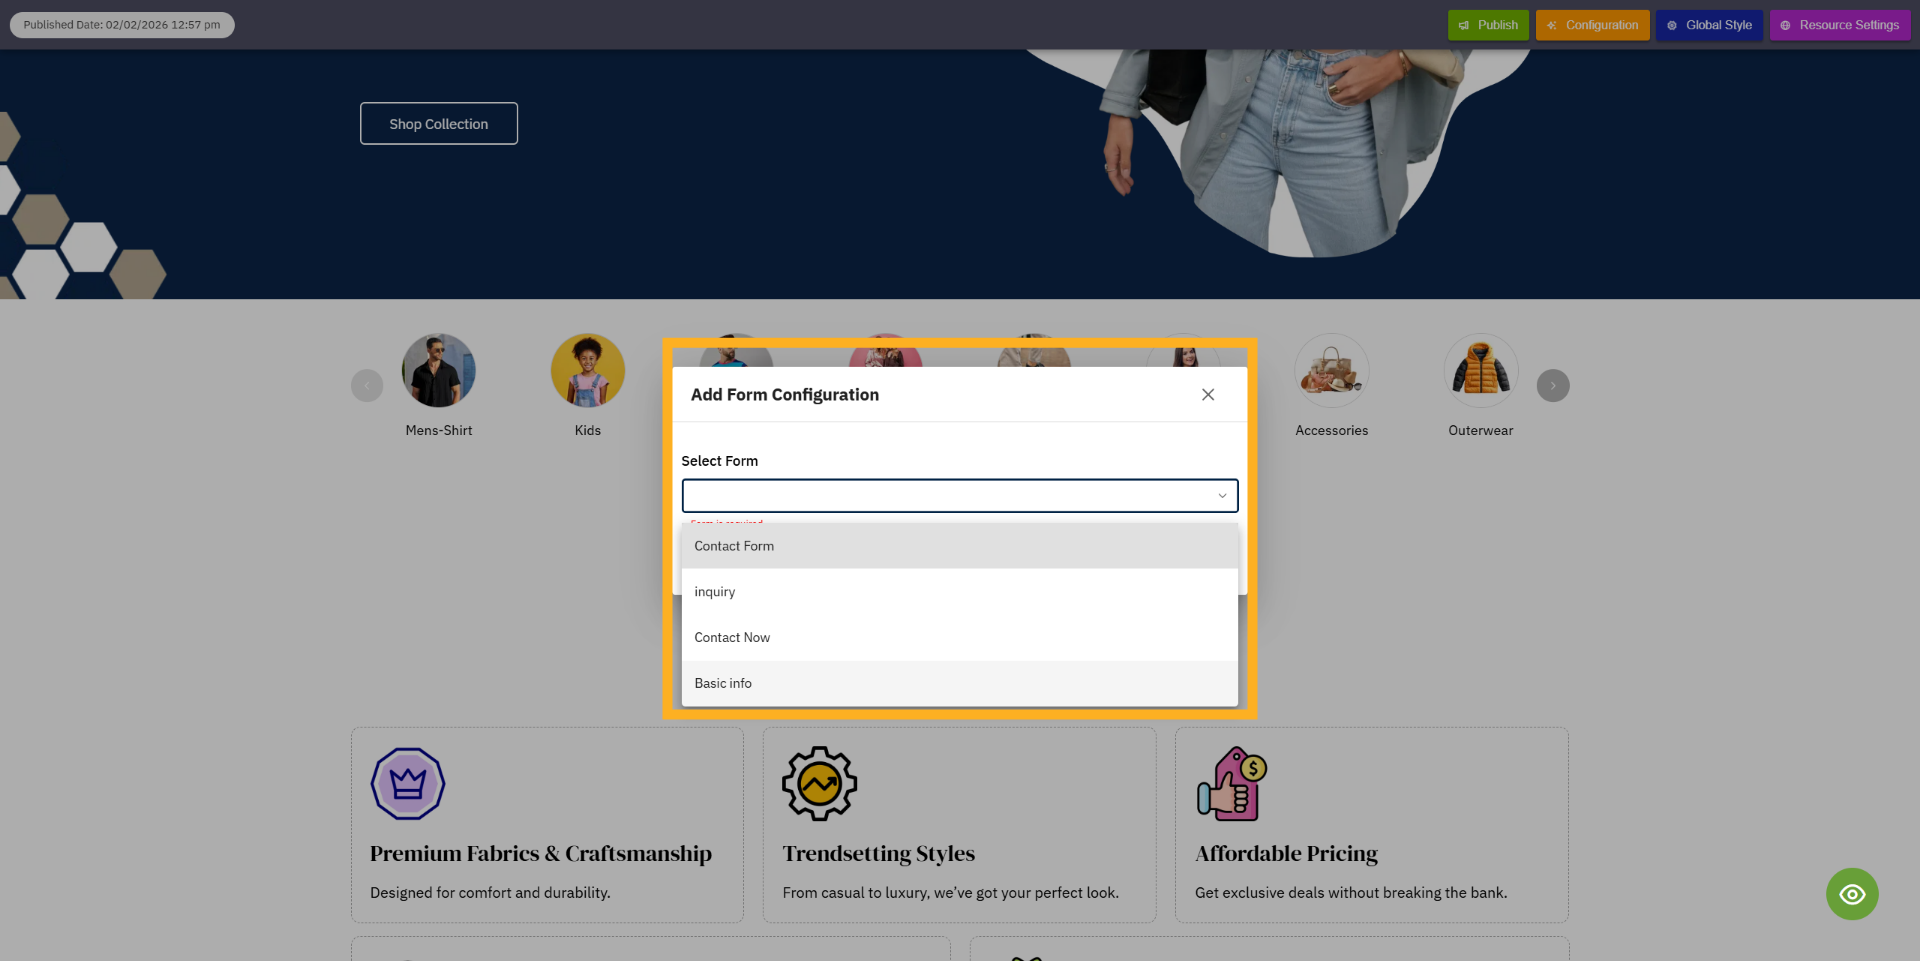
15. Select Basic Info Form
After clicking Forms, the Add Form Configuration modal will open. In this modal, you will see the Select
Form field where you need to click and choose your form.
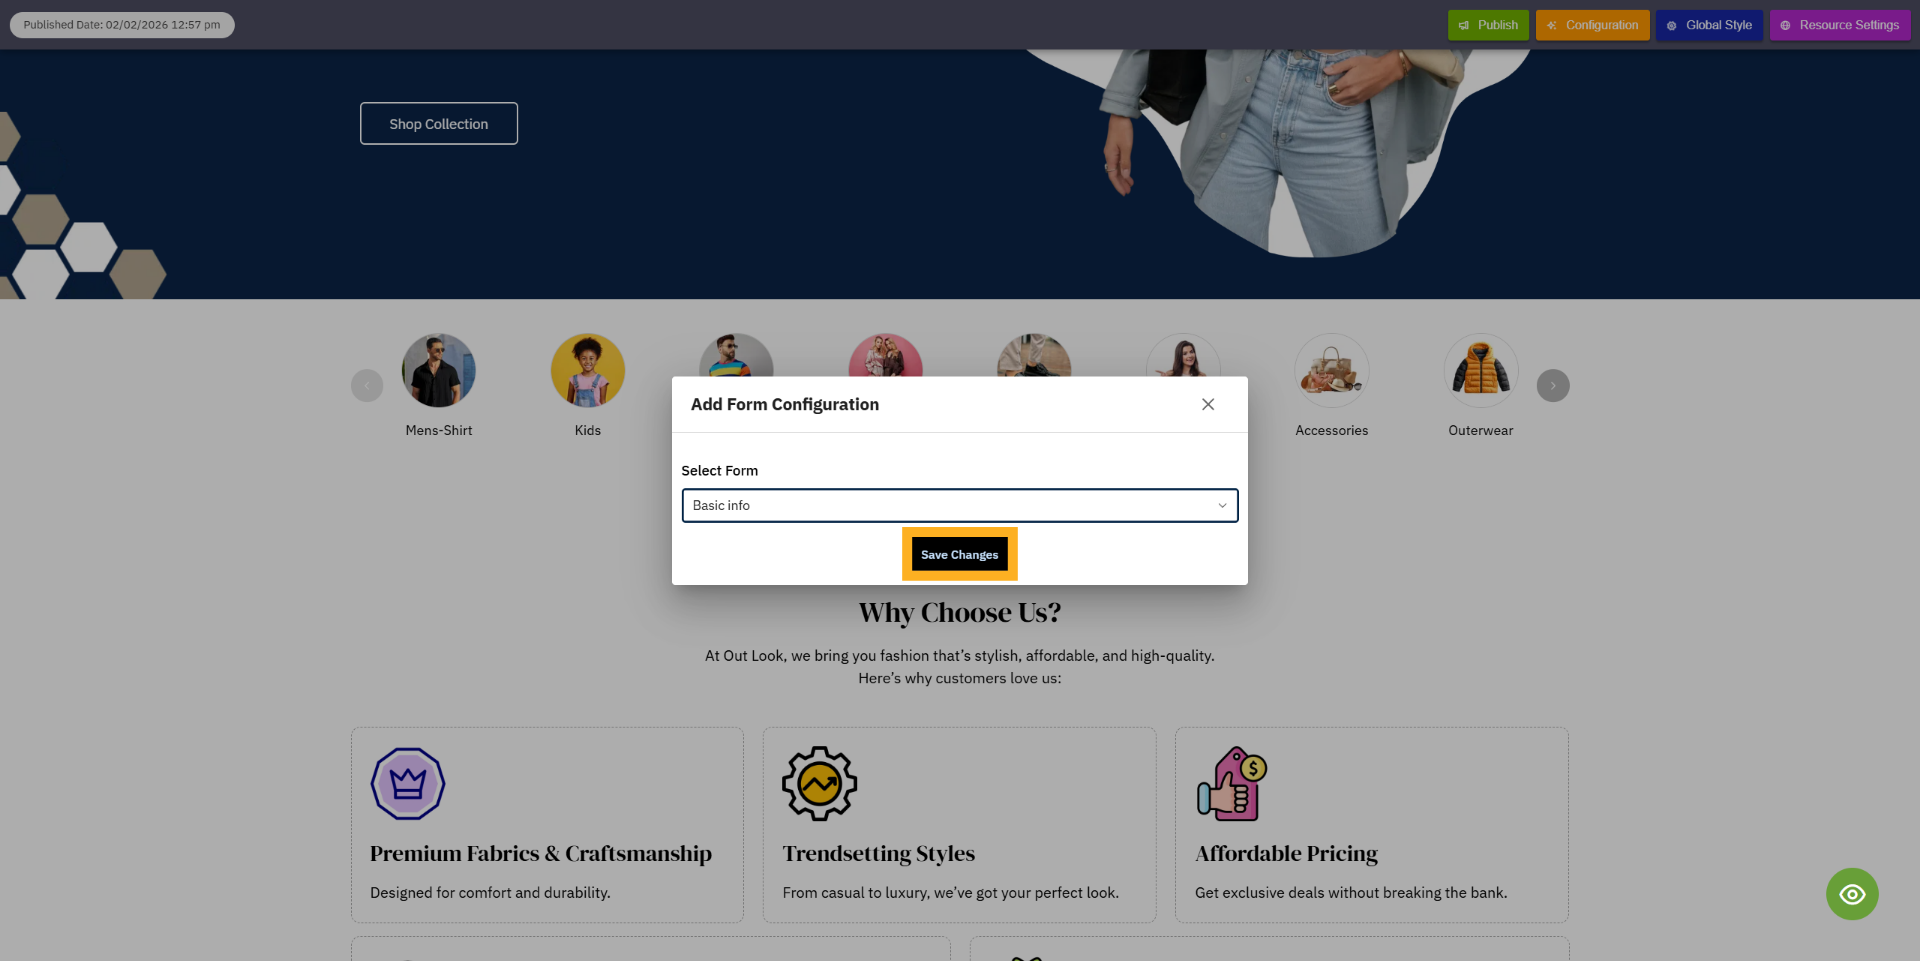
16. Save Template Changes
After selecting your form, click Save Changes to apply it. The form will then be added and displayed on
your website page.
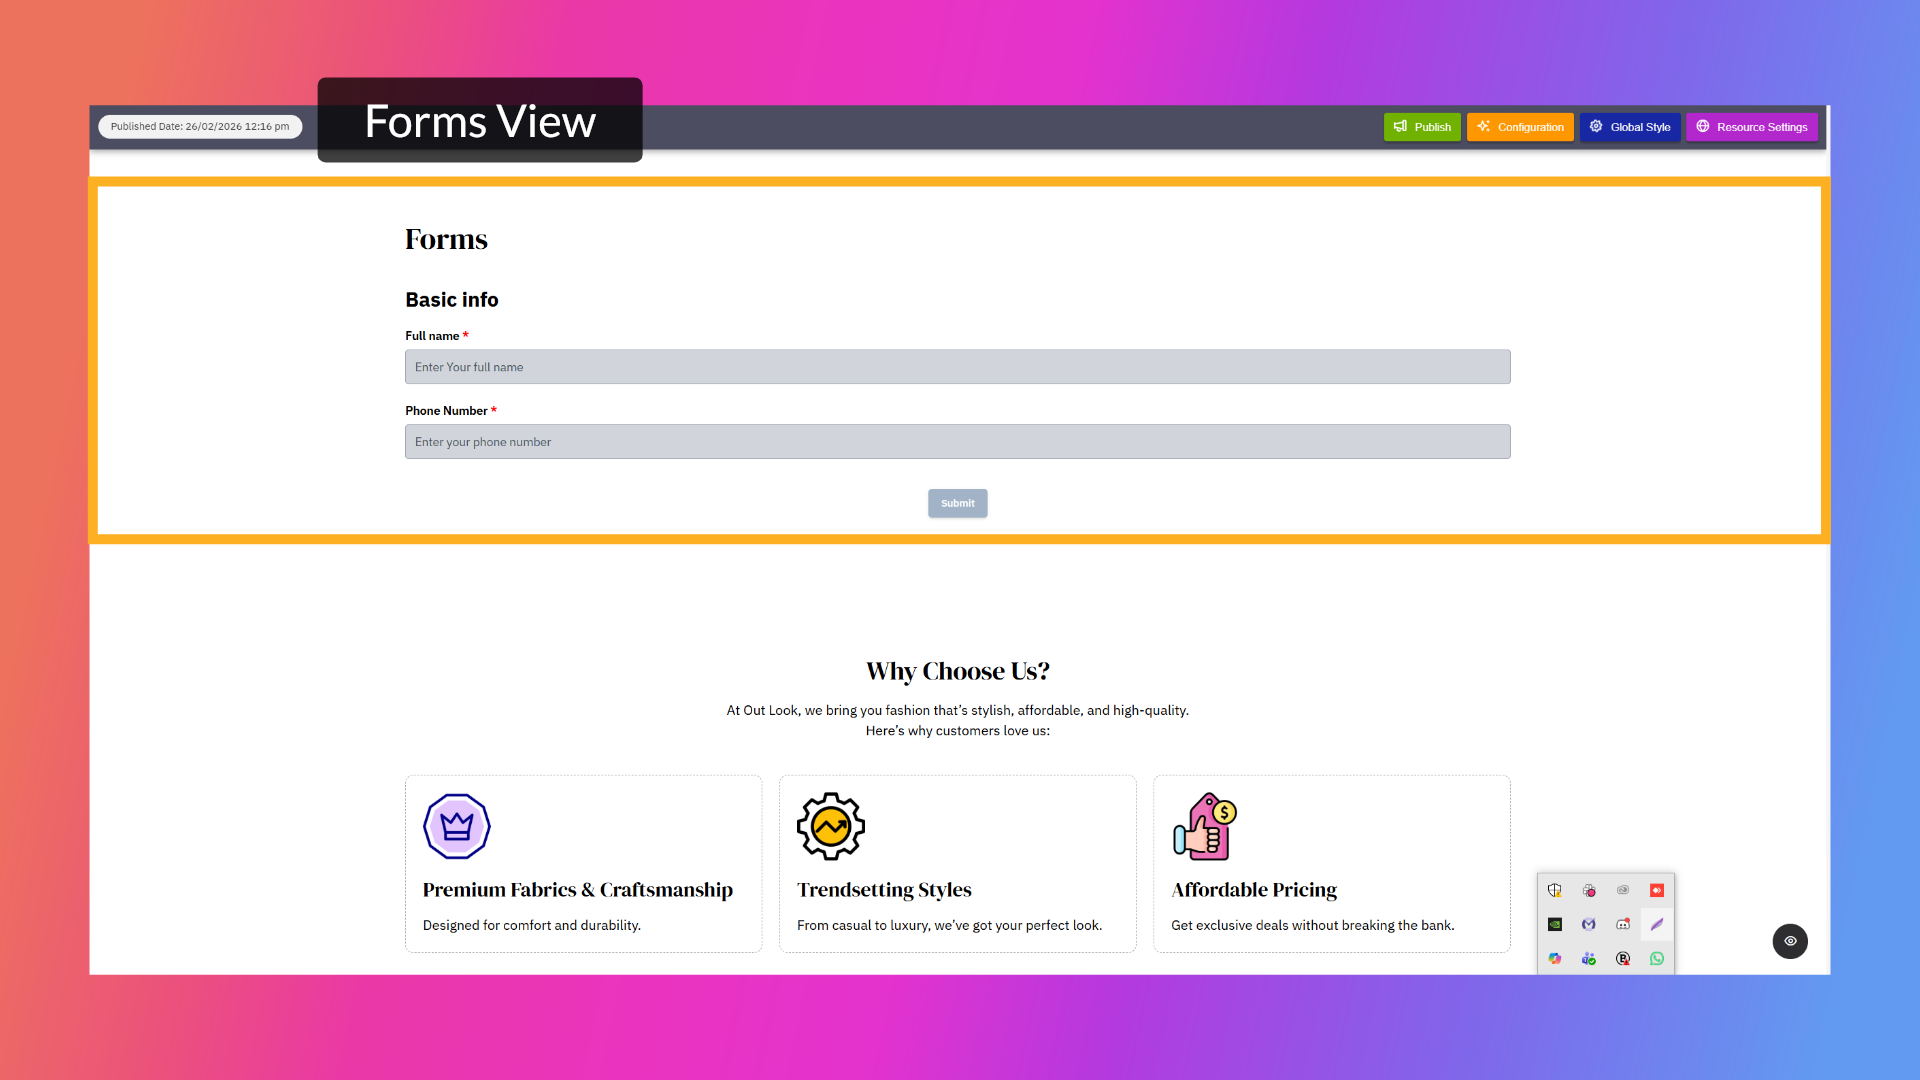
17. Forms View
After clicking Save Changes, your form will be added to the website page and displayed like the preview
you see.
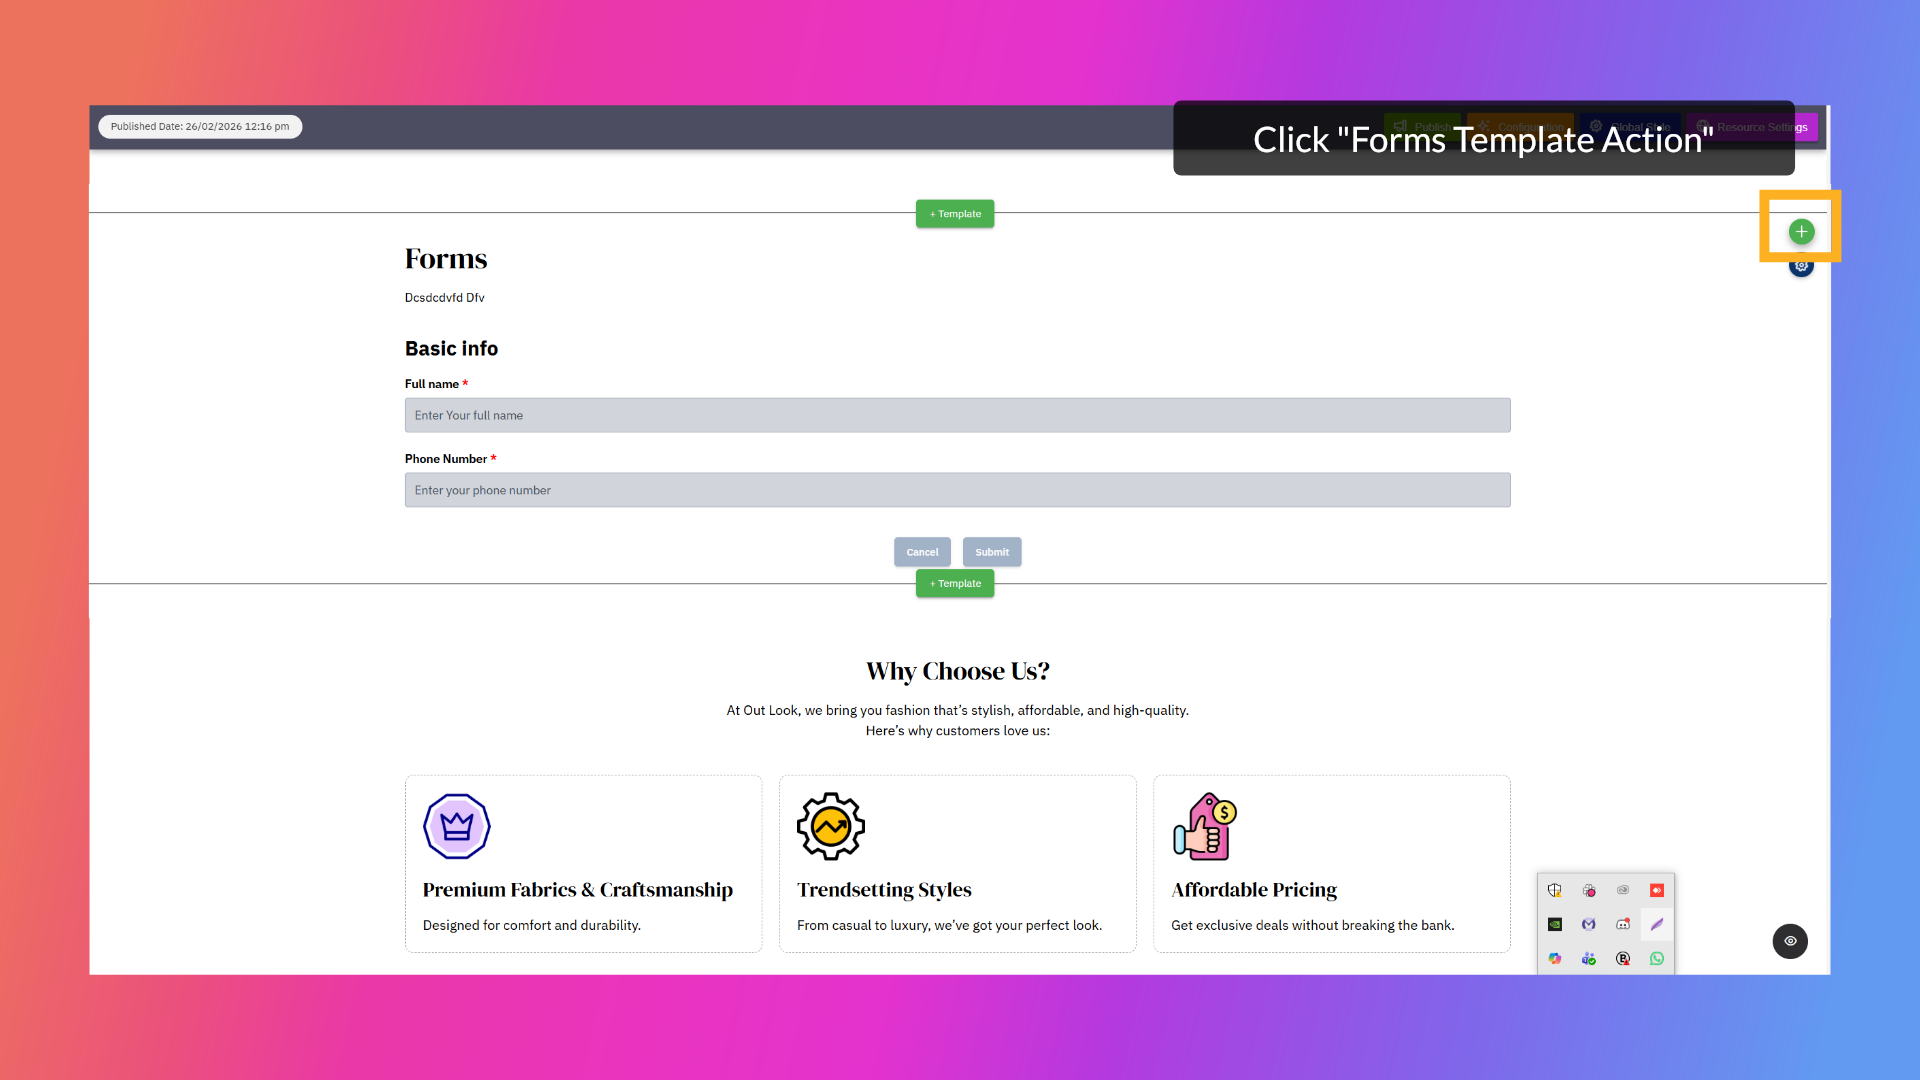
18. Forms Template Action
By clicking the Form Template Action button, you will get options to Edi, Delete, or Hide the template.
19. Template edit
To edit the template, click on the Edit icon.

20. Forms Template Config
To design the form template, we clicked on "Template Edit," which opened the "Template Configuration
Settings" modal.
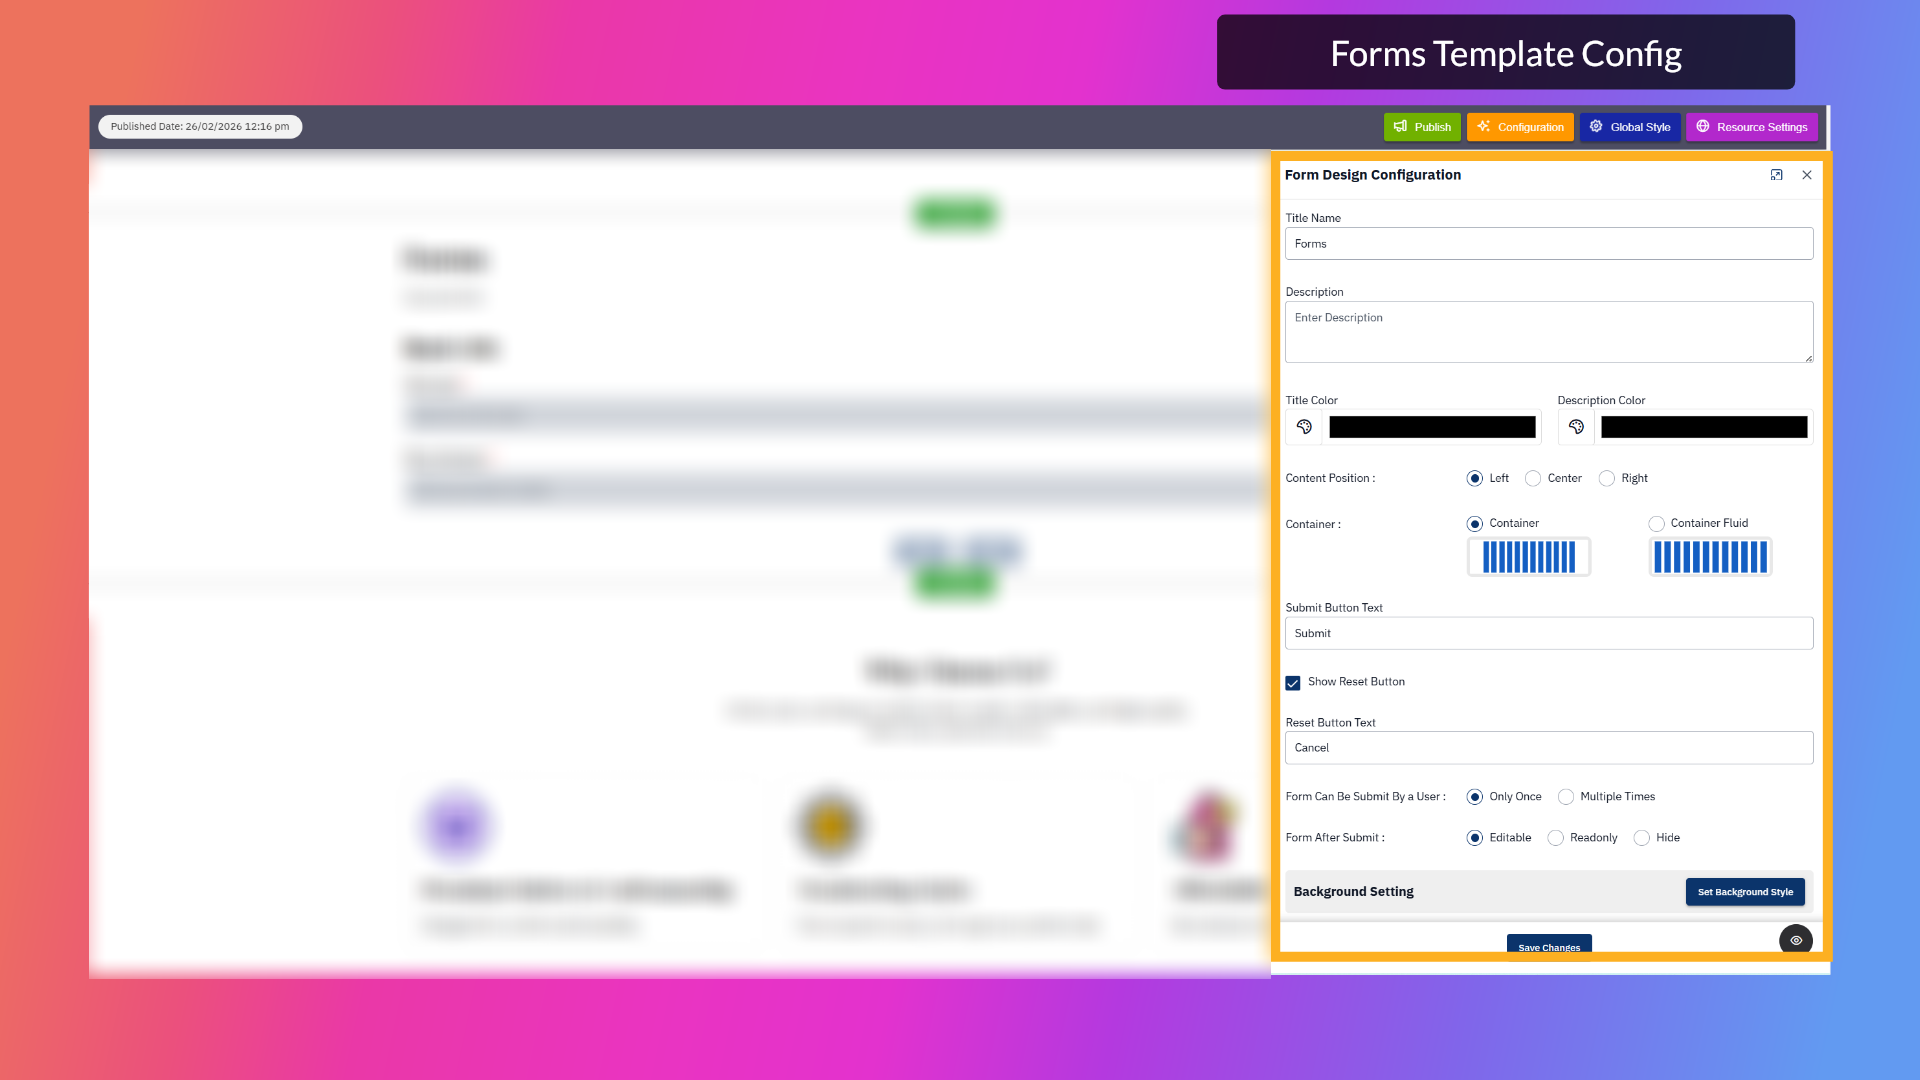
21. Forms Template Design Configs
What you are seeing is the Forms Template Design Configs. Here you can customize settings like form
template title, description, text colors (title & description), container type, and more. Using these
options, you can design the template according to your needs.
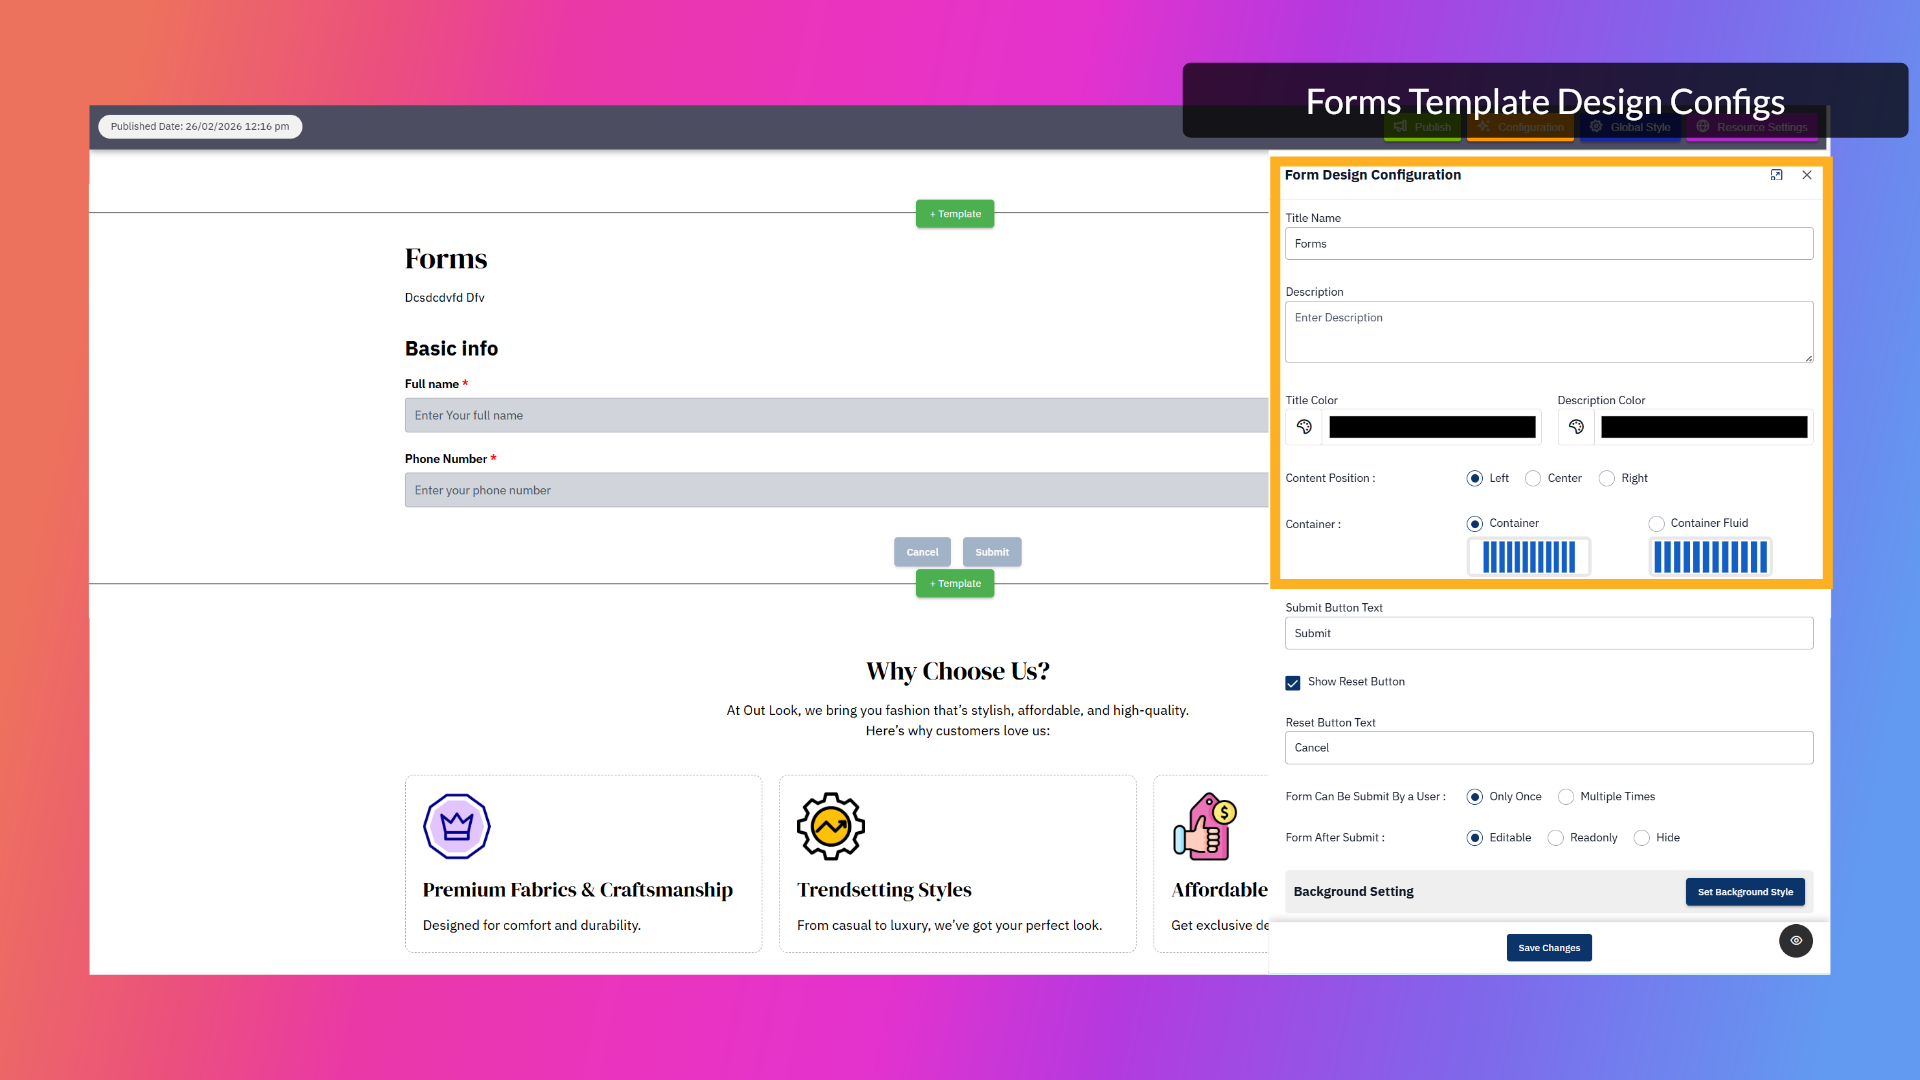
22. Forms Settings
Here you can customize the form submission settings:
You can set the Submit Button text as per your requirement.
When you enable Show Reset Button, a reset button will be added, and you can set its label text in the
textbox provided.
In the “Form Can Be Submitted By a User” option, you can choose what fits your use case:
Only Once: If selected, you need to configure Form After Submit settings.
Multiple Times: If selected, you can set a success message and also define the reset button text.
These options help you control how users interact with and submit the form.

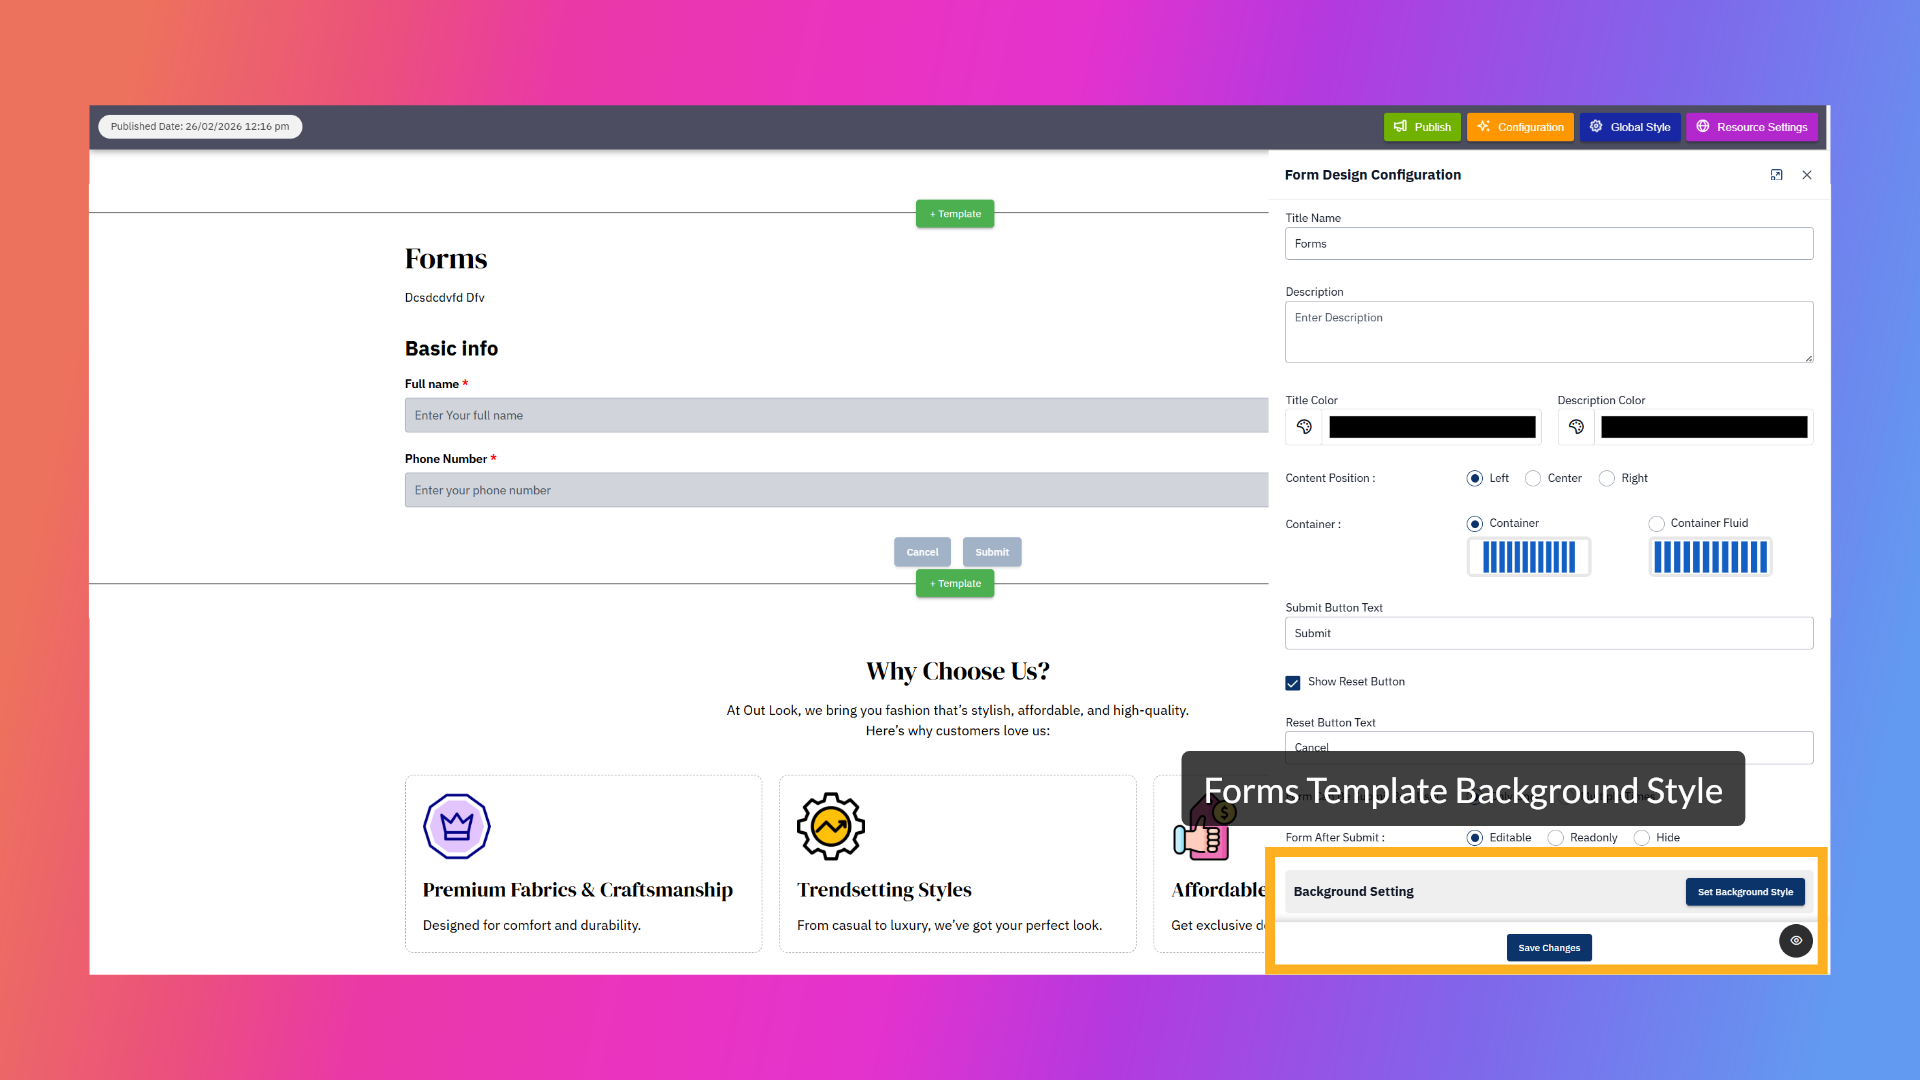
23. Forms Template Background Style
As we learned earlier how to set background styles in templates, you can apply the same here as well.
After setting the background style and other configurations, click Save, and all the form template
settings will be applied and reflected on the page.
You have successfully created and configured a custom form in the Boni CMS platform. Your form includes
required fields, validation rules, and display settings, ready for deployment or further customization.
Uploading...